
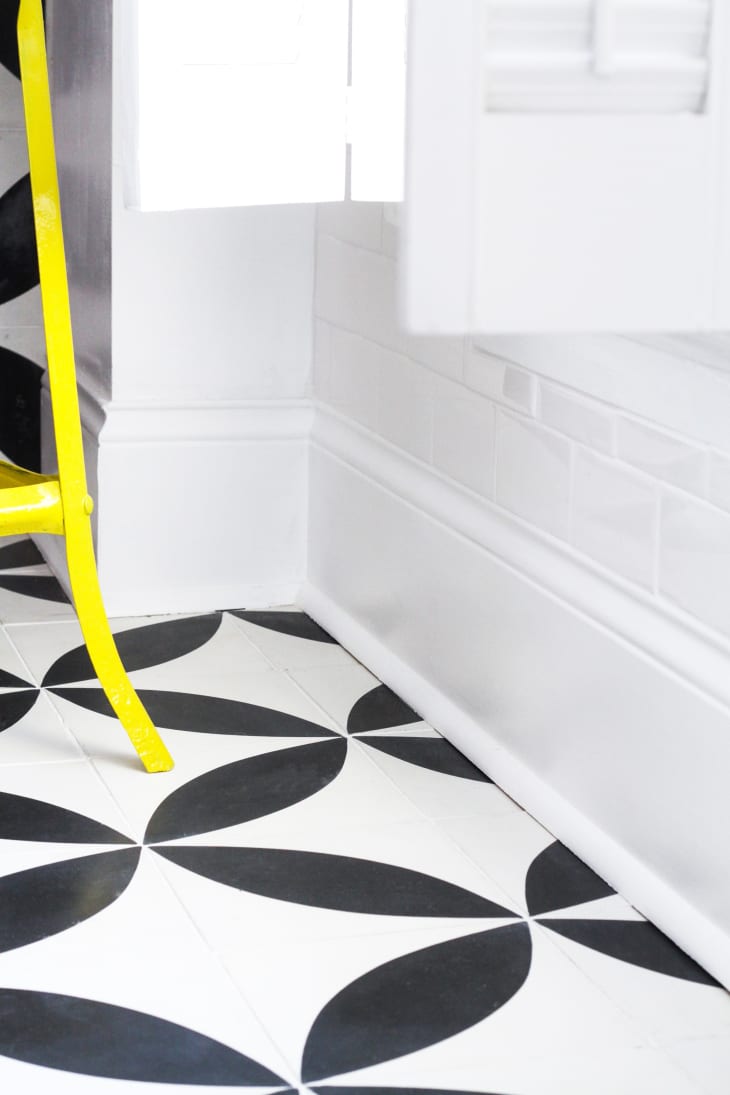
How To Finish Off Your Bathroom in Style With Baseboards
All this week we’re talking about bathroom renovations, starting with Ashley’s recent remodel, and following up with tons of helpful posts about the process!
Baseboards are a fantastic way to spruce up a room, and put the finishing touch on a newly remodeled one. Multiple layers of decorative molding brings great visual drama, or you can use a simple wood plank for a straightforward, modern look. Baseboards are relatively easy to install. As long as you have access to basic tools (including a compound miter saw) and understand how to cut three specific joints, you’ll do just fine.
What You Need
Materials
- Baseboard (we used this from Home Depot)
- Wood filler
- Paintable Caulk
- Nails
Tools
- T-square
- Pencil
- Caulk gun
- Nail gun + compressor
Instructions
Before you start, draw a little floor plan and label each wall with your measurements to keep organized. Check off the measurements on your floor plan as you cut the corresponding baseboard, and be sure to label the pieces of cut baseboard. It’s easy to get confused and mix up all those boards that look the same.
Start with the longest wall
Start by installing your baseboard along the longest wall first and work your way around the room. As you go, you’ll either need to: 1) connect two separate pieces to make a continuous baseboard; 2) turn an interior corner; or 3) turn an outside corner. Chances are good you’ll need to at least two out of these three.
Tip: If possible, try to hide the joints or seams behind a fixture in the room (like a sink or toilet). Look ahead to plan for the joints you’ll need to cut in your boards as you go.
For each of these cuts, lay the baseboard flat on the saw, with the good side of the board facing up, and the bottom of the baseboard closest to you. For each cut, you’ll be making bevel cuts (versus miter cuts).
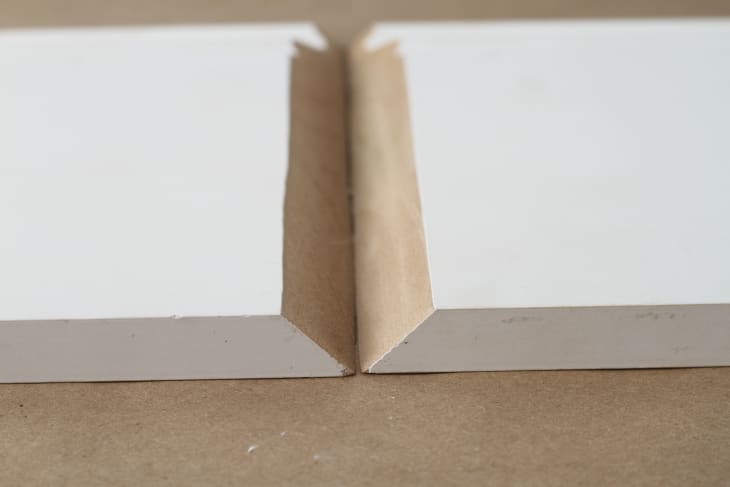
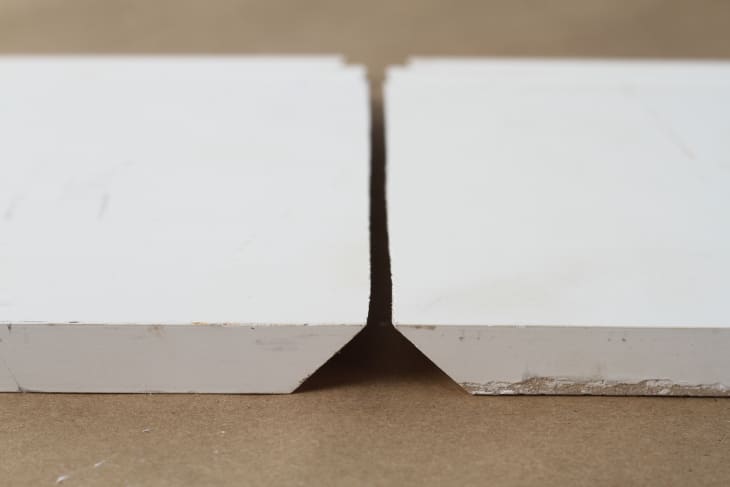
Cut #1: Scarf Joint
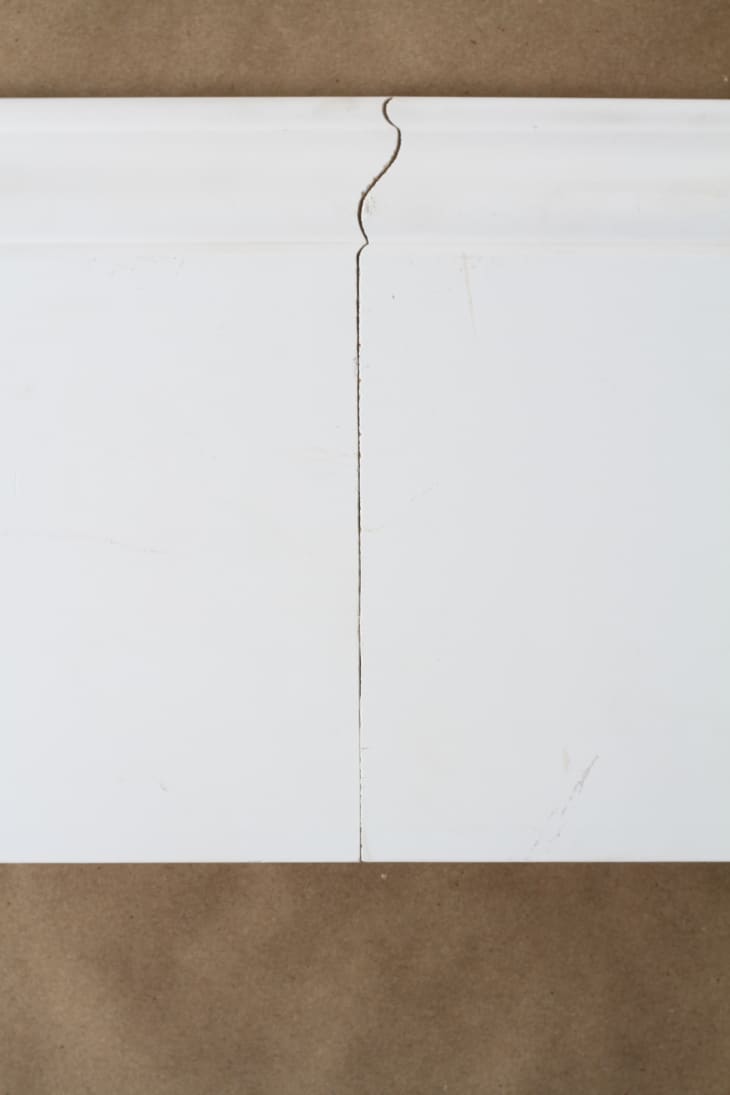
Adjust your bevel angle to 45° and make a cut at the end of one board. Keeping your miter saw in place, make a cut at the very beginning of the other board. This should allow the end of the first board to perfectly fit into the beginning of the second board. The result will look like the boards in the photo below.
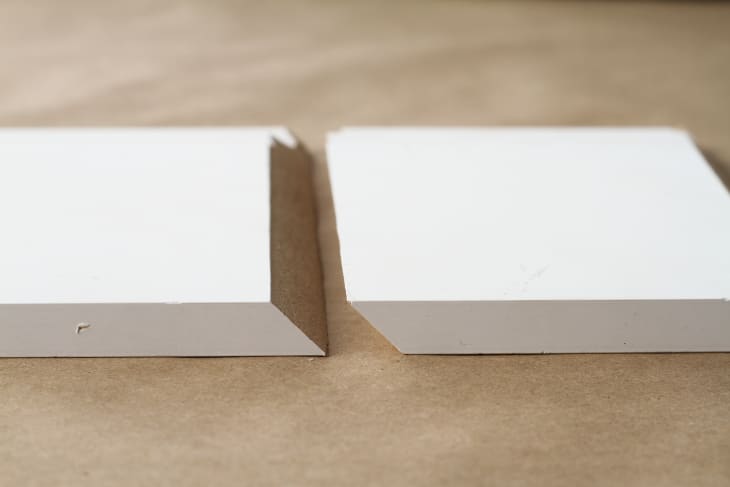
Cut #2: Inside Corner Joint
To create an inside corner joint, set the miter angle at zero, and cut the first board at a 45° bevel angle with the saw tilted to the left side. Then tilt the saw to the right side, set at 45° and cut the beginning of the second board you wish to join. The result will look like the boards in the photo below.
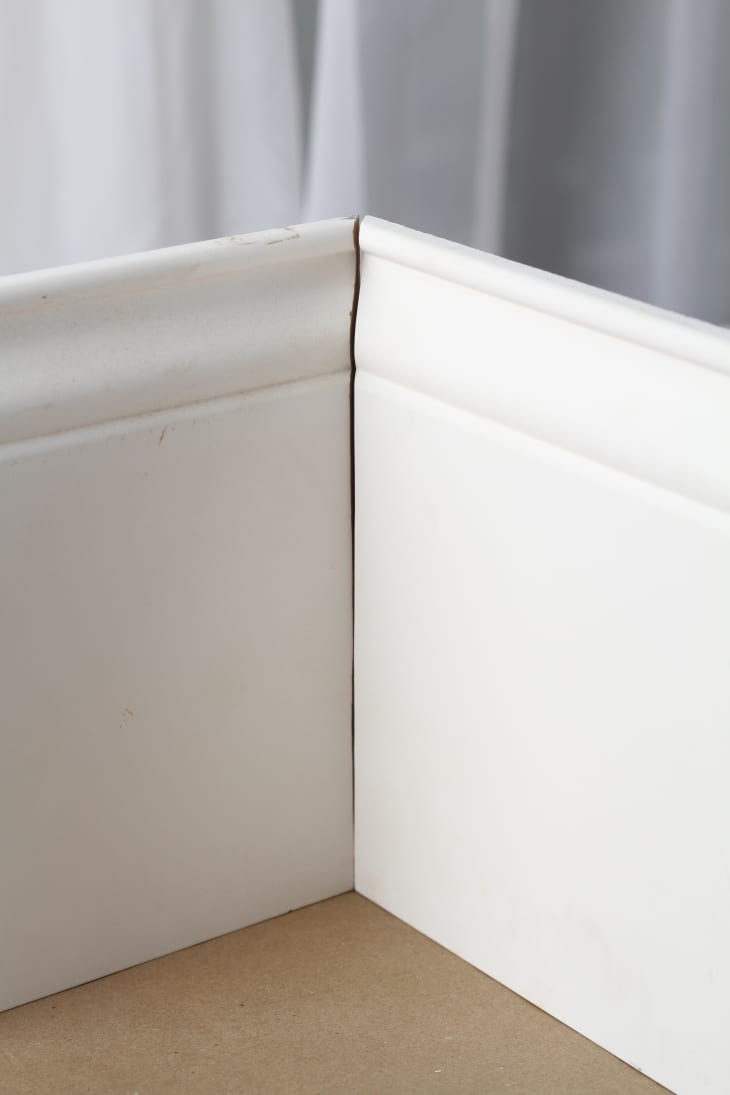
Cut #3: Outside Corner Joints

To create the corner for an outside joint, you’ll do the opposite. Tilt your blade to the right, and set your bevel at 45° for the end of the first board. For the second, tilt your blade back to the left, set the angle to 45° and make the second cut on the second board. The result will look like the boards in the photo below.
Attach to the wall
Using a brad nailer or nail gun, attach the baseboard to the wall by shooting nails along the bottom of the board into the studs in the wall. Push the baseboard down to the floor as you go. Place nails along the top of the board at intervals of every other stud.
Tip: In older homes you’ll probably run into issues with uneven floors. You might consider quarter round as a solution to any issues with gaps in the flooring. In addition to hiding imperfections, it can give your project an even more finished, refined look.
Fill in any gaps
Once you’ve attached the baseboards to the wall you’ll need to cover over the nail holes with wood putty (Don’t forget to sand before painting.). Next, run a bead of paintable caulk over any joints that are left exposed. It’s also a good idea to run caulk along the top of the baseboard where it joins up to the wall. Always be sure you’re using paintable caulk!
Paint
Most baseboard and decorative molding comes primed, but you’ll want to finish it off with a few coats of your favorite trusted trim paint.