
A Bonkers Beautiful IKEA Built-In Hack
I feel fairly confidant in my ability to spot an IKEA hack, but this project had me doing a double take. Christina’s project is not a casual, pick up and craft DIY, but it’s so perfectly executed that we had to share!
Skill Level: Moderate
Time Required: A LONG weekend
Project Cost: Approximately $1000 including hardware and trim
What You Need
Materials
- Pax Wardrobe Frames + Doors
- Komplement Organizers
- Ring Doorknockers
- Baseboard + Crown Molding
- Hardwood Boards
- Hammer + Nails
- Wood Glue + Clamps
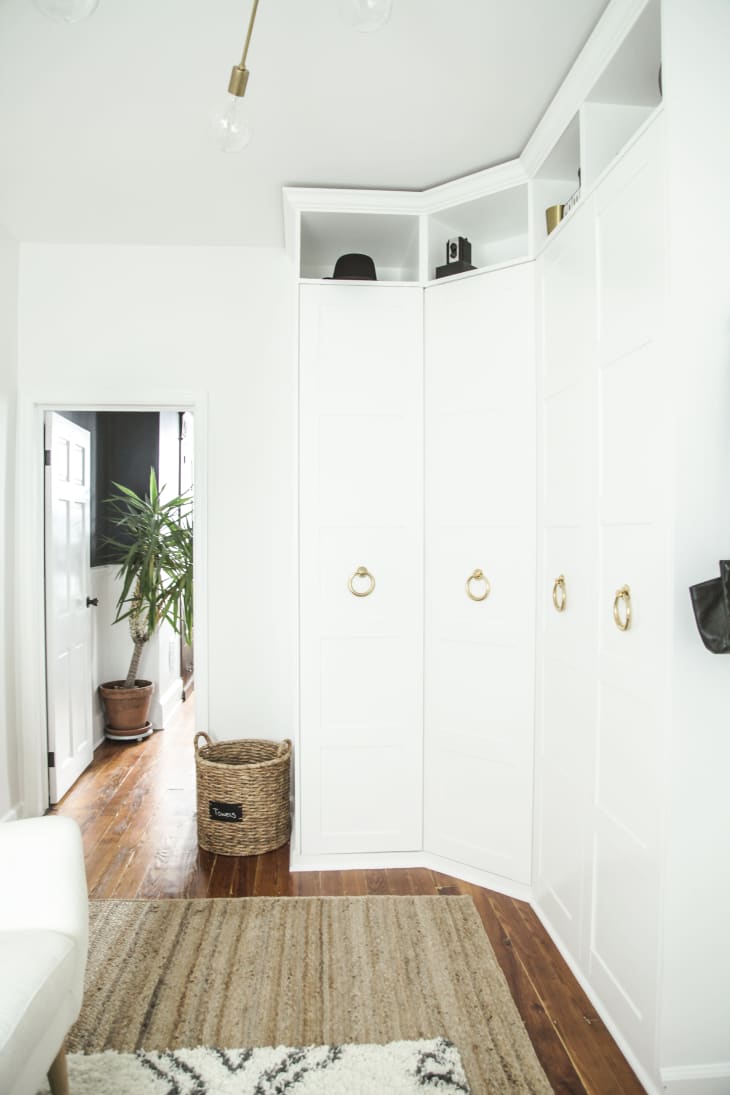
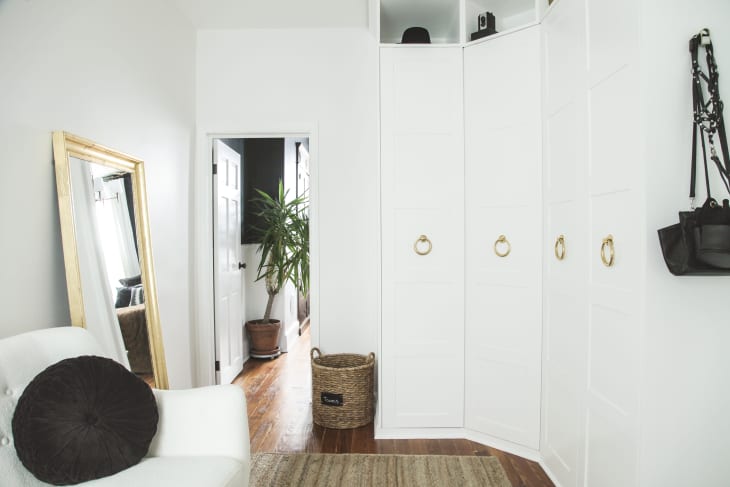
From Christina: When renovating one of the bedrooms in my house, I wanted to find a way to make myself a “walk-in closet” while still making sure it was functionally a bedroom. It took lots and lots of planning — on paper, with masking tape on the floor — and finally I decided on a layout with IKEA Pax Wardrobes by utilizing a corner of the room.
Steps
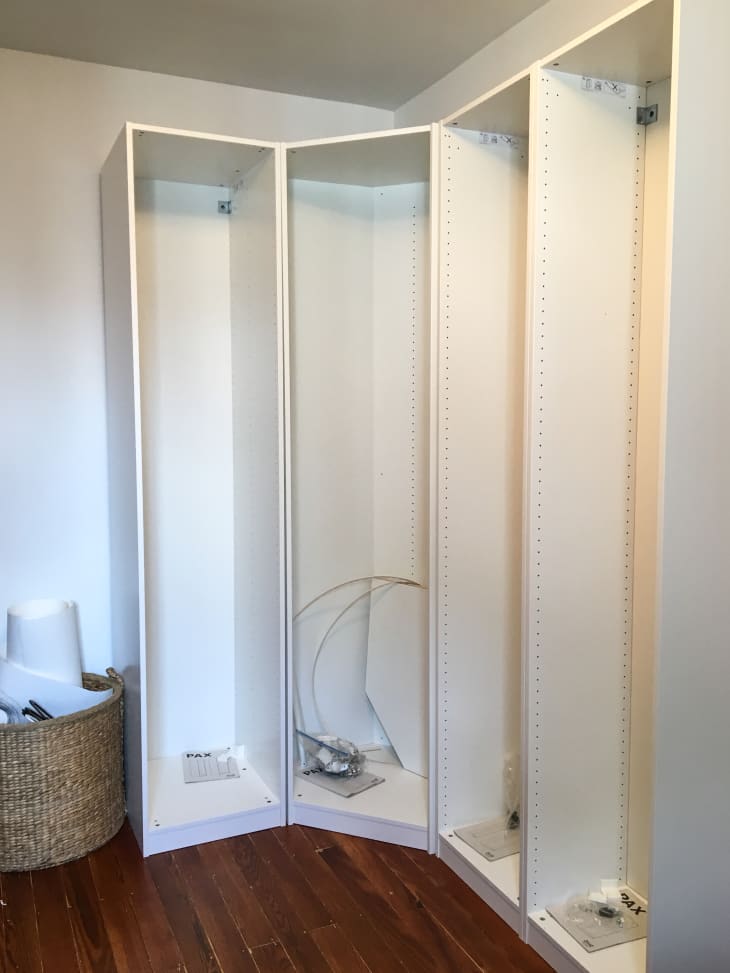
- I started out by assembling the frames and screwing them together — I actually asked for extra of the included screws for combining frames so that we could make sure that the frames were really secure.
- Once the frames were in place, we added the doors. Because our house is so old (our floors aren’t level in all spots and the plaster walls aren’t always plumb) we needed to do some adjusting with the doors until they fit correctly.
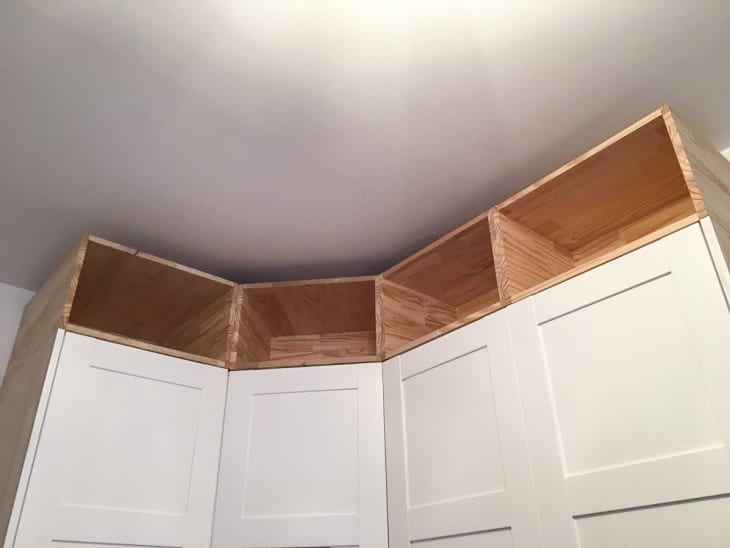
- Because we have 9′ ceilings, even the tallest Pax frames left about 14″ of unused space. I wanted to make this project look “built-in”, so using hardwood boards we built a frame around both sides of the wardrobe in order to close any gaps from the back of the wardrobe to the walls. Then we built boxes that were the same width as the frames to make open shelving, and nailed them into the top of the wardrobe.
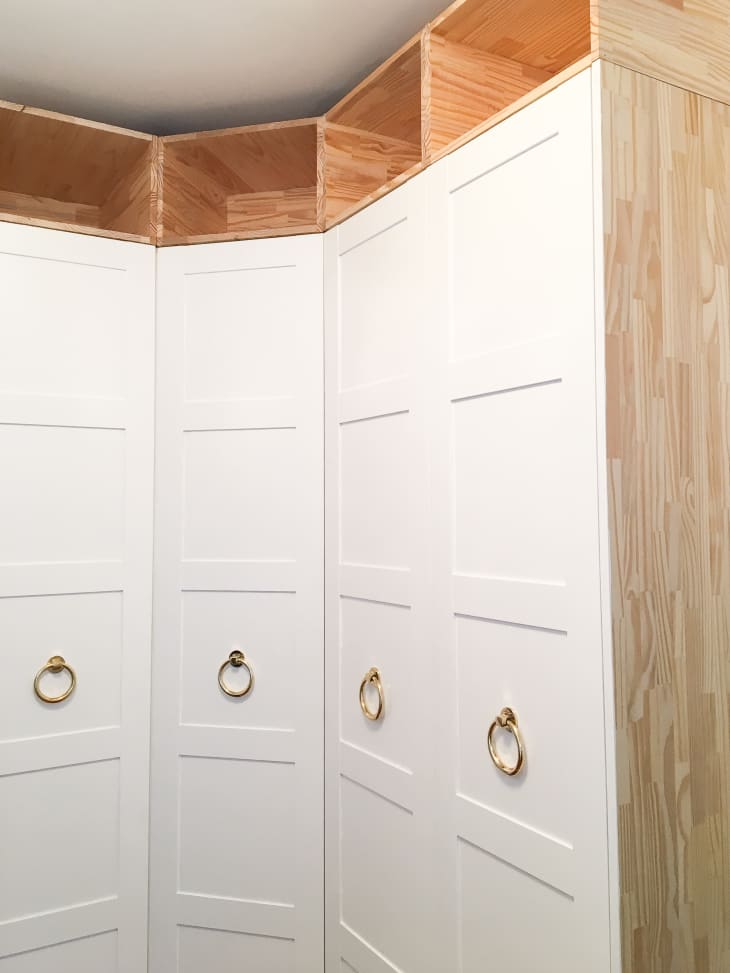
- To finish the “built-in” look I added crown molding to the top and redid the baseboards so that they run along the bottom of the wardrobe. We were originally planning on making the crown molding so that it touched the ceiling but ended up liking the little space between the molding and the ceiling – it leaves a soft shadow that really highlights the height of the wardrobe.
To finish the “built-in” look I added crown molding to the top and redid the baseboards so that they run along the bottom of the wardrobe. We were originally planning on making the crown molding so that it touched the ceiling but ended up liking the little space between the molding and the ceiling – it leaves a soft shadow that really highlights the height of the wardrobe.
Thanks, Christina! You can see more on Christina’s blog, And Christina.
Have a really great DIY project or tutorial that you want to share with others? Let us know! We love checking out what you’re making these days, and learning from our readers. When you’re ready, click here to submit your project and photos.