
DIY Project: How To Grout Tile
Applying grout is always exciting. It’s the final touch to all of your hard tiling work, and much less tedious and time consuming. (If you missed it, see my earlier tutorial on how to tile your shower.) Yet, there are still some steps to ensure the longevity of your grout lines and the lifespan of your tiles.
What You Need
Materials
- Grout
- Grout sealer
Tools
- Cheesecloth
- Trowel
- Rubber grout float (I used plaster knives)
- Razor blade
- Old toothbrush
- Small paint brush
- 3 buckets (one for grout, two for water)
- Sponge
- Cheese cloth
- Rubber gloves
Instructions
When buying your grout, you need to choose both: a) color and; and b) sanded or unsanded:
a) For color, I used Mapei sanded grout in Pearl Grey. Because the tile project is for my mother’s bathroom, my main concern was having a grout color that didn’t require too much maintenance. I took into consideration that prominent contrasting grout lines may make the already small bathroom look even smaller, but the priority was having something that won’t show as much dirt. If you didn’t do such a great job on tiling, you may want to consider a grout color that matches the tile color in order to hide the grout joints. Mapei’s Pearl Grey color is a mid-grey tone, not as dark as charcoal, and probably two shades darker than silver. I was a little skeptical when I applied it but, after the grout cured, it lightened to the perfect shade. For more advice on choosing grout see more tips here. If you’re ready to start applying grout, here’s what you need.
b) Sanded grout is used for spaces larger than 1/8″-1/2″, but otherwise it is recommended to use unsanded. Sanded grout ensures that the grout won’t shrink and crack within wider joints.
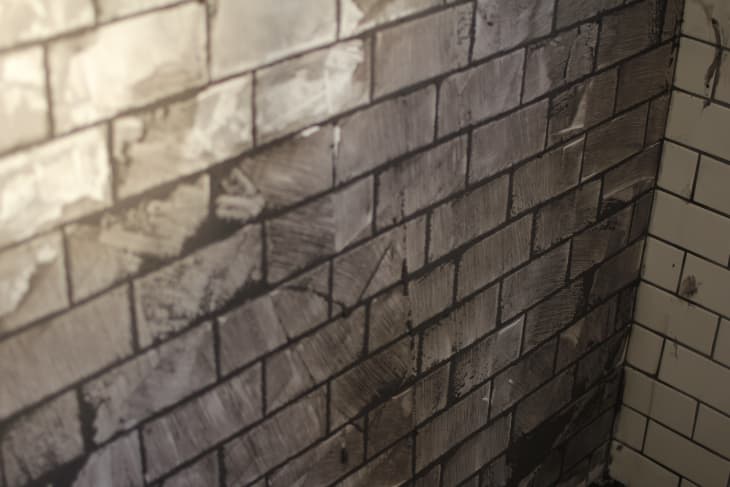
1. Before you get started, wait at least 24 hours for your tile adhesive to cure before you grout. Then, clean any residual adhesive or dirt from your tiles. You don’t want any debris in your grout lines.
2. Using a razor blade, carefully scrape off any cured adhesive (from the tiling process) that might protrude through grout lines. Don’t just quickly run a screwdriver through the lines. This is how I ended up with chipped tiles. Clean off any particles with an old toothbrush.
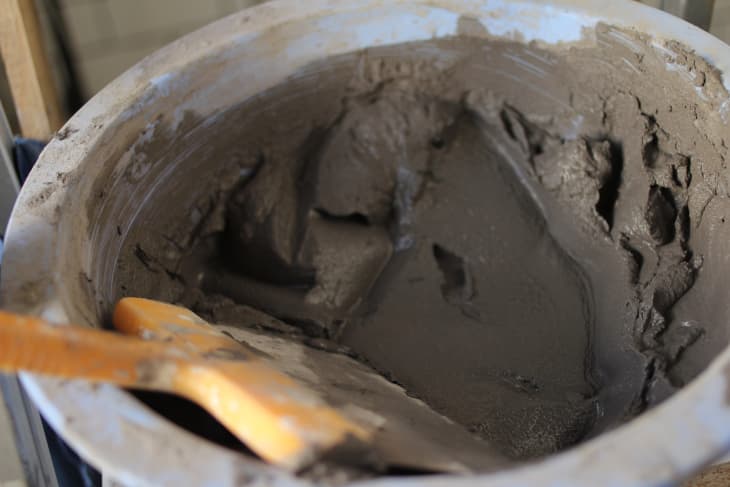
3. Prepare your grout mixture so it’s a mashed potato-like consistency. Only mix what you can use within an hour.
Tip: Work in small sections at a time. Grout one area, then while waiting for that area to dry, start grouting another area. When finished, the first area should be dry enough to start sponging (see below).
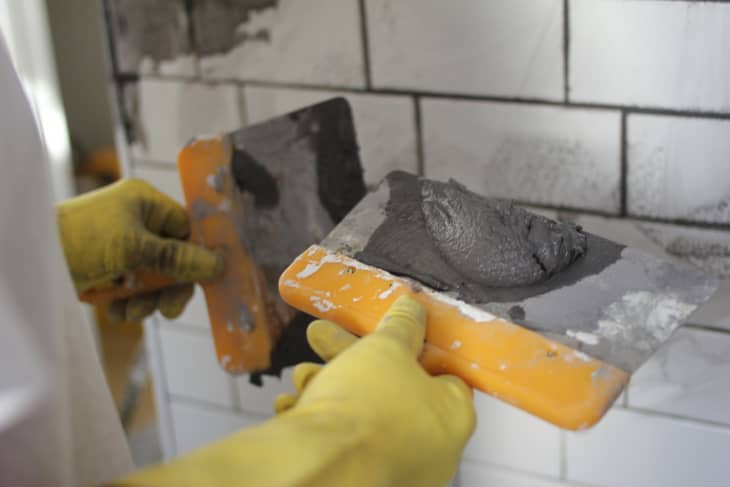
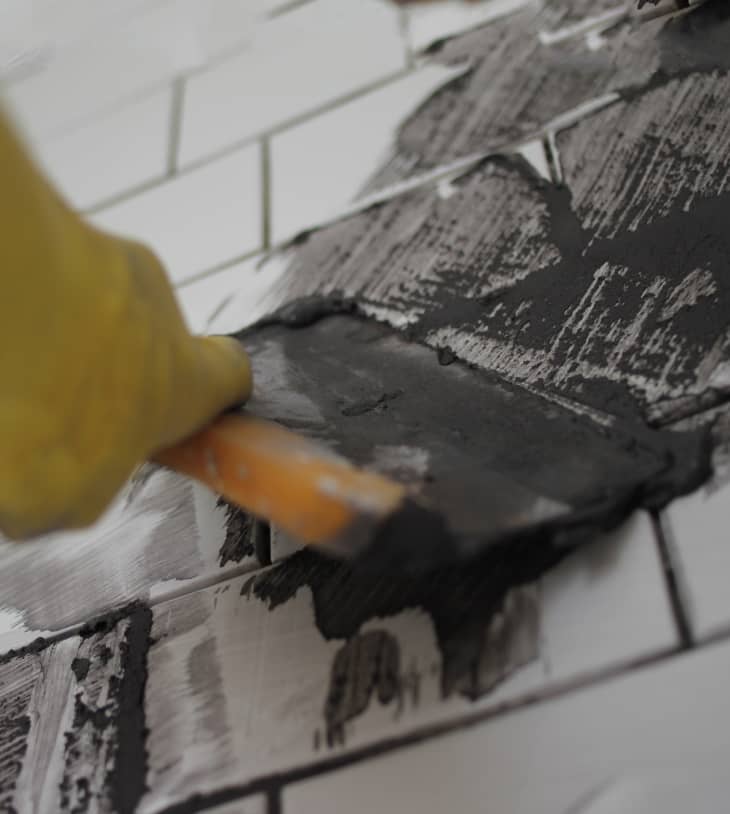
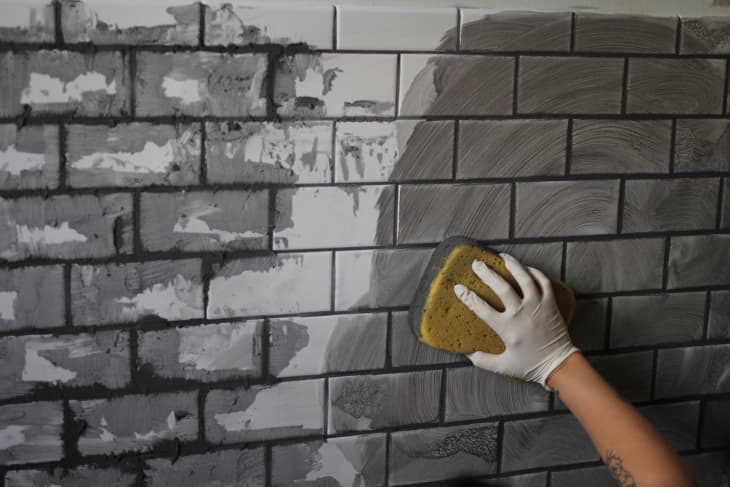
4. Scoop some grout onto your trowel and spread over the wall. Apply in an arc-like motion, diagonally at a 45-degree angle.
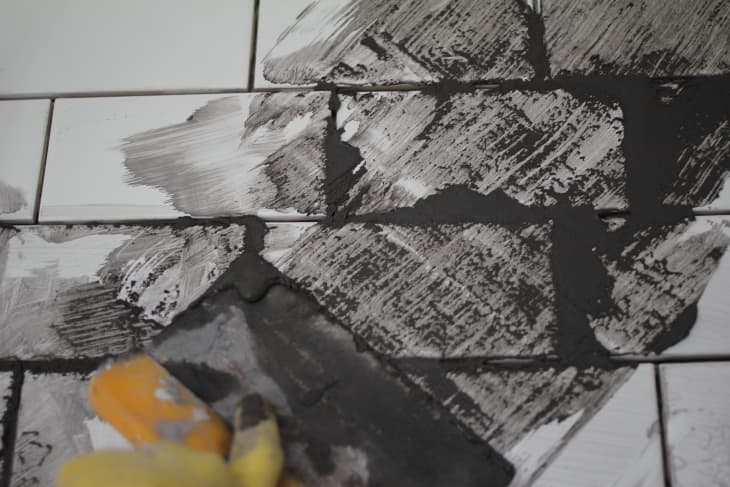
5. Press the grout mixture firmly into joints. Pack it in with lots of pressure, making sure every void is filled. Remove excess grout as you go. Grouting is super messy, so don’t worry if you notice more grout on the floor than on the walls.
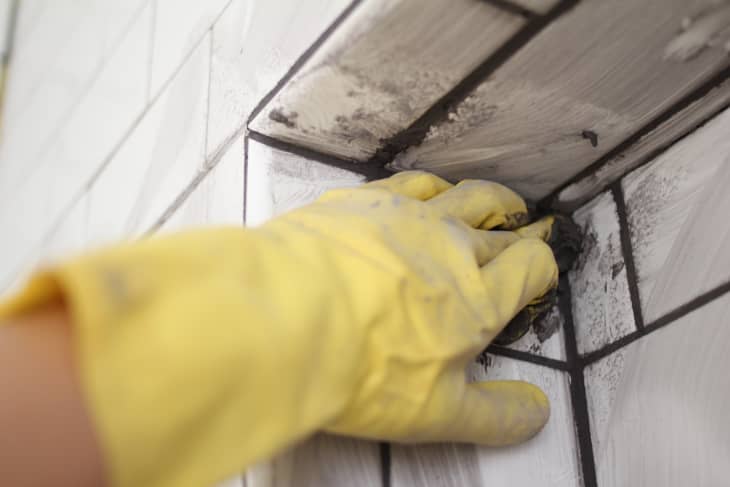
6. Use your finger to apply grout in small corners and hard-to-reach places.
7. After all your tile joints are filled with grout, save any extra grout by covering it with a plastic bag. You may need to fill any spots you missed later.
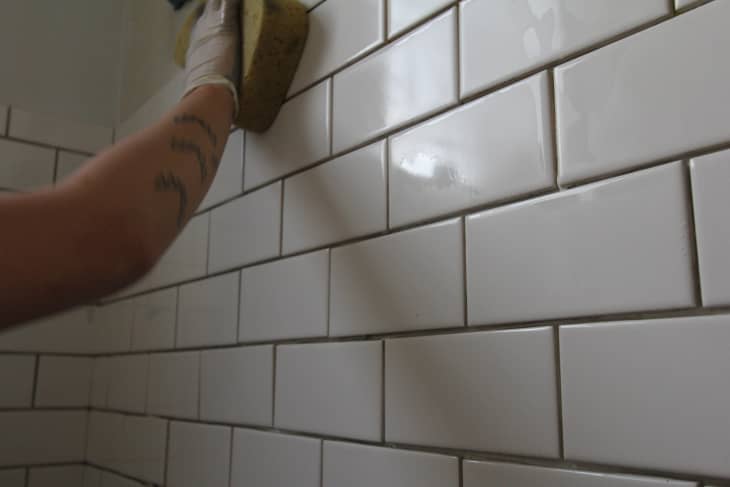
8. After the grout has set for 15 to 30 minutes, clean the face of the tile with a damp sponge. Work in light circular motions, taking care not to drag out any grout in the corners. Don’t scrub grout lines too hard or the tile corners will protrude. You’re not only cleaning the tile by sponging, but also ensuring clean smooth grout lines.
Tip: Sponging the grout too soon may pull the grout out of the joints, so test a small area first.
Use two buckets of water during this process: one to rinse and wring out dirty sponges; and the other for clean water and sponges. You will have to change the water often.
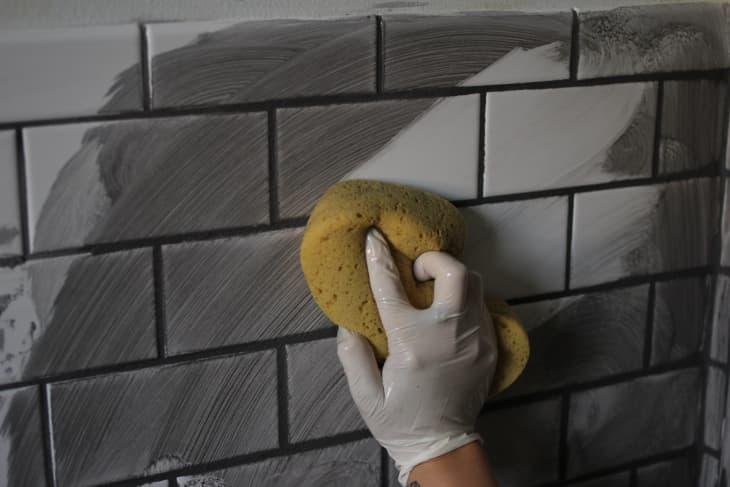
9. Repeat this sponge process two to three more times. Don’t worry about getting the tile super white. When it dries there will always be a haze of grout.
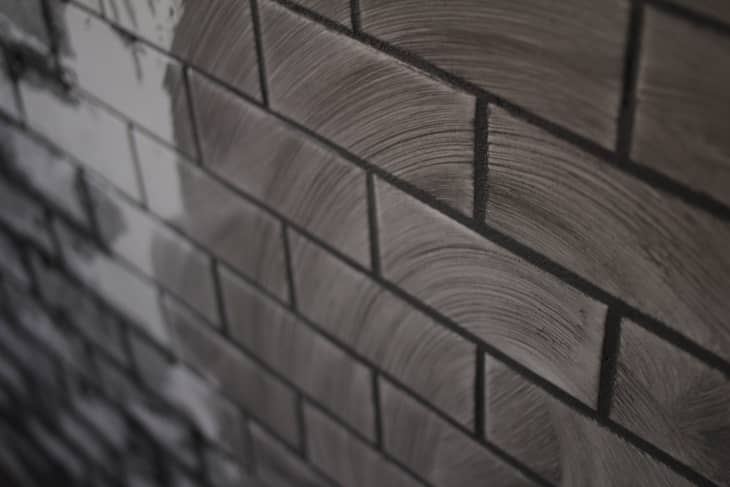
10. After you are done with the sponge, wait about 30 minutes, then buff your tiles with a dry cheesecloth until they shine.
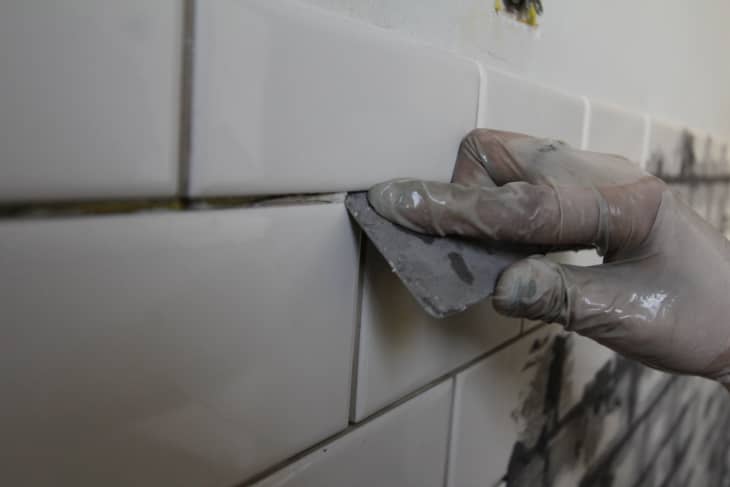
11. Go back and touch up any grouted areas that aren’t completely filled.
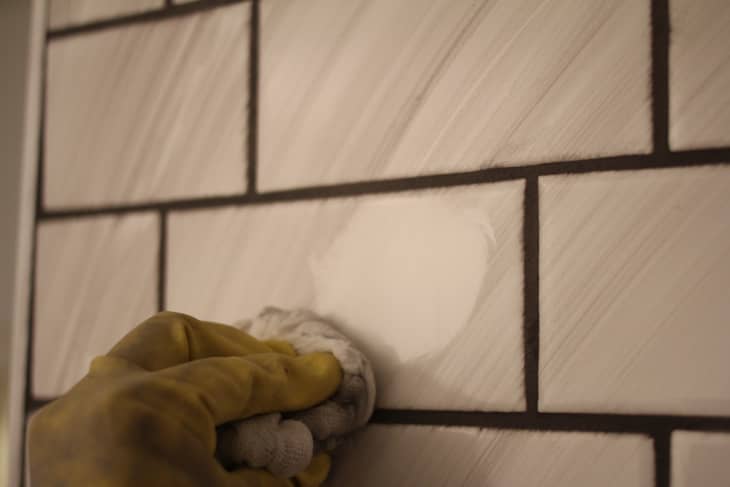
12. After 24-48 hours, you have the option to seal your grout. Sealing grout helps protect your grout lines from stains and makes it a bit easier to clean. To seal, take a small paintbrush and paint in the sealer along the grout lines. Apply a liberal amount, and work it into the grout. Wipe any excess sealant off the tiles within 5 minutes. Sealants can leave a stain so be weary of any spills.
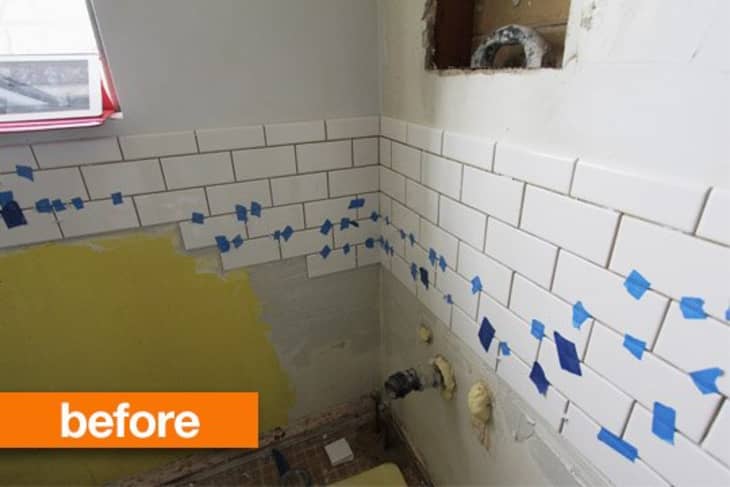
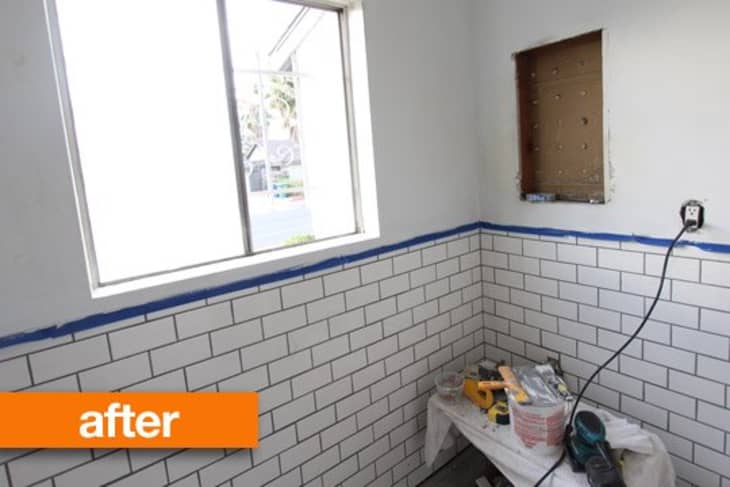
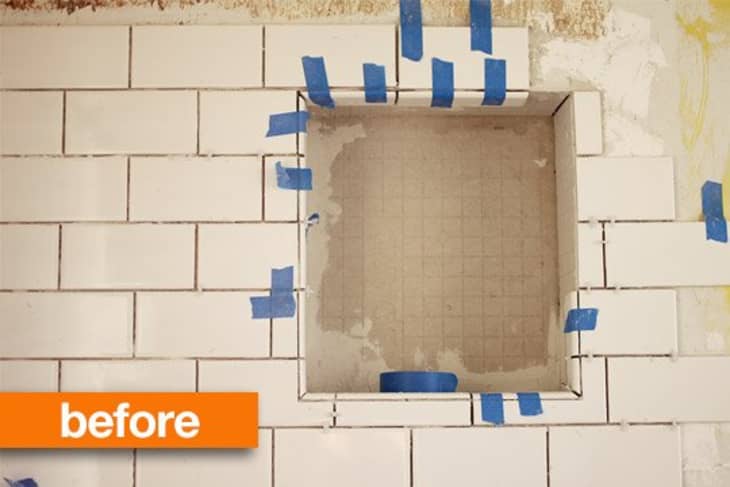
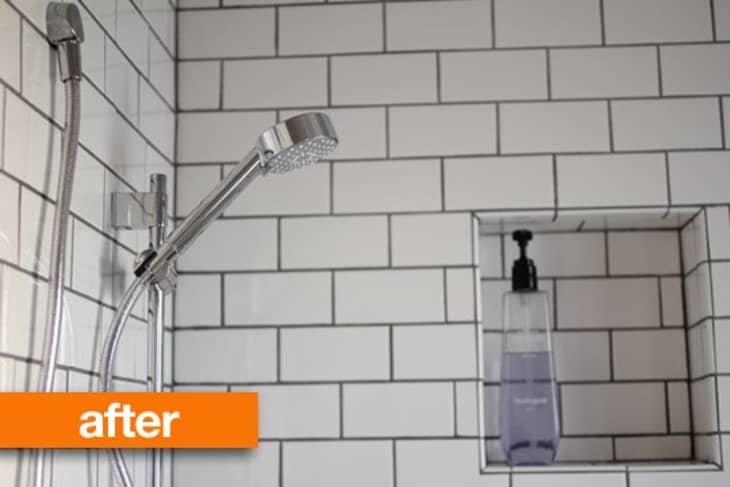
Here are some before and after grout photos for you to compare.
Have a really great DIY project or tutorial that you want to share with others? Let us know! We love checking out what you’re making these days, and learning from our readers. When you’re ready, click here to submit your project and photos.