
How To Make a Stencil For a Paint Pattern

Stencils are a fun and economic way to create a pattern or duplicate an image over and over again. They can be used on a vast array of items from rugs, and garden containers, to walls and ceilings. You can purchase them pre-made, but if you’re looking for something one-of-a-kind your best bet is to make it yourself.
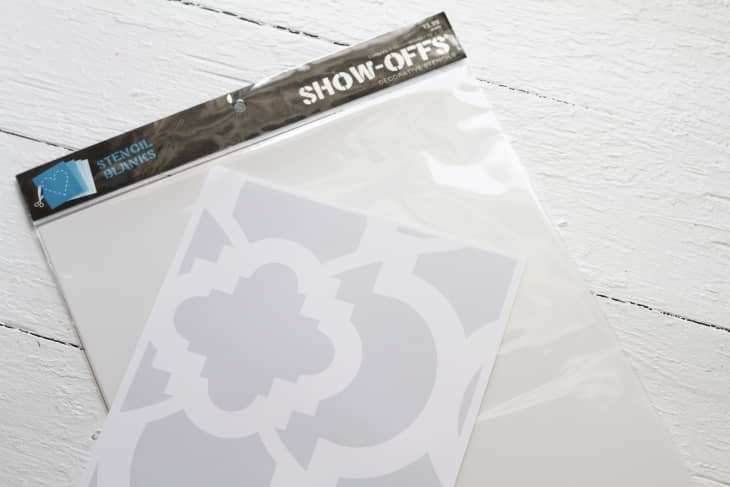
There are quite a few options when it comes to picking out the material for your plate. Hobby stores sell “stencil blanks” like the ones pictured above, but other items such as plastic office folders or laminate sheeting from a print center can be used as well. When choosing your plate, keep in mind the thicker the plastic, the more effort you’ll have to use when cutting out the pieces — and if you’ve got a detailed stencil this could mean hours of extra work!
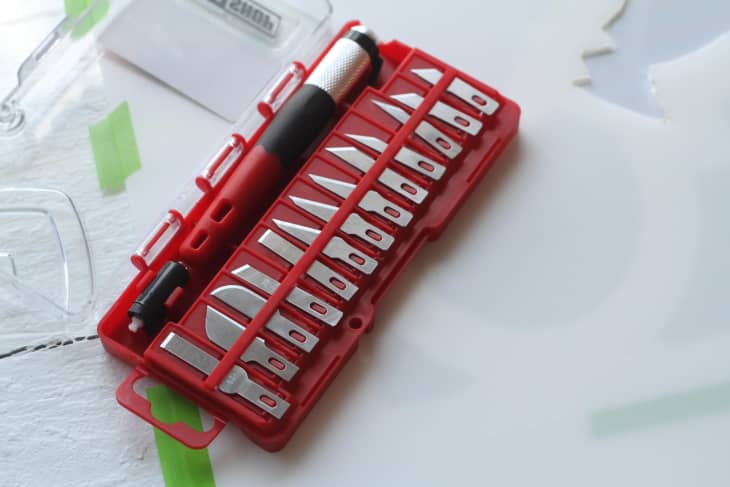
Two of the most popular tools used to cut a stencil are X-Acto knives, and hot knife stencil cutters. I tried both and found the hot knife really difficult to use. I wanted to grip the hot knife like a pencil so I could easily trace around my shape, but this wasn’t possible because of how the knife was constructed. Since you are virtually burning plastic, the smell is pretty unpleasant as well. I found while it took more exertion on my end, I had more control over my movement with the X-Acto knife which gave me much cleaner lines. It might be a good idea to try both to see what works best for your project.

What You Need
Materials
- Stencil plate (stencil blanks, clear laminate sheet, plastic folder)
- Printed design
- Cutting plate (glass sheet or rubber cutting mat)
- Cutting instrument (X-Acto knife or hot knife)
- Masking tape
- Marker
Instructions
After you’ve decided on a design and size for your stencil, print it out or draw it on a sheet of paper in black ink. If your design is larger than your home printer send it to your local print shop; they should be able to have it printed up for you in no time at all. While you’re there, be sure to pick up a piece of plastic or laminate large enough to fit the design. I decided on a simple-to-cut houndstooth pattern for my stencil.
Pattern designing tips:
Not sure where to begin when it comes to designing a pattern? Start with observing the world around you. Look to inspiration from visuals that you already like…architecture, nature and more. Zoom in to focus on particular angles and shapes, or experiment with motifs that already exist. As you plan out your pattern, think about scale (consider the surface you’d like to cover and what kind of look you want to achieve with the scale of the pattern) and how your pattern might repeat. (We like this explanation of how to make a repeating pattern found on Design*Sponge). Finally, when in doubt, opt for simplifying your pattern idea (you’ll thank us when it comes to cutting out and creating your stencil!). Rounded shapes can be more difficult to cut when making stencils than straight lines, so you may want to consider this when choosing your design.
1. If you are working with a hot tool to cut your plate, prepare your work area by taping your design face down onto a sheet of glass (I borrowed one from a framed print and it worked great). Those opting for an X-Acto knife can use a rubber cutting mat.
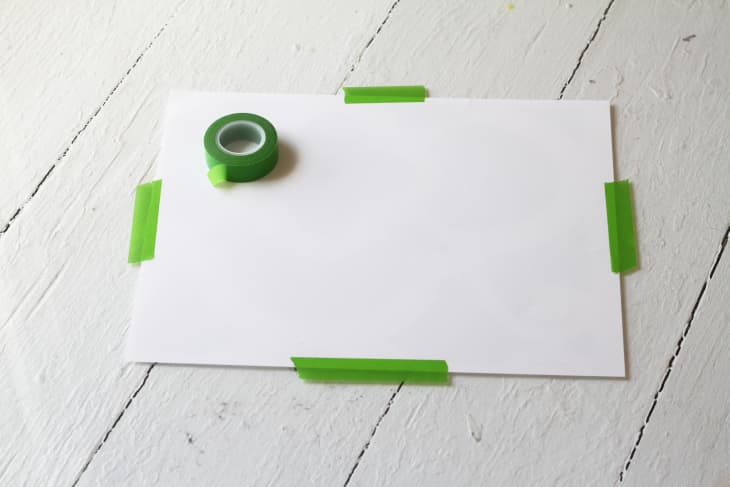
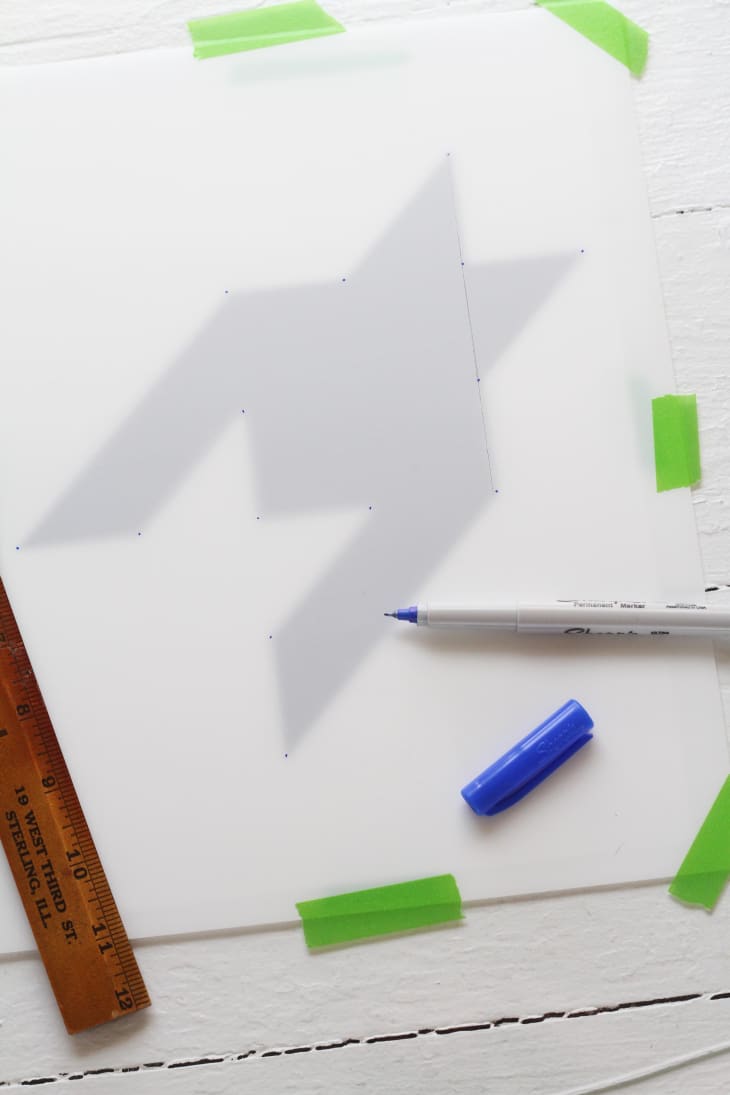
2. Turn your glass plate or mat over, so the design is facing up. Cover the design with your plastic plate and secure in place with a good amount of tape.
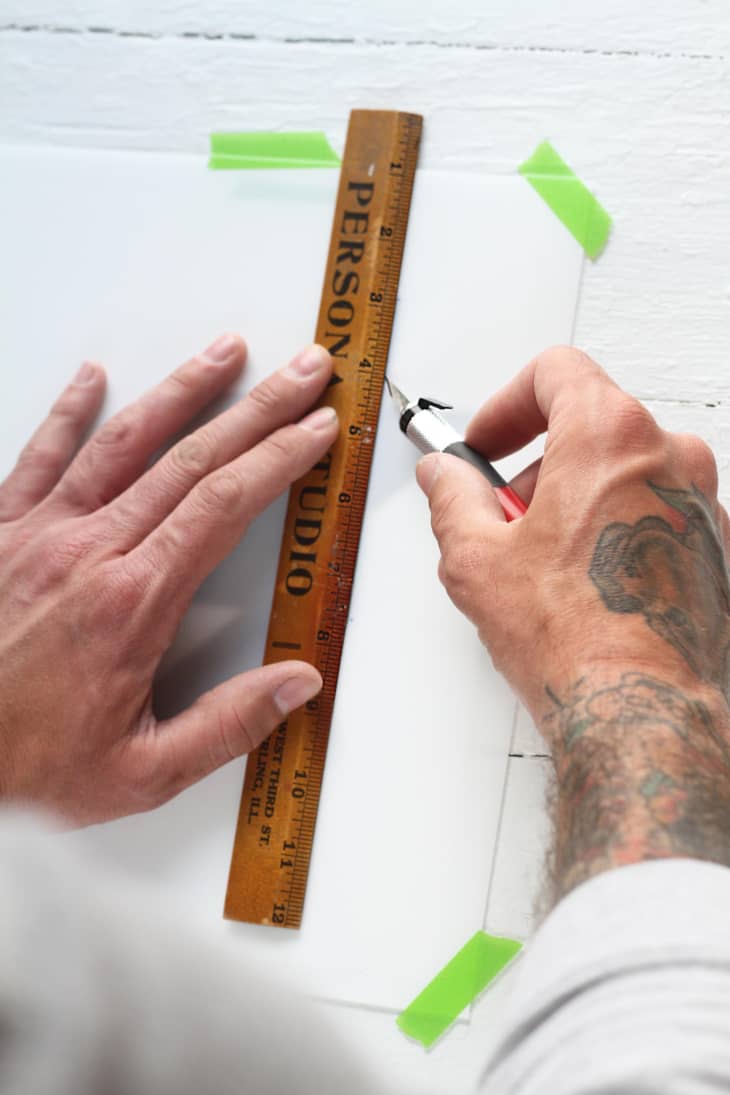
3. If it’s difficult to see your design through the plastic, hold it up to a window and trace around the edges with a marker (if using a rubber mat, you’ll have to remove first). You can then trace around the edges with your cutting instrument.
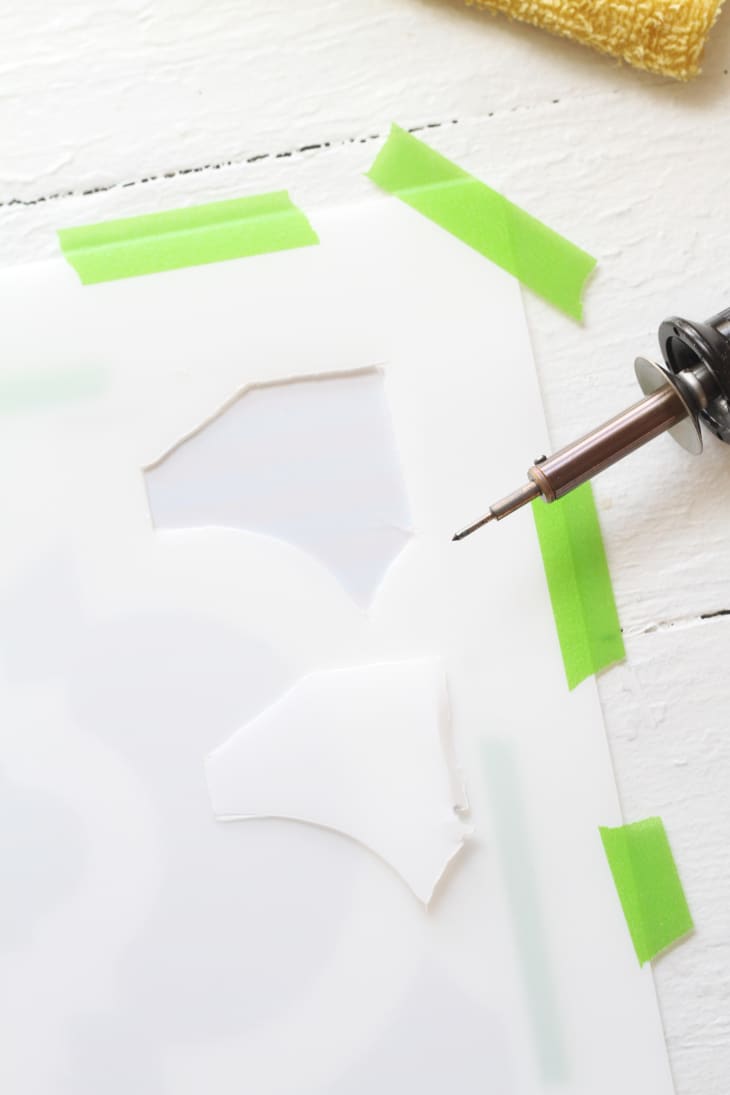
→ For this houndstooth pattern, I made guides where I would need to cut my lines. Since there wasn’t any other detail in the center of my design, I cut straight through the center so they would be even on both sides.
→ When using a blade and a straight edge remember you don’t have to cut all the way through the plastic on your first run. Once you make the initial score you can pass the knife through a few more times without applying a large amount of pressure and it will cut through leaving a very clean edge.
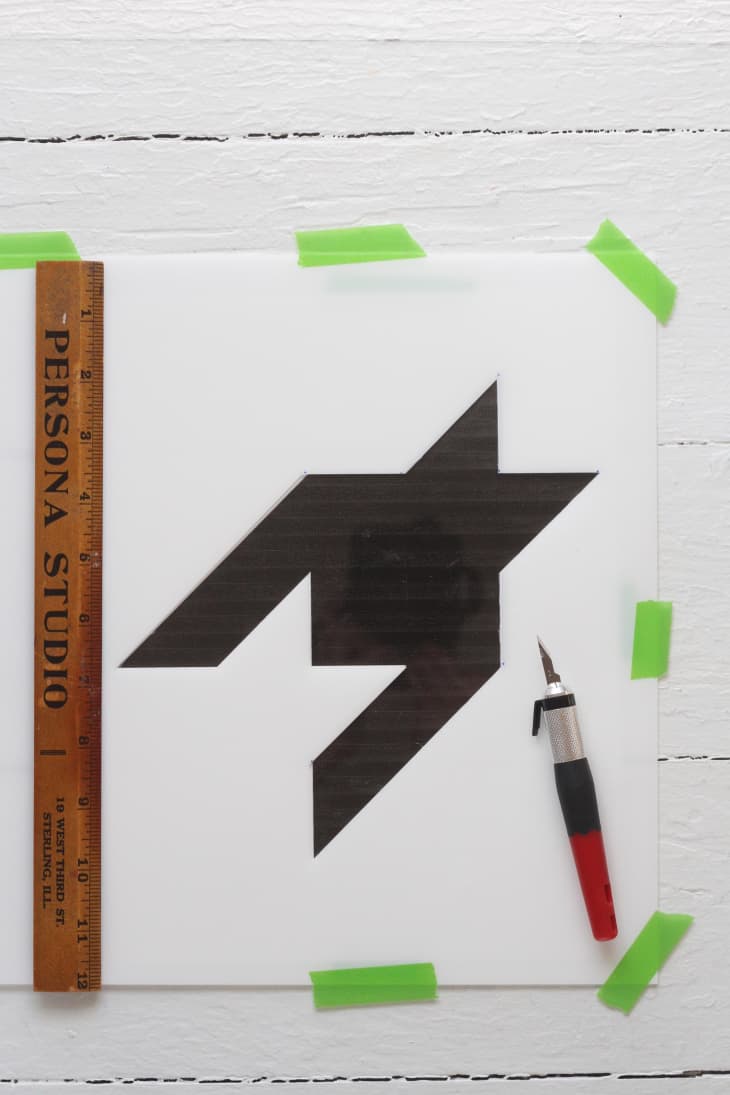
4. Continue to cut all your lines until your design is exposed through the plastic — be sure all the corners meet!
5. You might decide you’re done at this point, or if you plan to stencil a pattern you can measure and cut another design in your plate. For my design I measured out one width of the bottom “leg” and lined the design up just below that.
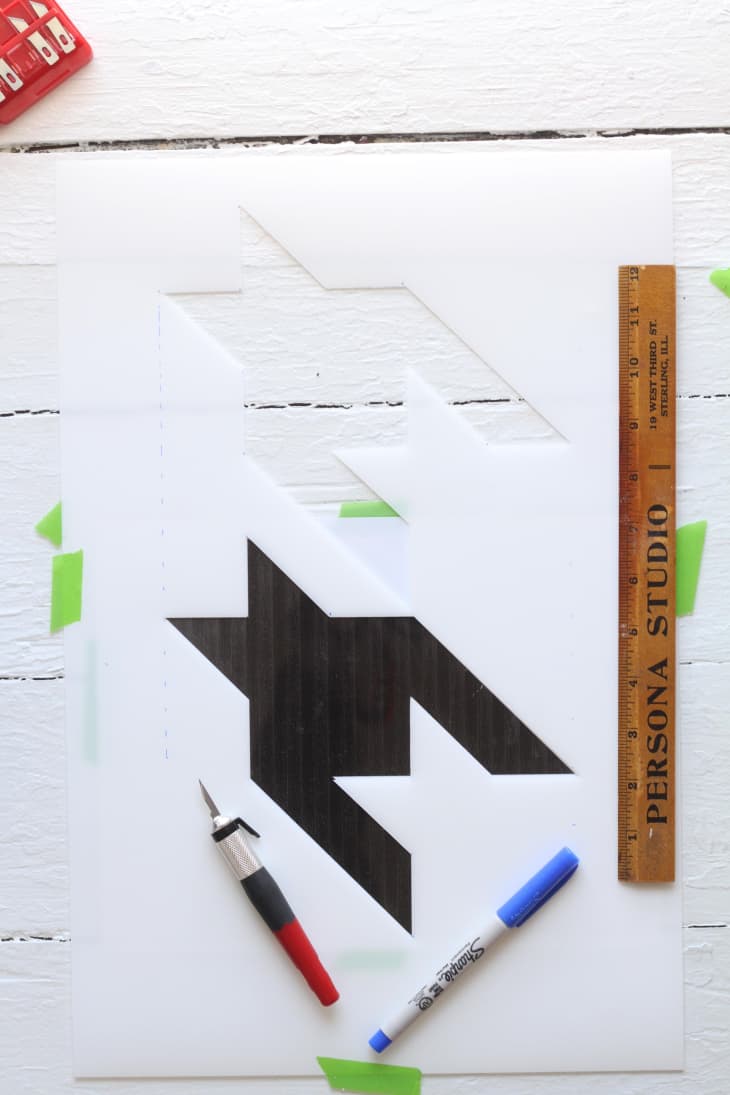
→ Be sure not to trim too much of the excess off the sides of your stencil; you want to leave a large enough area for the paint roller or brush during application.

6. You’re all set with a stencil! If you’re ready to get to painting with that stencil, you can find more instruction here: How To Paint A Wall Using A Stencil. If loud is what you’re going for with your pattern, choose bright, or contrasting paint colors. If you want something subtle try painting your wall a neutral color with a gloss finish and combining it with a stencil pattern in the same color but a different finish.
Want even more painting know-how? Find all our best tips here: Apartment Therapy’s Best Painting Tips.
Have a really great DIY project or tutorial that you want to share with others? Let us know! We love checking out what you’re making these days, and learning from our readers. When you’re ready, click here to submit your project and photos.