
Learn How To Spray Paint Plastic the Right Way
Ahh, plastic. The synthetic material we all love to hate. But here’s the thing: When it comes to affordability and durability, plastic is awesome, and if you give it a spray paint spruce-up, it can truly match any decor style. The most important thing to remember when you’re spray painting plastic is to start with a good primer to prevent the paint from peeling or chipping.
With new spray paints in sophisticated hues designed specifically for coating plastic (I’m looking at you, Liquitex!), you can customize that plastic find into a prized piece.
If your plastic outdoor furniture has lost its luster after a season exposed to the elements, or if you want to refresh an old plastic piece, spray painting is the easiest way to give it a dramatic makeover. While this is one of the fastest ways to revamp plastic, there are some important steps you’ll need to follow in order to prevent chipping and ensure that your hard work pays off.
What You’ll Need to Spray Paint Plastic
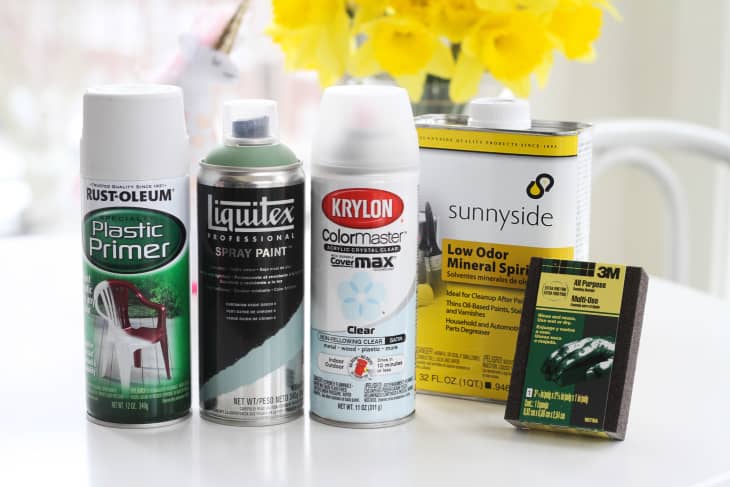
The most important material for this project is going to be your primer. Many different paint brands sell plastic primers, but I chose Rust-Oleum because I’ve used it many times before with fantastic results. I topped it with Liquitex spray paint, which offers a big selection of pretty hues.
Materials
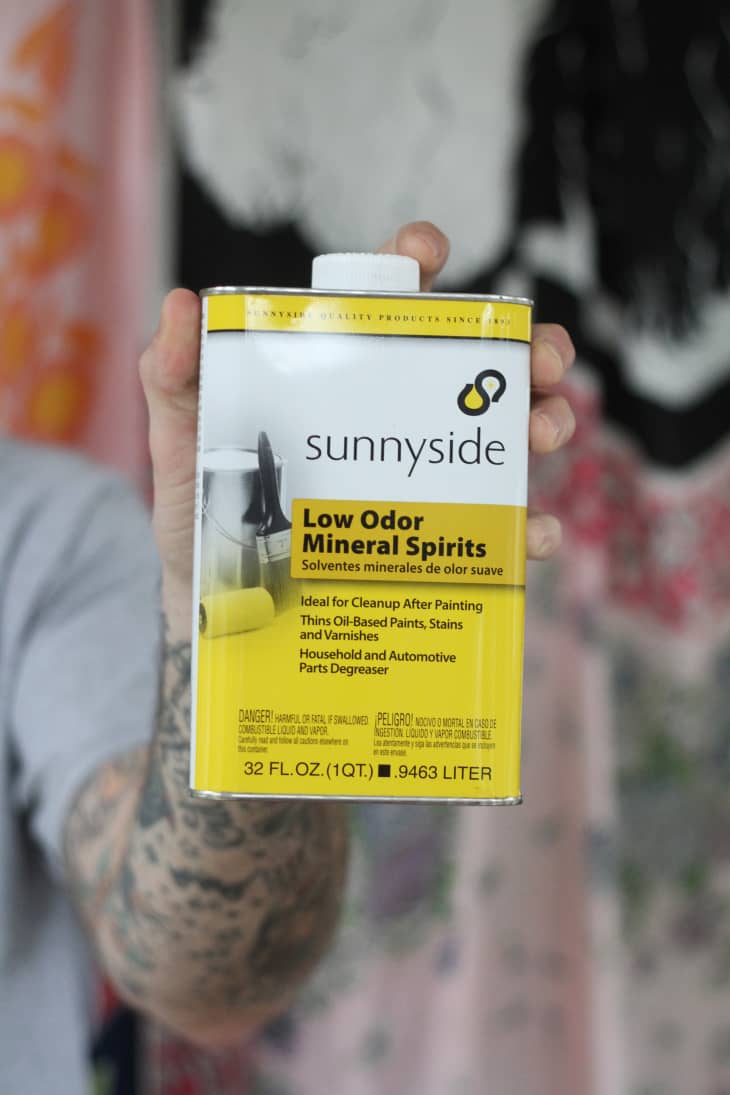
- Mineral spirits, such as this one
- Fine-grit sanding block
- Plastic primer, such as this one from Rust-Oleum
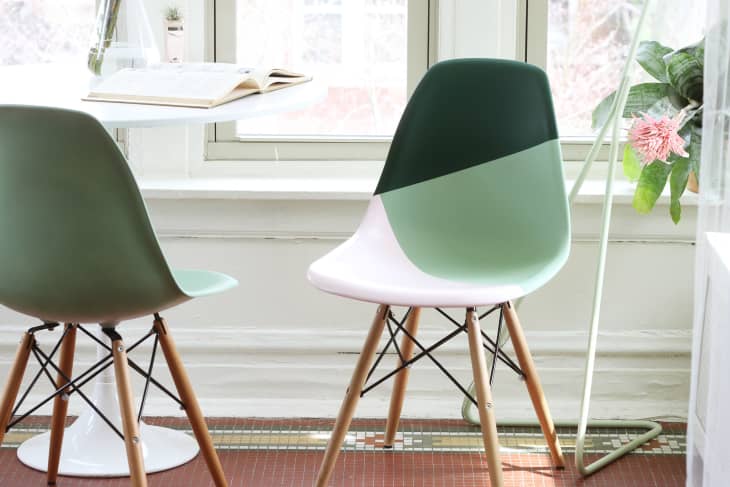
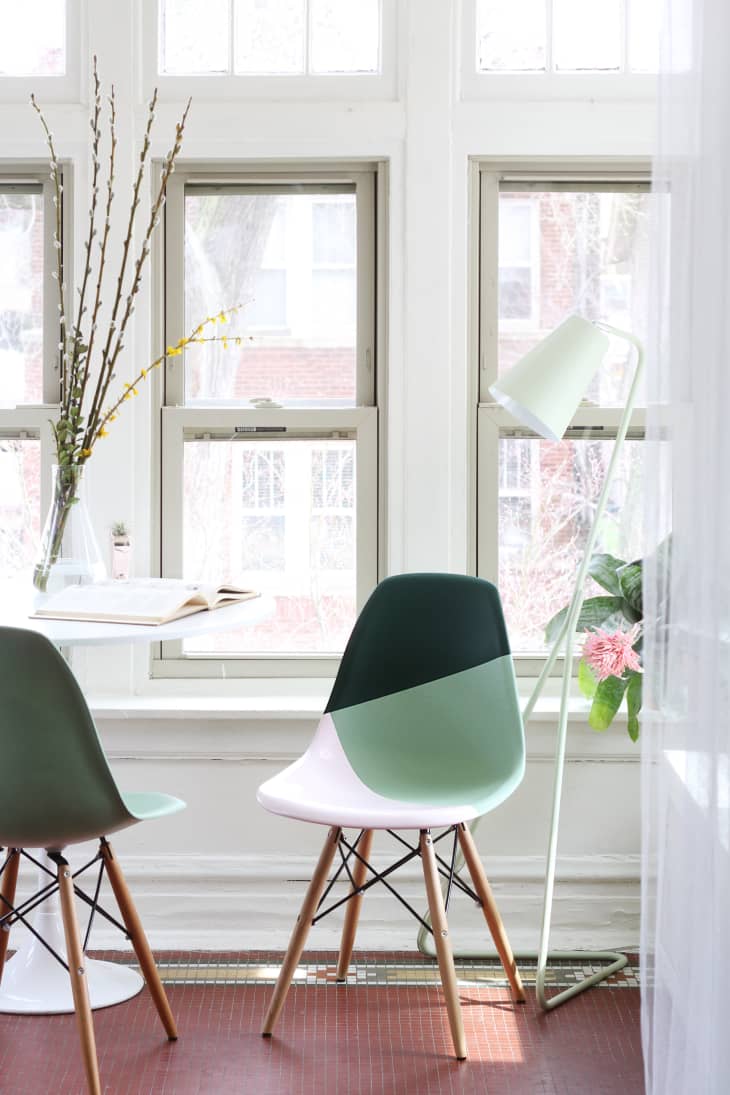
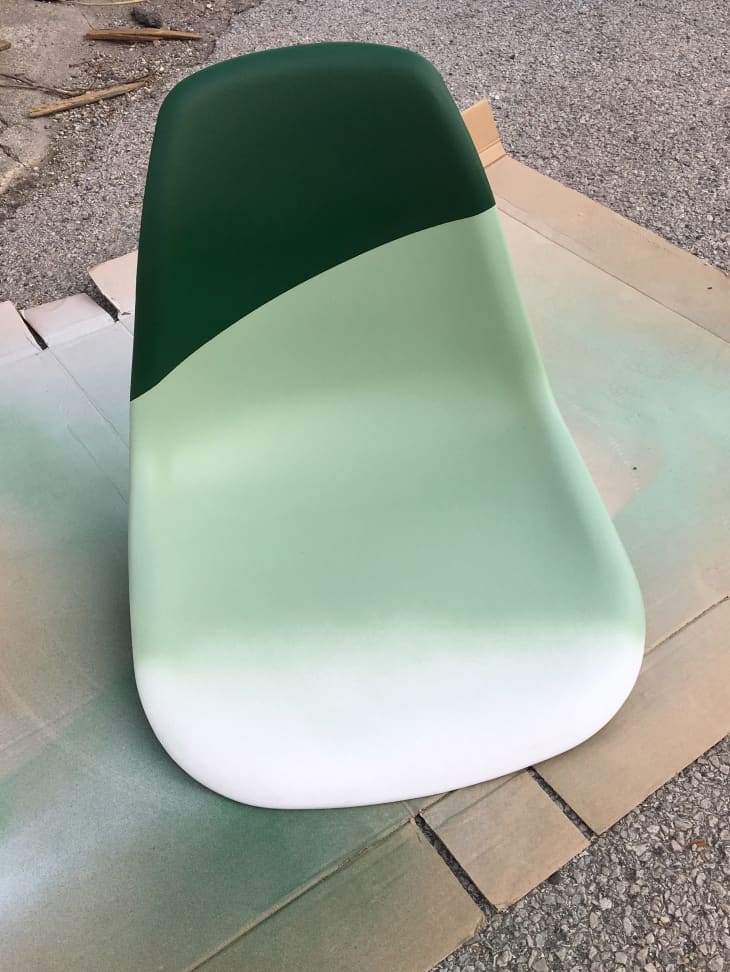
- Top coat paint (we used Liquitex Chromium Oxide Green 6 on the solid-color chair)
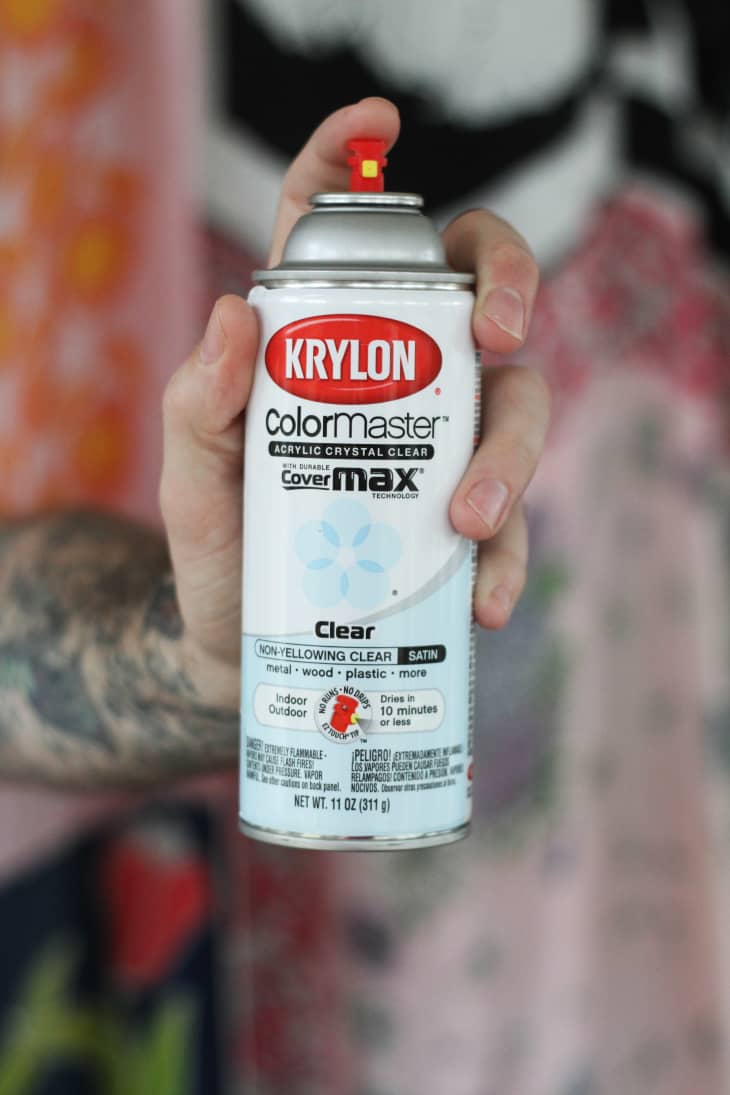
- Clear sealer
Instructions
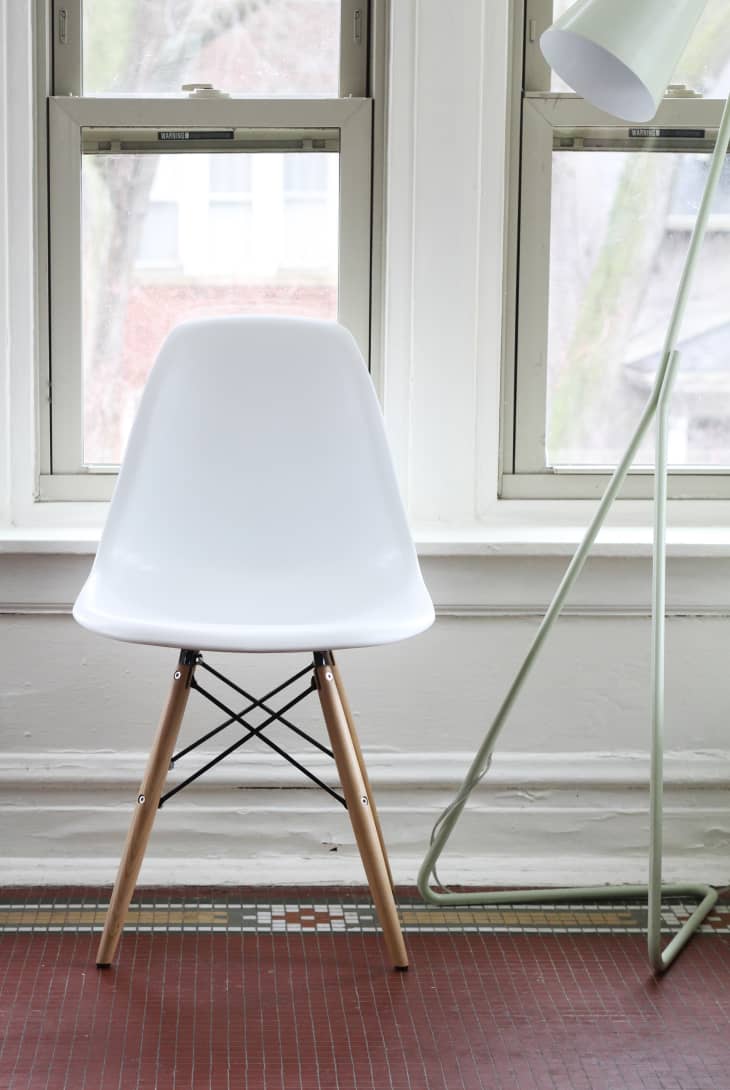
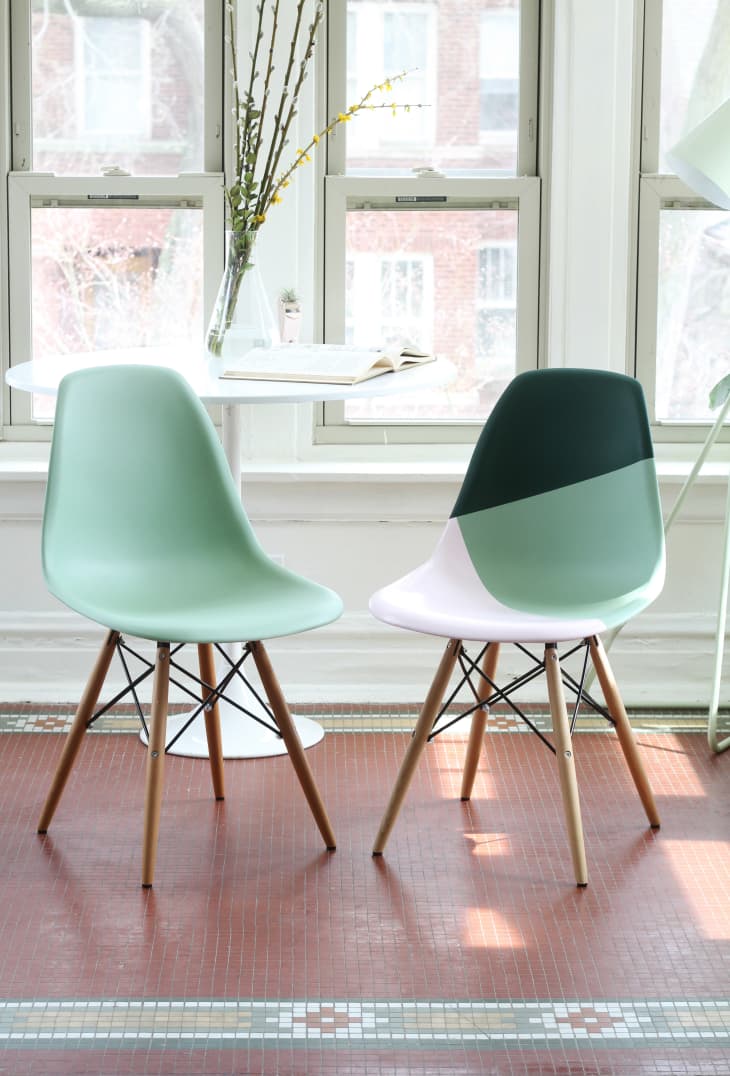
For our paint test, we started with two already fab Eames-style chairs ($112 for the set of 2!) from Hayneedle, but we wanted to spice things up a bit with some interesting hues and color-blocked designs. The image above shows what the chairs looked like before we got to work on them. Order your own set and dress them up with any colors or designs you like.
1. Start by wiping down the plastic surface with mineral spirits or rubbing alcohol. This not only cleans the item but also helps to break down any sealants that may have been used on your brand-new item. After completing this step, wash the piece with a wet rag and let it air dry.
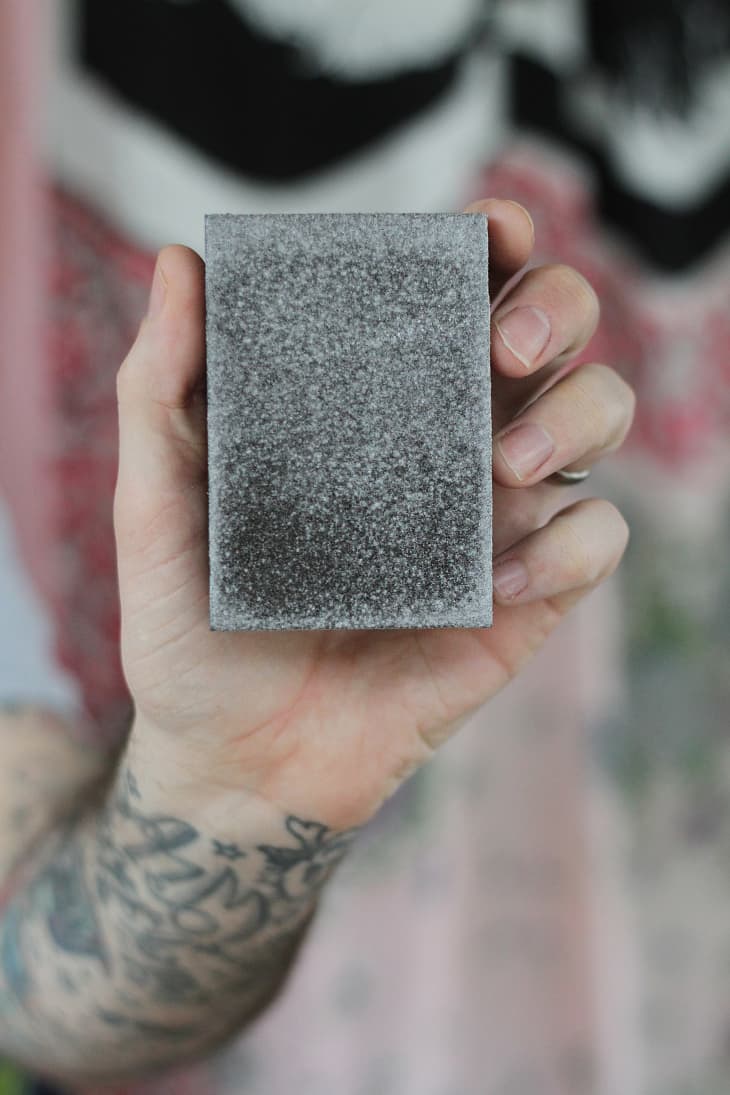
2. Using a fine-grit sanding block, lightly sand the surface to a dull finish. This will provide some texture, so the primer will stick. After sanding, dust the surface using a dry brush (a large paintbrush works great!) to clear away the debris and wipe the surface with a wet cloth. Let your object dry completely before moving on to the next step.
3. Apply the plastic primer according to the directions on the back of the can. Rust-Oleum recommends applying one thin coat, rather than one heavy coat or multiple coats, and shaking the can as you spray.

4. Apply the spray paint according to the directions on the can. If you’re painting furniture or something that will get a lot of use, give it about 3 to 4 coats, letting dry between applications.
If creating a color-block design: Apply tape to create the design, and use plastic to cover any area you don’t want to be sprayed with the first color. Let dry completely before covering over the first color and spray-painting the second. Continue until your design is complete.
5. Lastly, protect the paint by spraying the entire piece with clear primer. This step is especially important for furniture or other objects that will be kept outside and are subject to the elements.
Enjoy your freshly painted piece—until you get bored that is, then paint it again!
The paint + primer compatibility test
When I spoke with an artist expert at Liquitex, they shared with me their trick for determining whether a primer and paint will work well together. Essentially, your paint should stick as long as you have the right primer intended for that specific surface. Here’s how to double-check:
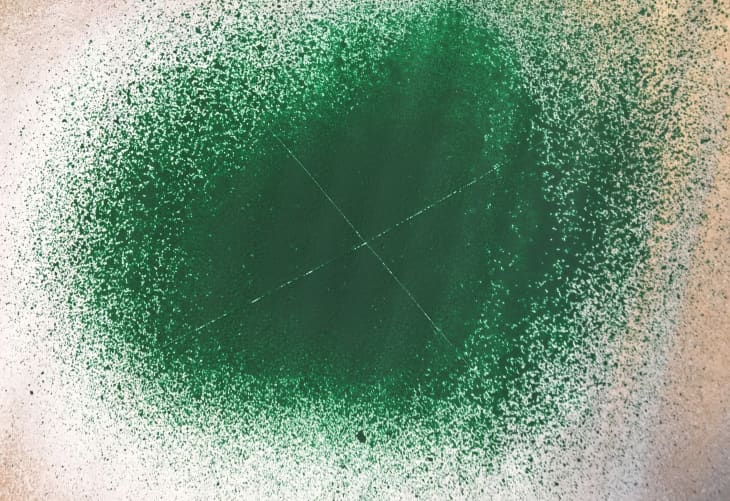
1. On a test patch, spray the primer. Let dry, then apply the topcoat color.
2. When it’s completely dry, make a crosshatch with a utility knife (again, you’ll want to use a scrap piece or a spot you’ll never see on the piece of furniture).
3. Lay a piece of tape over the crosshatch and pull it up. If the paint stays on the surface, congrats—you have a match! If the paint peels up with the tape, the paint and primer probably aren’t compatible and won’t work for your project.
Have a really great DIY project you just completed? Let us know! We love checking out what you’re making these days. When you’re ready, click here to submit your project and photos.