
Meghan’s $10 Bathroom Floor Makeover
Project by: Meghan
Location: Charleston, South Carolina
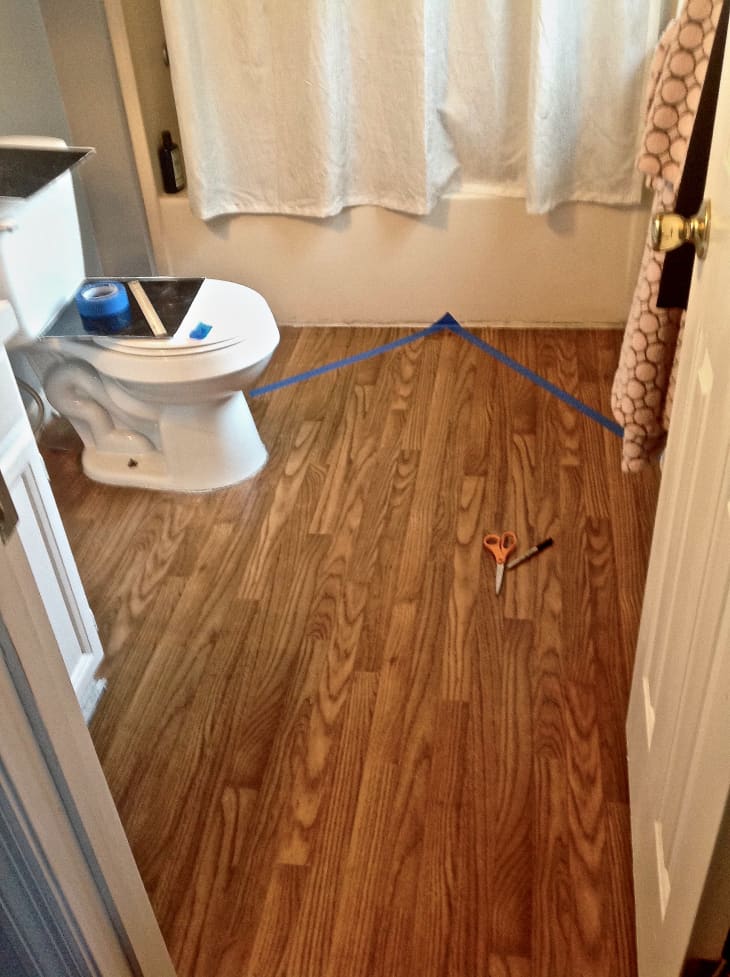
Our bathroom floor was disgusting. Like, ten year old faux-wood rental apartment sheet vinyl disgusting. Really, the picture does not do it justice AT ALL. I toyed with the idea of putting down vinyl tiles on top (like I did in our kitchen), but the floor is super uneven and I was worried that the humidity would cause the glue to unstick. So, we made peace with it for a year and a half. Flash forward to one month ago when I saw a picture of a painted hardwood floor online (thanks, Pinterest). I thought, I can do that…and for cheap! I already had painter’s tape, primer, and rollers/brushes, so all it cost was the $10 for a quart of porch/floor paint. I had it tinted in Valspar’s Lincoln Cottage Black.
It was already 8 pm, but as impatient as I am, I got started immediately. I cleared everything out of the bathroom, cleaned the floor with an industrial degreaser, and got to taping. I would highly recommend planning and sketching your design instead of taping and un-taping like I did… This was by far the most annoying and tedious step, but a little planning would have saved some time. I tried to lay out my tape in equidistant lines, but was not too concerned with perfection. In fact, perfection probably would have looked amiss with the uneven floors and crooked cabinets.
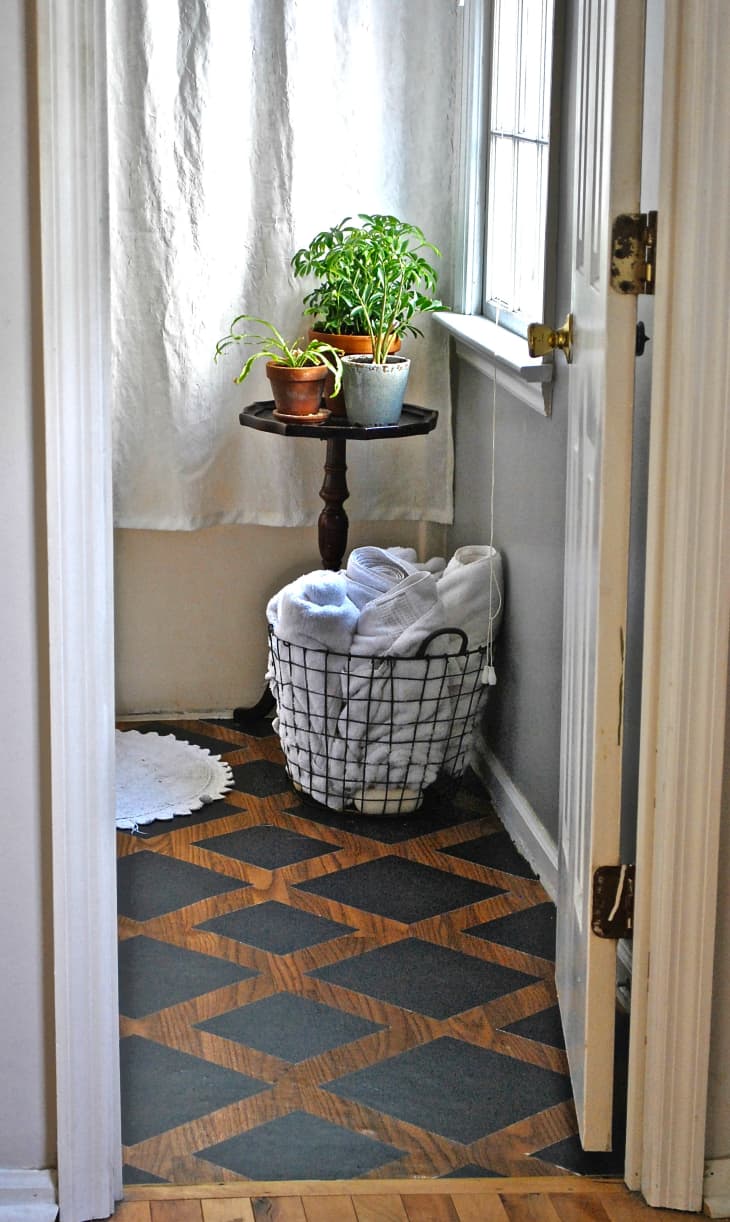
After all of the tape was laid down I primed my squares with regular ole’ Kilz primer. This only took about 20 minutes, and I let it dry for 1 hour before putting the black on top. I let it dry overnight, and pulled up the tape in the morning. I had a mini-freak out at this point because some of the primer had bled under the tape, but I ended up liking the way it looked…it’s barely noticeable. To be cautious, we waited another 24 hours before putting everything back in the room (thank you hubby). It has held up great, and we are not careful on it at all! It adds a lot of interest to our tiny bathroom.
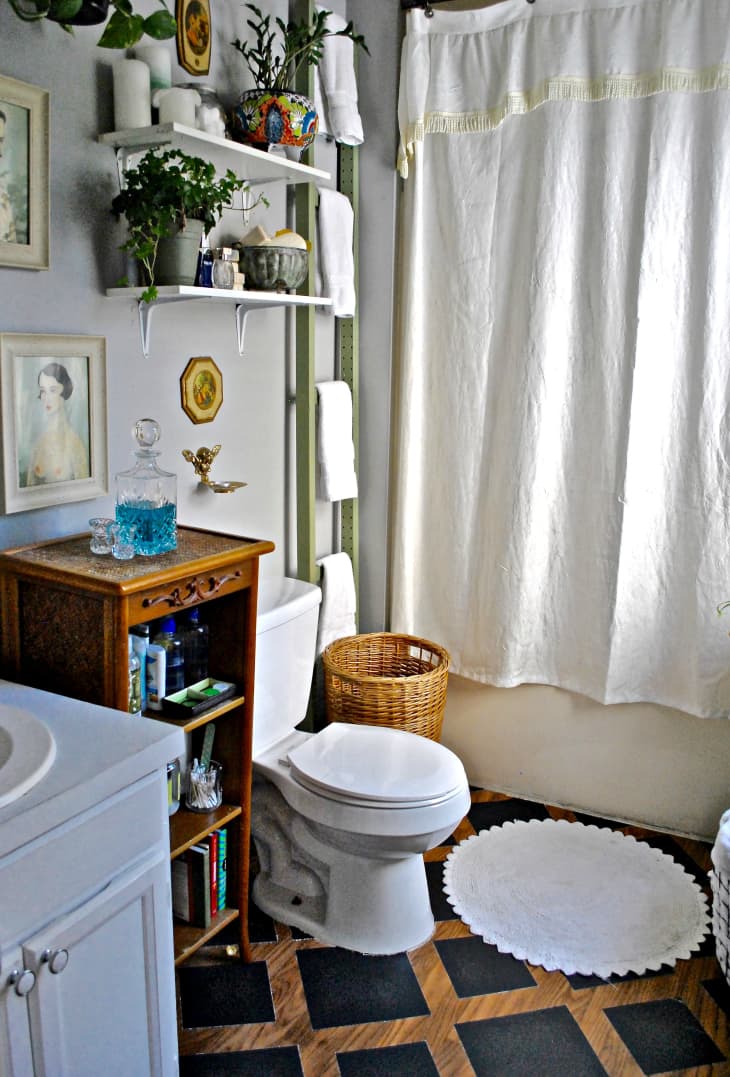
Decor-wise I kept everything the same, except that I added some (more!) plants, and a ladder for our hand towels. The “ladder” is actually a side unit from the IKEA Ivar system. If you remember from our Small Cool entry, we had a wall in our living room lined with Ivar shelves. Well…they toppled over about a month ago, and most of the side units broke. I’ve been looking for ways to re-use them around the apartment, and this is one!
Thanks, Meghan!
• Are you interested in sharing a decorating or renovating project with the Apartment Therapy readers? Contact the editors through our Makeover Project Submission Form.
Re-edited from a post that originally appeared 3.26.16. — CM