
How to Transform Basic Bi-Fold Closet Doors to Look Like Custom Cabinetry

Want more DIY tips, tricks, and inspiration? Check out more stories featuring the 2023 Apartment Therapy DIY Collective.This content is presented in partnership with The Home Depot; it was created independently by our editorial team.
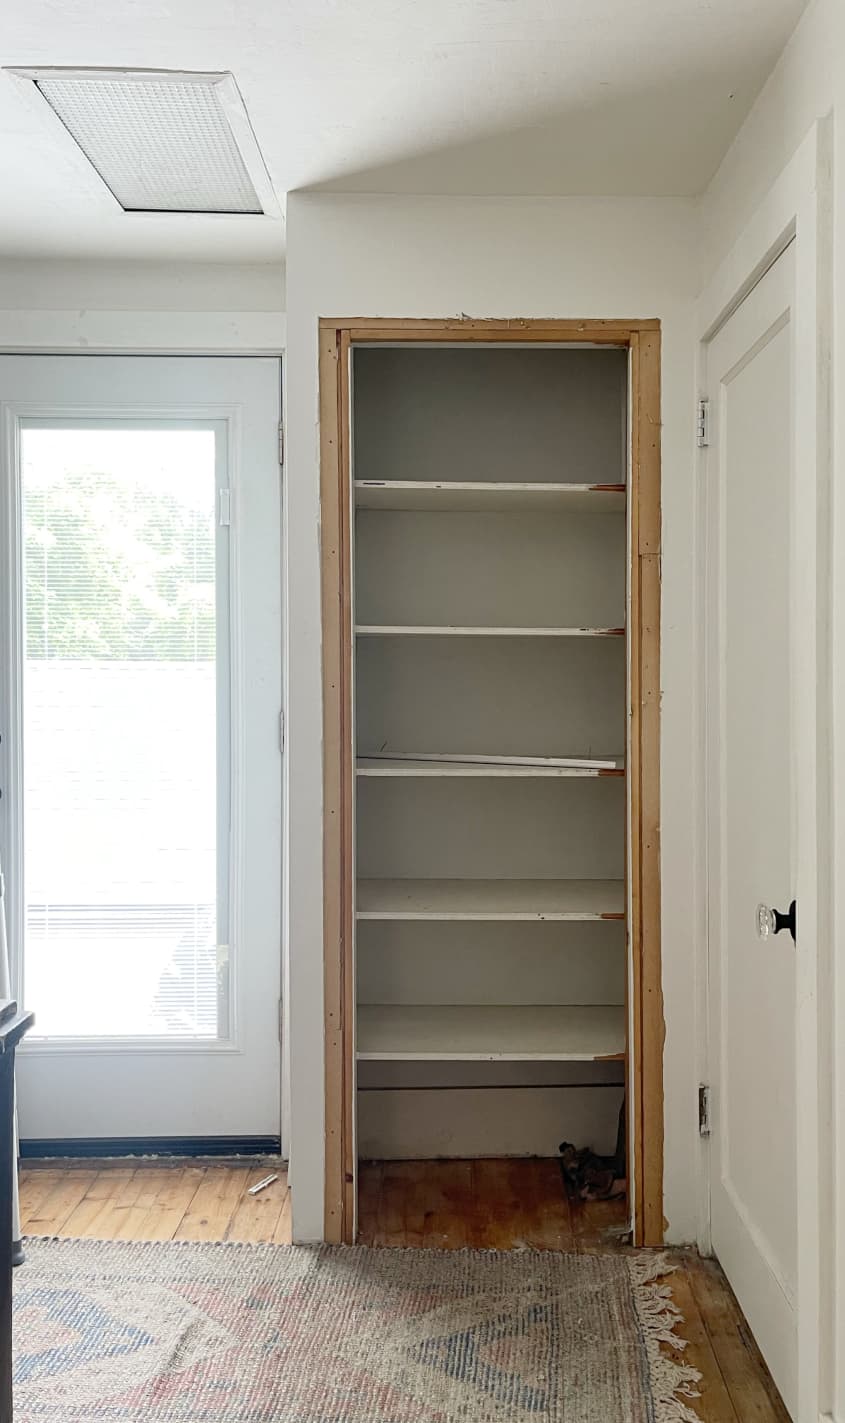
Sometimes home improvement projects have a domino effect — you start one, then that makes you think of another, which makes you think of yet another. That was the case for me in one of my most recent projects. I share a 1945 Colonial-style home with my husband and four kids, and our second-floor landing was a hot mess! The floors were rough and worn, and that musty old hall closet with dated louvered doors needed some love. We decided to get new hardwood floors installed, so I figured what better time to give this closet a glow-up?
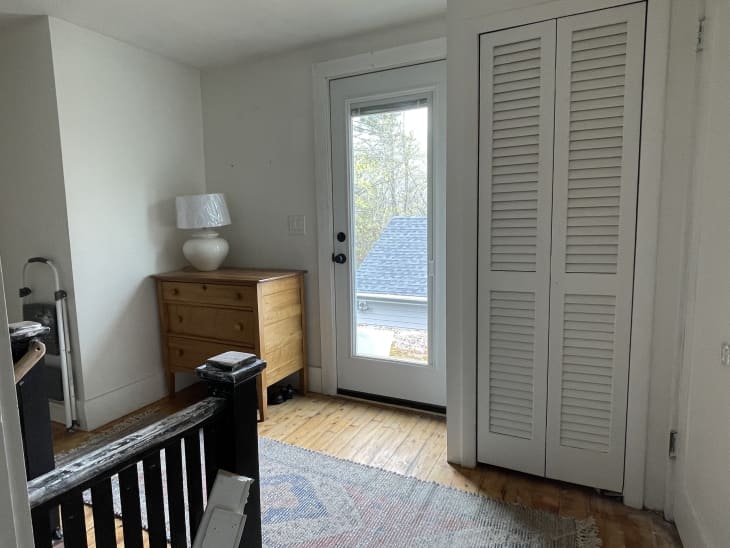
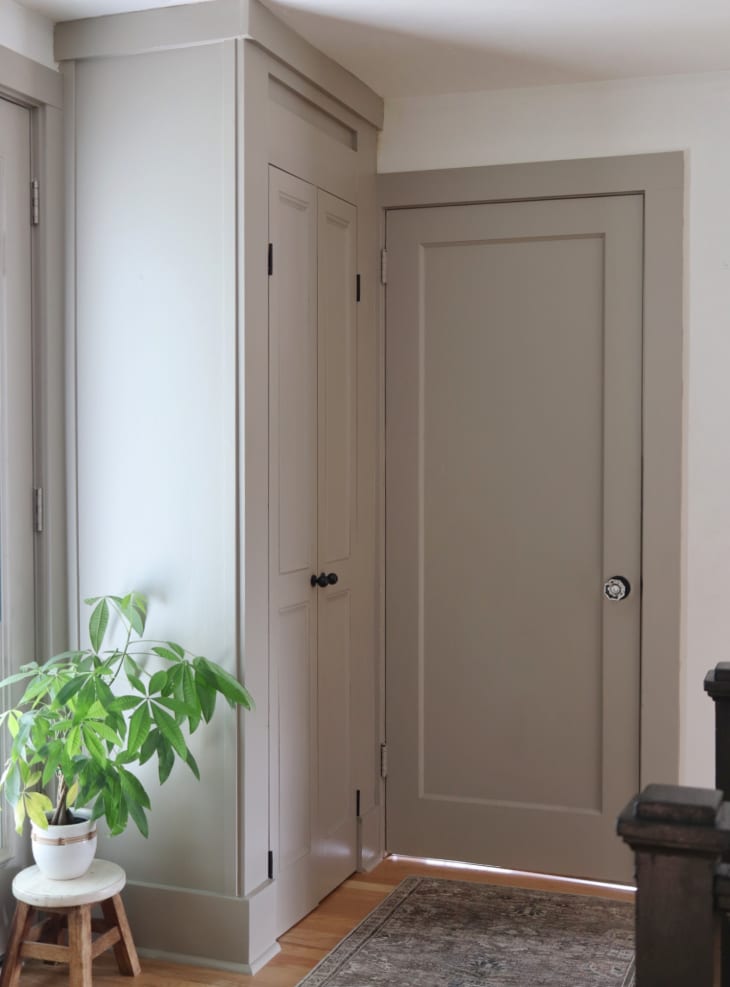
The floors were a pro job, but the closet makeover was a doable DIY. Before, there was nothing fancy about the exterior at all, it was just a big white utilitarian box — it didn’t even have baseboards. But by removing the old louvered panels on the doors and adding fresh panels, trim, and paint, I was able to totally transform this closet into what looks like really expensive custom cabinetry. Here’s how I pulled it off.
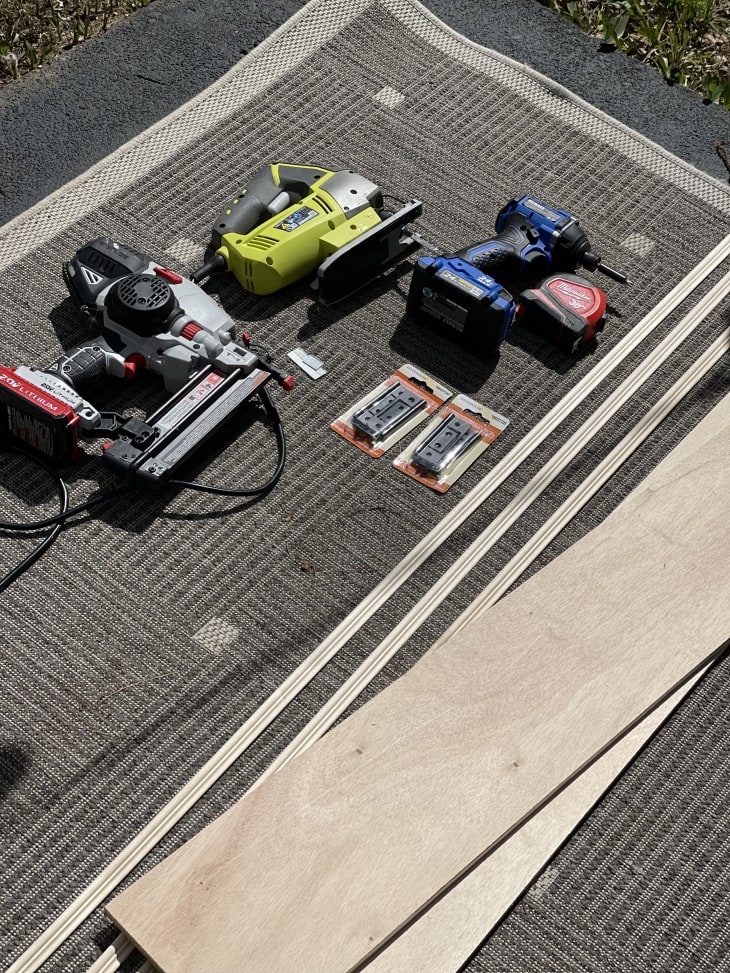
What You’ll Need to Upgrade Louvered Bi-Fold Closet Doors
- 1/2-inch plywood to fit the interior panels of your doors
- Small molding of your choice (I used a Colonial style to fit my home)
- Wood glue
- 2 sets of hinges
- Caulk
- Paint of your choice
- Paint brush
- Palm sander and sanding pads
- Wood filler
- Trim for closet’s exterior
- Brad nailer
- Jig saw
- Table saw (if you don’t have access to a table saw, you can take your measurements to the hardware store and have the plywood and trim cut for you)
- Drill
- Miter saw (you can also use a hand saw and a miter box)
- Level
How to Upgrade Bi-Fold Closet Doors
1. Remove doors from the closet and take off the hinges.
First, I removed the bifold door from the track and took the hinges off to create two separate doors.
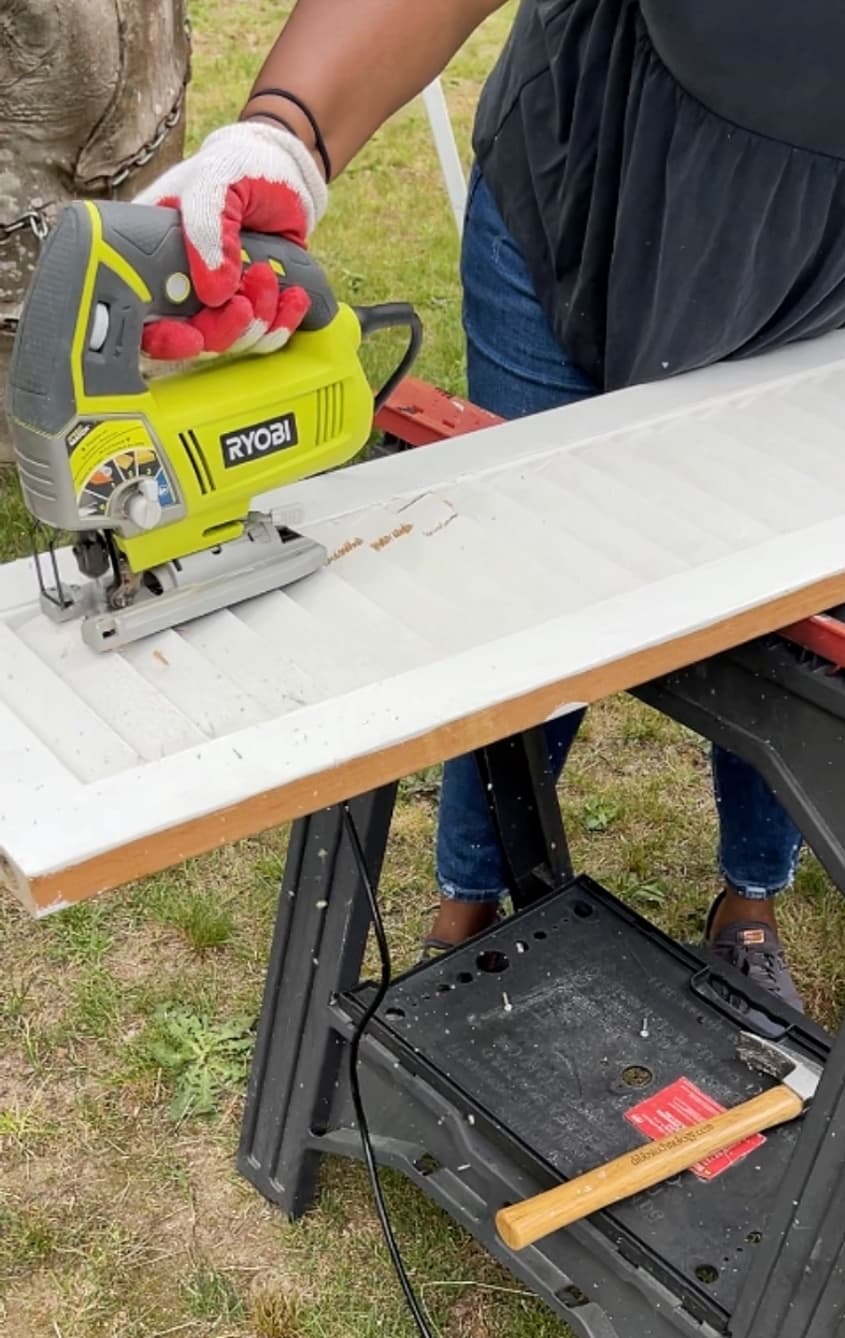
2. Cut and remove slats.
Next, I used my jigsaw to cut through the slats. Once they’re cut, the slats either fall out or easily snap out, which is oddly satisfying.
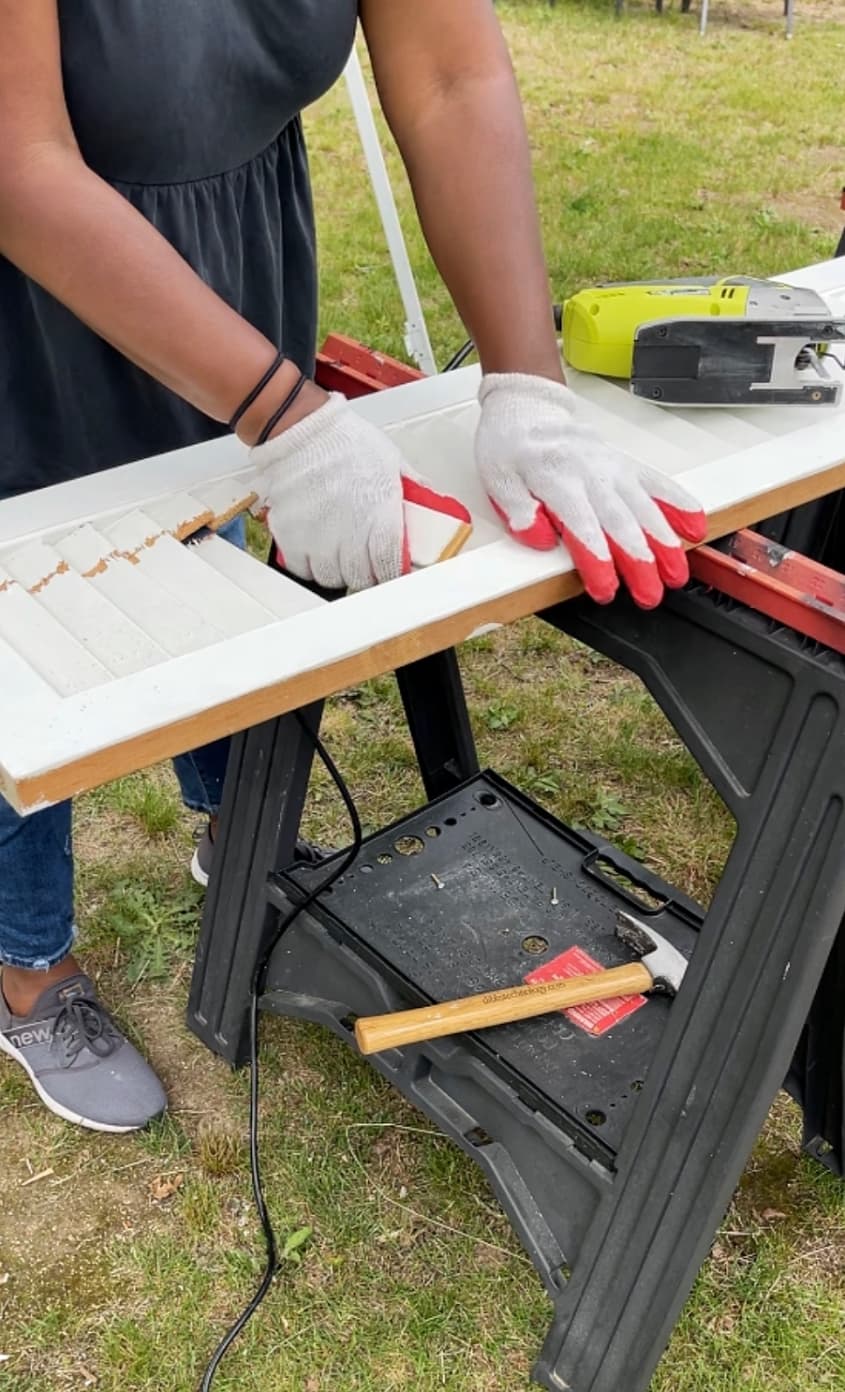
3. Use plywood to make new interior panels.
Next, it was time to cut the plywood to fit inside the door’s openings. I measured and ripped down each piece of plywood to fit and then celebrated because they fit perfectly! Yay, me! My doors had a small cleat in each opening that allowed the plywood to sort of rest inside. I applied wood glue to the cleats and set the panels inside. It didn’t have to be perfect, as any gaps would be covered with the trim.

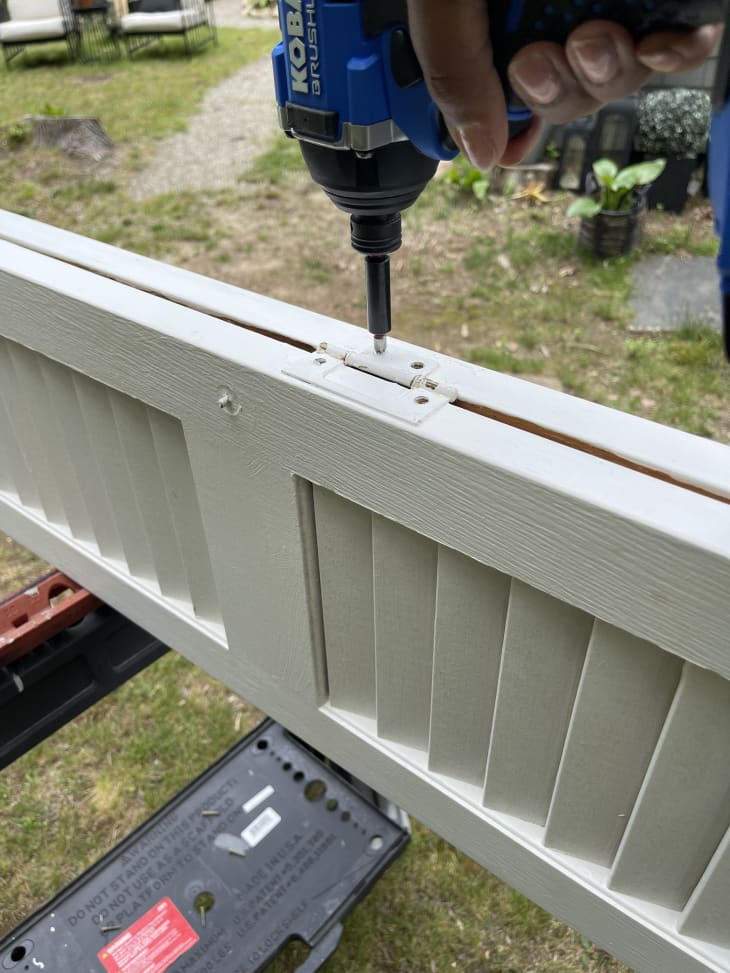
4. Nail down plywood and attach molding around edges.
I nailed the plywood to the cleats with my brad nailer and 1/2” nails. I used my miter saw to miter cut some simple trim and used wood glue and brad nails to secure them inside the panels. These helped to cover the gaps and added a nice decorative touch. Next, I caulked the trim and let it dry overnight.
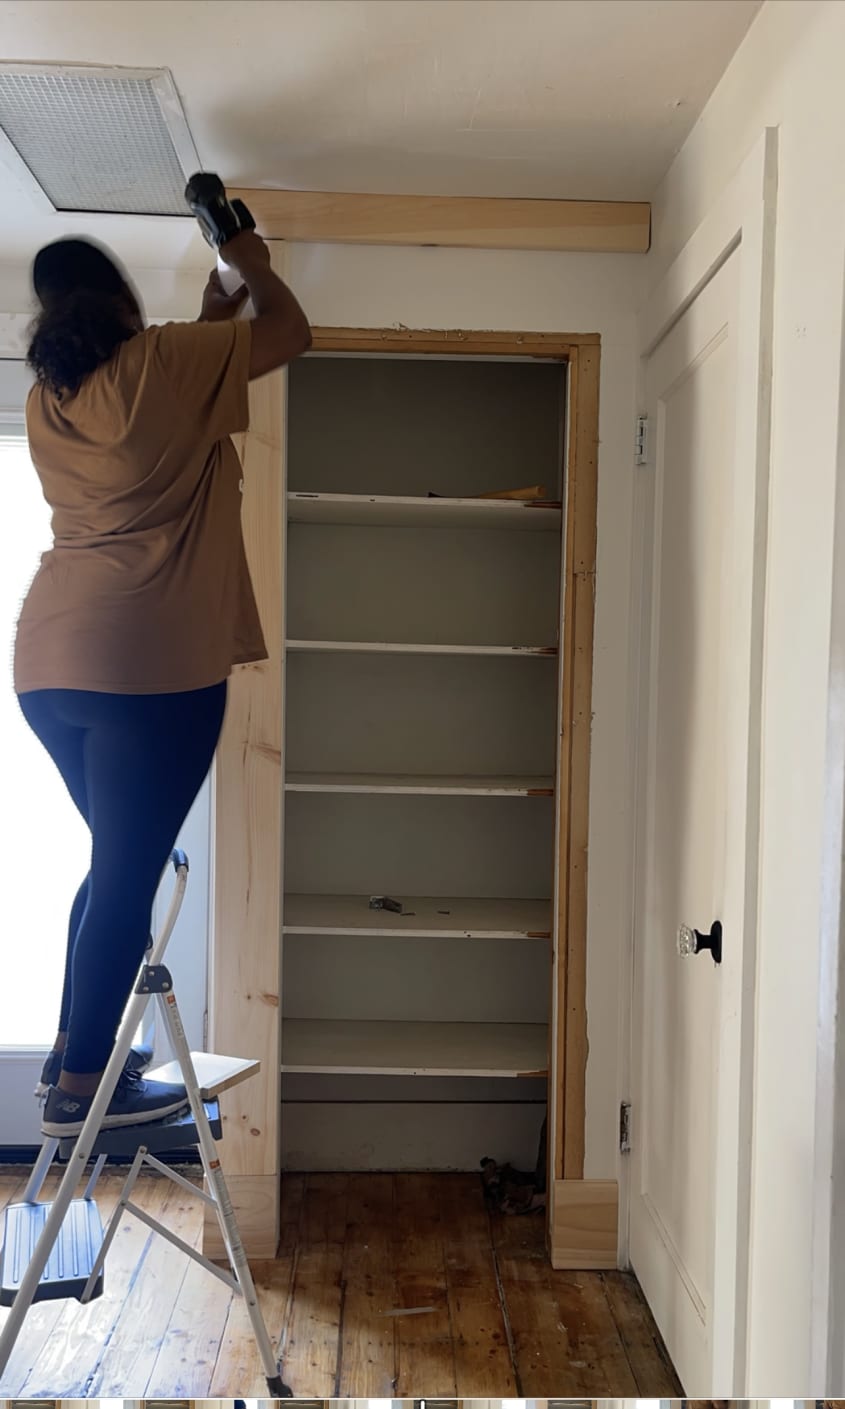
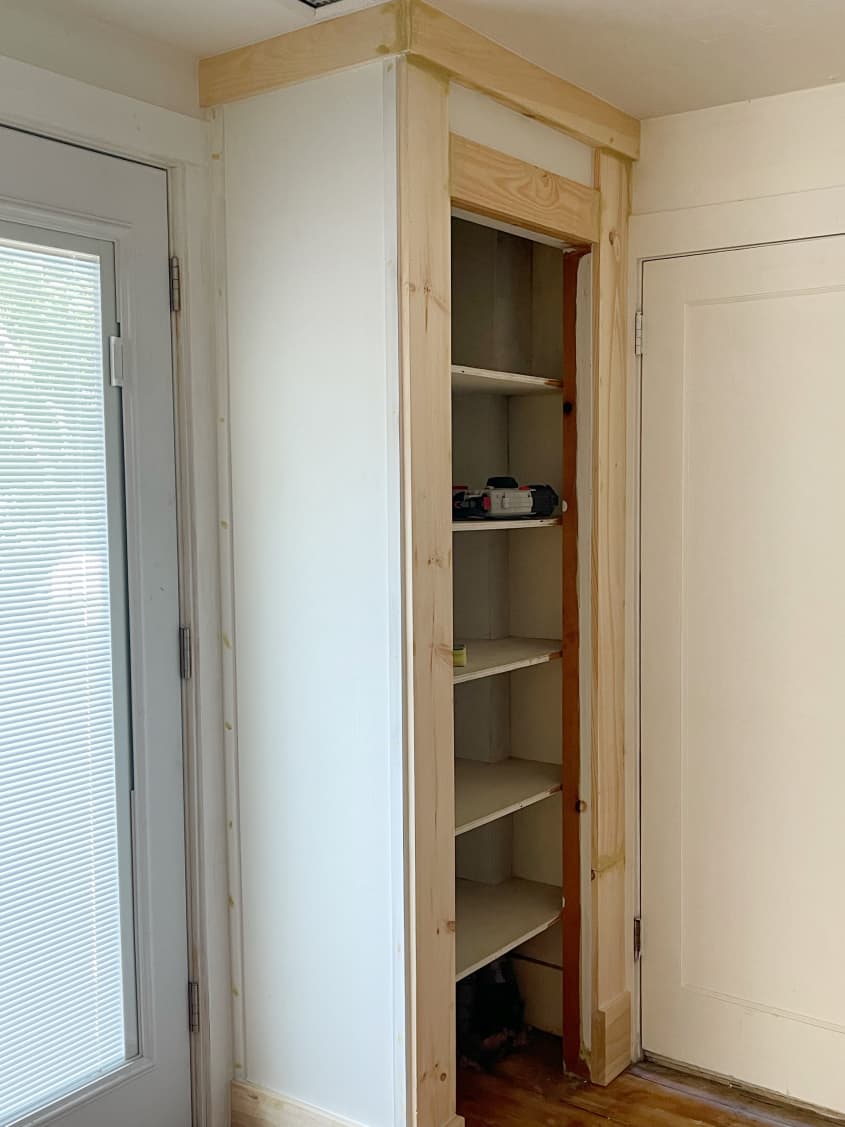
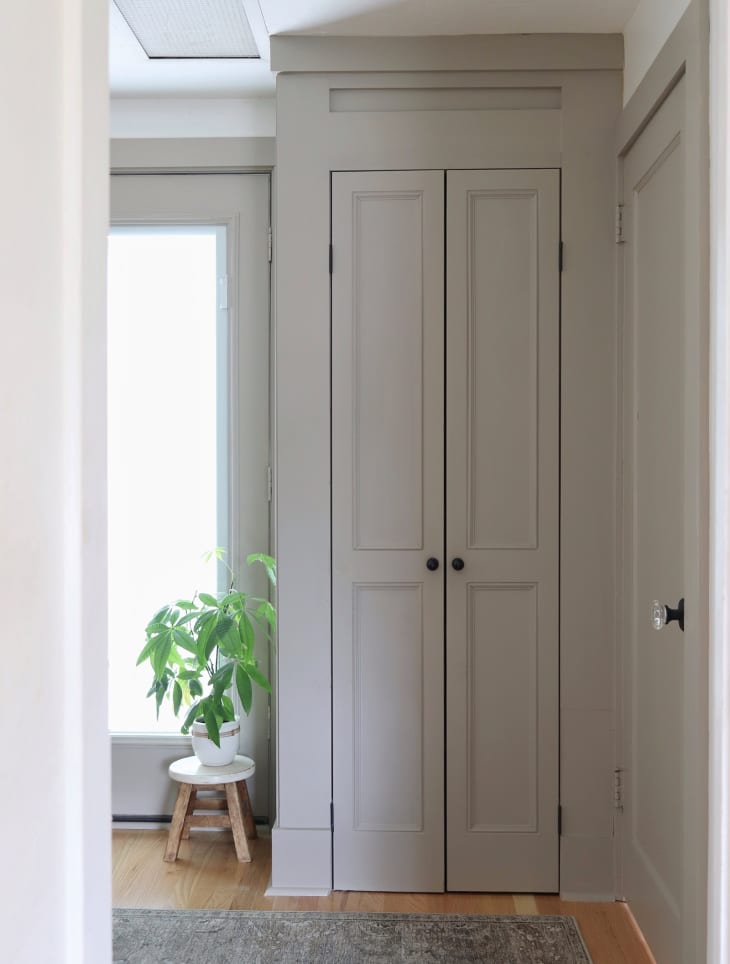
5. Finish the closet’s exterior with trim.
For my closet, I used a mix of 1x4s, 1x6s, and 1x8s (basically any trim in my scrap wood pile was free game) to bulk up the closet and add some character to the big white box. This step was huge for transforming it into something that at least resembled a “built-in” instead of a plain closet. This part of the project can be completely customized to suit your style.
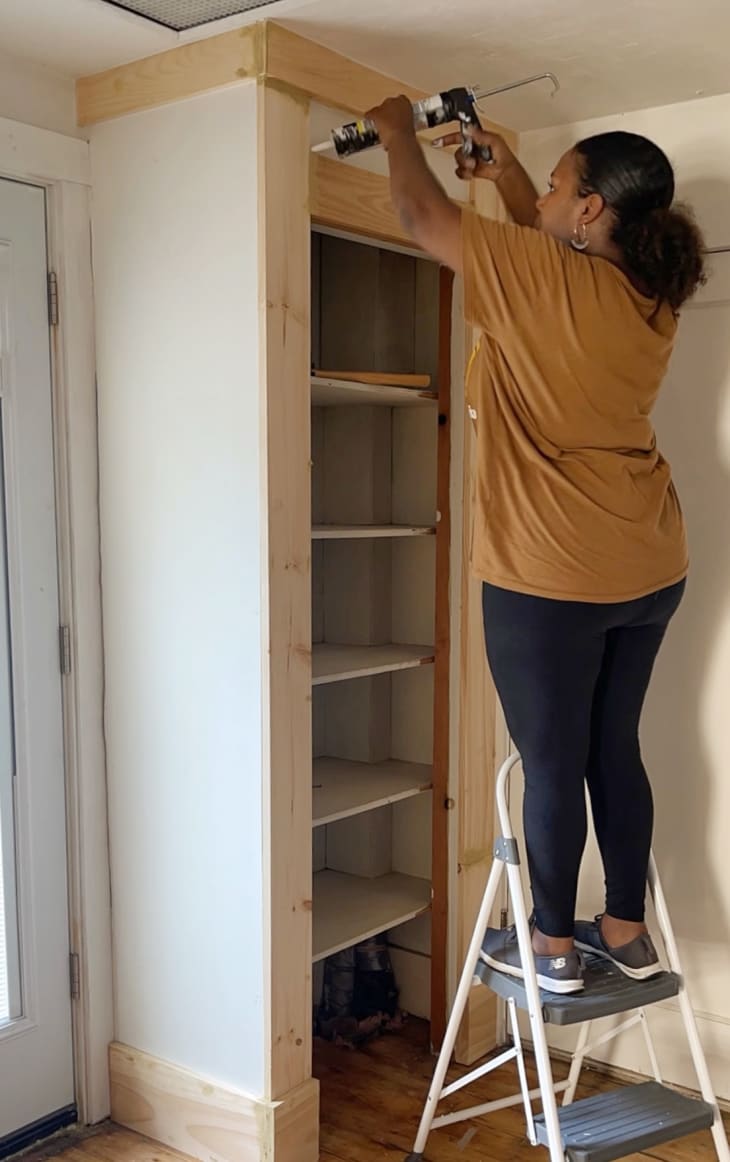
6. Caulk any seams and fill any nail holes.
I then filled the nail holes and caulked. This helps cover any imperfections before you paint and makes your project look professional.

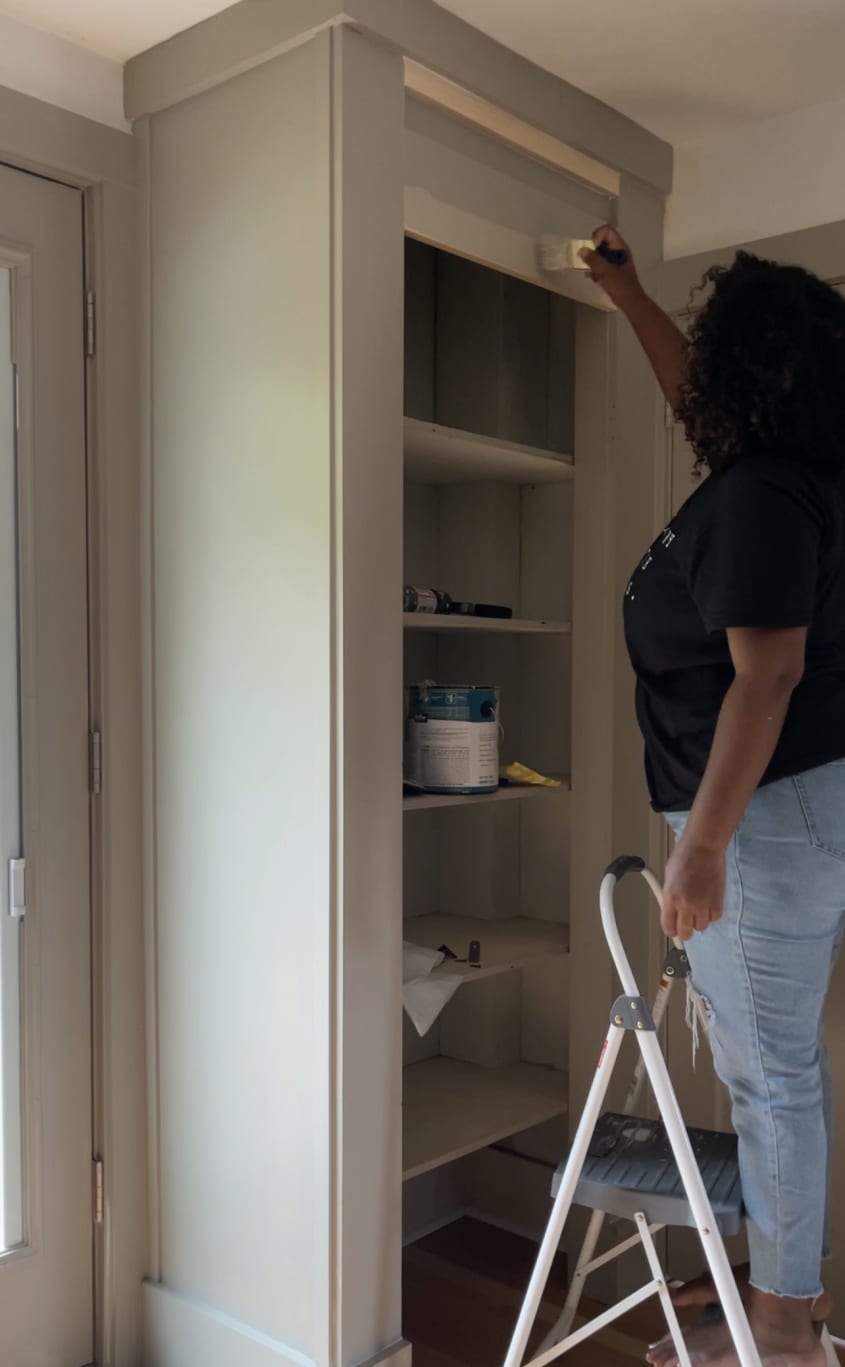
7. Paint your closet doors and your closet’s exterior.
I painted the frame and the closet doors to match for a really seamless look. (The color is Behr’s Smoked Tan.)
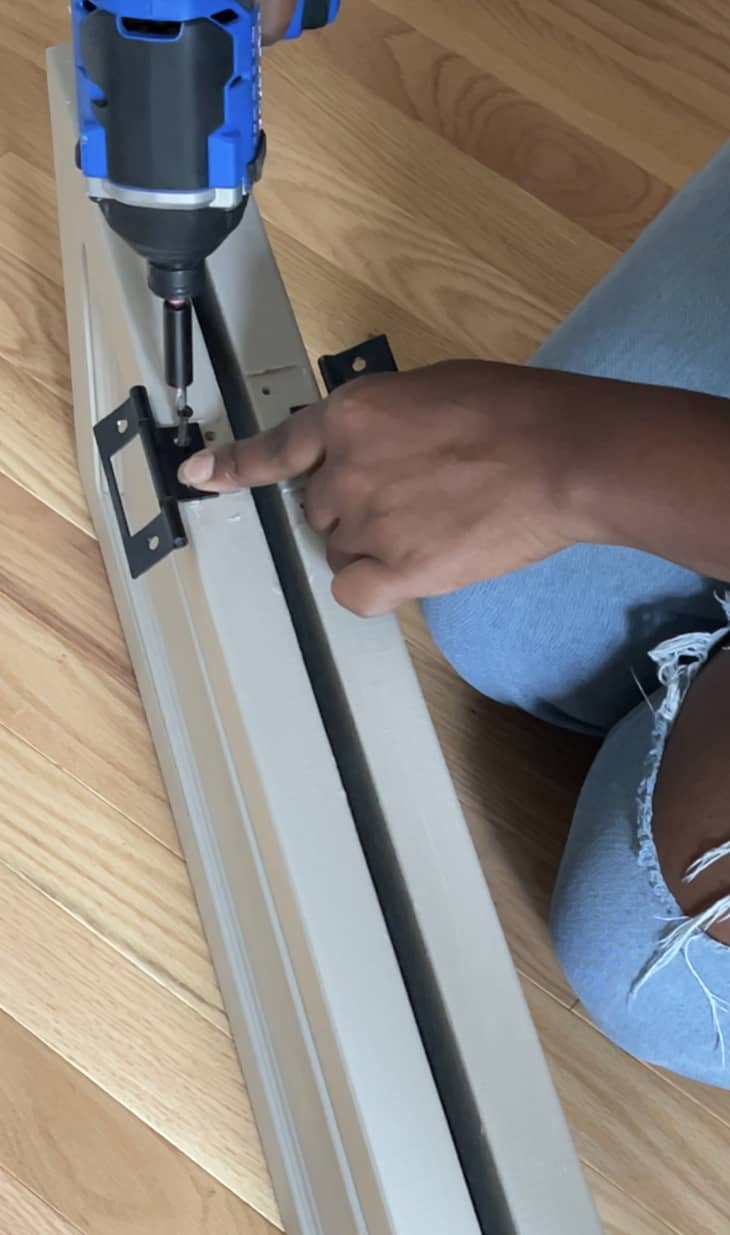
8. Attach new hinges and install doors.
Instead of a single bi-fold door, I wanted my closet to have two smaller doors — it looks more luxurious. I installed fresh surface-mount hinges on both doors so they’d swing outward, then installed those doors back on the frame.
The only thing I might do differently next time is ask for a little help when hanging those doors. I recommend having a second set of hands! Out of the entire process, the hardest part was making sure the doors were level and operated properly. This is where patience is key.
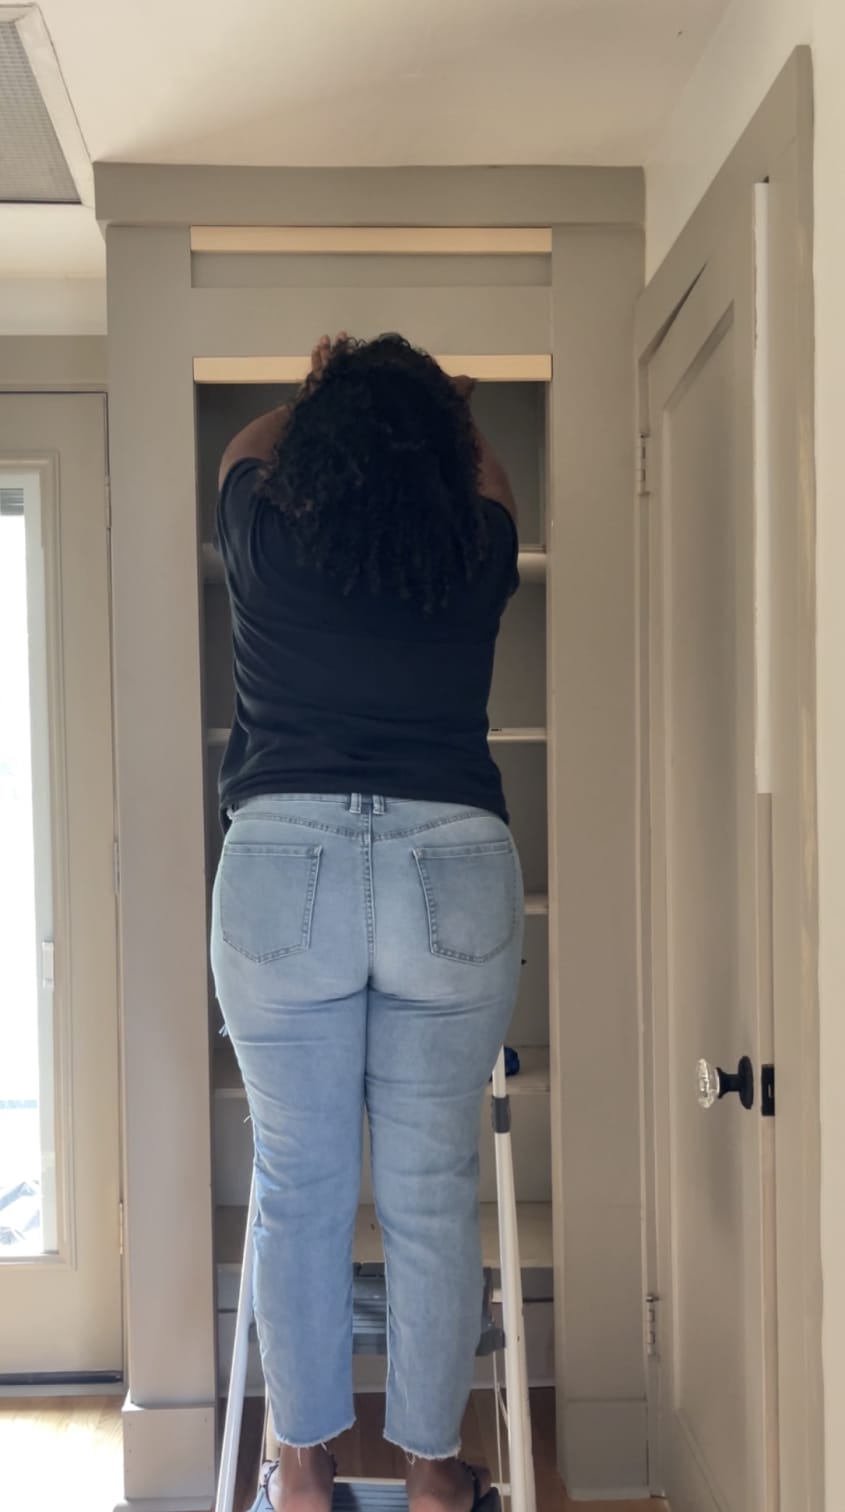
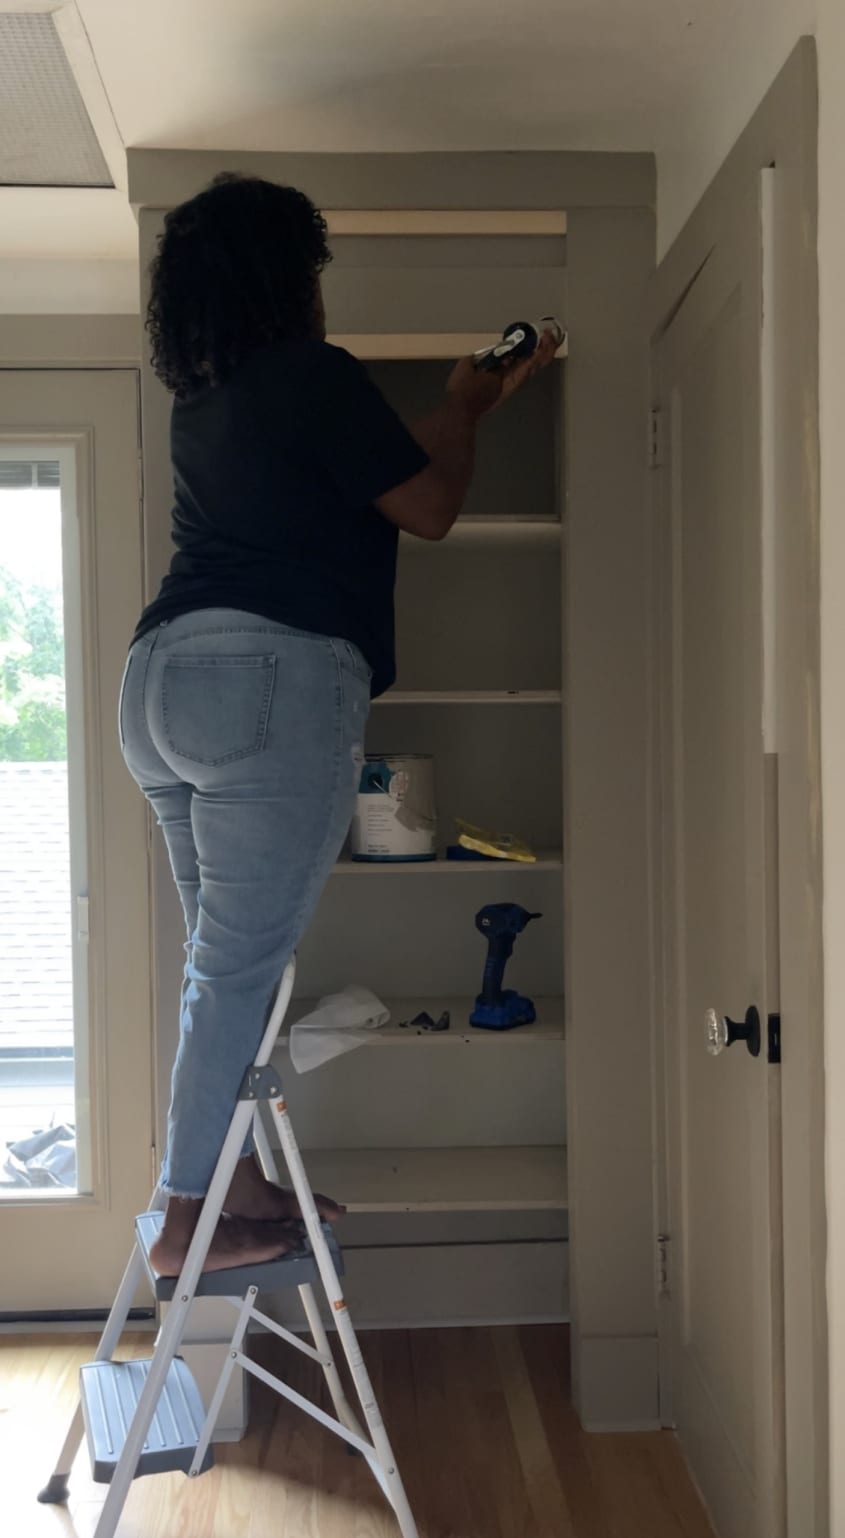
9. Install any extra trim as needed, then caulk and paint.
Your doors might be a perfect fit, or you might find (like I did!) that you have some gaps to fill. I had to improvise and added a 1×2 to the top of the frame to fill the gap. This worked out perfectly! I caulked the seams, filled the holes, and painted it out.
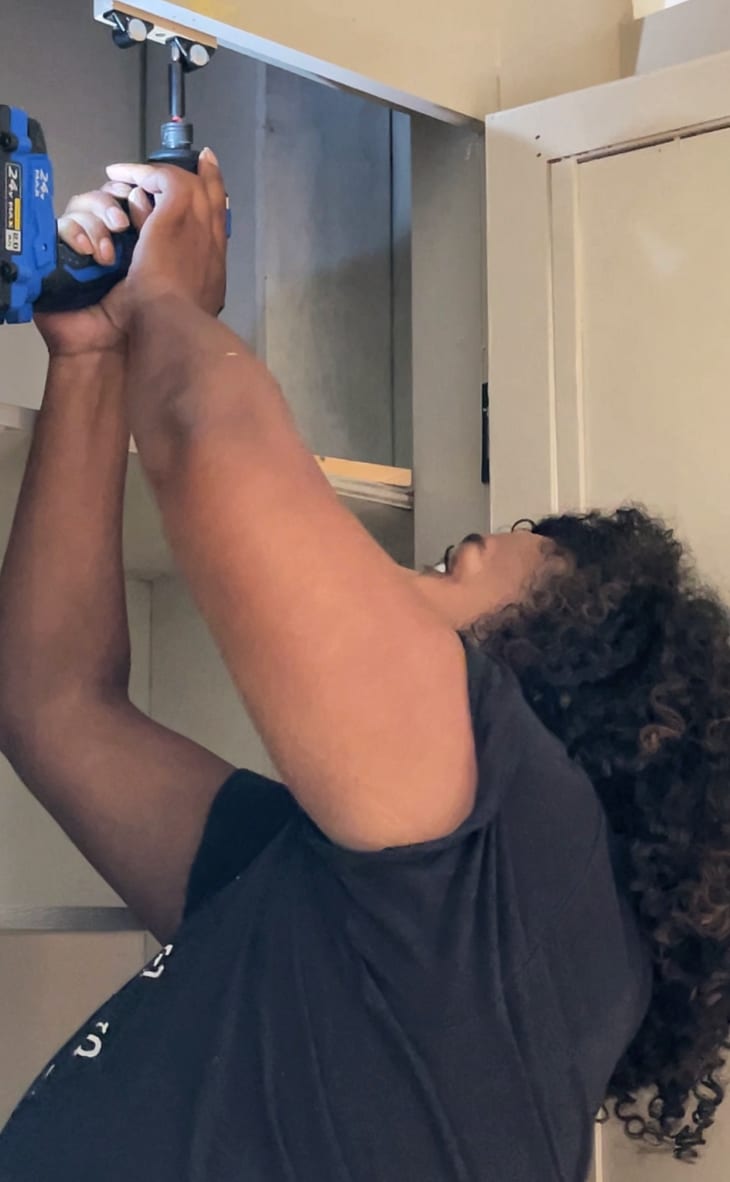
10. Add a magnetic latch.
Lastly, I had to add a tiny additional piece of trim to the closet header to mount the magnetic latch to ensure that the doors closed properly. This is as simple as screwing the magnetic latch to the inside of the closet header and attaching the corresponding magnets to the doors.
This is the time to add any hardware you’d like on your doors, too.
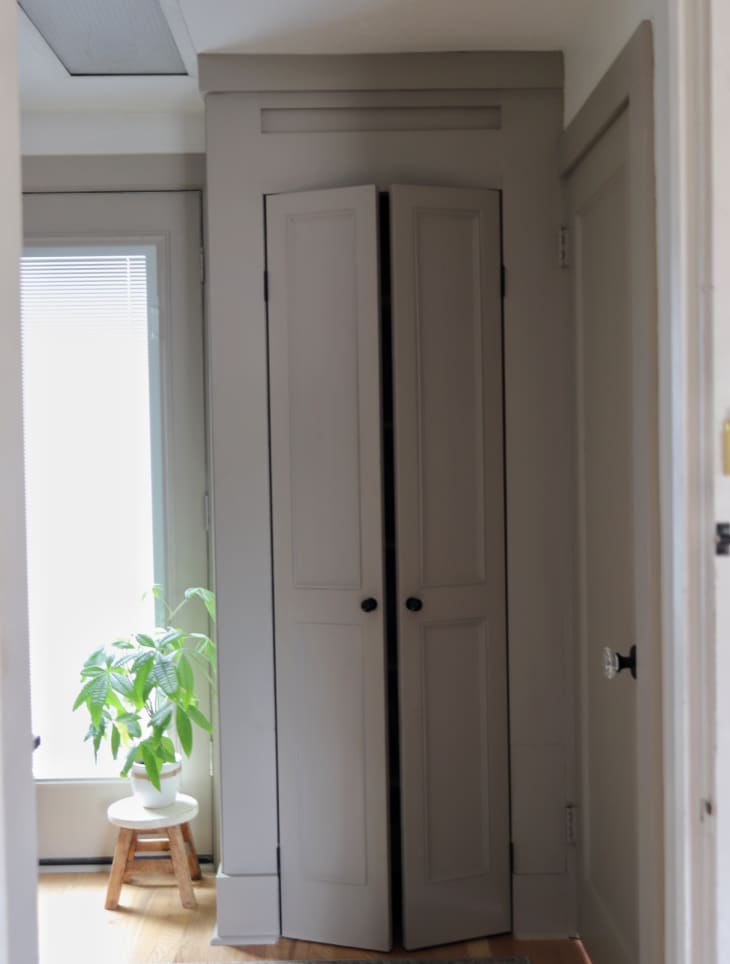
I’m absolutely thrilled with how this project turned out! It was so rewarding being able to transform those old louvered doors into something much more classic and updated. I love the warm color and that it’s now a beautiful focal point on our landing that has the look of custom cabinetry.
This project is great for any budget-conscious interior design lovers or DIY home improvement enthusiasts because it’s all about transforming what you already have. And the best part is that it’s completely customizable, so you can create something that matches your own personal style. If you try this out, let me know by sharing on Instagram or TikTok and tagging @apartmenttherapy.