
Before and After: A $60 Redo Cheers up This Blah Beige Bathroom
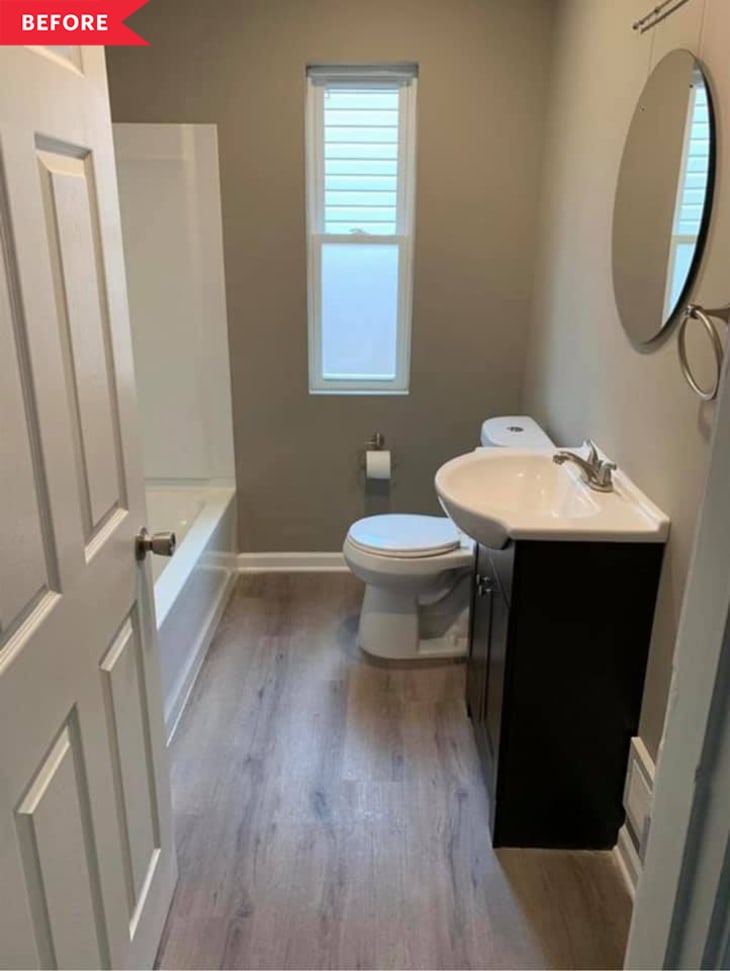
Bathrooms can sometimes be utilitarian, but they can also be welcoming and beautiful. The guest bathroom at Chelsea Scott’s home was anything but. “The ‘before’ of the bathroom was simply just plain,” Chelsea says. “The sink vanity was a dark brown and walls were painted with flat darker beige paint that did not stand up to normal traffic in a bathroom.” And while the 72-year-old home had some history to it, it had been recently upgraded before Chelsea moved in with what she says were mostly “simple builder-grade materials.”
All that said, though, Chelsea was pleased: “We actually loved this because it was a blank slate to work with on making each room of the house exactly how we wanted it to be. We have been working room by room to transform it from boring to unique and personal,” she says.
Since this bathroom is on the main level of the home, Chelsea wanted to give it some cheer. “I wanted to transform the space so that it was a happy spot to see each time we walk by,” she says. The look she created was inspired by the boho-style Instagram feeds of a few different DIYers, including @jessiegirlhome and @a.dabbled.dwelling
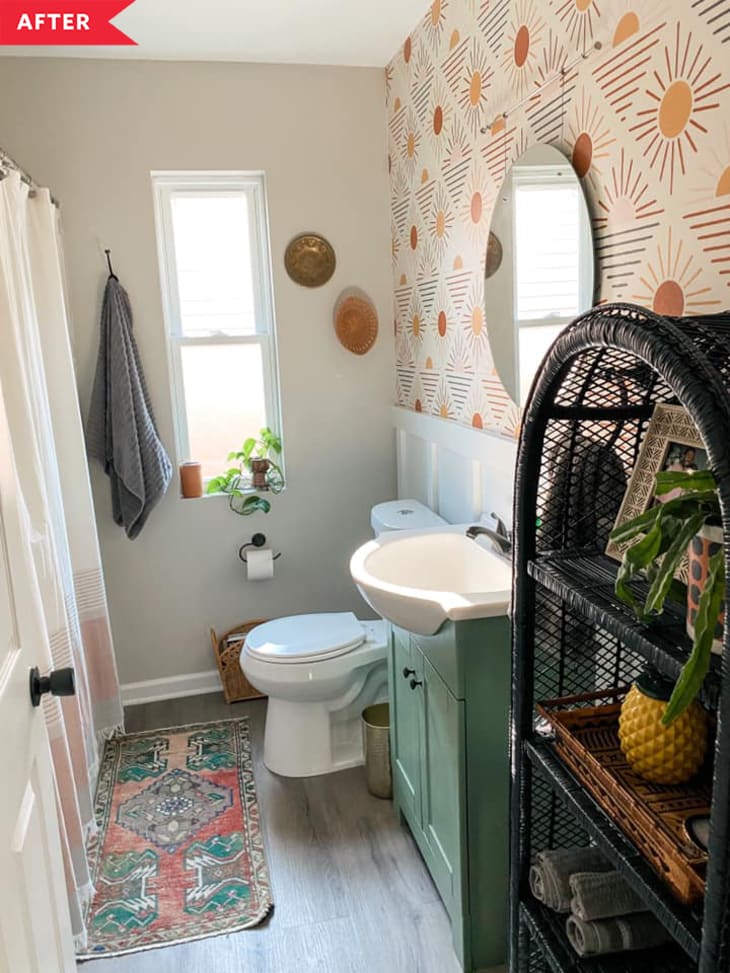
To start, Chelsea used some leftover paint from the entryway to paint the sink vanity in a jade green (Valspar’s Ginkgo Tree). “Because I already had the paint on hand, this cost me $0 to make a statement!” Chelsea says. The new green shade instantly brightened up what was once a dark wood vanity.
The next weekend, Chelsea installed faux board and batten on the wall behind the sink. “I was too nervous to rip out the baseboards, so to give the boards a flush surface to rest on, I decided to install a 1×2 MDF board directly above the baseboards to avoid unnecessary demolition,” Chelsea says. Smart!
“Installing this was definitely a pain because I did not have a finish nailer to attach the boards to the wall, so hand-nailing all of these with a hammer took a great deal of time,” Chelsea says. It took about four hours to install the trim; Chelsea then caulked and painted the wainscoting bright white. Total cost for this piece, including paint and materials? Just $40!
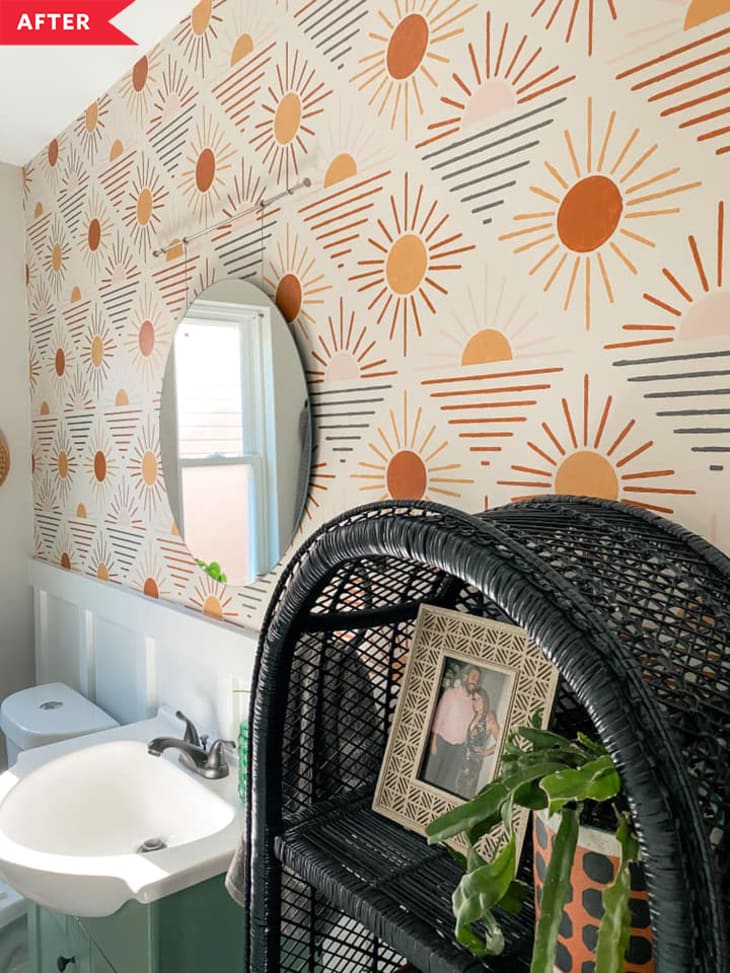
Finally, Chelsea created the centerpiece: a stenciled accent wall. She painted the background creamy white (Sherwin-Williams’ Divine White), then chose sample pots in a few different colors that meshed with the vanity color. She designed her own stencil and cut it out using her Silhouette cutting machine. “I had searched and searched for a wallpaper that fit my style and what I was looking for, but couldn’t seem to find one to the scale I was looking for,” Chelsea says. “When in doubt, create a stencil and hand-paint your accent wall, right?”
The whole project was completed in just three weekends, with just $60 spent. “I love the stenciled feature wall in the bathroom,” Chelsea says. “With the crisp board and batten and below, with the pop of green for the vanity, this is easily now my favorite room in the house.”
Inspired? Submit your own project here.