
Before and After: A $60 Redo Gives This Plain IKEA MALM Dresser a High-End Custom Look
Isn’t it nice when you can look at a DIY project and tell pretty much exactly what steps were necessary to get from point A to point B? It makes the project feel much more doable, since it makes for easy supply shopping and gives you clear steps to follow, too. Good news: This IKEA dresser flip from Jennifer Liu (@jnn.liu.liu) is exactly that kind of project.
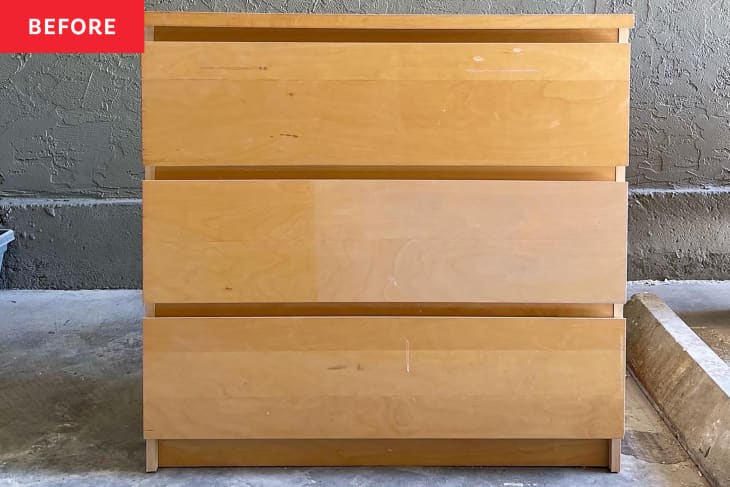
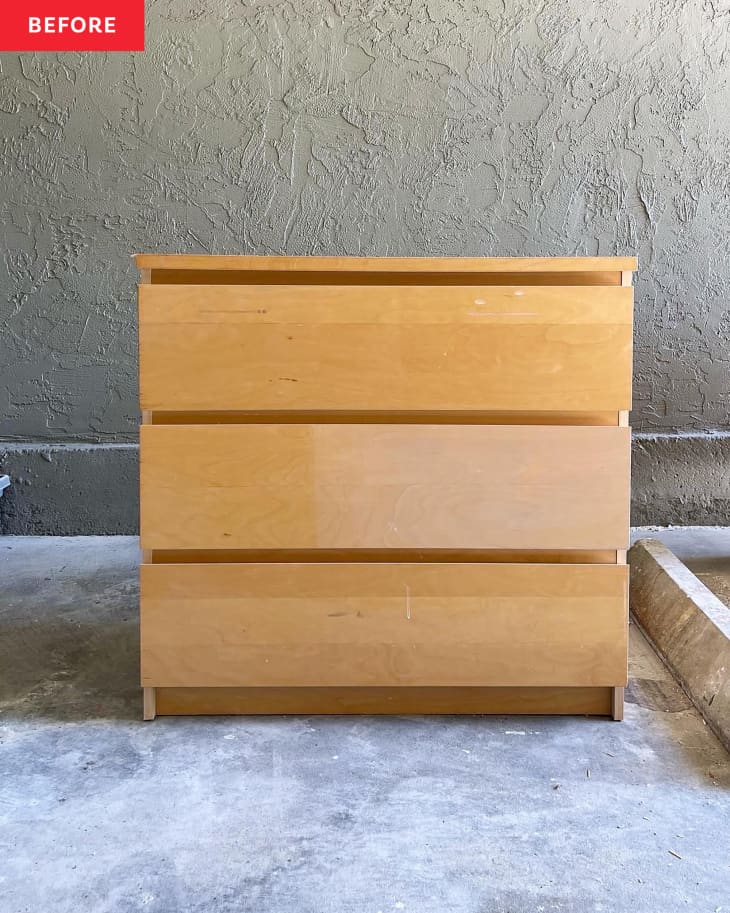
Jennifer’s dresser was a $15 Facebook Marketplace find, a MALM with slight discoloration, peeling veneer, and scratches in its “before” state. When you look at the “after,” it’s pretty easy to break down the steps: Jennifer added pole wrap for texture, added legs for height, painted it black for some drama, and add shiny gold hardware. Of course, these projects are always easier said than done. Read on for Jennifer’s insights and extras for making the sleek new look happen.
Jennifer says she chose to add pole wrap to make the dresser look a little different from a standard MALM, and she chose black paint (Behr’s Black) to cover up as many errors as possible. But before that, she used wood filler to patch the chipping veneer and scratches; then, she sanded the dresser smooth to help those patches blend and to help the paint adhere later.
Next, Jennifer affixed her fluted column wrap strips to the drawer fronts with a nail gun. One piece of pole wrap DIY advice from Jennifer: Make sure to pull the pole wrap taut as you’re nailing it down. On her first try, “I didn’t pull it tight as I nail-gunned, and I didn’t apply enough wood glue,” Jennifer explains. “This resulted in the pole wrap not being well-attached, and when the wood expanded due to temperature changes, some areas would lift up and have a ‘bubbling’ effect. To fix this, I had to remove all the pole-wrap and reattach it.”

On the bottom of the dresser, Jennifer attached tapered wooden legs “to give the dresser a less bulky, more modern look,” she says. To do this, she first had to add in additional supports to the bottom of the MALM using 2x4s and scrap wood. “Once the drawers are removed, the dresser doesn’t have a base, so you can’t attach the legs directly,” Jennifer explains.
After all her wooden elements were attached, Jennifer painted — her first time doing so on an IKEA piece. “I’ve heard that it’s hard to paint IKEA furniture due to the glossy veneer surfaces, but after some research, I found out that shellac-based primers are well-suited and help to increase the durability,” Jennifer says. “I decided to give it a try.”
Jennifer used Zinsser BIN shellac-based primer, and once completed, she did a scratch test on the back of the dresser and found that it does indeed hold up well against dings. She followed up the primer with her black paint and a matte polyurethane seal.
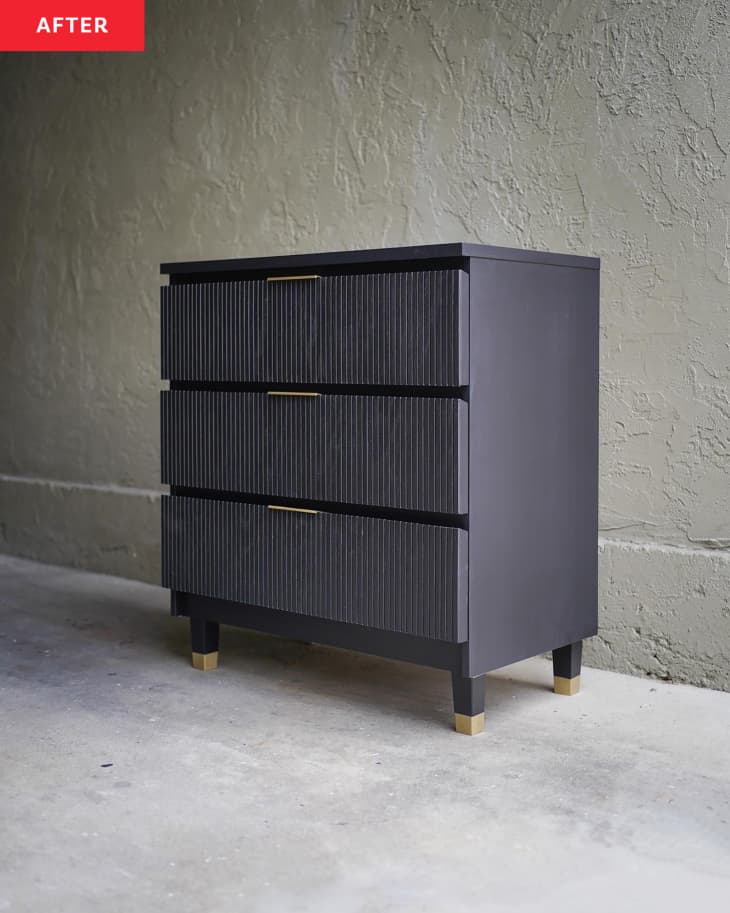
A paint sprayer will give you the smoothest finish, Jennifer says, but a cost-friendly alternative for an almost-as-smooth look is a high-density foam roller (her go-to). After painting, Jennifer added pulls that she’d spray painted gold from their original black. She also taped off the bottom of the dresser legs and spray painted those gold to mimic the look of capped feet. Then, she reattached them to the piece to complete her look. In total, the project cost about $60.
“It is now a real statement piece!” Jennifer says of the once-boring MALM. “The fluted drawers, the black paint, the gold handles and legs all come together and make the dresser look modern and new.”
Inspired? Submit your own project here.