
Before and After: This Kitchen Took 5 Months and $12,000 to Complete
This kitchen had a lot of cozy charm, but it wasn’t very user-friendly. After five months of DIY renovations, it’s now bright, spacious, and totally made for cooking.
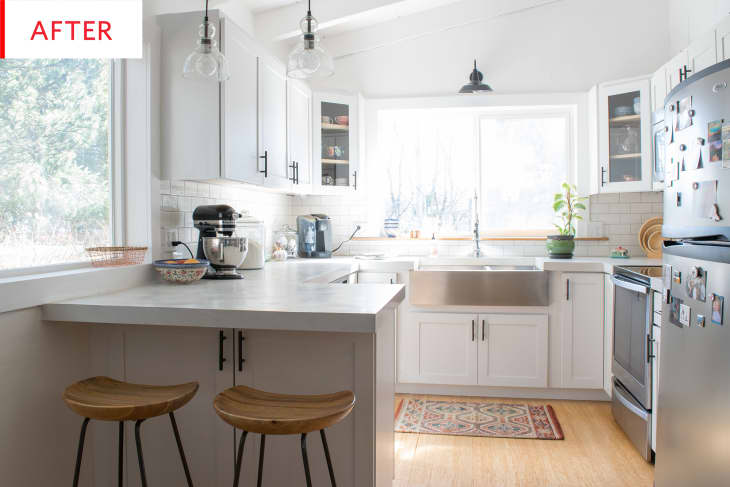
It’s hard to believe this is the same amount of space! While the old kitchen felt claustrophobic, the new one is roomy and airy, yet it appears to boast about the same amount of storage space. Rachel Klein of The Northern Current is the powerhouse behind this renovation, and she did a bang-up job. The larger window allows light to stream in, the white paint bounces that light all around, the stove and oven have been reunited, the new floor is beautiful, and those concrete countertops are to-die-for. Most importantly, the kitchen is now a joy to cook, sit, and move around in.
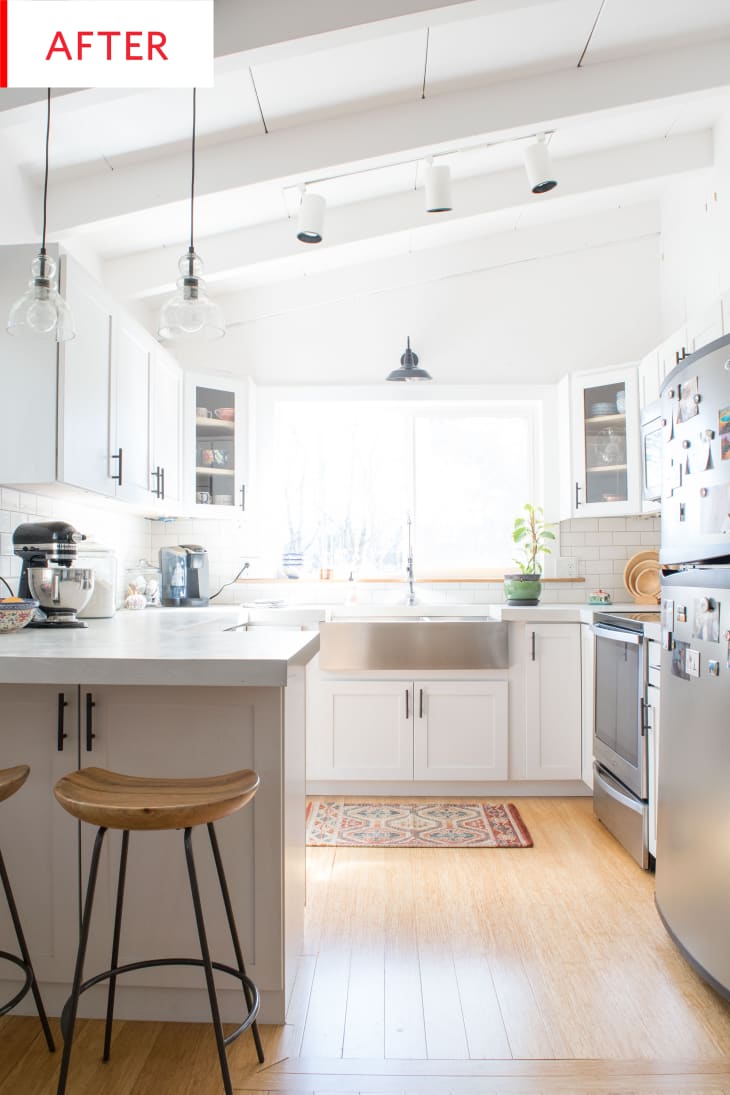
This full-length shot shows how the three lighting configurations interact and how stunning that ceiling is. The white paint unifies the walls and ceiling, for a feeling of luxurious spaciousness, whereas before the paneled wall brought the focus down towards the cupboards. (And just in case anyone is concerned about hardwood: the ceiling and beams were already painted, they’ve just been repainted.)
Here’s how Rachel feels about this lovely space:
What I love most is how open and bright it is… it’s almost the exact opposite of the original kitchen. We added a larger window over the sink which lets in so much more light (and in June when our lilac tree blooms right out front it is just gorgeous). We got rid of the small wall-mounted oven and added a small peninsula, so we have so much more counter space. I love cooking in our kitchen now!
I don’t know if I would have done anything differently, because the whole experience (the ups and the downs, the excitement and disappointment throughout) taught me a lot about renovations and even myself and what I can accomplish (with help, of course).
A lilac tree just outside of your kitchen window? That is the dream. As much as I admire that tree situation, I admire Rachel’s renovation attitude even more. Good things to keep in mind during future projects!
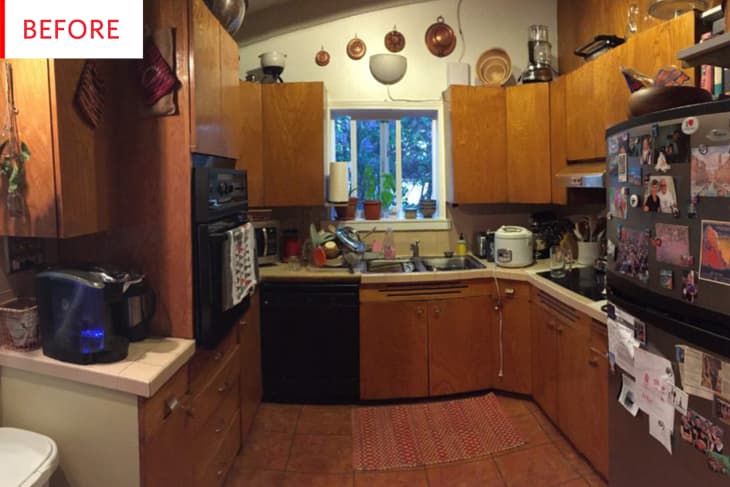
These cabinets are far too orange for my taste, but can we take a moment to admire how absolutely incredible that wood is? Nature is amazing. Unfortunately, the abundance of dark wood contributed to a feeling of gloom:
Our original 1960s kitchen felt so cramped and dark: we had a tiny window over the sink that barely let in any natural light and our oven was up on the wall, which left us with almost no counter space. The dark-colored cabinets made it feel almost like a den, and our countertop was made of small tiles (not so sanitary for food prep).
Yeah, those countertops are not ideal, aesthetically or hygienically.
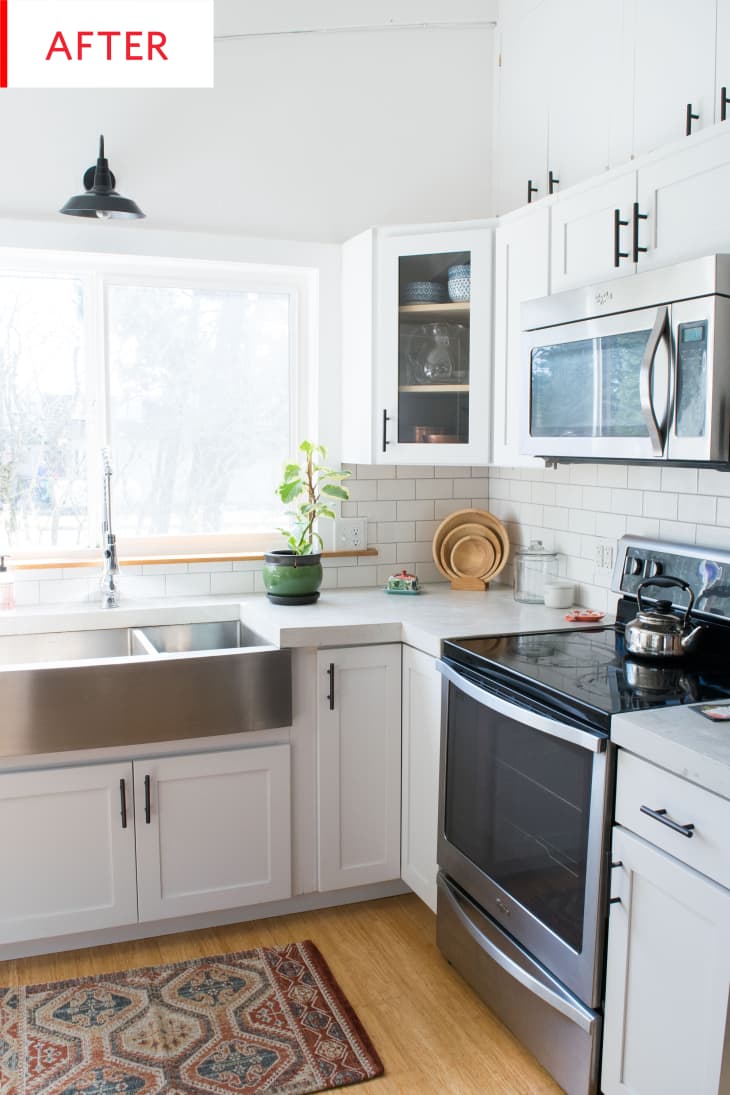
This is all great—that sink!—but be sure to check out the bonus set of cabinets above the cabinets above the microwave! They’re delightful, and probably perfect for storing the things that are needed only once a year. The black and stainless steel elements—sink, handles, stove, microwave, fridge, teapot, KitchenAid—help unify the room, while the wood floor and accessories add warmth.
The only surprise was the color of our concrete countertops. I ordered the mix in white, but I think because we used a wet belt sander to help make the surface more level it removed a lot of the white pigment. Once it dried, it turned out to be a light grey color. At first I was disappointed since I had my heart set on white, but after a while I actually liked it better because it added some contrast to a fairly stark, white kitchen.
Whatever color they are, the countertops look fantastic, and I salute Rachel’s ambition and execution. That’s a major undertaking!
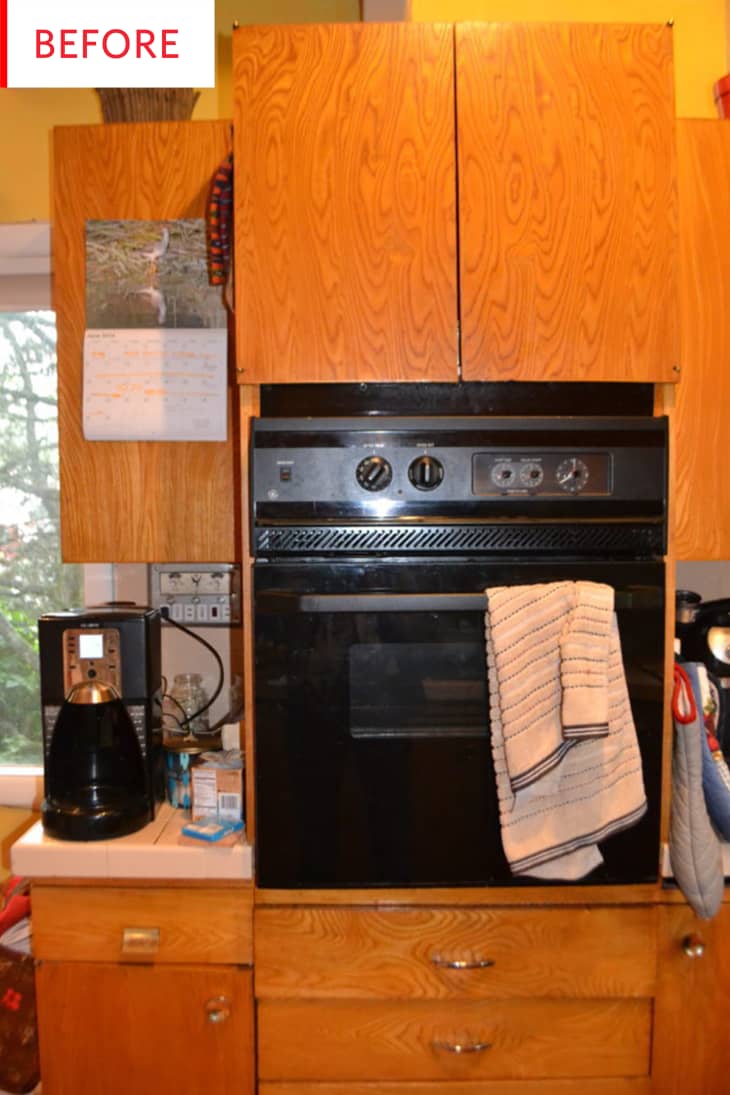
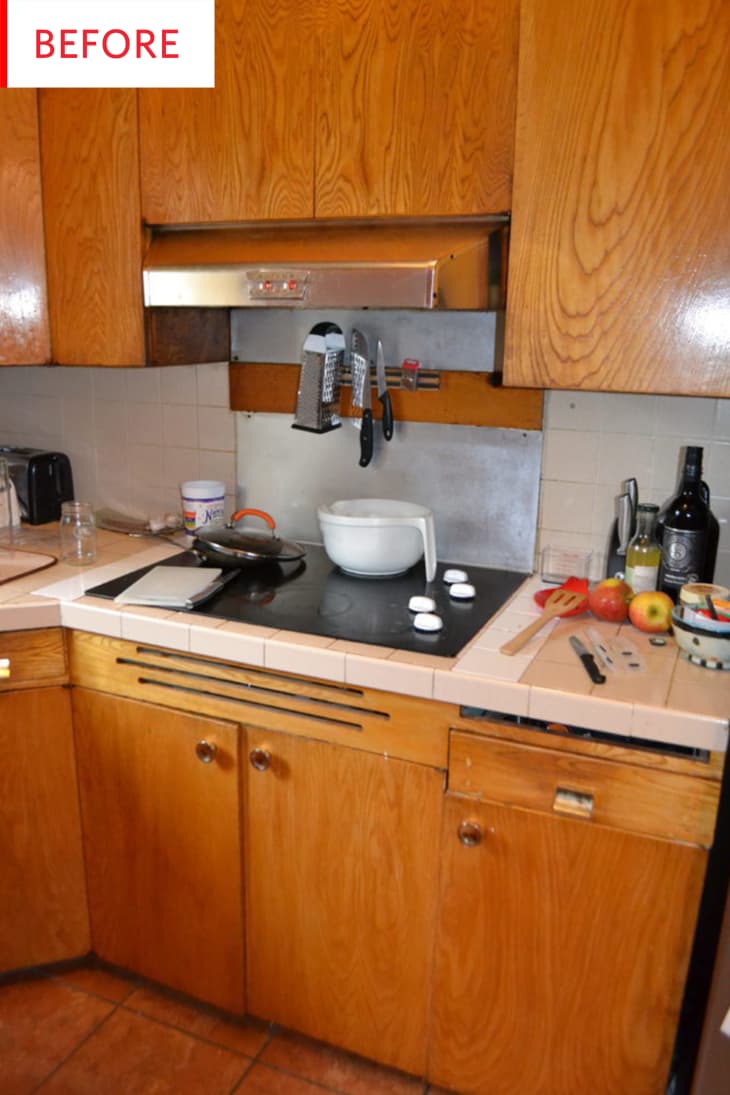
Here we have more incredible wood, and more awkwardness. An oven like this would probably be so helpful for people who have trouble bending over, but in this case, it just ate up counterspace. There’s already plenty of storage space, so replacing some cupboards with an oven didn’t cause a problem. What did cause a problem?
The process took quite a while for a few different reasons: one being that we live on an island in Southeast Alaska and it takes a long time for items to ship here (our cabinets took 6 weeks); another reason it took a while was because we started the demo and physical renovation in May, right before the commercial fishing season which my husband (Zach) and father both are a part of. I could do some bits and pieces by myself, but I needed help from Zach and my dad. The renovation ended up taking about 5 months. We did it all ourselves, though, (my dad is an electrician and plumber of sorts) so it saved us a lot of money. Our budget was $10k and we ended up spending about $12k.
An Alaskan island! I’m sure I’m not the only one who hopes that Rachel will share a full tour of the rest of the house and the island, too, please. That budget seems very reasonable for a project of this scale, especially considering all the shipping required.
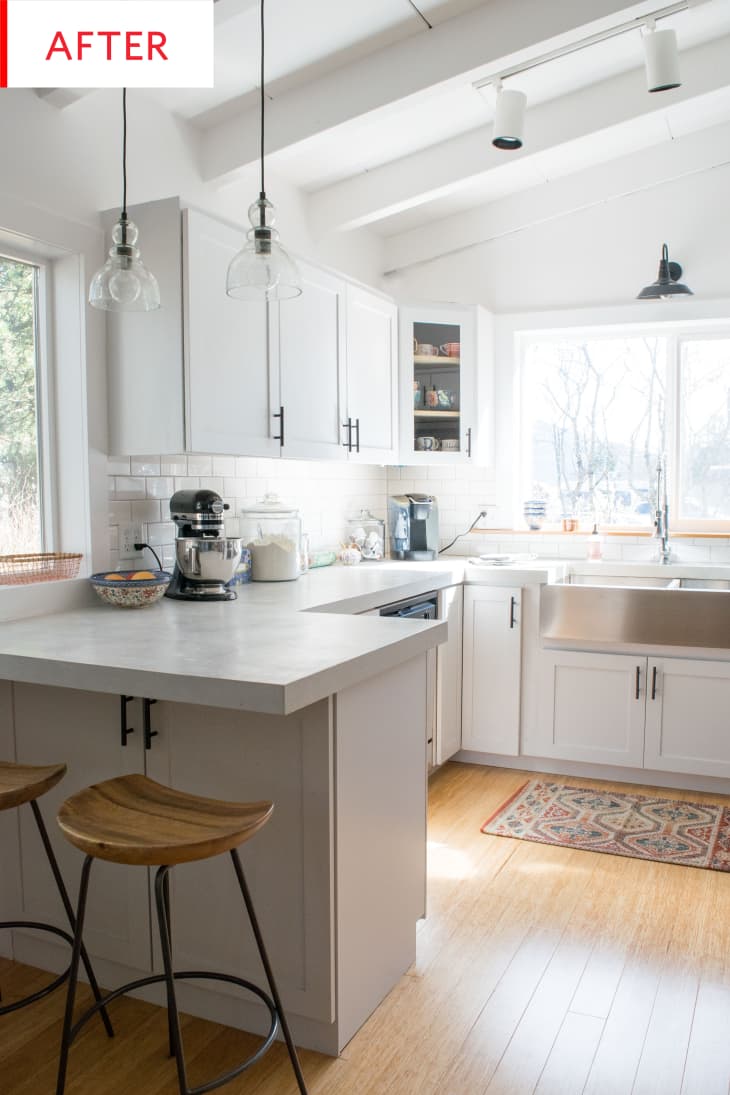
The addition of the breakfast bar is the icing on the cake—and the extra counterspace provides plenty of room for making and icing cakes using that enviable mixer. Oh, and there’s finally room for the mixer!
Now that the kitchen is complete, Rachel has some advice to share:
Be thorough in the planning process! Really map out your space, take your time with measurements, and build a realistic budget. The planning and preparation before the actual renovation will save you time, money, and headaches after the fact. Also, be patient and try to enjoy the process; it is so worth it in the end!
Thank you, Rachel Klein and The Northern Current!