
9 Materials You Need to Give Your DIY Built-Ins a Pro-Level Finish
Built-in shelving is an architectural detail that perfectly combines form and function. Since the shelves (or dinette, or window seat, or wardrobe) custom fit to your space, they provide maximum storage — and a look that flows with the rest of the house.
Not everyone is blessed with built-ins in their own place. But the good news is that you don’t have to shell out thousands to a pro carpenter to get the look. With a little creativity and the right tools, you can DIY the same look with pre-made frames (like the BILLY bookcases or PAX wardrobe system from IKEA). You’ll just need a few supplies to truly make them feel built-in.
You will of course need the basics like drop cloths, paint, and screws, but there are a few other materials and tools you’ll need to take your built-ins from ordinary to extraordinary. Here, nine things that will make your next built-in project look like it was made by a pro.
Crown Moulding and Baseboards
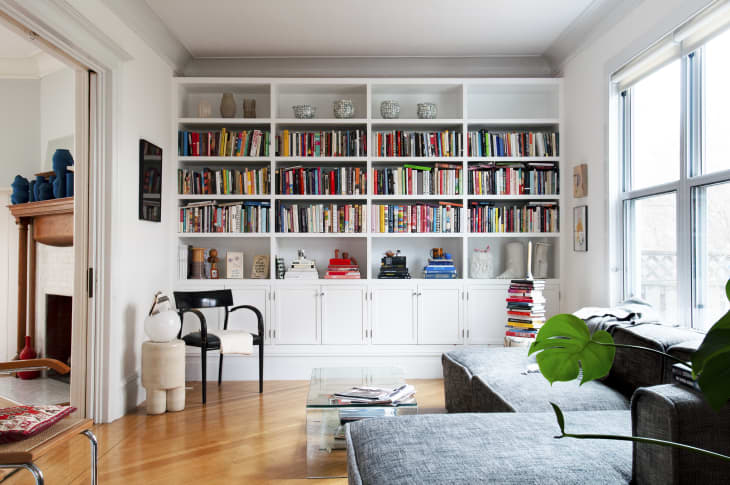
Crown moulding and baseboards go a long way in making built-ins feel like they’ve always been a part of the room.
Besides aesthetics, baseboards disguise any framing you might add for additional height or leveling, while crown moulding hides any gap disparities along the ceiling. Make sure you align the bottom edge of the crown moulding with the front edge of your frame so that the moulding looks like it’s an extension, rather than a separate piece.
Miter Saw or Miter Box
Sorry, math haters: 45° cuts on your moulding and baseboards are critical for crisp corners. You can achieve these one of two ways. Circular saws and miter saws are versatile power tools that will make quick work of your cuts. However, decent power saws can start at $120. If you don’t already have a miter saw, a miter box (which comes with a small hand saw) is an affordable way to accomplish the same goal. Just note that the manual miter box and saw will take longer.
Laser Level
I recommend a laser level over a standard bubble level for one main reason: You can check whether things are level over a longer distance. This is particularly useful when you’re trying to ensure that the top of all your cabinets are aligned, or later on, placing your hardware. If your floors or walls are uneven, you can adjust your built-in using shims, or small wedges of wood, in the places that need a lift.
Trim
Use trim on the front of your built-ins to cover up the seam wherever two bookcases butt up against each other. This will disguise the fact they are separate, independent pieces and make them look like one large assembly.
Wood Filler
One of the biggest giveaways of a pre-fabricated piece: the shelf holes. They’re fantastic for customizing where you want your shelves and drawers to go, but quickly become an eyesore once the piece is completely built. There are hole plugs you can buy, but they truly don’t end up saving you time or money and you will always be able to see the edge where they jut out.
Instead, fill the holes with paintable wood filler and let dry for 24 hrs. You’ll want to give them extra time to dry since the holes are deep, and you risk pulling the wood filler back out if you dry to sand or paint over them too early. Once dry, sand with your finer grit sandpaper until flush with the frame.
120- and 220-Grit Sanding Sponges
You’ll need two different grits of sandpaper for different stages of the build. Use the coarser, 120-grit for prepping the bookcases (you can skip this if your piece is pre-primed or raw wood) and the 220-grit for more precise sanding, like getting the wood filler flush or cleaning up minor paint drips. Classic sandpaper works just fine, but for big projects, you’ll find that sanding sponges are more comfortable to grip.
Tip: If you do have a paint drip but you’re not sure how long it’s been there, let it dry! It’s tempting to try to smooth it out with more paint, but it’s best to let it dry, sand it down, and apply a second coat rather than risk affecting the finish in the surrounding area.
Paintable Caulk
Caulk gets rid of gaps much like wood filler, and it’s something a lot of DIYers forget to add to their built-in projects. Edge all the seams on your project, including between crown moulding and ceiling; the baseboards and the frame; and the shelving and the frame. Grab caulk specifically labeled “paintable” so it can match your final paint color; other varieties won’t let paint adhere.
Shellac-Based Primer
Don’t skip priming, even if your paint is a 2-in-1. Primer is key for a long lasting finish. Shellac-based primer is particularly recommended for frames already “factory finished” like certain hackable favorites from the famous Swedish furniture store.