
How To: Make a Pegboard Wall Organizer
Project: Pegboard Wall Organizer
Time: An afternoon
Cost: $30.00 (more or less)
Our DIY home organization project for the New Year involved hanging a pegboard organizer in our tiny kitchen. Although we found lots of how-tos for installing pegboard on the web, very few of them had detailed instructions and supply lists, so we thought it would be helpful to document our own experience in step-by-step form.


Tools and Resources:
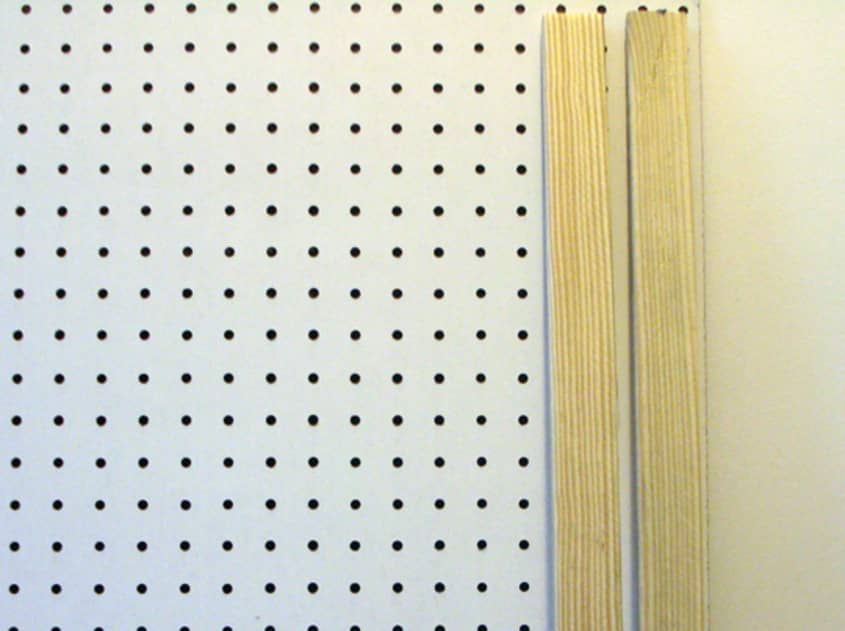
• One 2×4-foot pegboard*
• Two 4-foot 1×2 planks
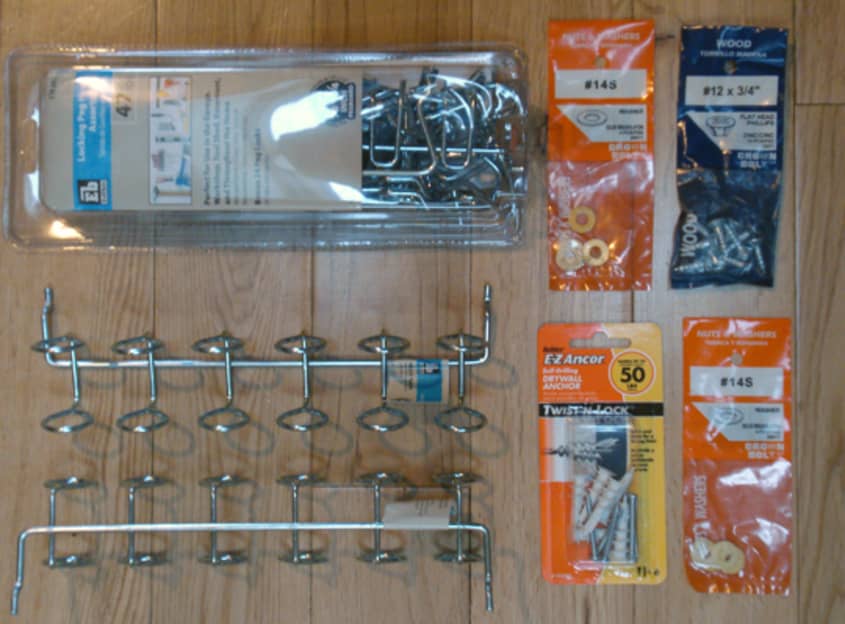
• Wood screws and plastic drywall anchors
• Drill
• Level
• Tape measure
• Pencil
• Paint (we used some leftover Behr 510B-5 Jamaican Sea in semigloss)
• Paint tray and roller
• Assorted pegboard hooks
*We bought our supplies at Home Depot, where pegboard, wood, screws, and hooks added up to about $30, but you could also find similar supplies at most hardware stores. Many hardware stores will cut the pegboard and 1x2s to a custom size. It’s a good idea to use semigloss (or even high-gloss) paint for the finish, since it’s easier to clean and wipe down.

Step by Step:
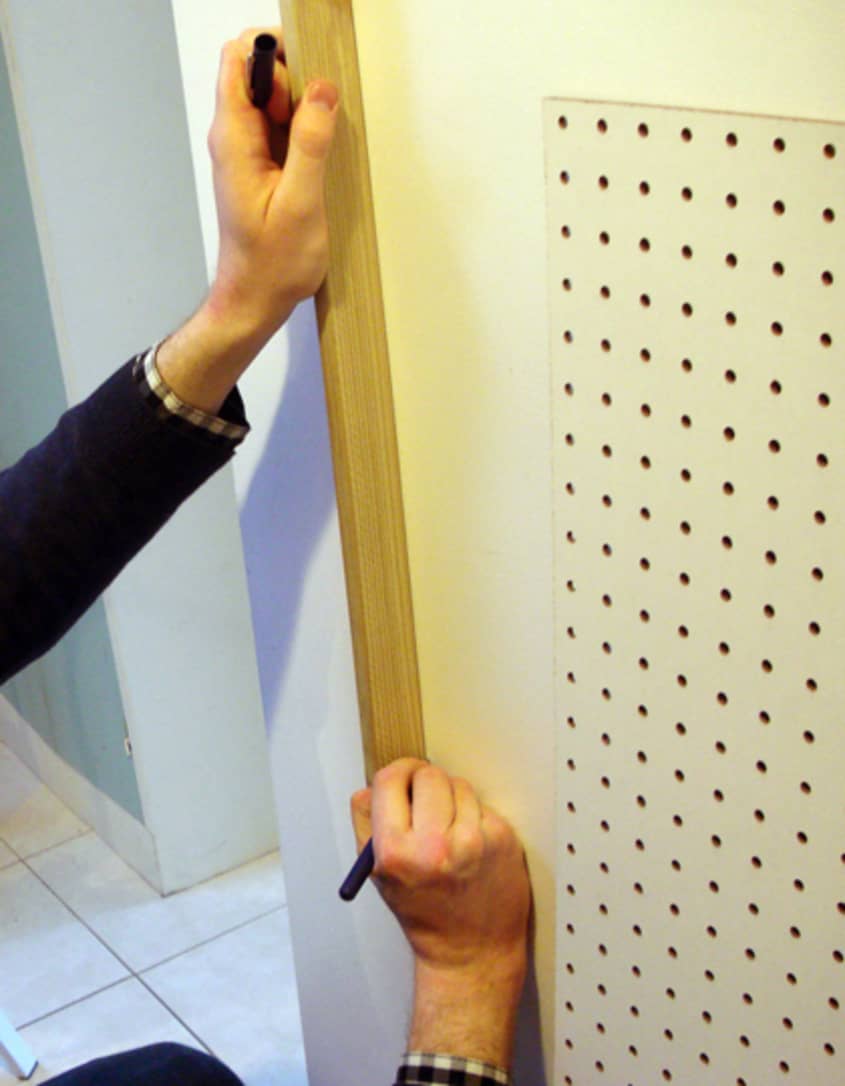
- With your tape measure, figure out where you want to position the pegboard on the wall.
- Use a pencil and level to mark the vertical (long) edges of the pegboard on the wall.
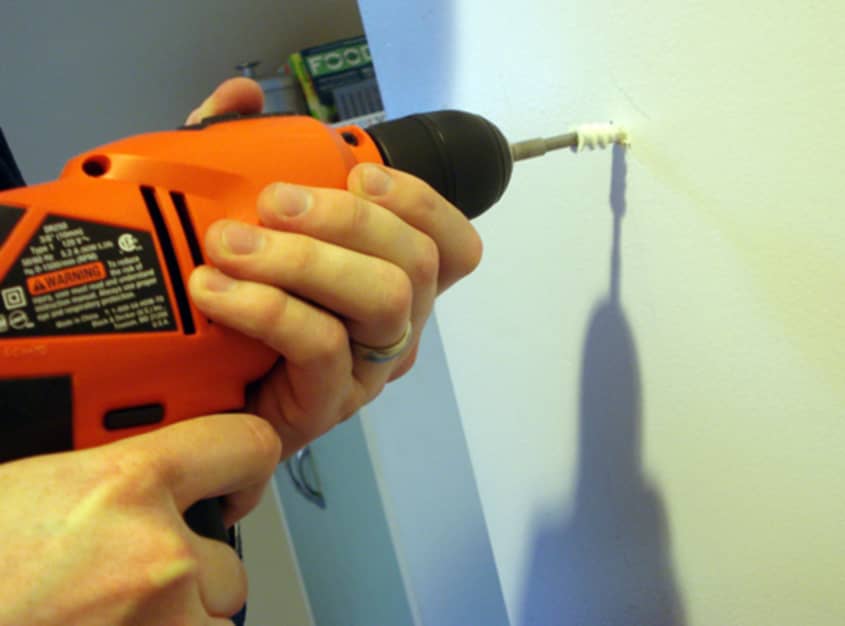
- From the vertical marks on the wall, measure 1 inch in and mark the spots for your drywall anchors. We used 6 anchors total (3 for each 1×2 support).
- Using a level to make sure the anchors are correctly aligned, drill your drywall anchors into the wall.
- Using the level again to check that your edges are straight, line up the first 1×2 against the wall, so that its broad surface is flush against the wall.
- Drill your wood screws through the 1×2 and into the drywall anchors.
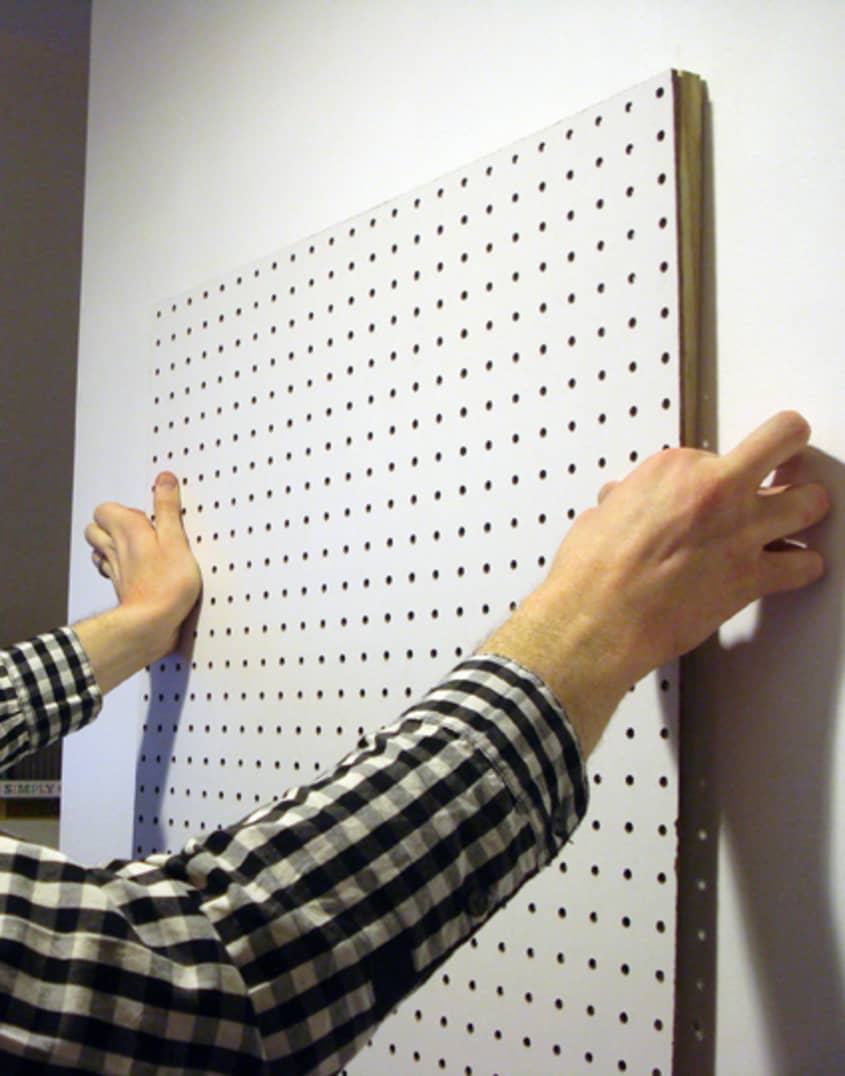
- As you go, it helps to hold your pegboard up against the 1x2s to make sure it’s straight and the edges line up.
- When you’re finished, you’ll have two 1x2s fastened to the wall, like train track rails.
- Hold your pegboard up against the 1x2s and line it up so that the edges are flush.
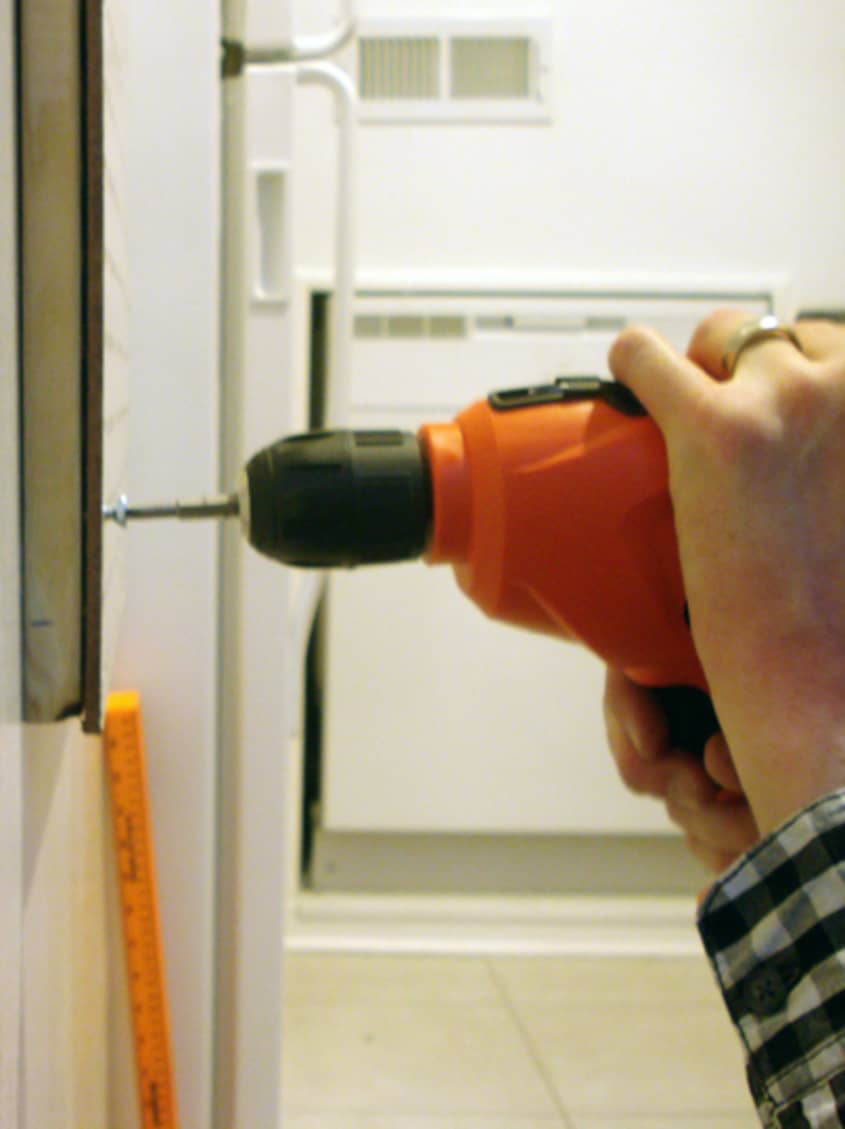
- Along the edge of the pegboard, thread a short wood screw through one of the peg holes.
- Drill the screw through the peg hole and into the 1×2.
- Repeat this step using as many screws as you think you need to hang the pegboard on its supports. We used 6 screws.
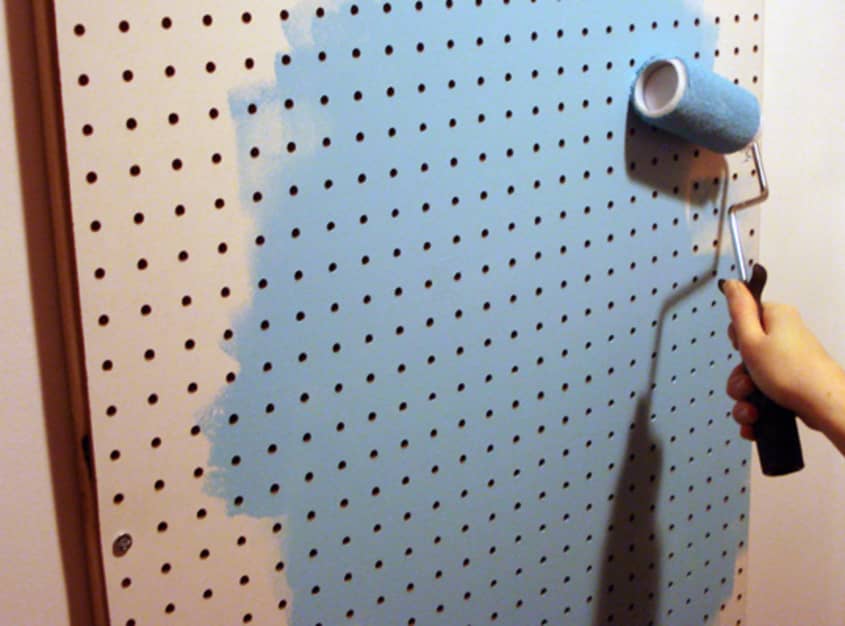
- Pour the paint into the tray and use your roller to coat the pegboard.
- Apply the paint in fairly thin layers. Otherwise, the peg holes will get gunked up with paint.
- Allow the paint to dry, then repaint with a second coat. We found that two coats were plenty for proper coverage.
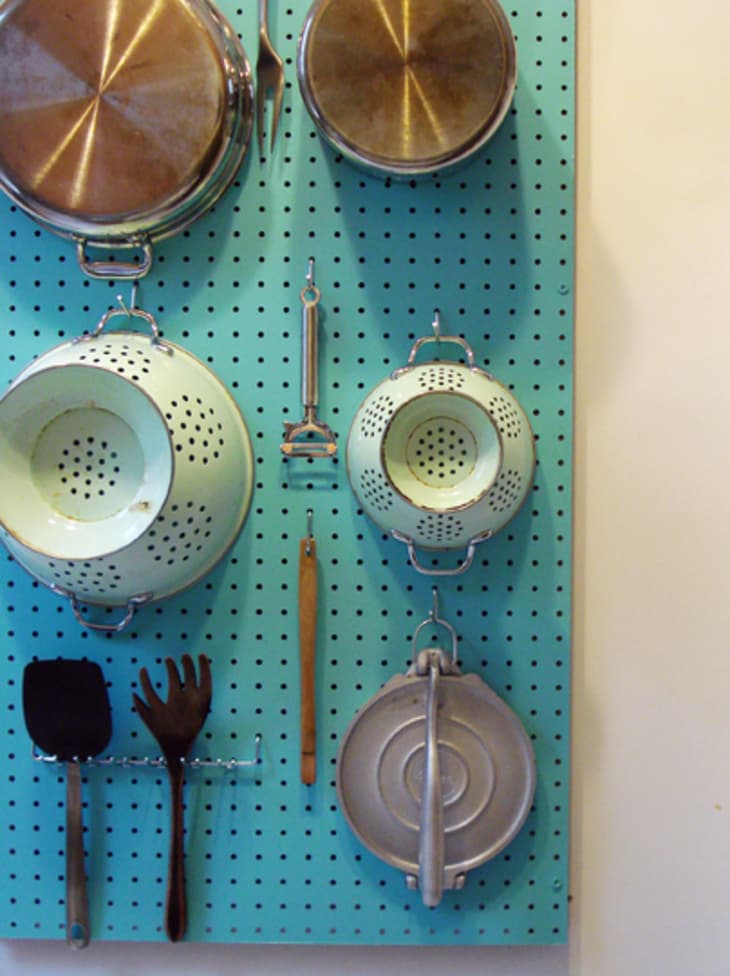
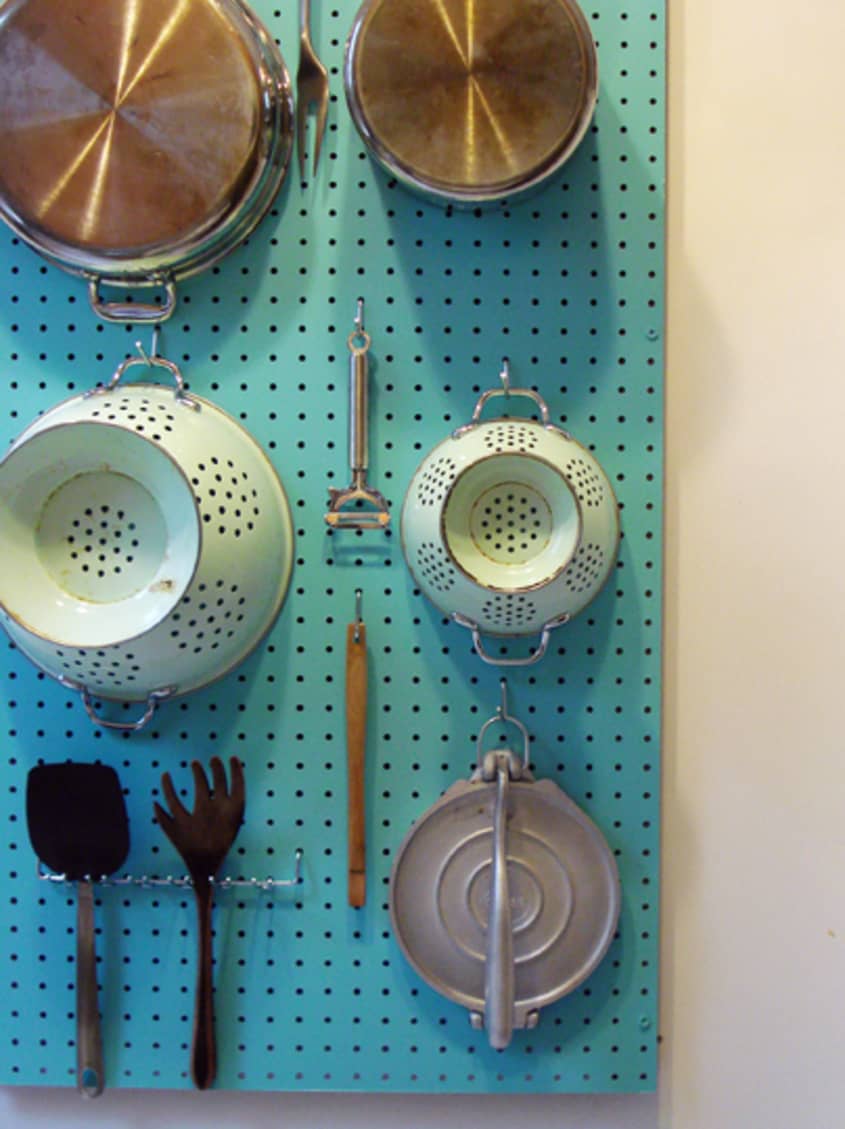
- Arrange the hooks on your pegboard, hang your stuff, and you’re all set!
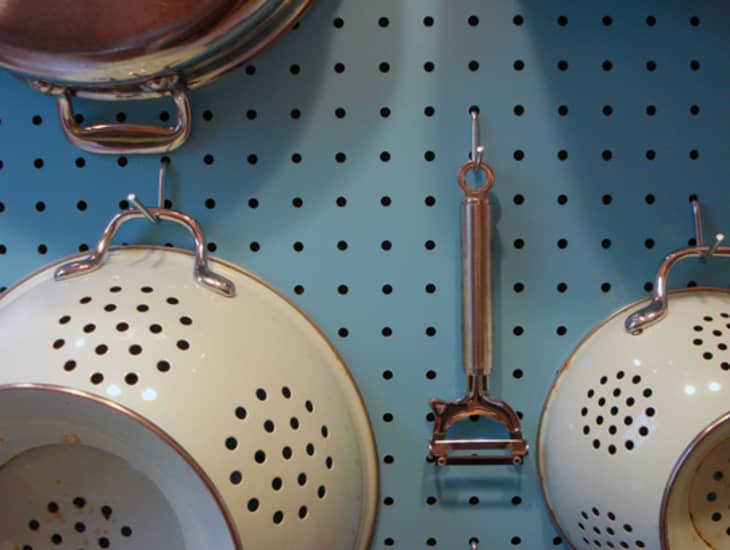
We’re really happy with the results. In addition to organizing our pots and pans, the pegboard adds a shot of color to our otherwise plain apartment kitchen. We worried about the pegboard looking cluttered, but the fact that everything’s contained in a compact area makes it feel very organized.
For more pegboard inspiration, check out these posts:
• Heather’s DIY Pegboard Organizer
• 7 Places to Use Pegboard from Martha Stewart
• Peg Board Roundup
• Open Storage in Small Kitchens
• How To: Install a Pegboard
Photos: Sarah Coffey