
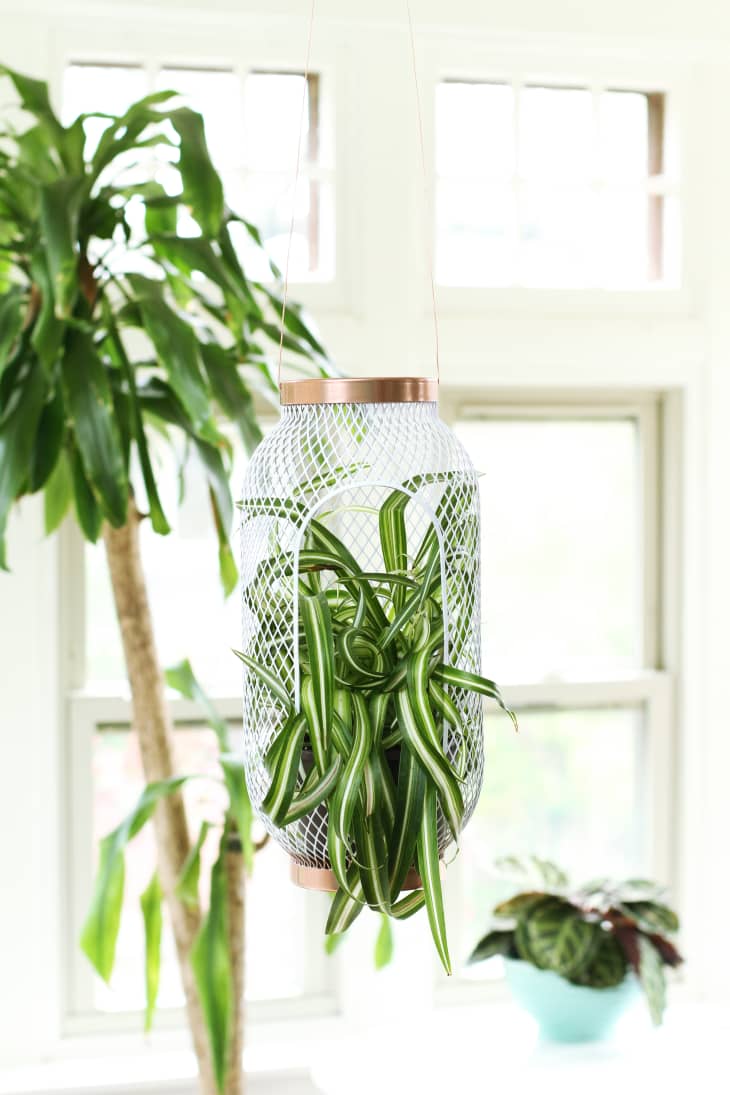
An Easy Hack to Turn this Inexpensive IKEA Lantern Into a Hanging Planter
IKEA hacks are often inspiring, but there are so many I’ve never tried myself because they take too long and require tools that I don’t have–and they’re often furniture pieces that I just don’t need. So when I found myself wandering the floors of IKEA recently, and the TOPPIG lantern presented itself as a possible hanging planter, I knew it was a hack I was willing to try because I could do it quickly and with minimal supplies. Besides, who can’t use a hanging planter these days?
What You Need
Materials
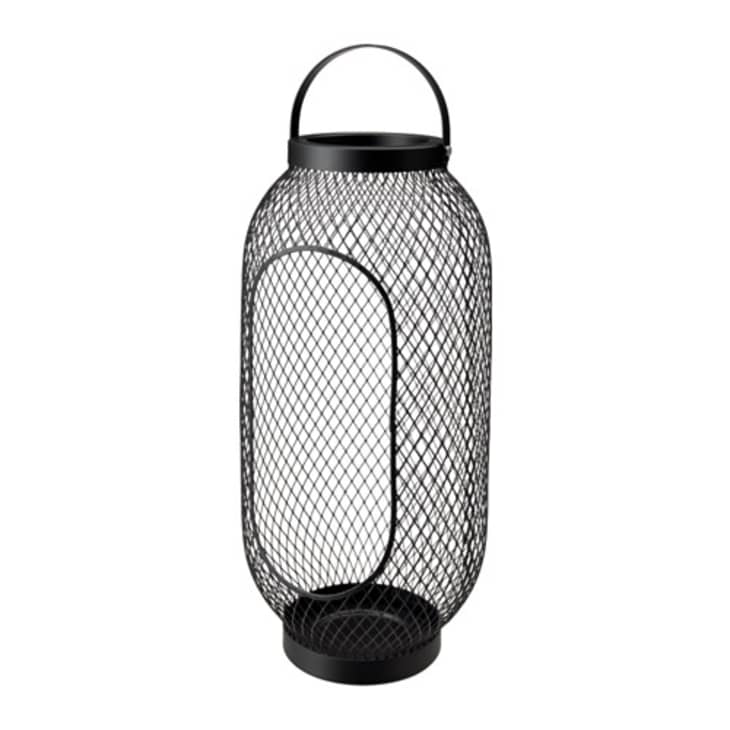
- TOPPIG lantern
- Spray paint
- Copper wire
Tools
- Fine grit sanding block
- Painters tape
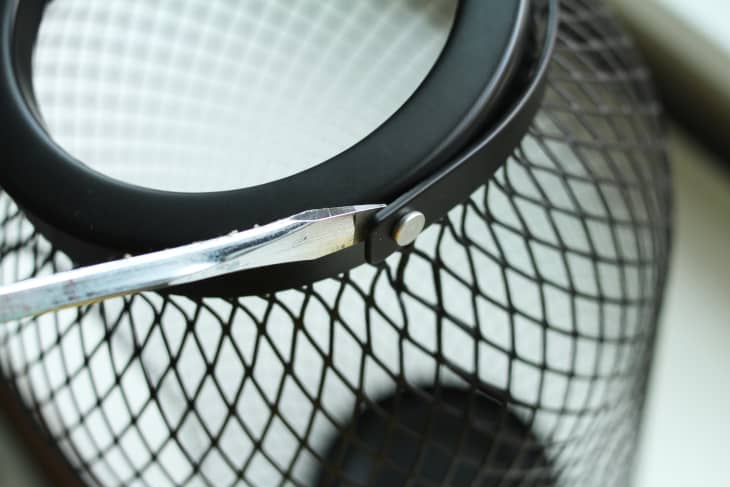
- Flat head screwdriver
Instructions

The lantern might take on a few dings and scrapes in the process, but not to worry, it will cover when you paint it.
Step 2. Scuff up the entire lantern with a fine grit sanding block, especially the rims. Wash away the dust and wait for it to dry completely. Step 3. Spray the top and bottom rings with your first color. After they’ve dried completely and are no longer tacky, cover with painters tape and spray the rest of the lantern with your second color.
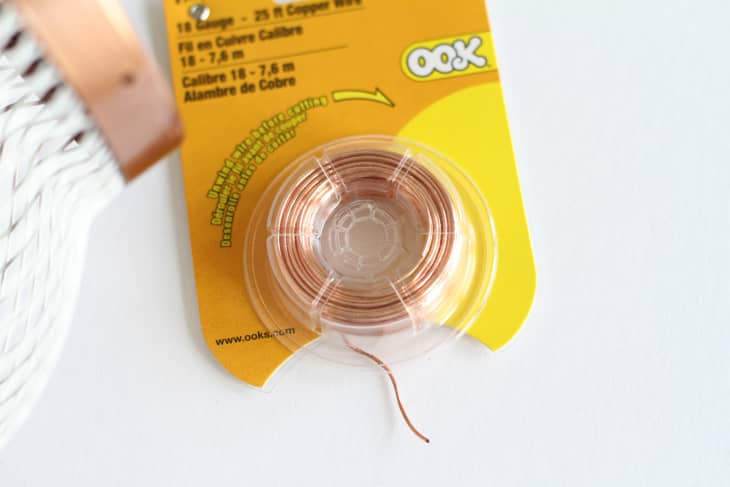
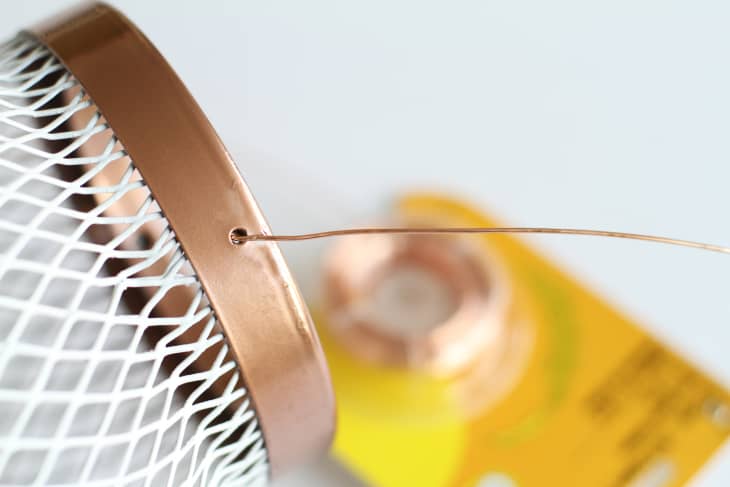
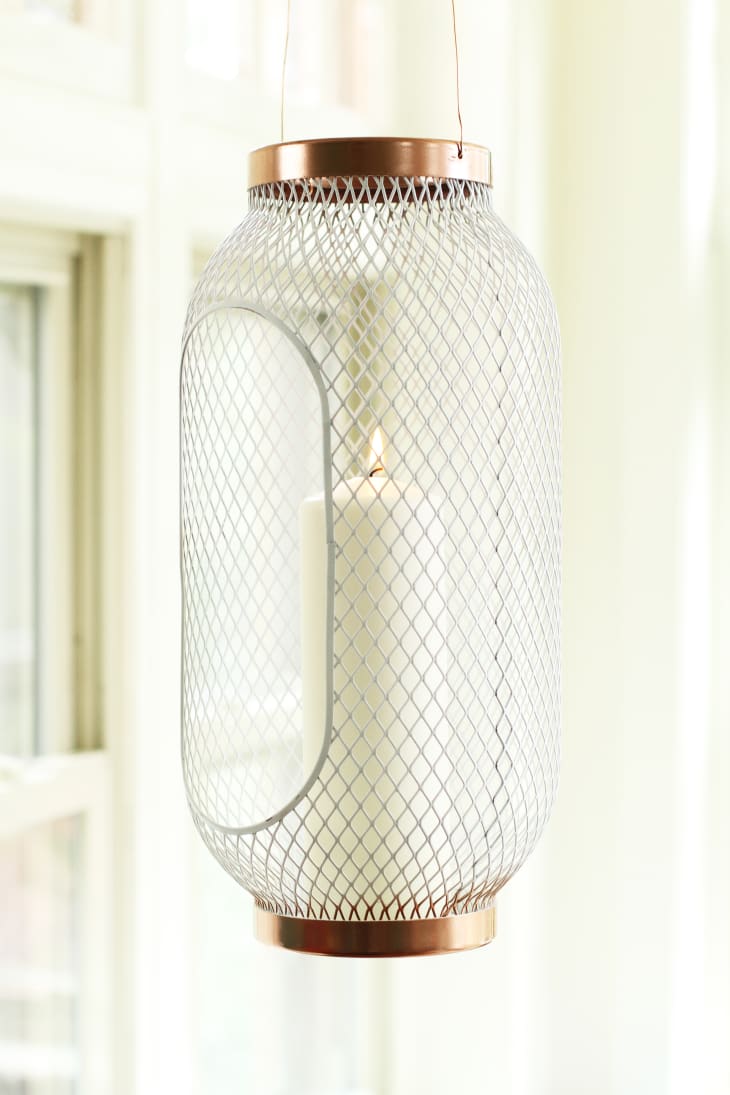

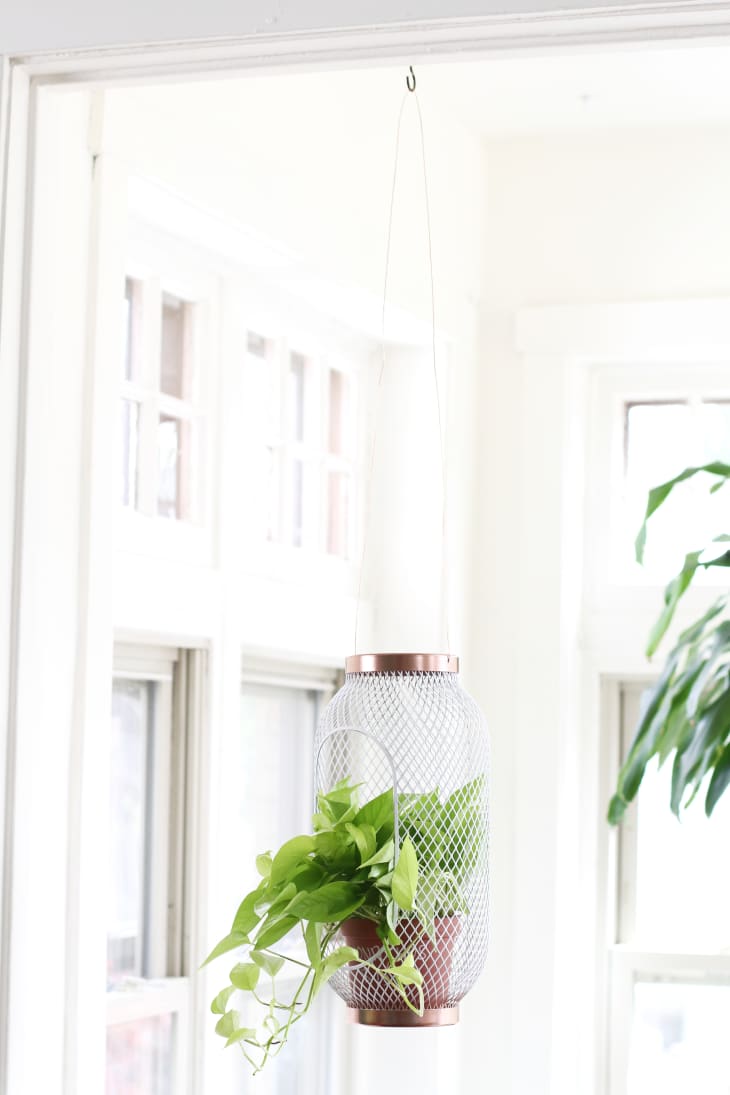
Step 4. The lantern looks great sitting on the floor or a table top, but I wanted it to hang so I picked up some 18 gauge copper wire at the store in the section with picture hanging hardware. You certainly can get fancy with twisting wire and making a fun handle, but I opted for simple because I needed a long hanger and didn’t want to run out of wire. Before cutting the wire, I measured from the ceiling down to where I wanted the top of the lantern to hang, and doubled it to find my length. To secure the wire, run it from the outside of the rim in and loop it around the inner hole two times to secure it. If you plan to put something heavy inside the lantern be sure to twist the wire more than just a few times to be sure it will hold.> This hack is great because it’s dual purpose: use it as a candle holder, or as a hanging planter!
Have a really great DIY project or tutorial that you want to share with others? Let us know! We love checking out what you’re making these days, and learning from our readers. When you’re ready, click here to submit your project and photos.