
How to Choose the Right Grout for Tile Jobs
All this week we’re talking about bathroom renovations, starting with Ashley’s recent remodel, and following up with tons of helpful posts about the process!
So you’re well under way on your bathroom renovation, but it’s time to choose a grout. While this step may seem unimportant in comparison to the bigger pieces of the renovation, the material and color of the grout can have a huge impact on your bathroom’s design and function.
How to Choose the Right Type of Grout
The three main types of grout are epoxy, cementitious, and hybrids. Each of them will come with varying levels of difficulty to install (each type having different sensitivities to moisture and the materials around them), but for look, it’s entirely up to you.
- Epoxy grout is waterproof and creates a strong bond between tiles. However, it’s not always the prettiest or easiest to install. Because of this, it’s not often chosen for residential work. Epoxy tends to have a more plastic-like appearance (sort of like caulk) and some residential tile installers aren’t as familiar or comfortable with the installation process. It can also be more costly to you.
- Cementitious grout has a more granular look than epoxy – it’s the type of look most homeowners expect to see. However, it’s a porous material, which means the color can change over time. Seal it once after installation and again every year or two to protect the color.
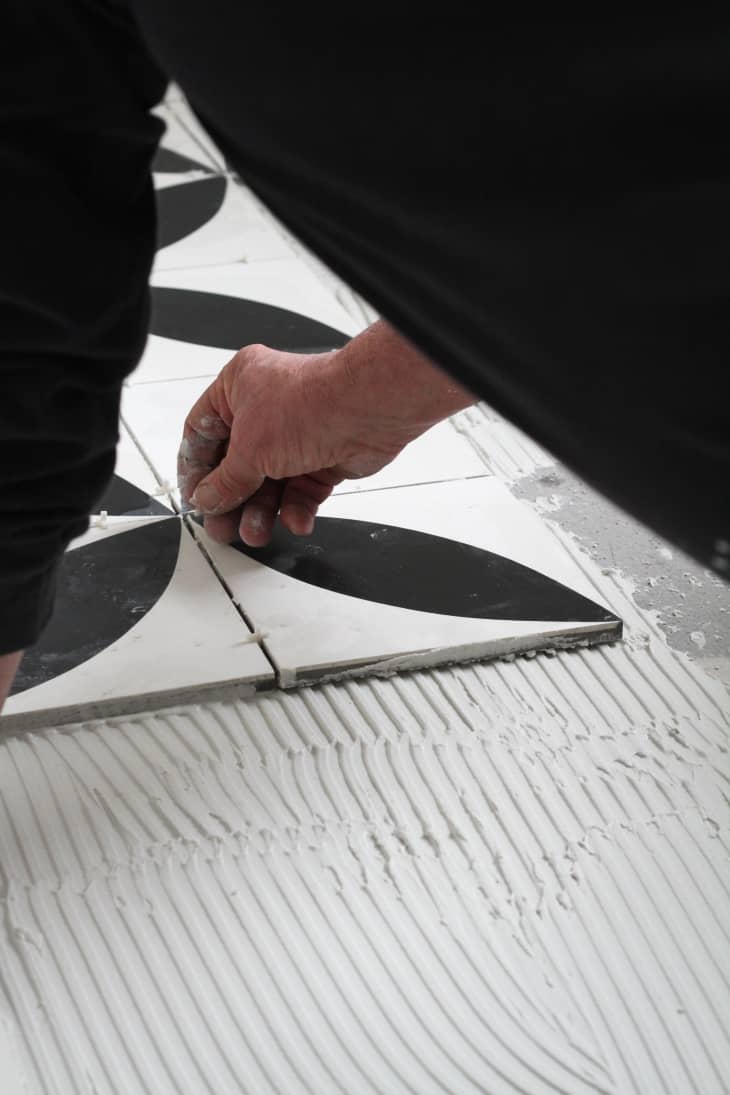
- Cementitious grout can come sanded or unsanded. Sanded grout is useful if you have a fair bit of space between the tiles. Unsanded grout is useful if you have very thin lines between tiles. It’s also recommended for stone installations, since it’s less likely to scratch the surface of the tile.
- Hybrid grout aims to maintain the look, function, and ease of installation of cementitious grout while providing the long term performance and uniform color of an epoxy grout.
How to Choose the Thickness of the Grout
The thickness of the grout can have a large impact on the overall look, and choosing the right thickness will depend on the type of tile you’re using: machine-made or handmade.
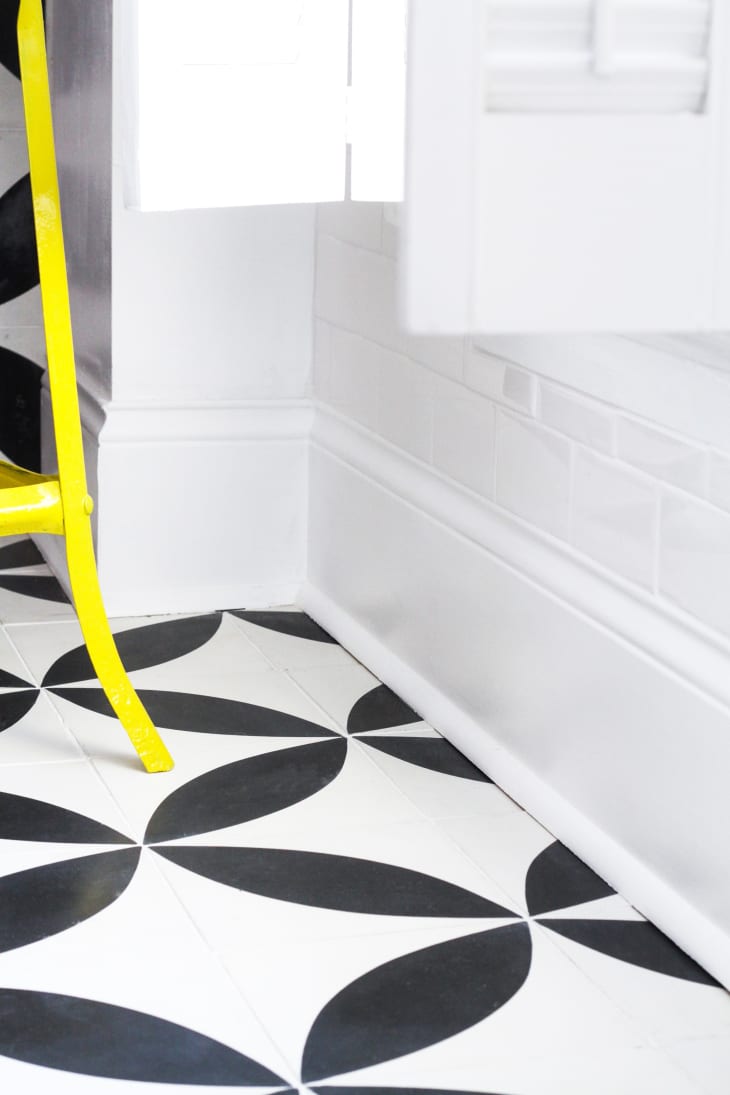
If you’re working with machine-made tile (such as ceramic tile), a thinner line will give you a more modern look. If you’re working with handmade tiles, you’re going to need a bit more thickness due to the natural variation of handmade tiles. I suggest having a minimum of 3/16” in between each handmade tile. However, also check with the manufacturer first and get their recommendations. Clé Tile, the makers of the tile used in Ashley’s bathroom renovation, recommends a 1/16″ grout joint. For the subway tile, she went a little thicker and used 1/8″ tile spacers. The thicker the grout line, the more you’ll see, so choose your grout color carefully.
How to Choose the Perfect Grout Color
When choosing a grout color, it’s important to consider the level of difficulty with installation (depending on whether or not you’re doing it yourself or are paying someone) and the maintenance you may have to do over time.
The two main choices between grout color are uniform or contrast. If you prefer contrast, you’ll want to work closely with your installer, as any imperfections will be very apparent. If you prefer a uniform color, ask your installer to do a mockup installation of a few tiles so you can see if the colors really match once the grout is dry.
As for overall maintenance, a white grout/dark tile mix may be more difficult to keep clean over time (since the grout is where dirt and dust tend to collect). But if you try a dark grout in the shower, you may find that the moisture conditions affect the color of the grout. A darker grout can also stain the tile if the tile is too porous.
If this sounds complicated, just keep this in mind:
- Dark grouts are good for keeping a cleaner look, but should be matched with a less porous tile (so the tile doesn’t stain).
- Light grouts can work well for keeping a clean look if paired with a light tile – and are less likely to stain a tile.
No matter what type, thickness, or color of grout you choose, empower yourself to get the results you want by working closely with your installer. If you can see a bit of the process finished before the entire bathroom is complete, then you can quickly make changes if necessary. For more information on grout, check out The Tile Council of North America, one of my favorite grout resources!
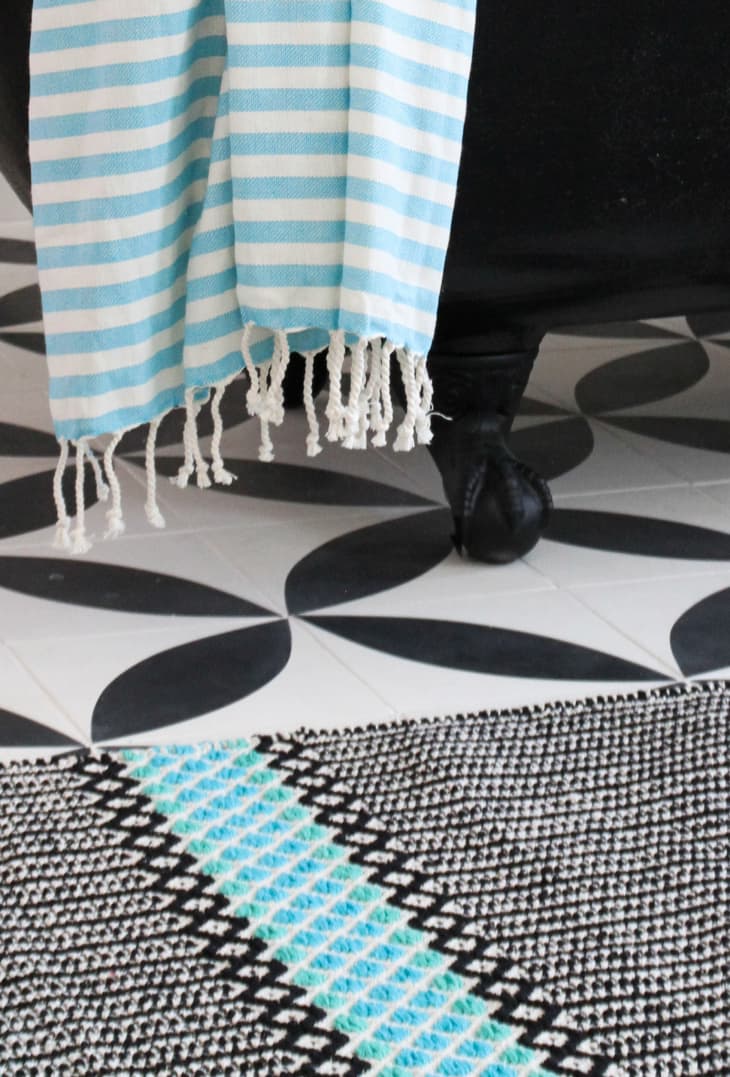
Ashley used cement tiles from Clé Tile (their Big Dane pattern) for the bathroom floor and up one partial wall. White Rittenhouse subway tile by Daltile from Home Depot provides subtle texture and interest on the sink wall. Since the cement tile already offered a lot of pattern, she kept it clean and uniform with the white tile, and used Polyblend #381 Bright White 1 lb. Non-Sanded Grout from Home Depot for both types.