
Before & After + How To: Tufted Dining Chair Seat Cushion
We independently select these products—if you buy from one of our links, we may earn a commission. All prices were accurate at the time of publishing.
(Image credit: Apartment Therapy)
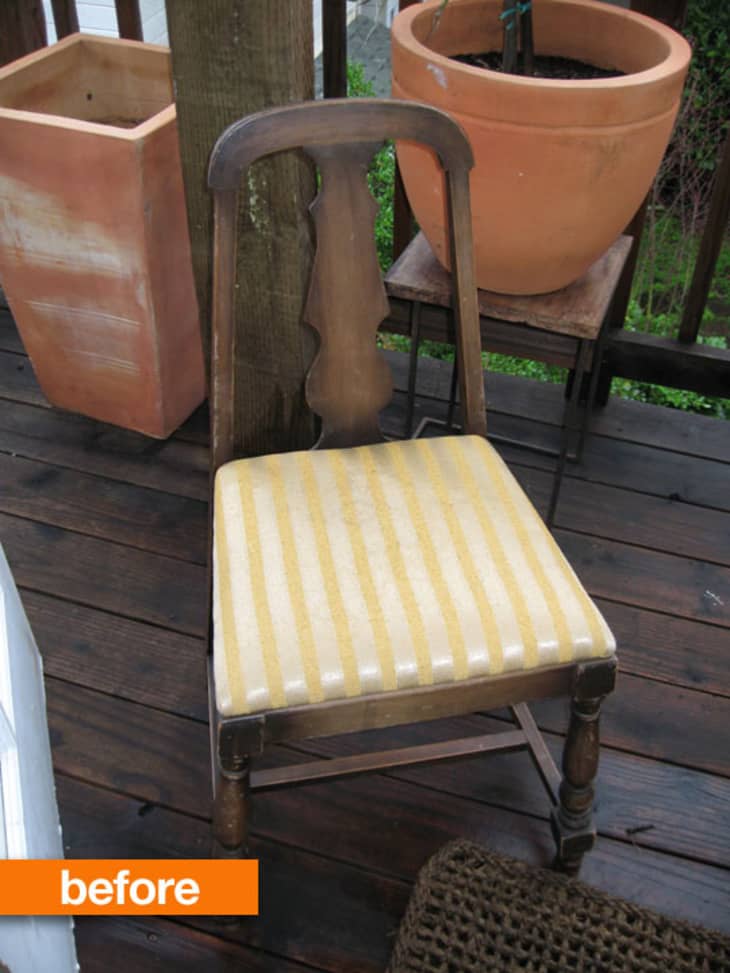
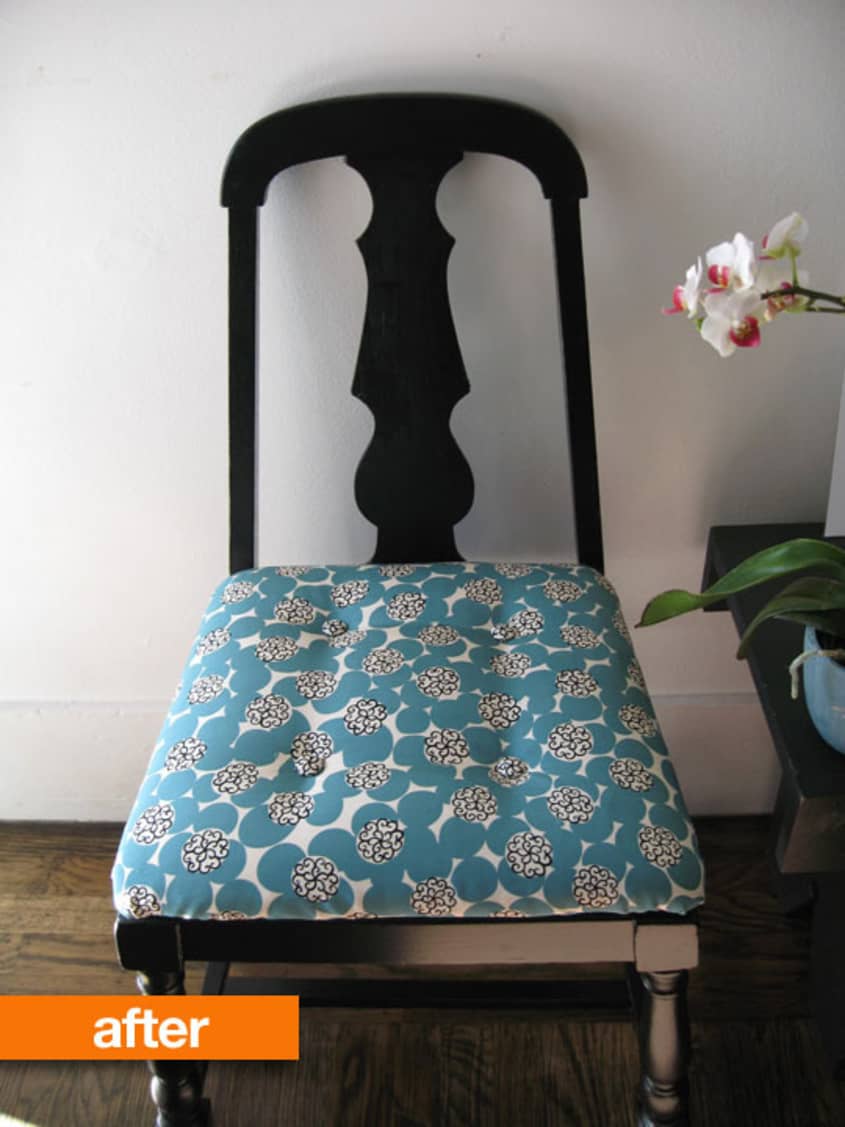
I posted this Before & After on Design Sponge a couple of years ago, but I never had the chance to show how I did it. You can figure out the paint part, obvi, but here’s how I actually tufted the seat. Enjoy!


What You Need:
- 1 yd. fabric, preferably upholstery-weight (I opted for silk and reinforced with iron-on interfacing)
- 4-pack of 1-inch (or desired size) self-coverable buttons, found at any fabric store
- 4 upholstery tacks or similar
- drill
- hammer
- screwdriver
- tape
- pencil with eraser top
- Fabric scissors, fabric chalk, large sewing needle, upholstery thread
- Optional: 1 yd. batting and staple gun to cover original seat
- Using screwdriver, remove seat from wood base. Cover with batting, if desired. Place batting on flat surface and center seat (top facing down) onto batting. Fold two opposite sides over to bottom of seat and staple in place, about ½ inch from edge. Repeat with other two sides, mitering corners. Cut any extra batting beyond ¾ inch from edge.
- Following packaging instructions, cover buttons with fabric, making sure to cut fabric from edge.
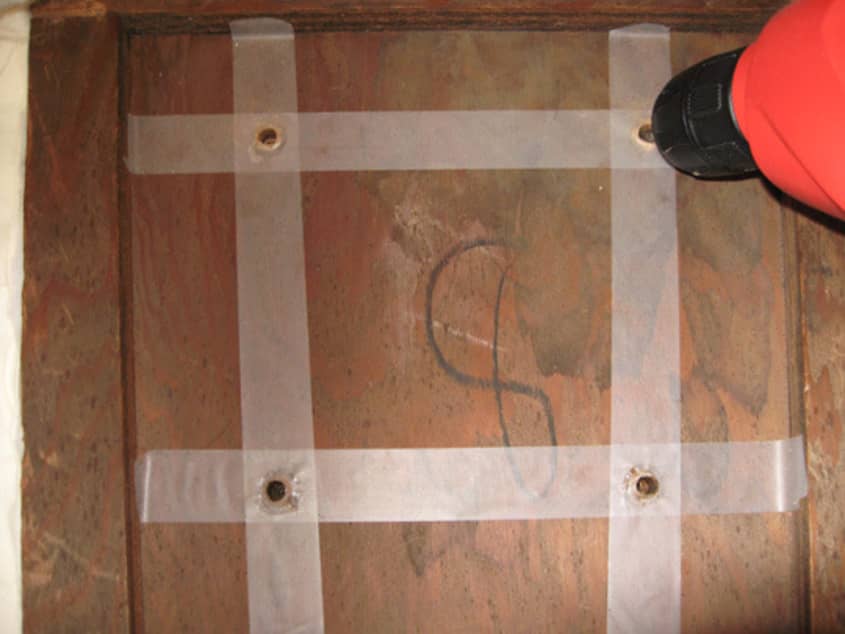
- Using tape, create a center square on bottom of seat, about 2 inches from each edge.
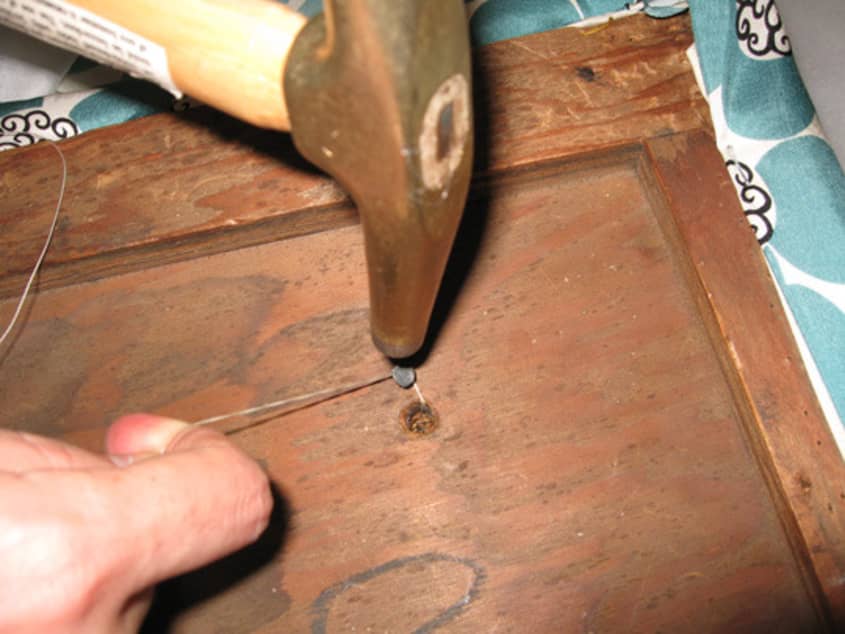
- Drill holes where tape crosses (as shown), large enough for pencil to fit through to other side. Hammer a tack about 1/2 inch from each hole, leaving room to wrap thread around nail before hammering down completely.
- Place fabric on flat, clean surface, right side facing down. Center seat on top of fabric, top side down. Fold fabric as you did with batting in Step 1. Trim and fold over edges to 1 inch, then staple, avoiding tacks and holes.
- Using fabric chalk, mark four dots on seat, where you want your buttons to be placed.
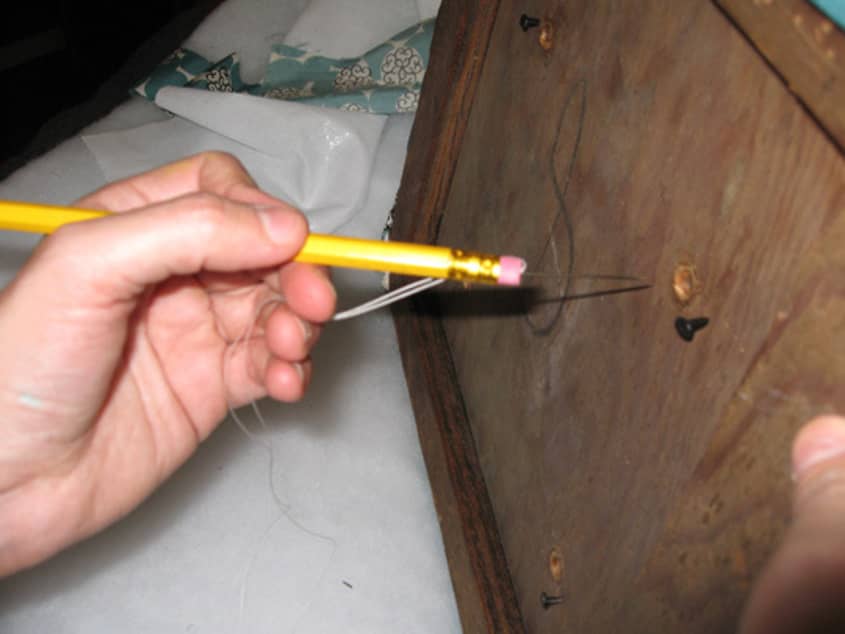
- Thread needle with 1-2 feet of thread and poke threaded edge into pencil eraser. Push pencil through hole, needle first, stopping when needle pierces through fabric. Grab needle on fabric side, pulling pencil back through hole. Make sure there is still enough thread on bottom end to wrap around nail to secure (after next step).
- Stitch needle through a self-coverable button on top of seat, stitching back through hole in seat, using pencil again on other side (push through, eraser first). With both ends of thread on bottom of seat, pull thread tight to tuft button on other side. Wrap thread around nail, and hammer down. Repeat with other three buttons. Trim any excess thread.
(Images: Theresa Gonzalez)