
Before & After: A Surprising & Superb Splurge
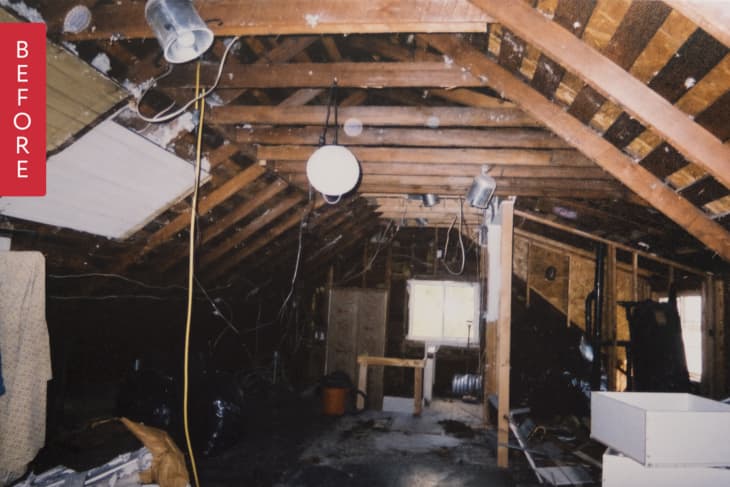
Looking at this photo, this space could become a lot of things. A retro inspired kitchen? A dreamy den? A nursery? The homeowner went an unexpected route and turned the space into a warm, relaxing and wholly unique space.
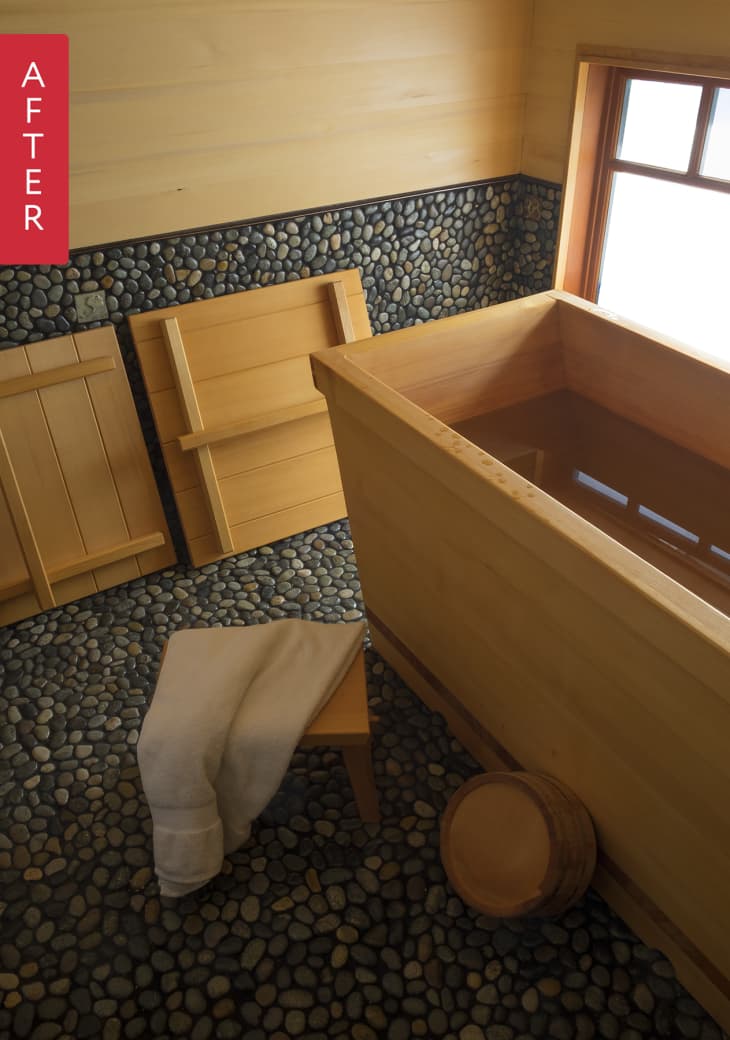
From E: This project has been a long, long time in the planning and execution, but we’ve finally got the payoff of being able to use our beautiful wooden soaking tub.
This corner of the house had been a kitchen when the house had been sectioned into an incomprehensible upstairs/downstairs duplex. The layout of the space is completely different now.
The process was a long one and we did all of the work ourselves. This is upstairs so the first step was to reinforce the floor with a flitch beam (two regular floor joists with a piece of steel sandwiched between them). Then the subfloor was built up to accommodate the beefier beam and the drain piping. We used Wedi board to water proof the room and act as tile backer for the floor and wainscot walls. The tile is Riverstone pebble tile. The upper portion of the walls is Alaskan Yellow Cedar paneling (Bear Creek Lumber). The wood is very water and rot resistant and needs no finish. The bathtub was made by Sea Otter Woodworks/Zen Bathworks and made from Port Orford Cedar. The tub is amazing – soft, comfortable, fragrant and holds heat incredibly – the water in it will only lose about 10F in 24 hours! After using it I can’t imagine why you would ever want a tub made of a hard, cold material like porcelain or fiberglass.
As far as cost goes… we’re not sure we want to add it all up. We saved a ton on the labor by doing it all ourselves and the materials were all purchased over time, as we needed them, so the true cost, we probably won’t ever know…
Biggest surprise – spending around $600 in grout. The pebble tile, to be sure it stays well set and the grout doesn’t crack or flake out of the large grout lines needed a urethane grout, which was pricey and it took about twice the amount I expected. Working with it was interesting too – like sandy glue rather than cement like traditional grouts.
Thank you, E!