
How to Build a Basic Home Bar — a DIY That’s Surprisingly Approachable

Want more DIY tips, tricks, and inspiration? Check out more stories featuring the 2023 Apartment Therapy DIY Collective.This content is presented in partnership with The Home Depot; it was created independently by our editorial team.
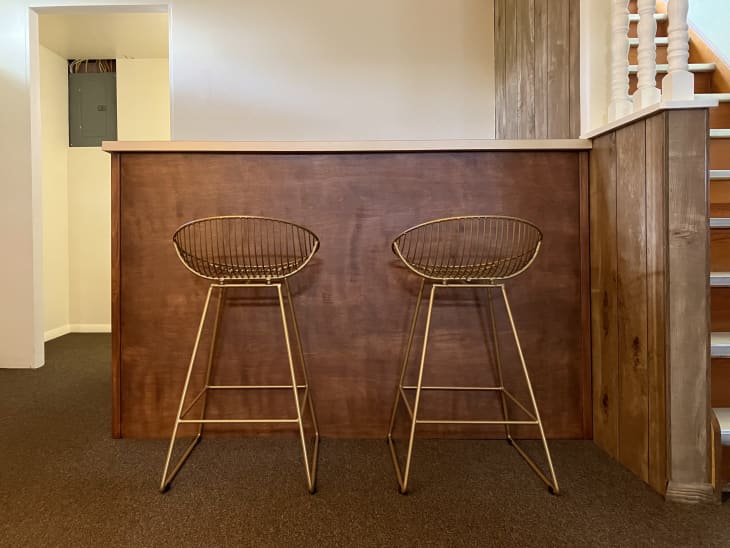
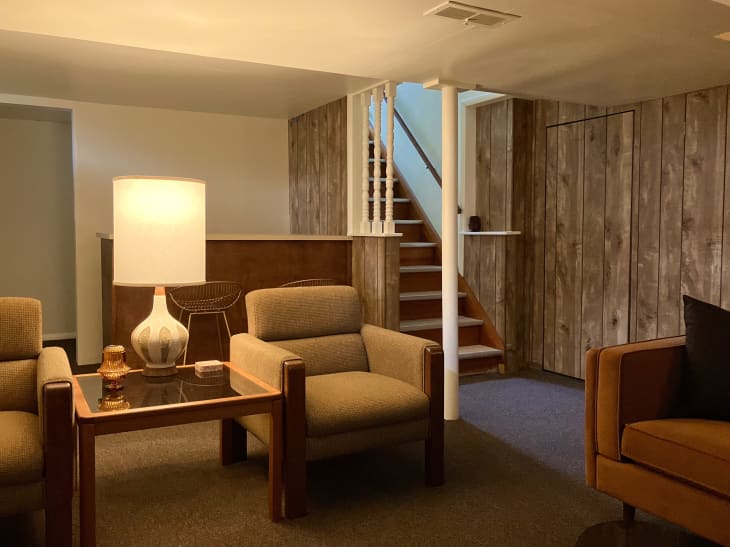
Like many other DIYers, I’m almost always in the middle of a project. Lately, I’ve been in the process of transforming my unfinished basement into a 1970s-style dream space. I’m almost done with this renovation, and my partner Ben and I are super pumped about it. One of the most recent pieces of the reno that I completed was the home bar, which is a surprisingly easy beginner woodworking project that you can do even if you don’t own a single power tool.
The spark for this project came right from the city where I live: Milwaukee, Wisconsin. Every time I go into someone’s basement here, there’s always a bar that’s been there since the ‘60s or ‘70s. Each one is so different and I love them all, so it inspired me to have one in our basement, as well. I’m not much of a drinker, to be honest, but when I started tearing everything out of the basement to start from scratch, I knew a bar was a must-have in the design of the space. Even better: My basement had a little nook that was the perfect space to put a home bar (though that’s not necessary for your own DIY).
The great thing about this DIY home bar is that it’s actually pretty adaptable, so you can modify this simple design to suit your needs and style. In addition to a classic bar, it can be a coffee or tea station, extra seating or prep space in a kitchen area, and more — and you can paint or stain it to match your decor. Here’s what you’ll need, and how to do it.
What you’ll need to DIY a simple home bar:
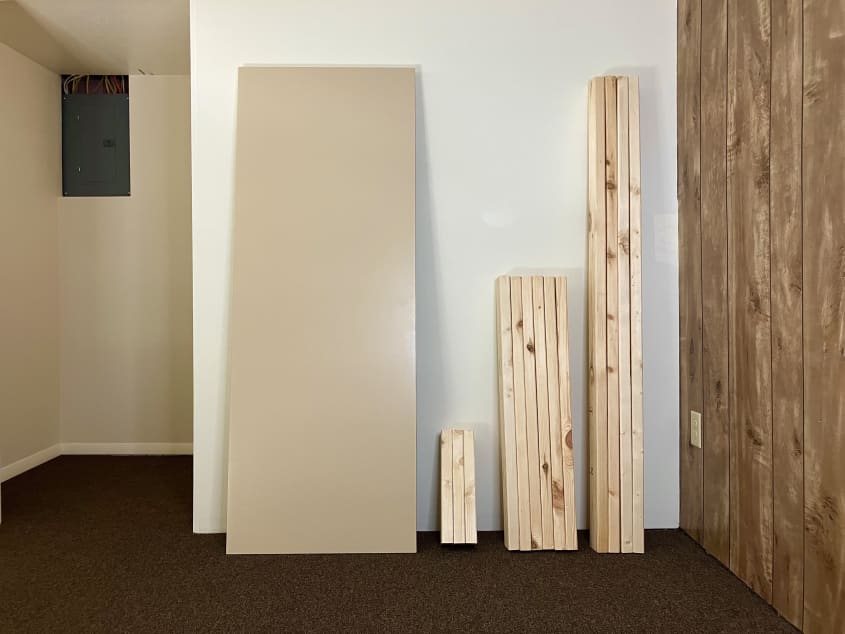
- 2×4 lumber (you’ll use this for your frame)
- 1×2 lumber (you’ll use this for the shelf supports)
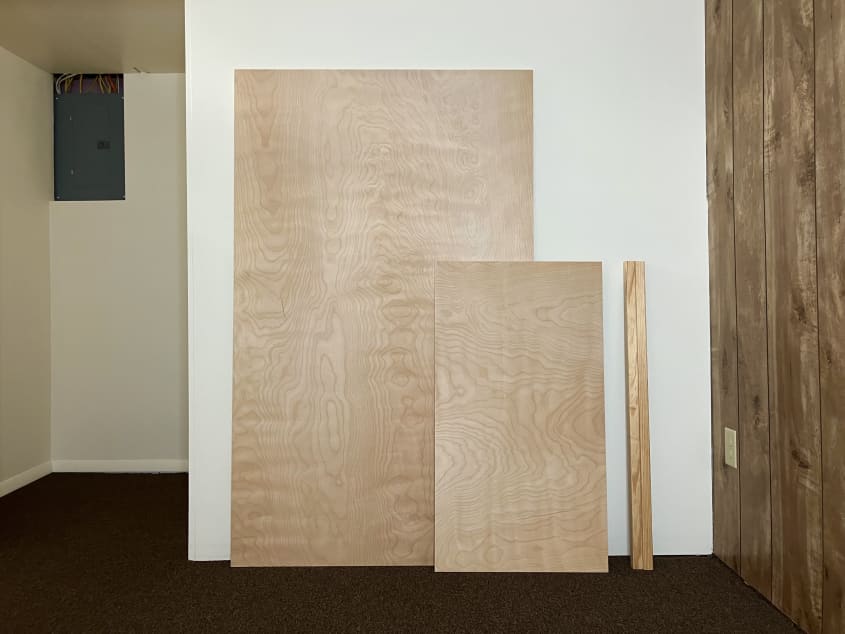
- 18 mm (3/4-inch) plywood (this is for the shelves and surfaces)
- Corner molding
- Cordless drill
- 2 1/2-inch wood screws with corresponding bits (I used this one to make the pilot holes)
- Brad nailer and brad nails, or a hammer and finish nails
- Wood glue
- Wood putty
- Pre-stain conditioner
- Stain in your color of choice (I used this one)
- Polyurethane
- Foam brush
- Level
How to build a simple home bar:
1. Gather your measurements and cut your lumber to size.
If you want to build this home bar but you don’t have a saw, this is the most important step of the project. When you buy your lumber, you can ask someone in the lumber department at the hardware store to cut your pieces to size — but you’ll need to know exactly what those sizes are and how many pieces you’ll need.
With some simple math, you can figure out your own custom measurements at home, but if you want a true shortcut, you can copy the exact measurements I used.
My home bar, excluding the countertop, is 40 inches high, 65 inches long, and 22 inches deep. Here’s exactly what you’ll need to recreate it:
2×4 lumber in the following cuts:
- 2 bottom frame pieces: 65” long
- 2 top frame pieces: 65” long
- 6 side frame pieces: 37” long
- 5 cross-support pieces: 15” long
1×2 lumber in the following cuts:
- 2 shelf supports: 21” long
Corner molding in the following cuts:
- 2 corner covers: 40” long
Plywood in the following sizes:
- 2 inner shelves: 21 1/2” x 39”
- Shelf brace: 12” x 21”
- Front face: 40” x 65 3/4”
- 2 side faces: 40” x 22”
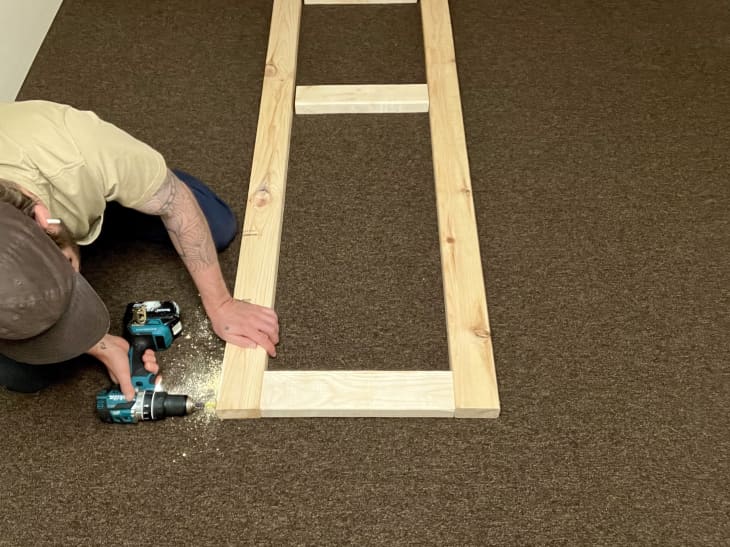
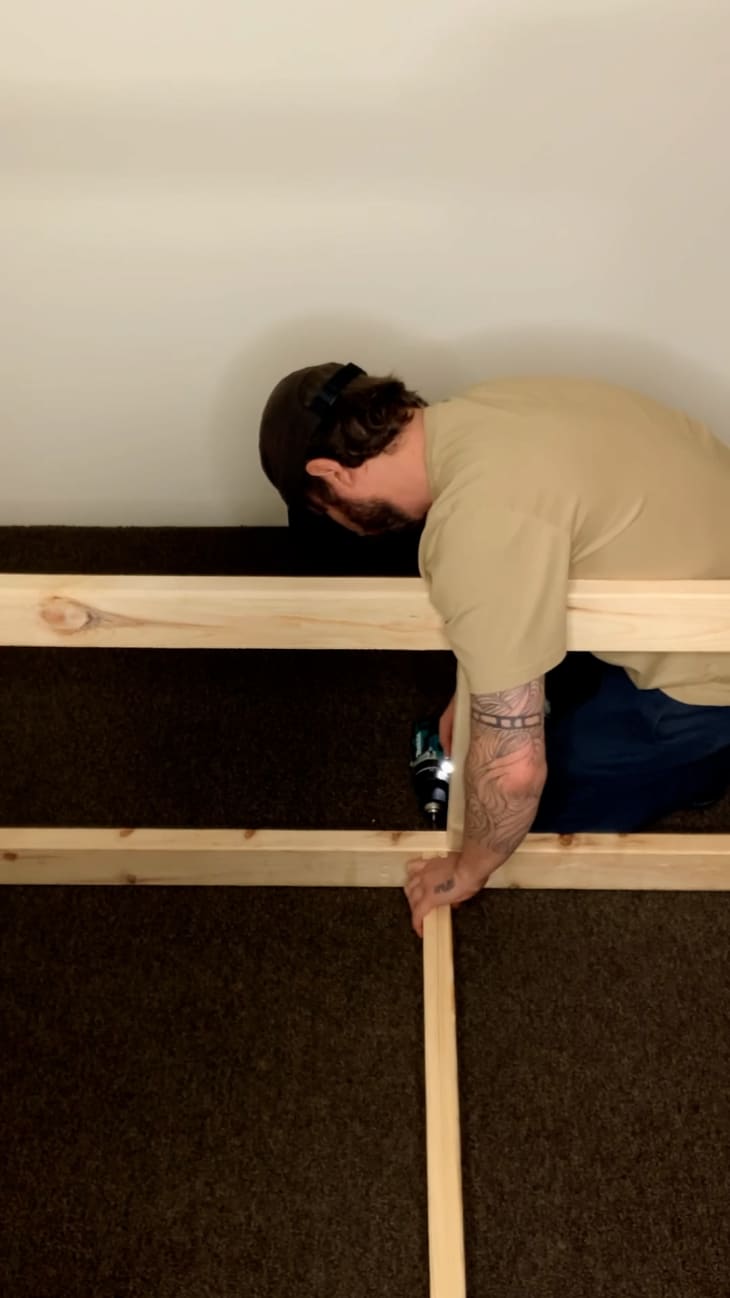
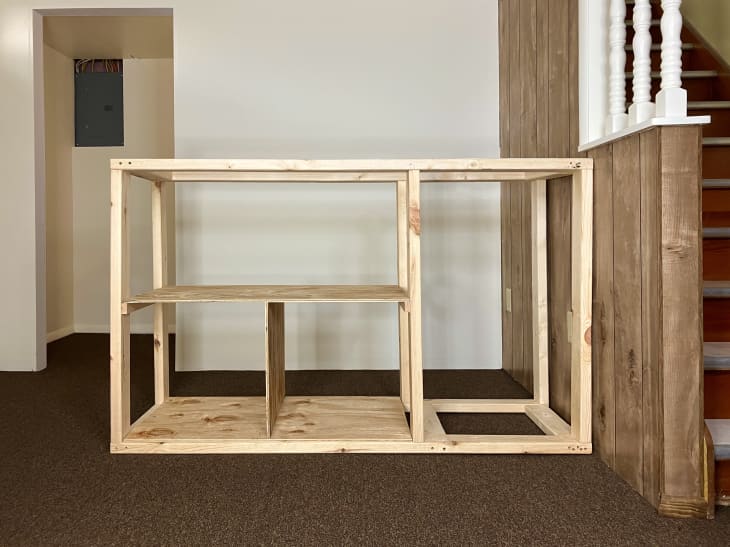
2. Build the bottom support.
Once you have your cut pieces, you’ll start by building the bottom of the bar. For this, you’ll use your 2x4s that are cut to the length of the bar, plus the smaller 2x4s that are cut to a little less than its depth. Put the longer pieces on the floor parallel to each other. Use two of the shorter pieces to connect these two boards at the ends, with all edges flush. Your wood pieces should be arranged in a rectangle. Place a third support so that its far edge is 39 inches from the outside edge of the base (at about the two-thirds point on the base).
Make sure your pieces are straight using a level, then fasten them together. You’ll use a bit to create a pilot hole about halfway through the board before using your drill to screw in your 2 1/2-inch screws. The pilot hole will help hollow out your front board enough that your screw will be able to grip the back one. (Note: This is the ultra beginner-friendly method. If you want to get a little fancy, you can use a pocket hole jig to fasten these two pieces together from an angle.)
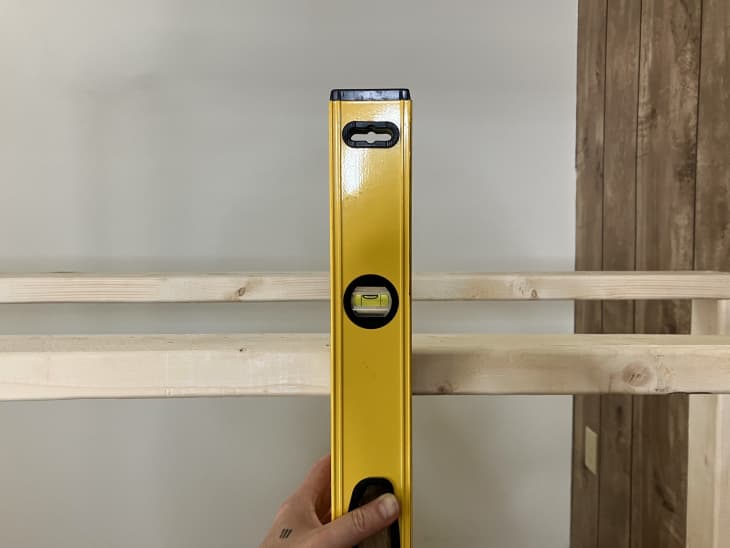
The main thing I was watching out for during the construction of the base was making sure that everything was level and square as I was going. I highly suggest using a level during the building process to ensure that you don’t have a lopsided piece of furniture when it’s all put together. I literally checked every board that was attached, just to be sure, as I went. You definitely want to avoid having to take it apart to fix something that’s off.
3. Start building the sides.
Tilt the bottom brace on its side so you can screw the side supports in from underneath. These should be placed so that they’re exactly perpendicular to the longer bottom pieces, with the widths matching up exactly. There should be two supports on each end of the bottom piece, plus two located at either end of the cross-support that you added to the middle of the bottom brace.
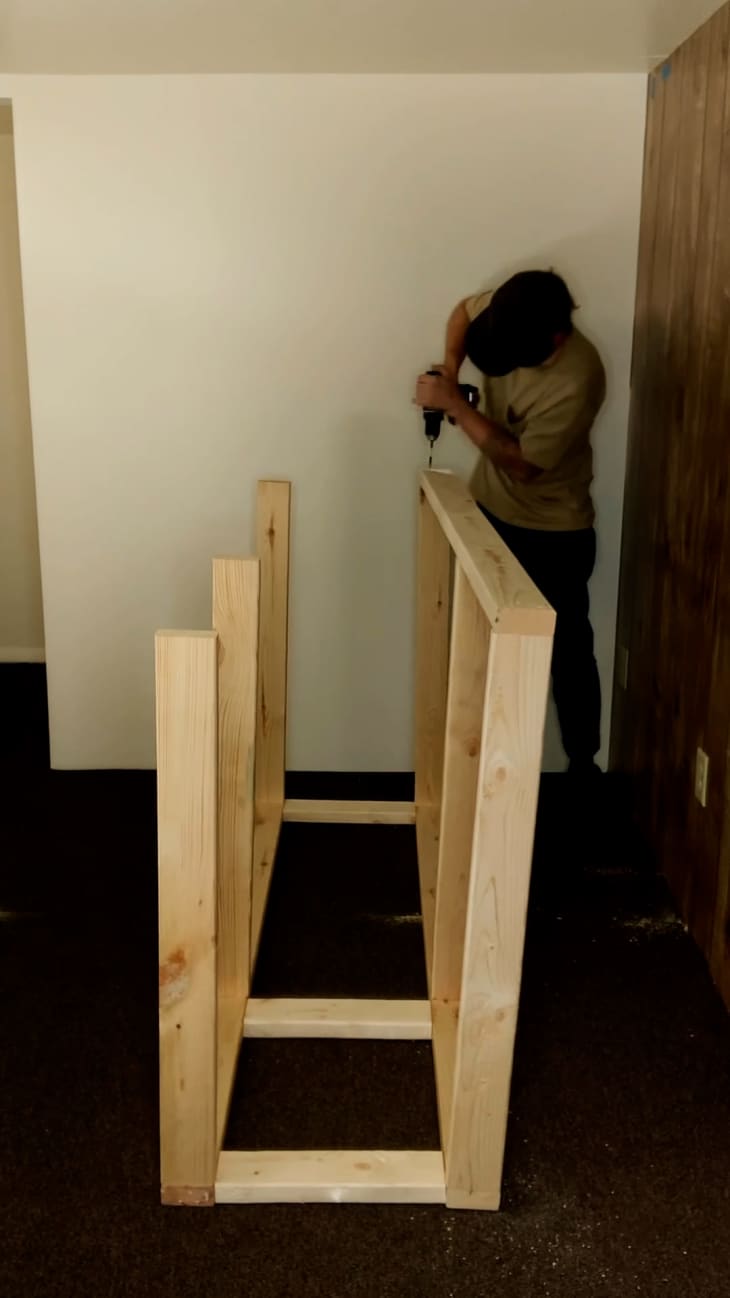
4. Build the top brace.
Attach the remaining 2×4 pieces to the side supports so that they mirror the bottom brace. In the end, you’ll have a skeleton that looks like the outline of a box.
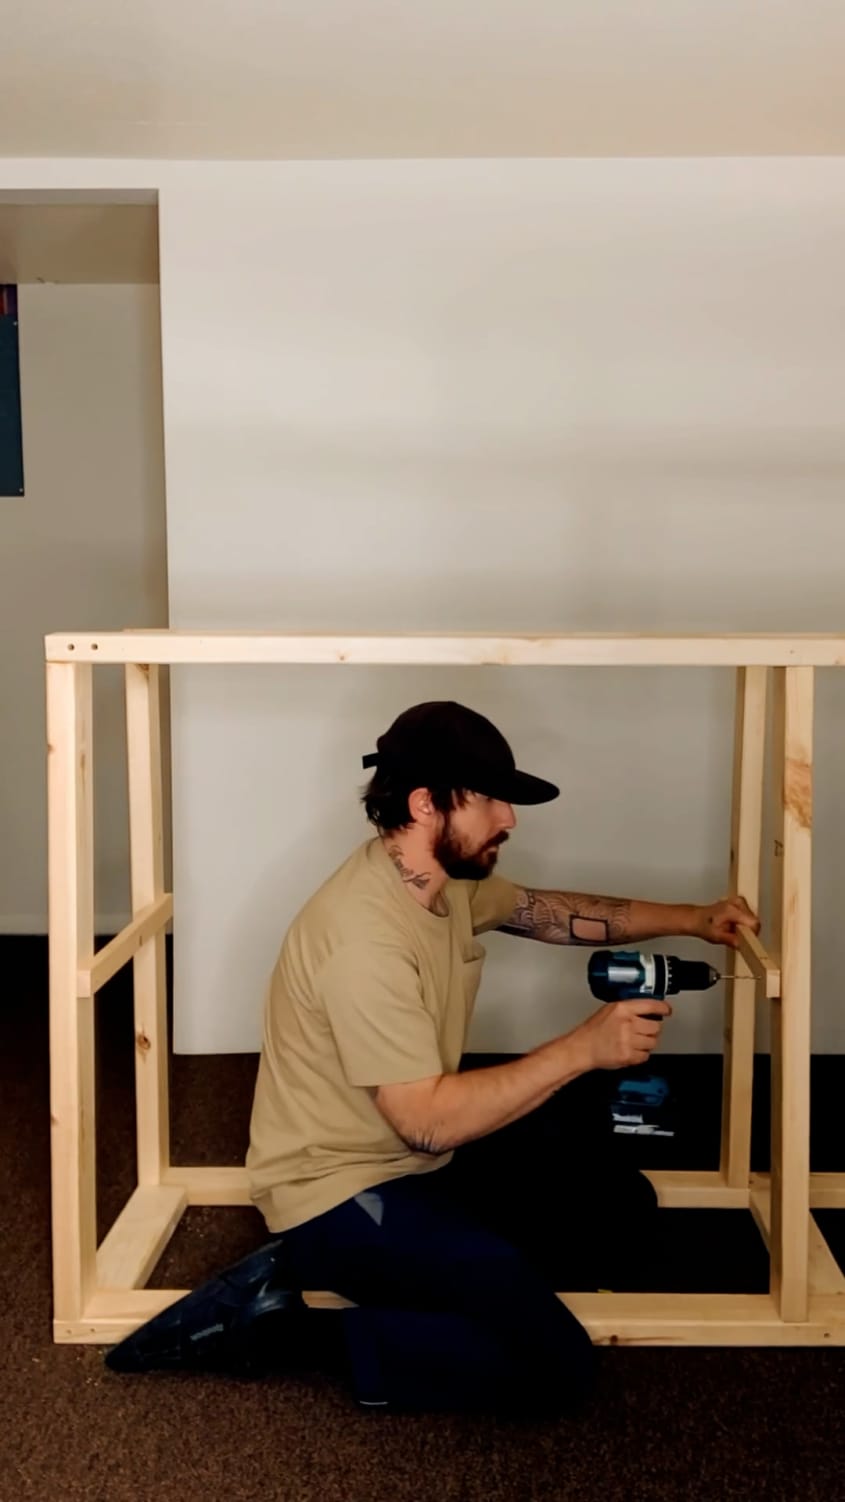
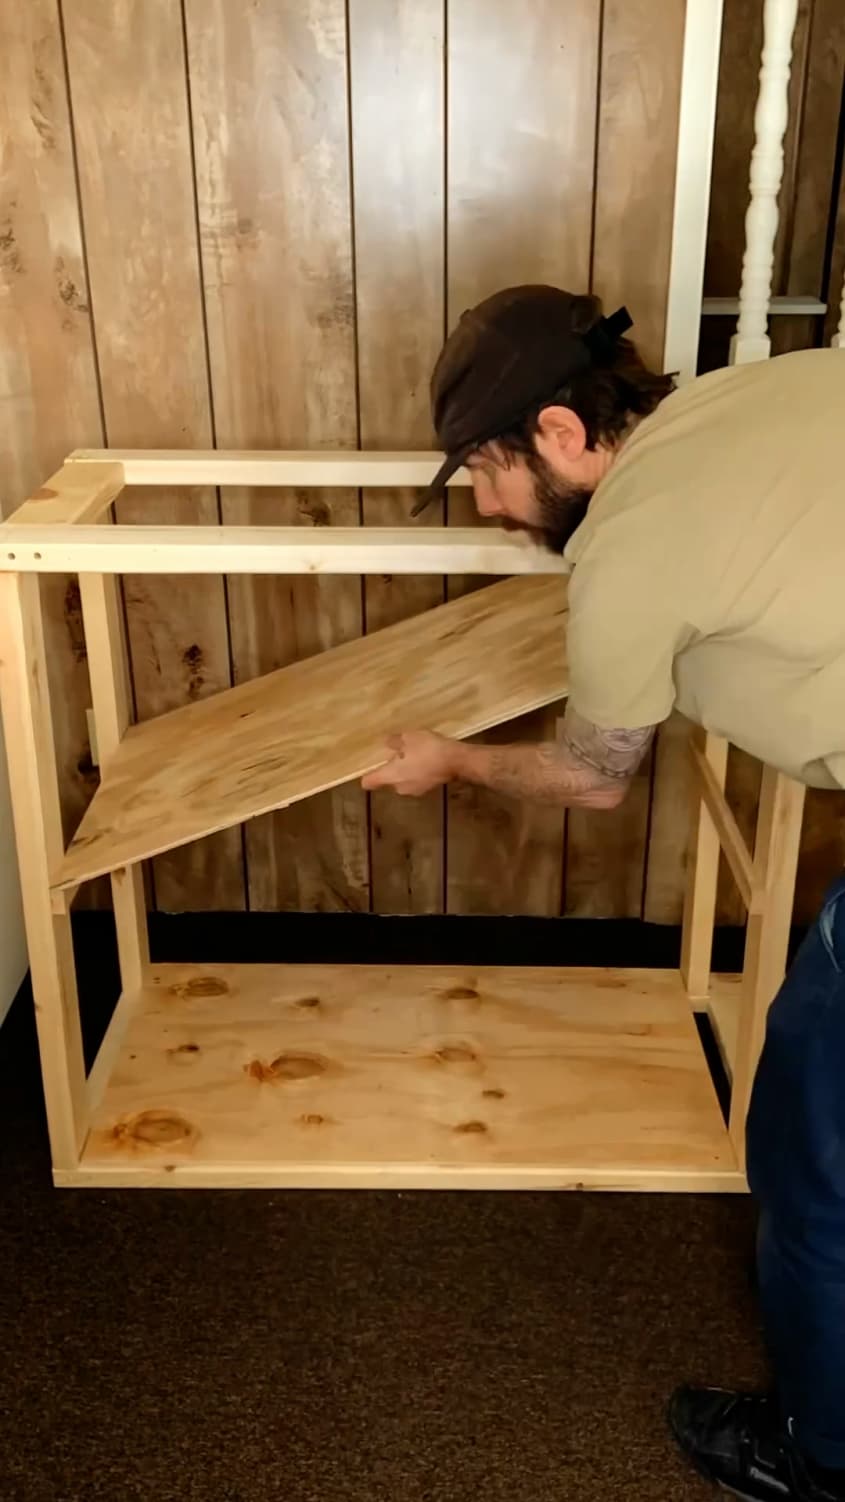
5. Attach the shelf supports and shelves.
Screw your 1x2s into the side and center supports so that their top edge is 12 inches from the top of the base. Again, use your level to make sure they’re straight.
Screw your lower shelf to the bottom brace, and screw your upper shelf into the shelf supports. Your plywood shelf brace slips between these two, and stands vertically.
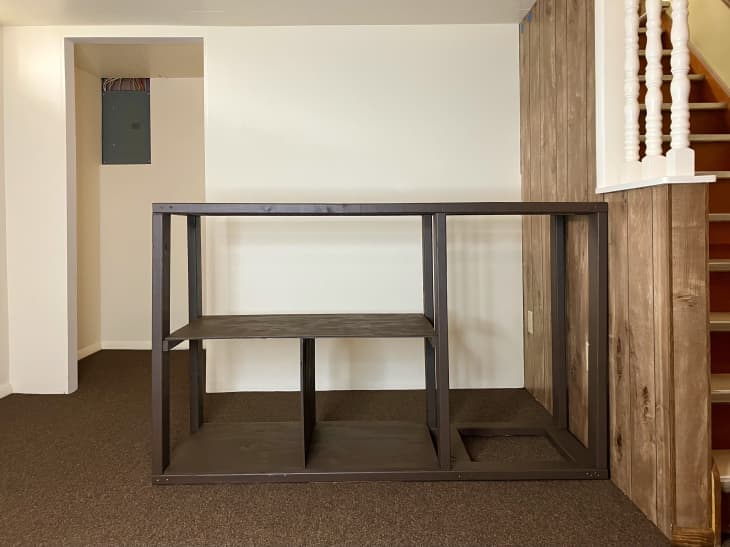
6. Paint the interior.
Now is the easiest time to paint the shelves and frame! I chose brown to blend in with the stained wood exterior.
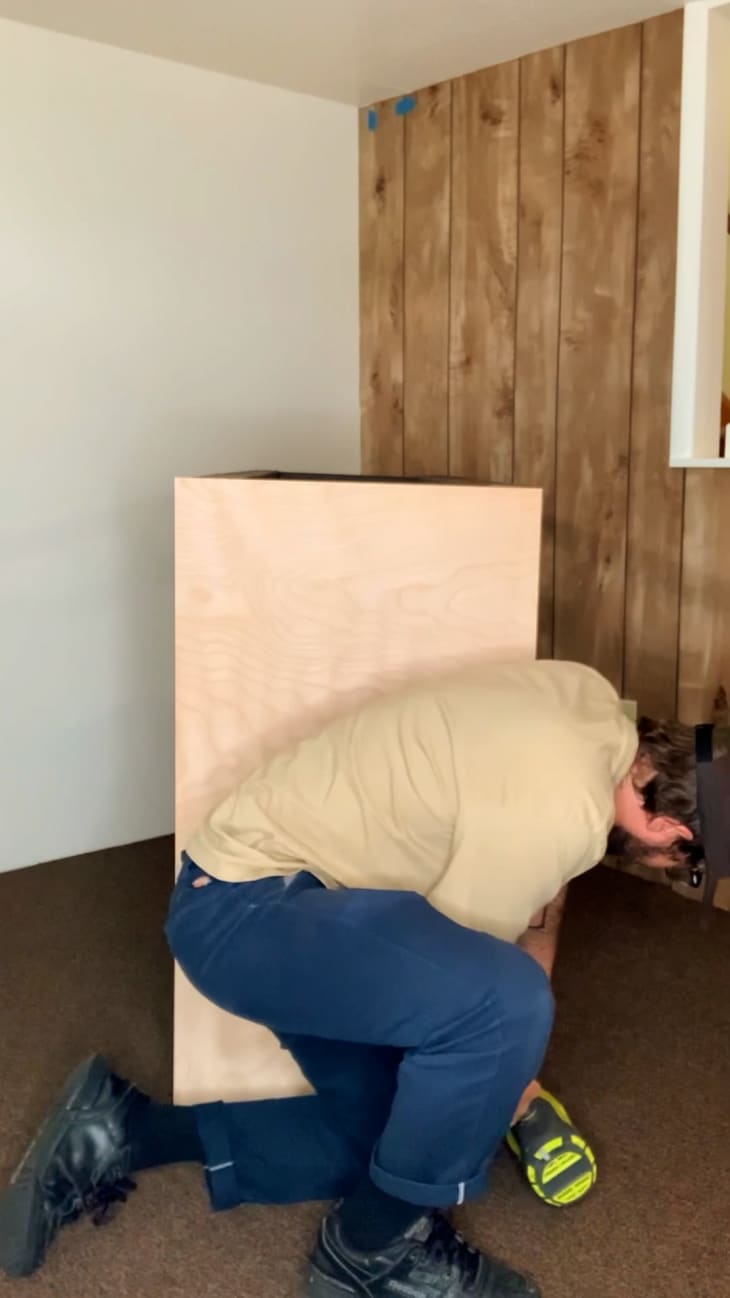
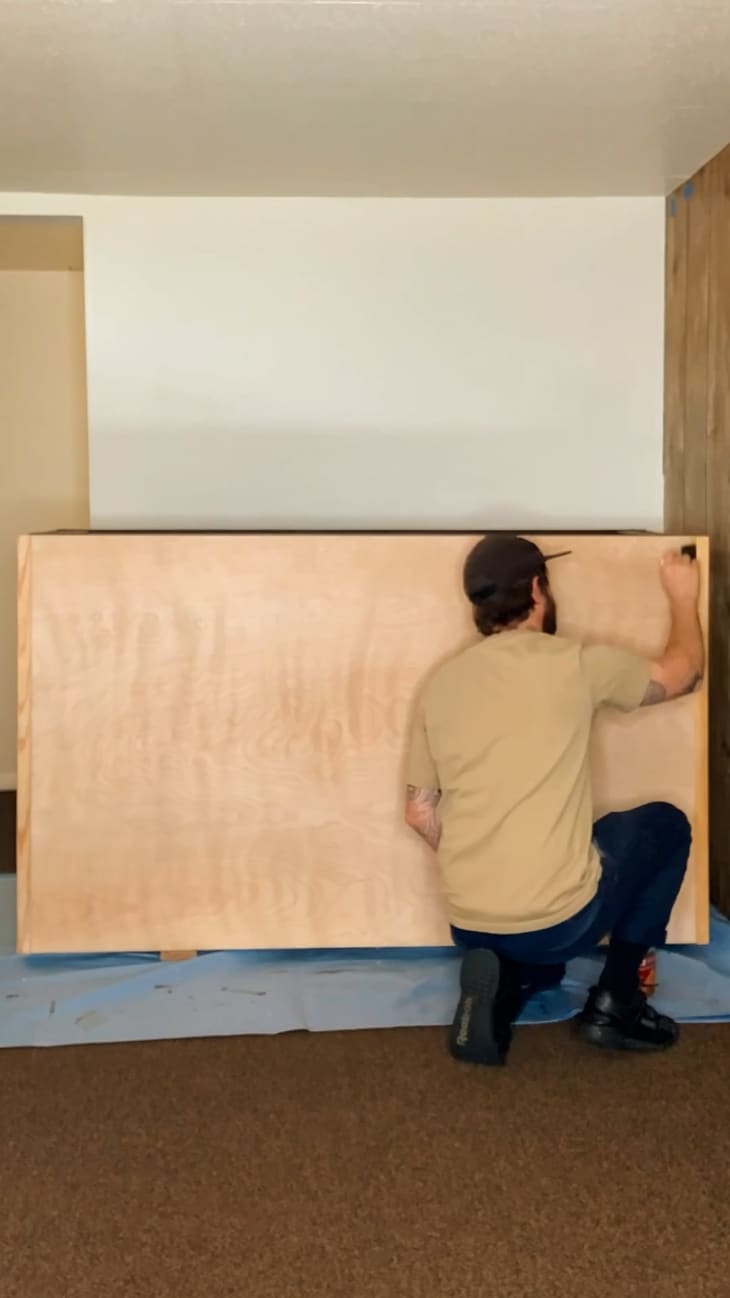
7. Attach the face pieces.
Once the base is painted and complete, it’s time to install the plywood shell to conceal everything. (My secret: Since one side of my own bar goes up against a wall and isn’t visible, I only covered the exposed side with plywood. If you’re planning on placing your own bar against a wall, I recommend this time- and money-saving shortcut.)
I used a brad nailer to attach those pieces on the front and side of the bar, but a hammer and finish nails would work just as well. There’s no need to buy an expensive tool for this part unless you plan on using it for multiple projects.
My best tip is to use minimal nails on this part since you will have to use wood filler to fill those holes in later. Stain always takes either a little lighter or darker in wood filler as compared to the rest of the natural wood, so the fewer nails you put in, the less noticeable discoloration you’ll end up with. You want the piece to be secure, but you don’t need to overdo it. I’d say a finishing nail every 8 inches is good here.
8. Add corner trim.
This will help hide any gaps and make the corners of your bar look perfect (even if they’re not). Glue and then nail these pieces in place so that they cover the entire corner on both sides of the bar.
This is a great time to fill in all your nail holes with wood filler.

9. Stain the bar.
Sand your plywood in the direction of the wood grain, wipe away any dust, then apply pre-stain wood conditioner. Follow that with the stain of your choice. Finish with a polyurethane sealer.
10. Attach your countertop.
Use screws to attach your bar top of choice to the frame by drilling into both from below. I used a 1 1/2-inch Formica top to keep with the ‘70s vibe (it’s 26”x67”), but literally anything could be used for this, including butcher block, or even a door from the hardware store that doesn’t have holes cut out yet for the knob. Another good source to find countertops are stores like ReStore where you can find something secondhand.
From there, you’ll just need to move your bar to your desired location. If you’re intimidated by this project, don’t worry — you can start your builds with something more manageable to get your feet wet. The first thing I ever built was a simple bookshelf, and now I just made a bar. Literally anything is possible. You can do it!