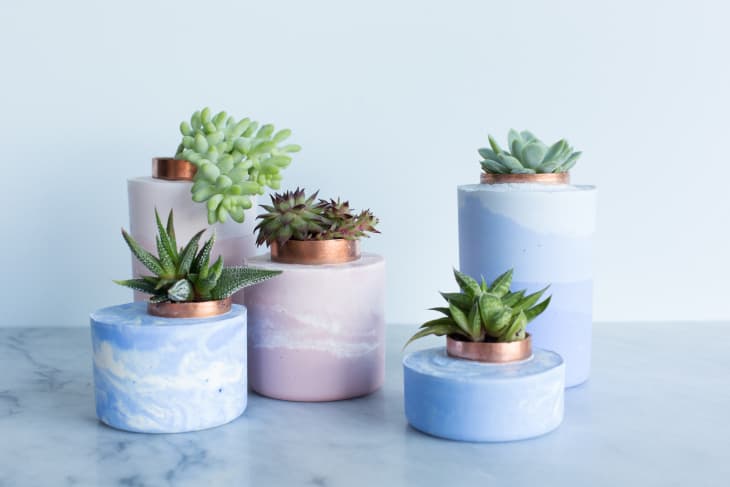
How to Make Modern Cement Planters

I started making these eco planters for gifts a year ago and haven’t stopped. They are simple, stylish and downright lovable. Each pot is unique and has an organic, handmade feel. It is not an instant gratification project and you will have to commit, but the results are well worth it. I like to make about six at a time.
What You Need
Ingredients
Cement (it’s the glue that binds the other ingredients)
Vermiculite (you can use sand instead, but the planters become very heavy)
Peat moss, pearlite, gravel or rock (add for fun!)
Materials and Tools
Gloves
Apron
Food containers
Plastic Bucket
Succulents
Shovel
3 – 9 x 12 pieces of sheet metal or plexiglass. (Approximate 9 x 12. Just an easy size to work with.)
Needle nose pliers
Scissors
Sand paper
Drill
Instructions
The ratio is one to four. One part cement and 4 parts anything else. To make six different sizes of planters shown here, we used 4 cups white portland cement and 16 cups vermiculite.
1. Collect recycled food packaging for molds. Pay attention to unusual shapes. Wash them and spread out to find proportional molds. For instance, a cottage cheese container in an ice cream container works well.
2. Combine the dry cement mixture in a plastic bucket using one part cement, and 4 parts vermiculite. Use gloves when mixing.
3. Slowly add water as if you were making dough, being sure to add the last part of water slowly. Humidity can affect how much water you need. It should be the consistancy of peanut butter. (It looked too dry to me but you will be suprised.) The mixture should clump in your fist and hold its shape. We used a drill to mix the materials but a shovel will work if you don’t have one. Be sure to wash it immediately after mixing.
4. Transfer mixture to one of your recycled containers.
5. Tap the container on your work space to make sure it settles in until the top is flat and even.
6. Push a smaller container into the larger one. Remove the displaced cement mixture and put it back in your bucket. I like to put it in off center to give it that cool modern look.
7. Place the sheet metal on top and flip it over. Move the container back and forth to get the top nice and flat. Leave to dry for at least 24 hours
8. To remove the molds, tear off the outside mold if it is paper or use a knife to cut off plastic molds. Pull out the inside mold with pliers.
9. Sand the edges smooth
10. To create drainage, drill holes in bottom. Let dry for at least two days before drilling.
11. Plant a succulent!
(Re-edited from a post originally published on 11.17.2010 – CM)