
Remodeling Secrets: Tips For Installing Encaustic Cement Tile
All this week we’re talking about bathroom renovations, starting with Ashley’s recent remodel, and following up with tons of helpful posts about the process!
Cement tile is a Pinterest dream come to life. Installing it, however, can be tricky if you don’t plan ahead and do your research. If you’ve laid ceramic tile before, you’re headed in the right direction — but there is still much more to learn before you start. Think of cement tile as ceramic tile’s dramatic, entitled, spoiled cousin who is allergic to everything. But man is it beautiful at the same time.

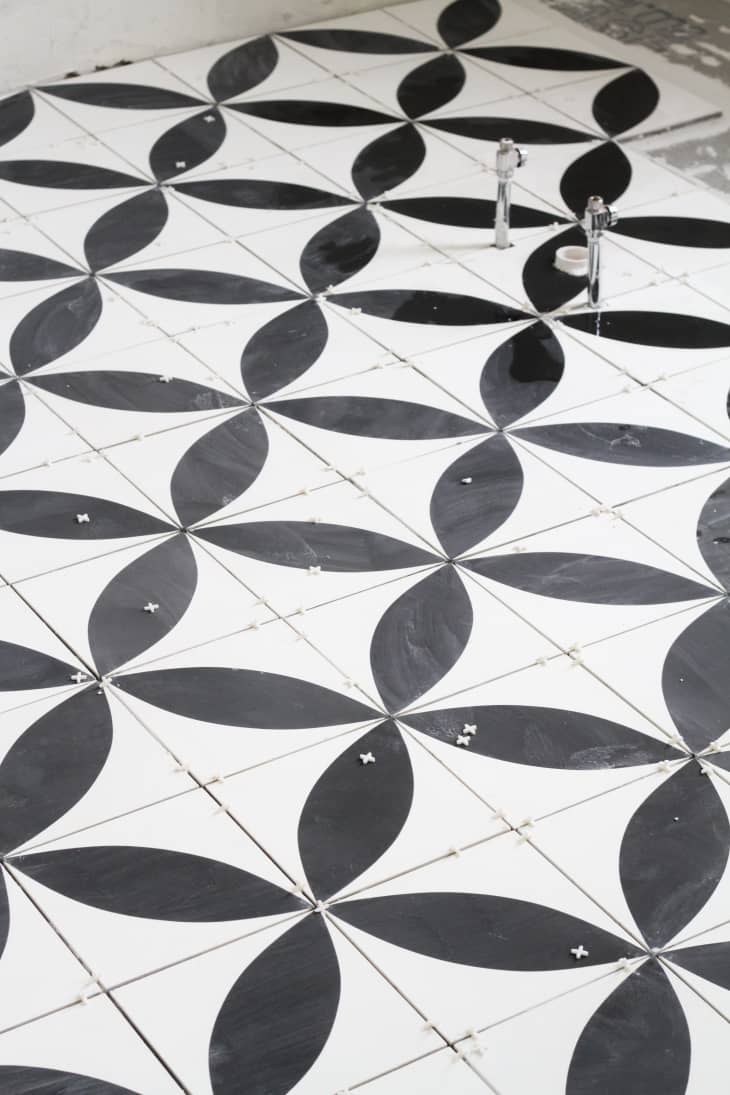
I used Clé Tile’s Big Dane pattern for my bathroom floor. If you’re not familiar with encaustic cement tile, it’s a beautiful product. Thicker than the average tile, they are all natural. Because each is handmade, there are also a lot of so-called imperfections — variations really — in color, thickness, and edging. The result is fantastic, but it does make for a harder installation job.
Use The Best Tools You Can Afford
- Don’t opt for one of those super cheap tile cutters.. You’ve splurged on your gorgeous tile, buy (or rent) a tile cutter that will do the best job possible — and don’t skimp on the diamond blade either!
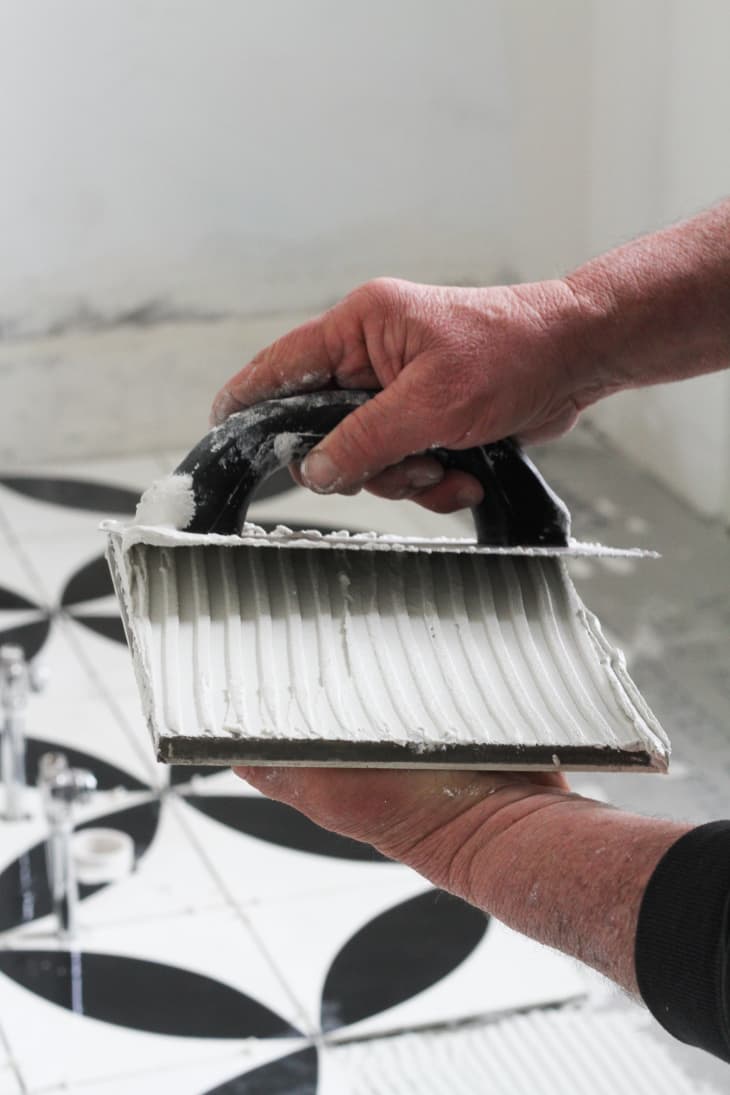
- Have a large assortment of buckets and sponges to use during the install. We didn’t have any water on the level of the house we were working on, so we had five buckets of water at all times, and changed them out for clean water often. Cement tile soaks up anything and everything- you want to keep it as clean as possible as you go. Don’t think you can get away with sending in the clean up crew afterwards.
Watch Tons of Tutorials

Keep it Clean
- This is the key to having your tile job look amazing when finished. Any little thing can (and will) stain your tile, so if you spill or slop something, wipe it up right away. Once you are finished, be sure to completely cover the tile to protect it while working on any other construction projects.
- Before you even mix the mortar, be sure you’re prepared with lots and lots of rags. We’re talking lots, like, go through all your old t-shirts and cut them up so you can continually swap out the dirty ones for clean ones.
- DO NOT use pencil to mark any parts of your tile that will be installed. Pencil marks are surprisingly impossible to remove from cement tile. We made this mistake and were able to lighten the marks with an eraser, but they never completely went away.
- Keep a flat-head screwdriver close when your laying the tile, it fits perfectly between the joints to quickly clean out excess mortar that might squish up in the grout lines. It’s also useful for prying up tile off of the thinset if you wind up laying it down in the wrong place.
- Work as a team. One of us would butter and lay the tile and move on while the other came behind and leveled, set the spacers, and cleaned up. This kept things going at a good pace and kept all the excess thinset that was on the tile layers’ hands from getting on the tops of the freshly laid tile.
- Use any other color except for red when snapping your chalk line. Just trust me on this one.
When In Doubt: Ask Questions!
- Most manufacturers have experts available to talk you through any questions you might have —whether it’s about the tile itself, types of grout, or sealant. It’s possible that I called four or five sealant companies before settling on one specific brand. I wanted to have a complete understanding of what I would be using before committing to the product. Again, Clé Tile’s Resources page is an excellent source.
- Call someone who knows. My dad knew the answers to many of our questions and — better yet — came over and helped! We couldn’t have done this without him. (Thank you so much Dad!)
Follow Directions To a T! Don’t Rush the Process
- There are so many steps to installing cement tile — from the cement board under the tile to the grout release you apply before actually applying the grout. Each step takes time (and most steps take at least 24 hours). Allow for each of these steps to cure completely before moving on to the next step to ensure you don’t ruin the finish on your tile.
- Plan on your tile install taking 2-3 times longer than you anticipate. Take your time and do the job the gorgeous tile deserves.
None of this is meant to scare you off. It is however meant to help you along your journey. We could have hired an expert, but instead we tackled the job ourselves and are elated with the results. Now, go forth and lay some excellent cement tile!