
How To Make a Clementine Candle
It’s that lovely time of year again, when even though the weather is getting colder, bright little boxes of clementines start popping up in store windows. Now is their season, and it’s ours to exercise a little bit a of will power and optimism in the dark.
I learned this fabulous little party trick when I was a school teacher years ago (thank you Ana Opitz!) and have been showing other folks how to do it for years. It’s ALWAYS a crowd pleaser. I’ve updated the whole post and combined all the elements from instructions to slide show to video. Here’s also a nice clip of how to lay them in water for optimal effect. Enjoy!
Turns out that clementines are also a hugely popular fruit in Japan and are given as meaningful gifts during the winter season. When a local Japanese production company saw this post a few years ago, they asked me to show it to their viewers on television. So, I posed for the cameras, and then they went in for their closeup on the clementine. I made nearly half a dozen for their cameras before we were done.
I realize that many people still may not have heard about the beautiful Clementine Candle and that others may wonder how it’s done. Since making one is easier shown than written, I have included a photo step by step and a video of how it’s done.
Try it yourself!
What You Need
Materials
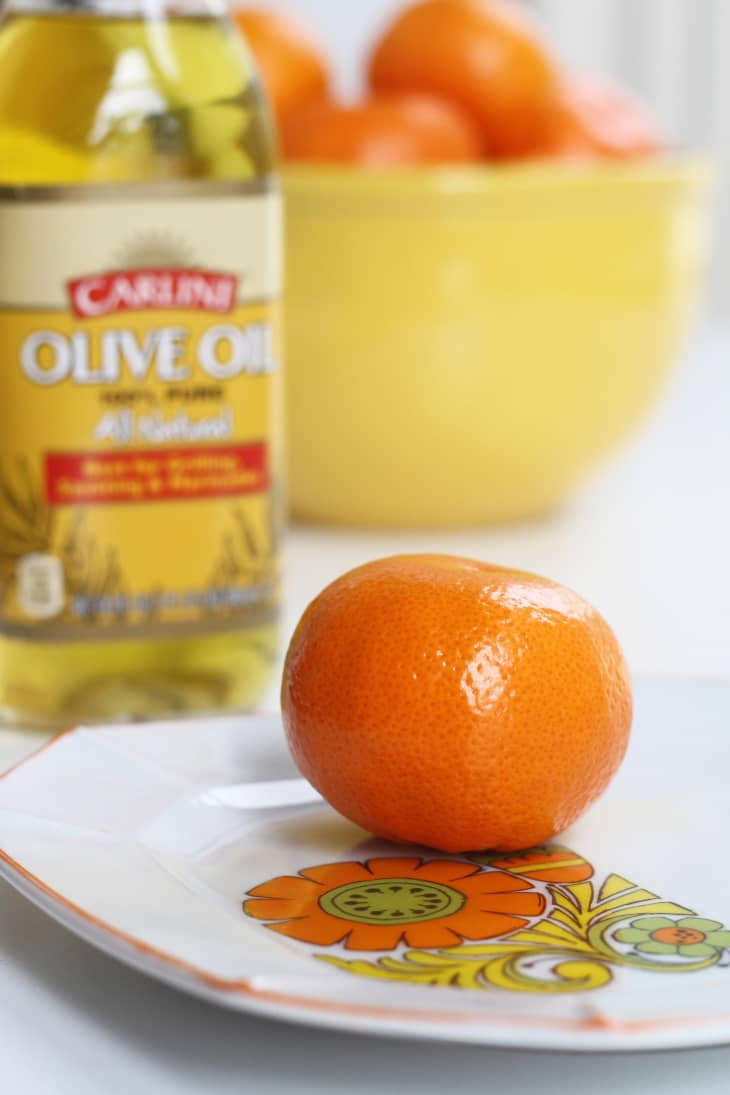
- 1 clementine
- Olive oil
- Many matches
Tools
- 1 sharp paring knife
Instructions
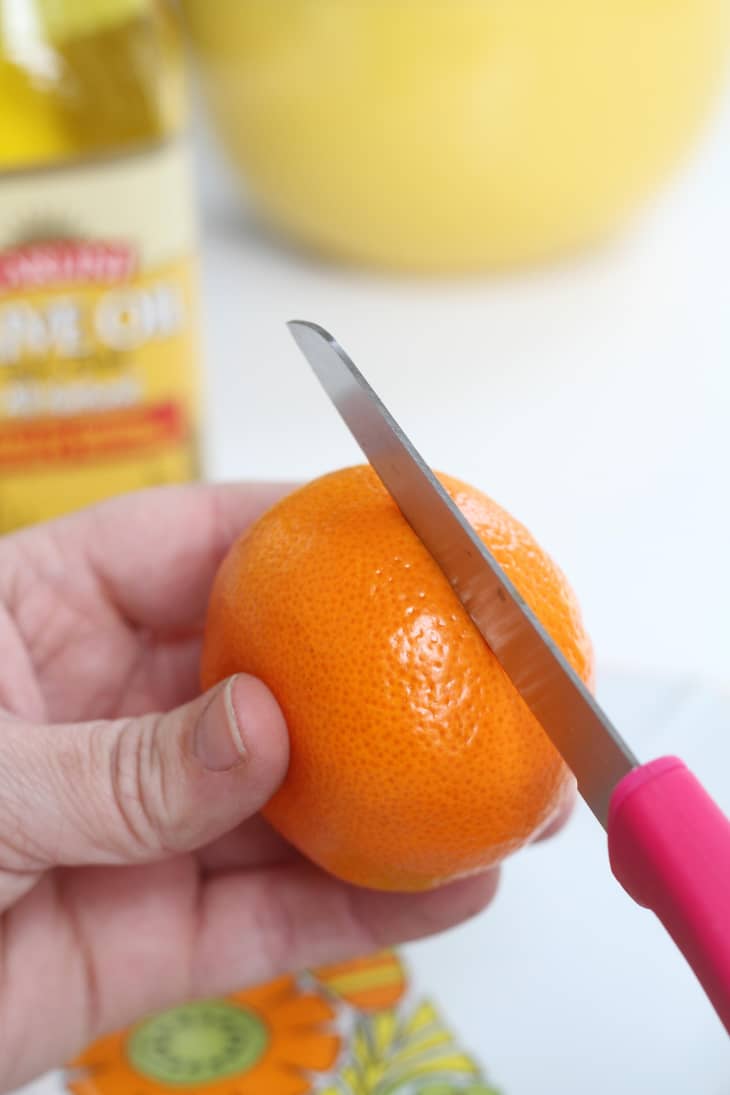
Starting with a nice soft clementine, score it with your paring knife around the center so that you are able to gently peel back the skin.
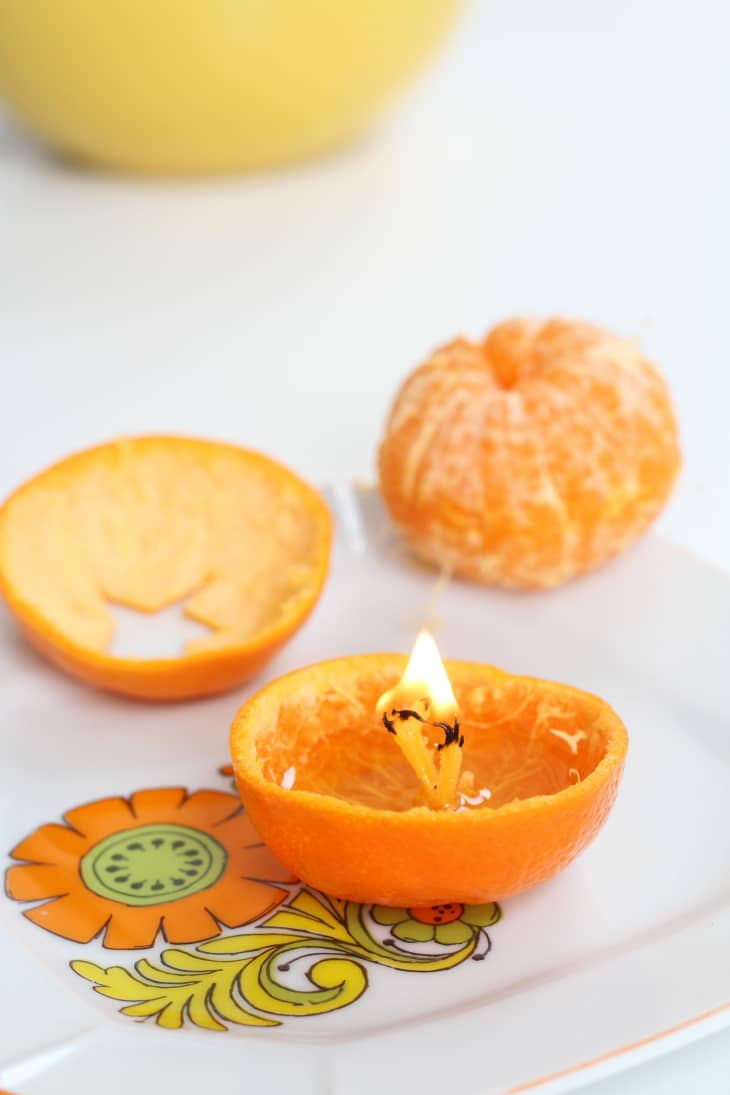
Without ripping the skin you should be able to remove the top and bottom of the “globe” so that you have two empty cups of clementine peel. Eat your clementine. 🙂
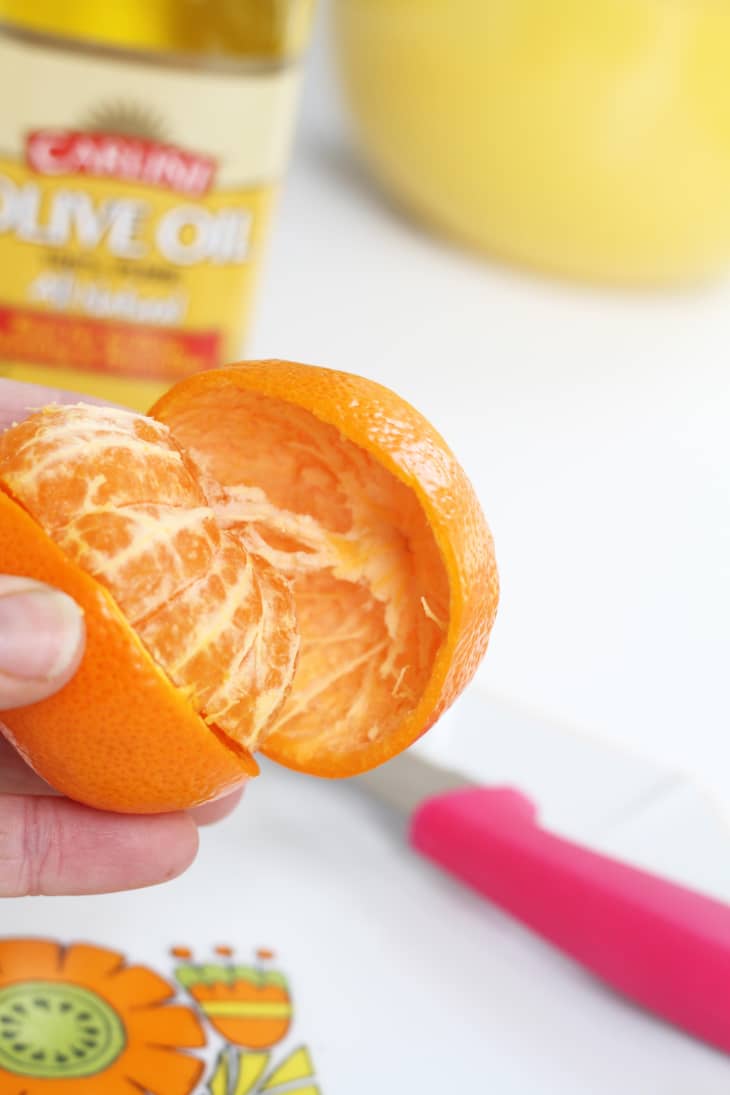
One of your cups will be from the bottom of the clementine, and it will have a pip sticking up from the center of it from running up the middle of the fruit. This is your wick. Squeeze or twist the pip into a nice wick and then fill the bottom of the cup with olive oil so that it is absorbed up the “wick.” Wait a few minutes for this to complete.
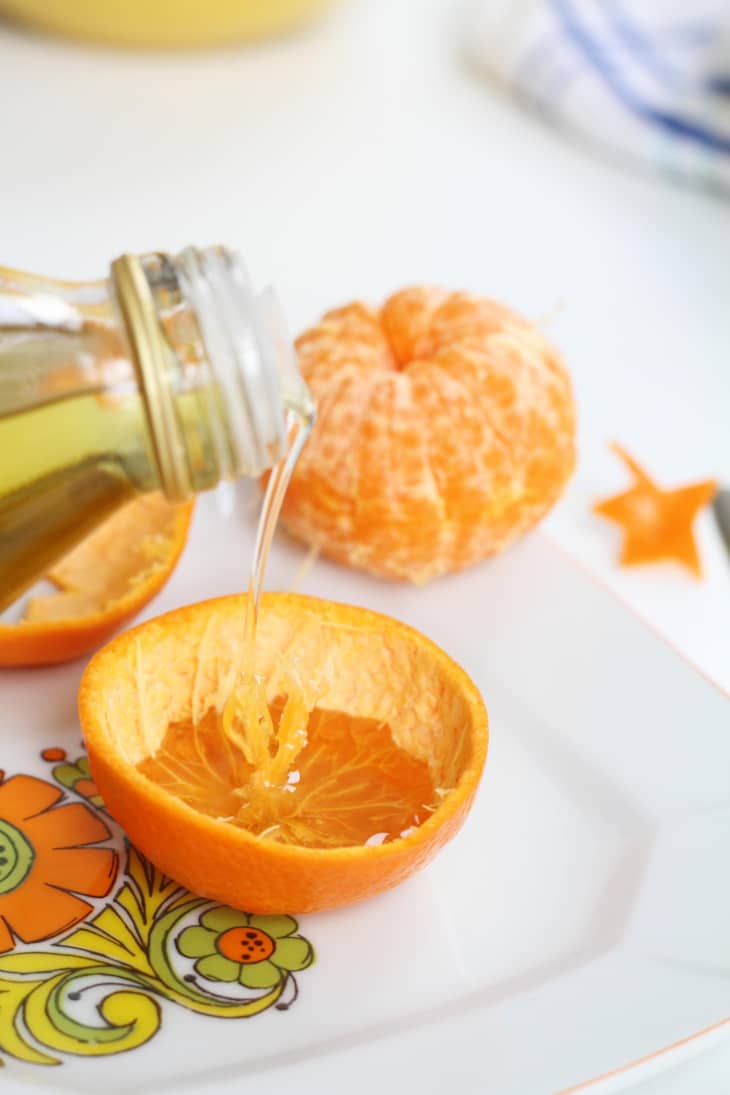
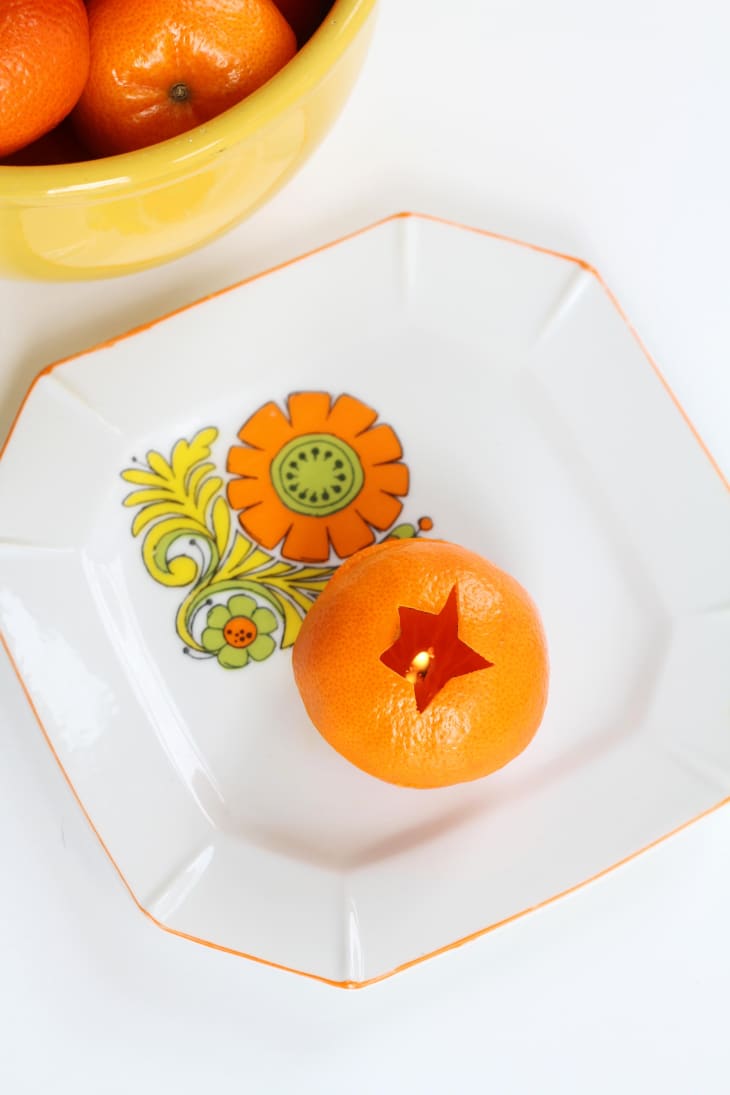
While waiting use your paring knife to cut a decorative hole in the top cup so that the heat can escape. Personally, I like to cut stars in the top.

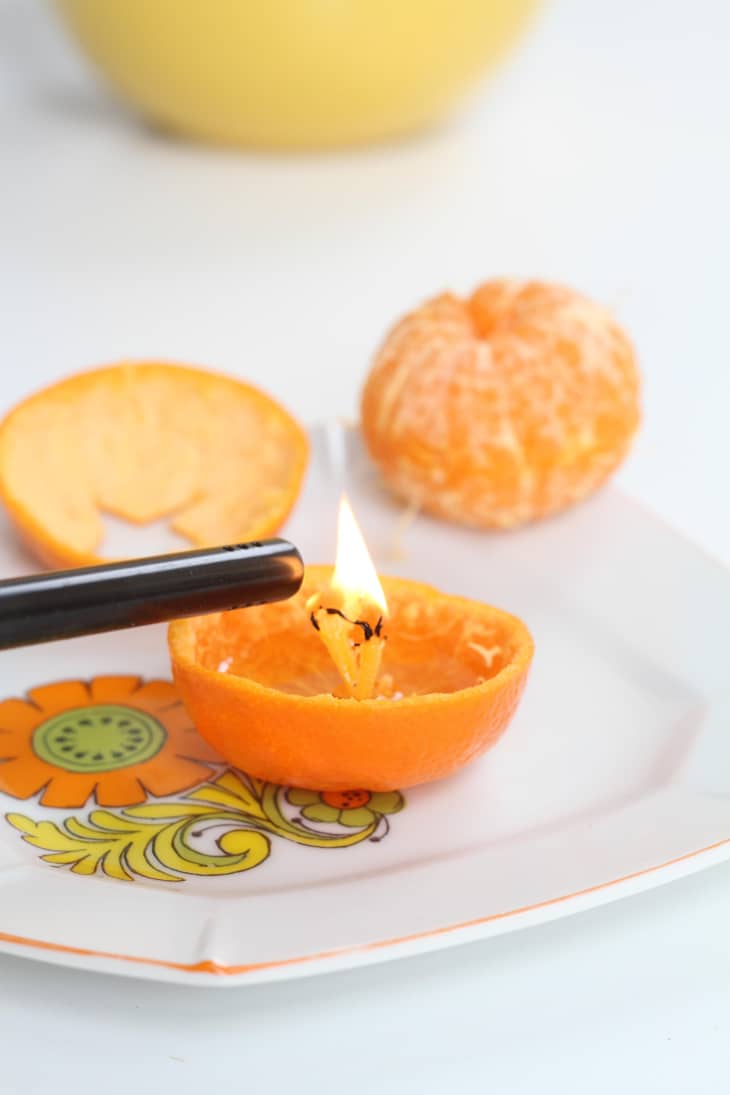
Returning to your bottom cup, gently light the newly oiled wick until it burns steadily. The wick needs oil to burn and will continue until all the oil in the cup has been used up. Pour oil directly on the wick if needs be.
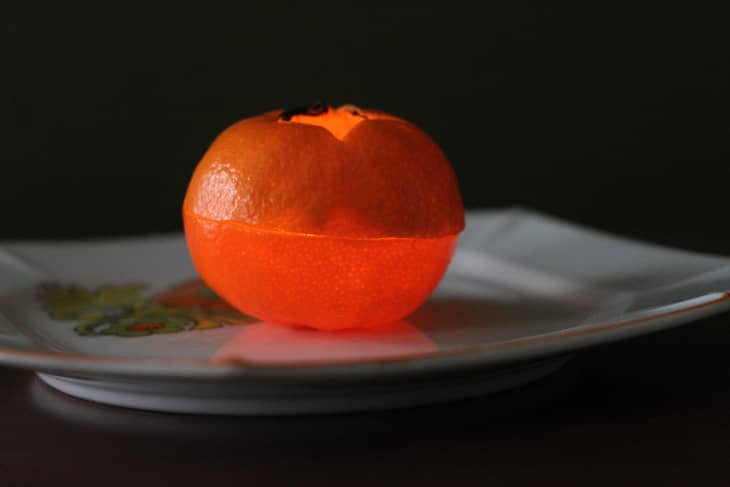
When burning steadily, gently place the “top” over the “bottom” and enjoy. The opening up top should allow the candle to burn without too much burning of the skin. A little burning is fine and the smell of clementine heating up is delightful. Blow out before bed!
NOTE: The tough part is getting the “wick” to light. You really need a nice bit of clementine “flesh” sticking up in the middle, which you then soak for a minute in the olive oil. If your clementine doesn’t have any flesh in the middle OR if you rip it, you’ll need to start with another one.
Subscribe to the Apartment Therapy Youtube channel for more inspiring video tips on how to make your home more beautiful, organized, and healthy.
Have a really great DIY project or tutorial that you want to share with others? Let us know! We love checking out what you’re making these days, and learning from our readers. When you’re ready, click here to submit your project and photos.
Related Links
- How To: Make a Pomegranate Votive
- How To . . . Make an Artichoke Votive
- What To Do with Clementine Boxes
- Clementines for Seasonal Entertaining