
Removing Old, Bulky Shower Doors Is Much Easier Than You Think
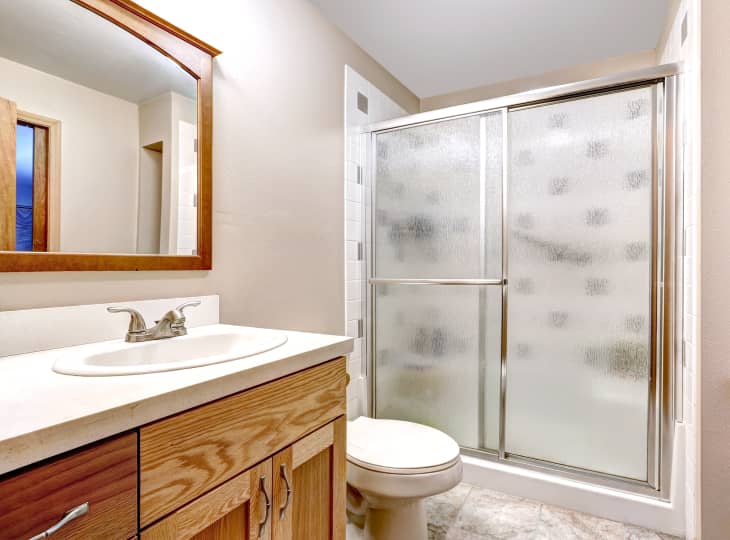
If you’ve ever wanted to get rid of your old shower doors and replace them with a shower curtain, it’s much easier to do than you think. There are many good reasons to switch them out: some are leaky or collect mold, and they also get in the way of cleaning and bathing kiddos.
A shower curtain eliminates all of these things and, even better, both a shower curtain and a shower liner can be washed when they get too dirty. Plus, when the curtain is left open when not in use, the bathroom feels so much larger than before. Don’t be daunted by the idea of leaving holes in the walls — you’ll be happy you took the plunge!
What You Need to Remove a Shower Door
Materials
- Caulk remover (I used Motsenbockers Lift Off in the gel formula)
- Curtain rod
- Shower curtain (a liner at minimum, plus outer decorative curtain if you like)
- Shower curtain hooks
- Silicone caulk
Tools
- Utility knife
- Screwdriver
- Plastic scraper or an old credit card
- Caulk gun
How to Remove a Glass Shower Door: Instructions and Images
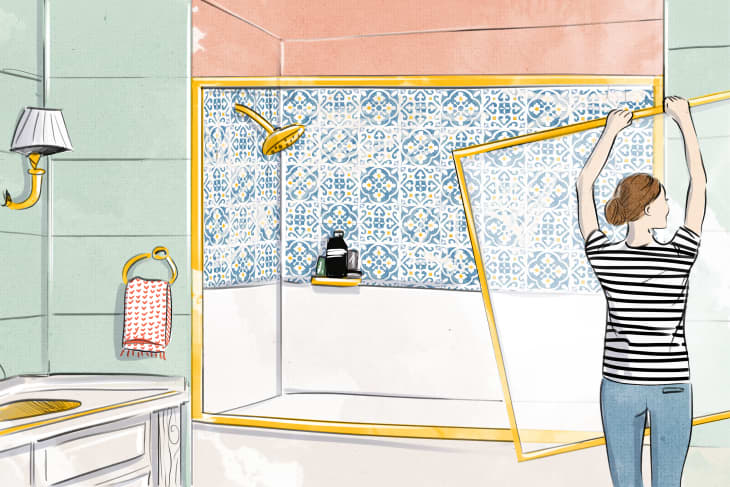
1. Remove shower doors from the track.
My shower doors lifted up and out from a top track. The doors can be heavy, so get help on this part if you need it.
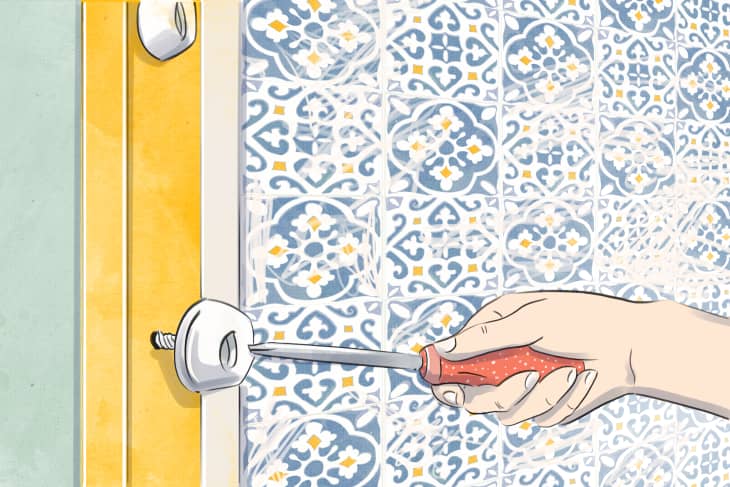
2. Remove screws from the shower door frame.
My frame had three screws on each side and zero in the bottom track (jackpot!). There actually was one small screw in the bottom track that was the reason I put off removing the doors for so long (in fear of leaving a hole in the bathtub), but it turned out to just be a set screw for the guide on the track.
So, if that’s holding you back, do a little investigative work to determine whether the screw actually penetrates the tub body.

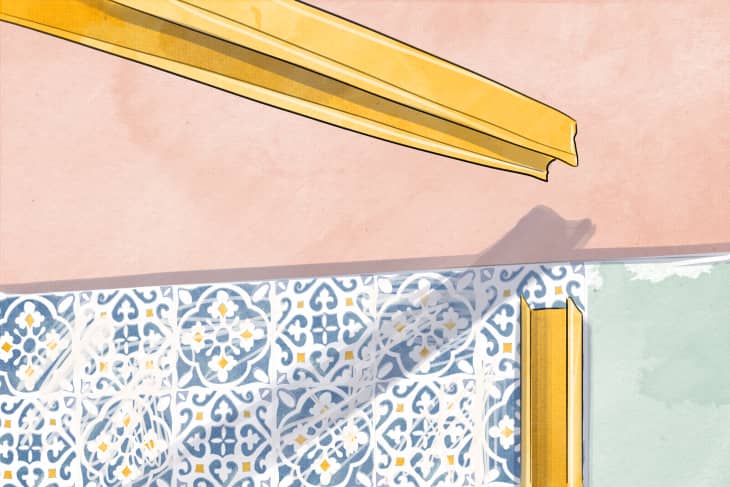
3. Carefully cut any caulked joints.
Use your utility knife to break the seal between the frame and the walls and tub. Be sure to hold the knife parallel to the wall and tub, not perpendicular. You don’t want to leave cuts in the wall and tub surfaces, you just want to separate the frame from the wall.
4. Pop off the top track.
My shower door’s top track was not attached to the rest of the frame at all, it was only sitting in place on top of the side frames. A simple jolt with the palm of my hand loosened it, and it lifted out easily.

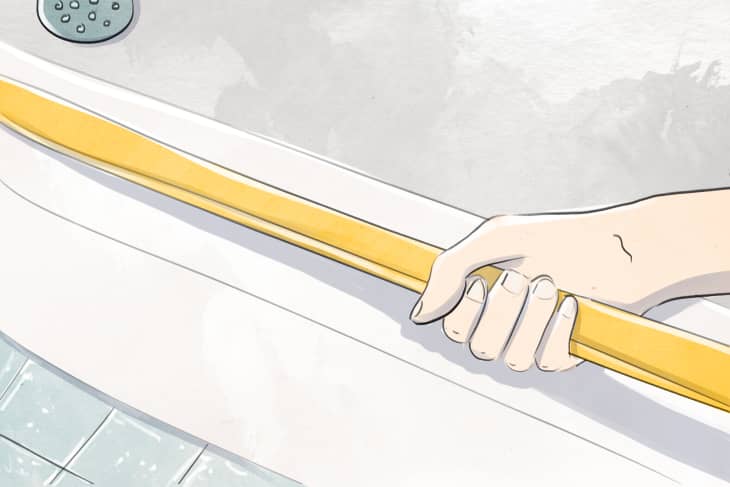
5. Remove the side frames.
Have your utility knife handy in case you need to cut a little more caulk as you pull the frames from the walls. There will be caulk left behind on the tile, but don’t worry.
6. Remove the bottom rail from the tub.
Prepare yourself — this is going to be yucky! But this moment is also liberating, seeing your tub free of cumbersome metal frames. Think of it as having braces removed!
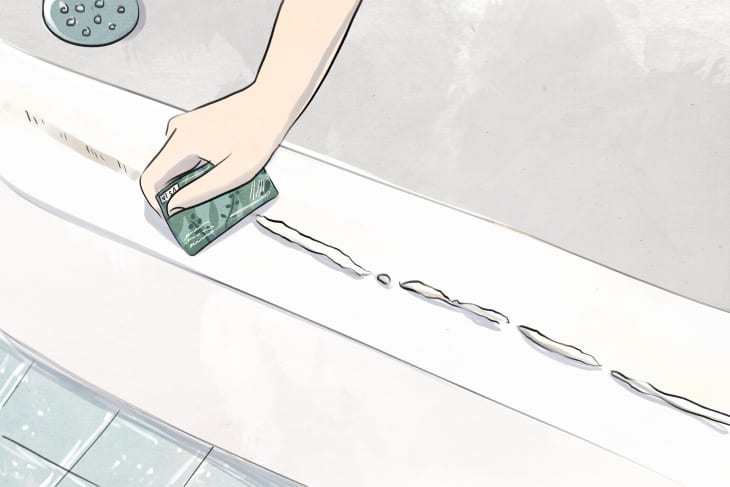
7. Scrape up excess caulk.
This is where an old credit card can come in handy — I found it most effective in scraping up the discolored caulking left behind once the door frames were removed. You likely won’t get all of the caulk removed in this step, but that’s okay! Just get as much as you can without damaging any surfaces.

8. Use caulk remover on stubborn spots.
I applied a gel to the strips stuck on the tub, let it sit a few minutes, then scraped again with the plastic card. As a side note, I skipped this step on the wall tiles, as my tiles are unfortunately painted. So, the caulk peeled right off of my walls, along with strips of paint, revealing pink tiles beneath the paint.
Because of this, I left strips of caulk on the walls in some places, as I plan to replace the tile down the road. In the meantime, I will likely peel off the rest of caulk and touch up the tile paint, but this wasn’t done as a part of this project.
Also, our tub surface beneath the old track is pretty rough, but any discoloration came off with this step. There are still pocks in the surface, but I far prefer them to the constantly-dirty old shower door frame!
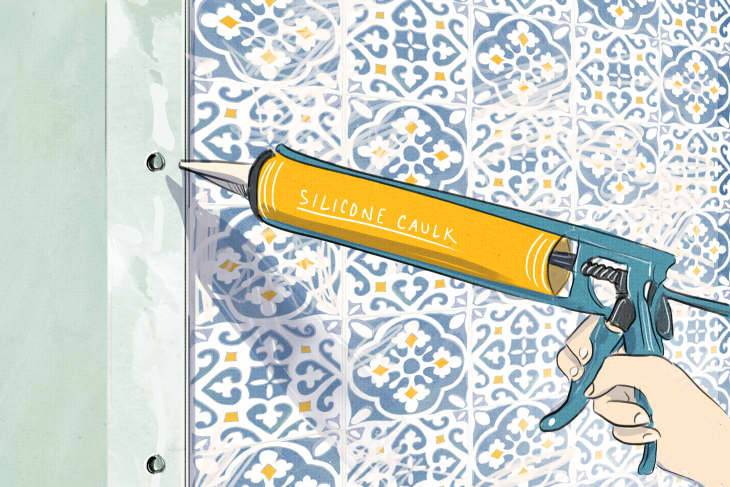
9. Fill in any screw holes in the walls.
This can be done in a few ways: with special plugs inserted into the holes or with silicone caulk matching your tile. I chose the latter and filled the holes with white silicone caulk. This is where the old credit card comes in handy again.
Fill the holes with silicone caulk, then remove excess with that nifty card! Allow the caulk to set for 8 hours before exposing to moisture. If the holes have plastic anchors in them (mine did), just pull them out with a pair of needle-nosed pliers before filling them.
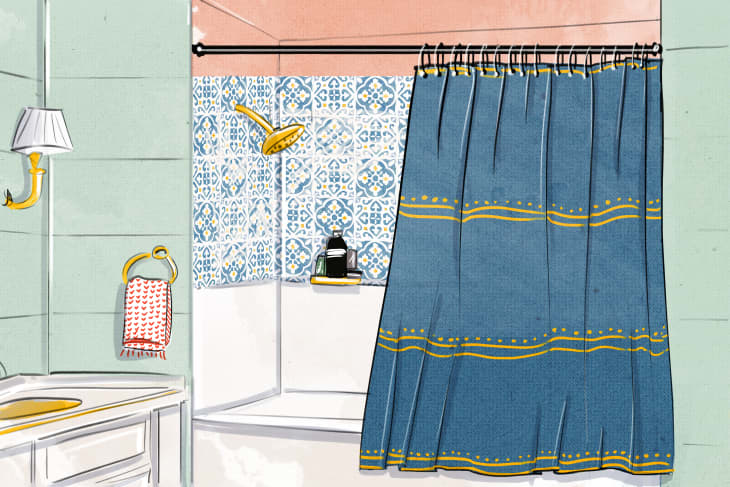
10. Hang that glorious new rod and curtain!
Helpful hint: Attach curtain hangers to the curtains before stringing them onto the rod. This way, you aren’t tottering up on the edge of the tub, wrestling twelve grommets onto clips.
FAQ About Removing Glass Shower Doors
How do you fill holes in shower doors after removing them?
After removing your shower doors, your tile, plastic, or fiberglass surround will feature several unsightly holes. Fill the holes with kitchen and bath silicone caulk that best matches the surround’s color. Here are some tricks:
- Be sure to clean any debris and dust from the hole first.
- The caulk will need something to stick to. If a plastic anchor exists in the hole, consider cutting off the top edge of it with a utility knife while leaving the bulk of the anchor in place.
- Overfill the hole and remove the excess with a putty knife to ensure a smooth surface when complete.
How do you take off the shower door bottom seal?
Most often, taking off your shower door’s bottom seal simply requires pulling it firmly away in a downward direction. However, some door seals may be held in place with adhesive, in which case, a heat gun or hair dryer briefly aimed at small sections at a time can help loosen the seal’s grip on the door. Simply heat a section, grip and pull the seal downward, and repeat until the entire seal is history.
Can you replace a shower door without replacing the frame?
In most cases, finding an appropriate replacement door is the most challenging part of this project. You can, in fact, replace just the door. However, you’ll need to ensure the door fits perfectly.
Bring your measurements to your local home center retailer, along with a photo or two, to make sure the one you bring home will fit nicely.
Can I remove my shower door by myself?
Technically, you can remove a shower door by yourself, and if you’re unconcerned about damage to the door, floor, or walls, that makes it even more doable. However, construction and remodeling expert Kristin Hintlian, co-owner of Bonsai Builders in Massachusetts, has tips for doing this safely.
Hintlian emphasizes the “importance of having a second person to stabilize the door and ensure safety” during removal. She also says that some painter’s tape along the door’s edges can provide even more safety when unscrewing and removing it and help avoid cracking or breaking, so you can reinstall it if that’s your plan.
How do you remove shower door glue?
Several products can help remove shower door glue from the tub and surround. Whichever you choose, wear safety glasses to avoid getting chemicals or particles in your eyes. Acetone (nail polish remover), latex paint remover, vinegar, spray lubricant, butane (lighter fluid), or even just water are all possible solutions.
The key is to loosen the material with the solution and remove the gunk with a straight-edge tool. “Always use a plastic scraper for adhesive residue to prevent scratching the surfaces,” Hintlian says.
Are my shower doors reusable after removal?
If you remove your shower doors carefully and they don’t suffer from other damage not caused by their removal, reinstalling them in the same spot — or another if you plan to reuse or upcycle them — shouldn’t be any trouble.