
15 Clever & Unusual Ways Magazine Holders Can Organize Your Life
Magazine holders — whether metal, cardboard, wood or some other material — aren’t just for corralling your issues of Dwell. They can keep papers and magazines neat and tidy, and hold mails, books, newspapers, documents, and files without taking up too much space on your wall or door. With so many ways magazine holders can organize your life, you can get creative and clever in just about every room of the house to make your life a little more organized.
1. In the pantry
Corral your canned goods by turning them on their side and stacking in a sturdy (perhaps metal) magazine holder. You’ll make more room in your pantry without having to install more shelves.
2. Veggie holder
Also in the pantry, use magazine holders to keep your onions, potatoes and other dark-loving veggies from rolling around and getting forgotten behind a bag of chips. Via Mimi’s Crafty World.
3. As an extra toilet paper holder
Extra toilet paper’s never really that attractive to display, but if you don’t have the space in your bathroom cabinets to store it, try stacking them in a magazine holder next to the toilet.
4. A compact gift-wrapping station
Install a sleek stacking wall-mounted magazine holder on the wall and use it to store small gift bags, folded paper, stickers, ribbons and other things you might need to wrap a gift. Narrow, it’ll fit behind doors and barely take up space. Via One Good Things By Jillee.
5. Curling iron holder for your vanity
Grab a decorative magazine holder in a pattern you love and use it to store your curling irons when not in use. Via Seventeen.
6. Curling iron holder under your cabinet
Or save countertop space by attaching a magazine holder to the inside of your bathroom cabinet doors to stash your curling irons and more. Via DIY n Crafts.
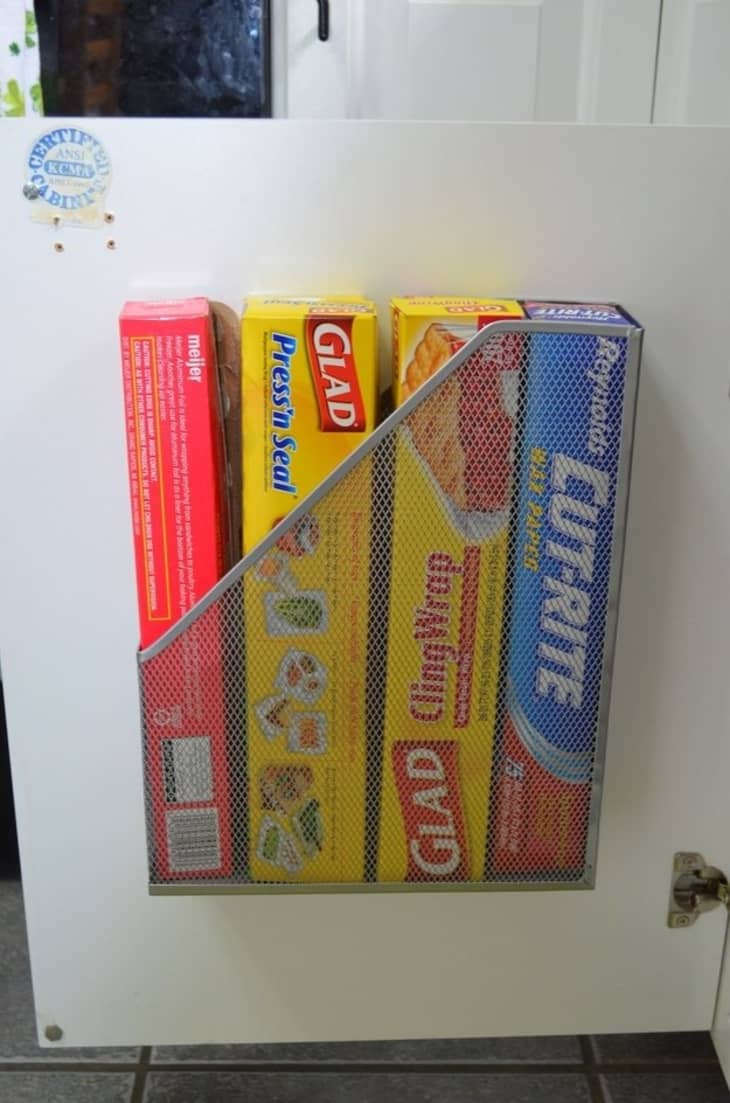
7. Plastic wrap box holder
Never lose your plastic wrap again and always keep your food fresh by attaching a magazine holder to the inside of a kitchen cabinet door or pantry door for easy access and a perfect fit.
8. Craft supply organizer
Craft supplies are notorious for being small and hard to manage, but tucking them away in boxes means sometimes forgetting what all you have. So instead attach magazine holders to a wall by their backs; you’ll create useful holders for supplies while still being able to see what you’ve got. Via Laughing Purple Goldfish Designs.
9. Flip-flop closet tamer
Don’t let those flip-flops and sandals run amok in your closet, tame them with ease by tucking them into magazine holders that fit snugly onto your shelves. Via HGTV.
10. Cutting board holder
Always find just which cutting board you’re looking for by attaching a magazine holder to the inside of a kitchen cabinet door for filing ease. Via The Kitchn.
11. Wall-mounted corner side table
Grab a wooden magazine holder and turn it on its side for a perfect fit within a corner to become a shelf and tabletop, all in one. Consider stacking and installing multiple ones in a corner for a great composition. Via Design*Sponge.
12. Compact coffee table
This smart IKEA hack transforms a handful of magazine holders into a small but modern coffee table. Via Ikeahackers.
13. Mail sorter
Don’t let your mail pile up and get all messed up; keep it organized by having a magazine holder installed for every member of the household who receives mail. Via The Organized Housewife.
14. Wireless router hider
Hide an ugly wireless router discreetly with a decorative magazine holder! Via Design O.C.D.
15. A paperwork organizer
Never lose a bill again and always stay on top of your paperwork by using wall-mounted magazine racks as a visual filing system.
Are you using a magazine holder in a really unusual and clever way around the house to keep you organized? Share your ideas in the comments below!