
Not in Love With Your Backsplash? We Tested Adhesive, Removable Smart Tiles
“Renew your room in less than three hours.” That’s the tagline on the Smart Tiles website, where you can find their range of self-adhesive and removable tiles. I’m always wary of any promise of simplicity, as there are often a bunch of tools involved in a project—tools that I would never own—or the project itself isn’t beginner-friendly.
But the Smart Tiles website promises their product can be installed without any mess (yay for adhesive products for renters!) or special tools, are easy to clean, and resistant to the heat of stovetops and humidity of bathrooms. A quick search online also generated some positive reviews. As a renter, I found those all reaffirming, so I thought I’d give them a try.
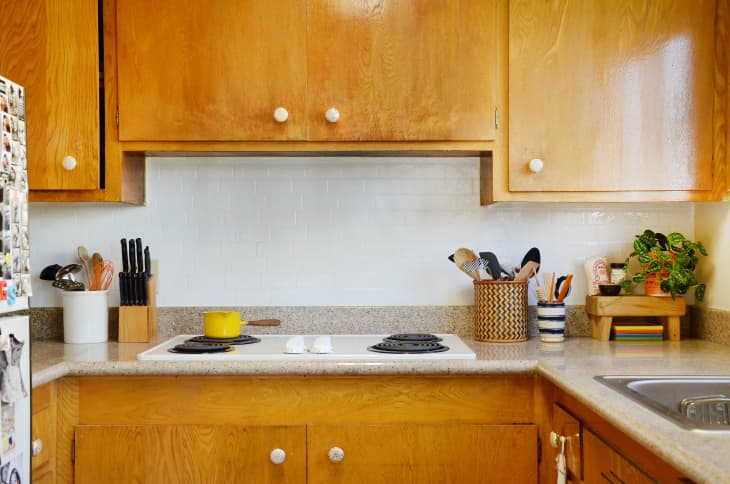
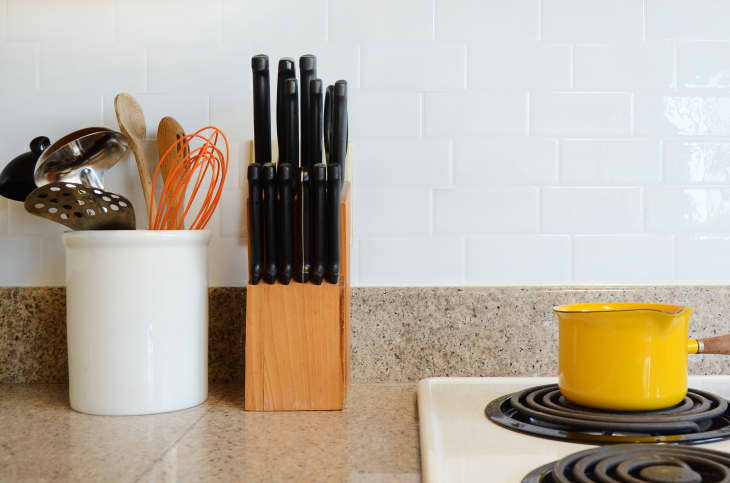
My partner and I immediately decided to test these on our kitchen backsplash, which was previously covered in that “landlord white” paint that is all too familiar to renters. Smart Tiles’ claim that removal won’t damage your wall put us at ease, and we decided to tackle the project on a Saturday afternoon. We chose the clean and sleek “Subway White” tiles, as they would allow the natural wood cabinets to stand out and felt more timeless.
Preparation
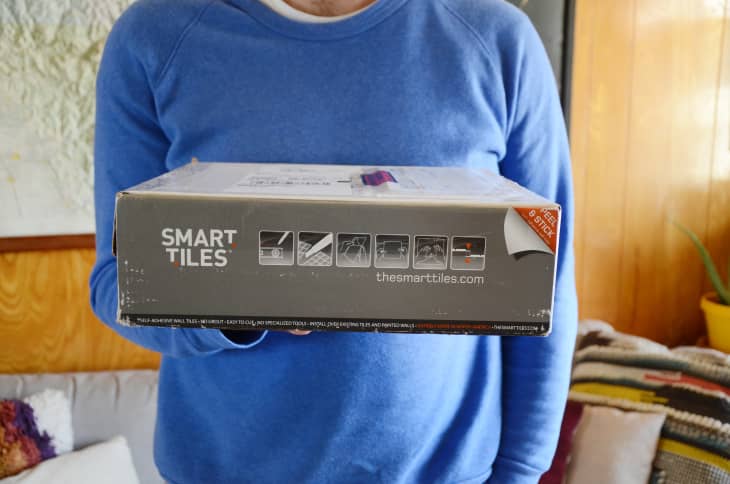
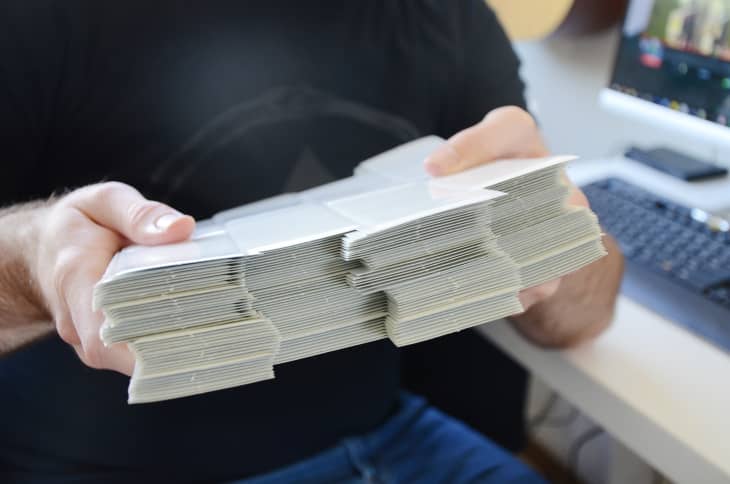
When I found the Smart Tiles package at my doorstep, I was surprised at its size. Inside the box were 42 tile sheets, each one measuring 10.95in x 9.70in. Upon opening the package, I looked for instructions but shortly realized they weren’t included. However, their website featured the four steps for installation: 1) Clean your wall; 2)Trace Your Guidelines; 3) Measure and Cut; and 4) Peel and Stick. Sounds easy, right?
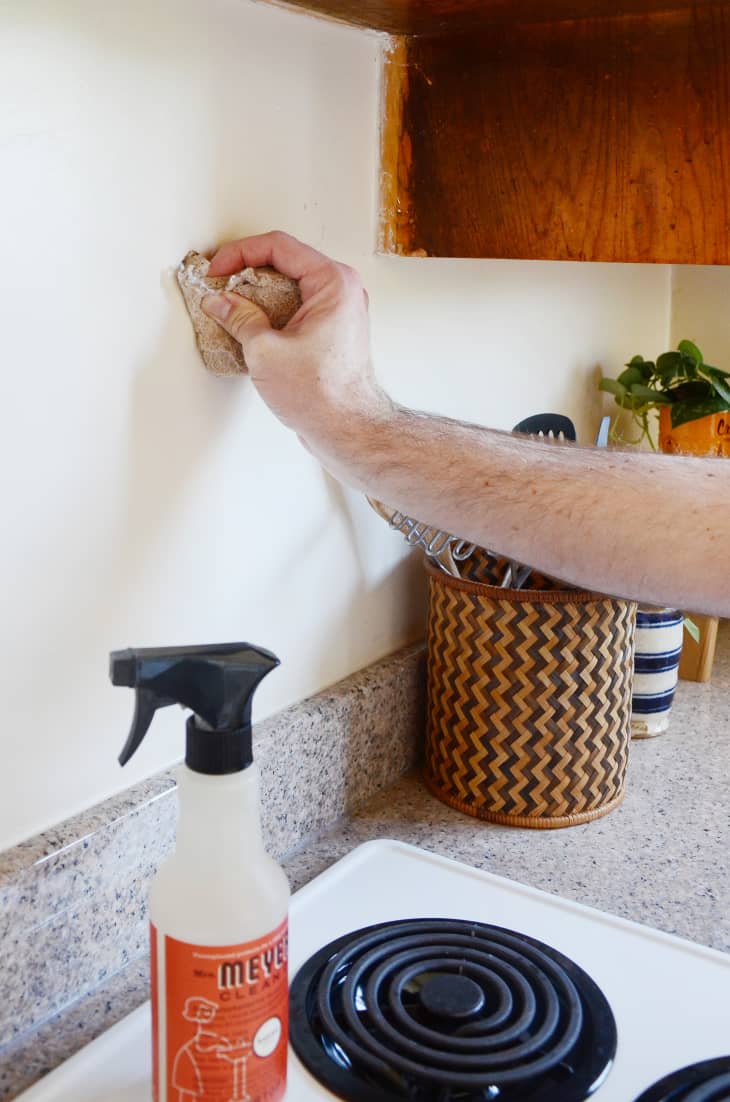
In order for the Smart Tiles to properly adhere to the surface, it needs to be clean and dry. We’re embarrassed to admit that the longest and hardest step of the process was cleaning our backsplash wall. It was covered in old grease, small oil droplets, and even dust in some areas—we felt terrible for neglecting it for so long. So, we grabbed a sponge, a few dry towels, and followed these instructions to get cleaning. After about an hour and a half of scrubbing, we finished and were ready to stick the tiles to the wall.
Installation
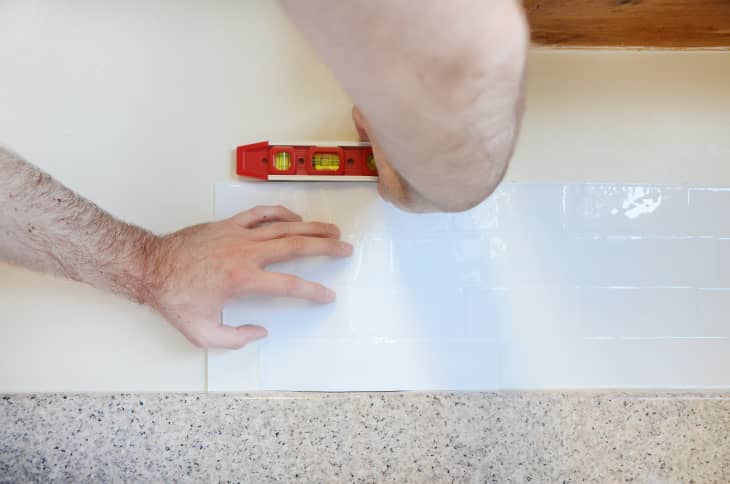
After the wall was clean and dry, we made sure we had enough tiles to cover the wall. We measured the tiles, and determined we’d use around 25 sheets. Using a pencil, we added a few very light guide lines on the wall to make sure they were going on straight. According to Smart Tiles, the only materials needed are a piece of chalk or a pencil (to draw guides), a level, and a box cutter.
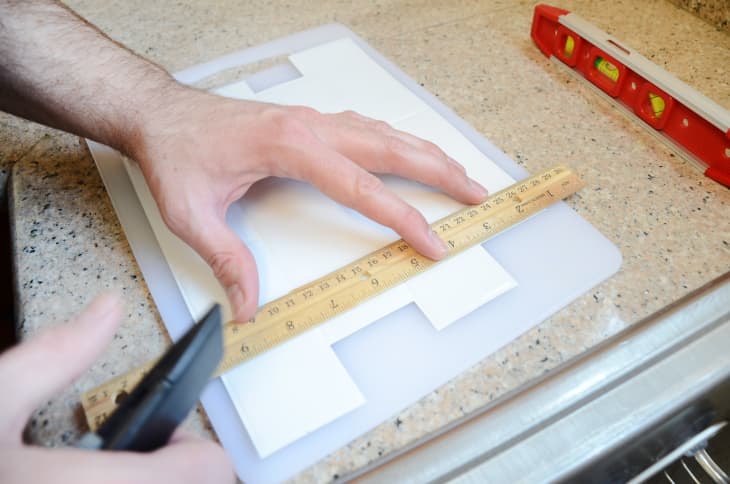
Cutting the tiles was simple. Using a ruler and box cutter, we cut one side so that the piece would align to the corner of the wall. Since the tiles are so thin, this wasn’t very difficult, and it got easier with every sheet.
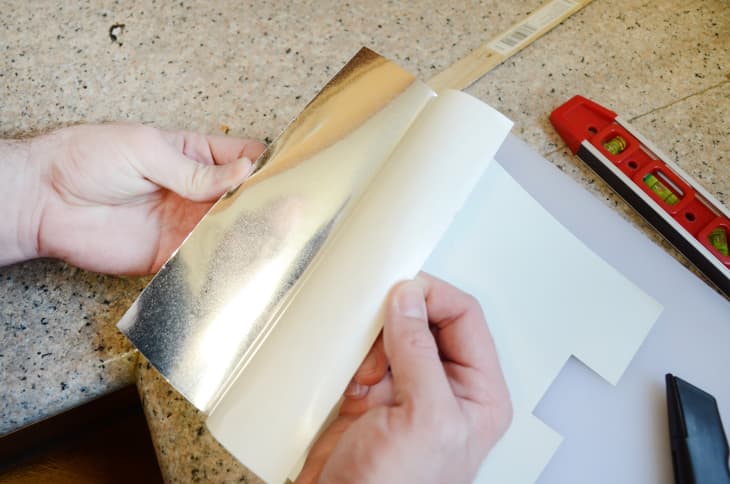
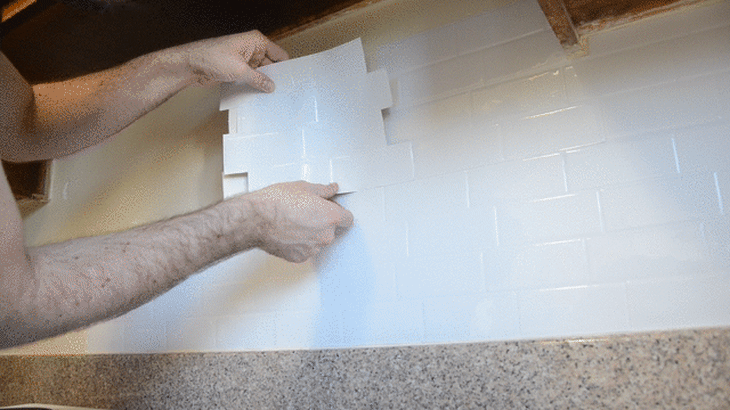
Smart Tiles has a handy video on the website, illustrating how to install the tiles. Basically, you fold back half of the protective paper and align the exposed adhesive portion with your guides, and peel off the rest of the paper as you press it down. That really was all there was to it.
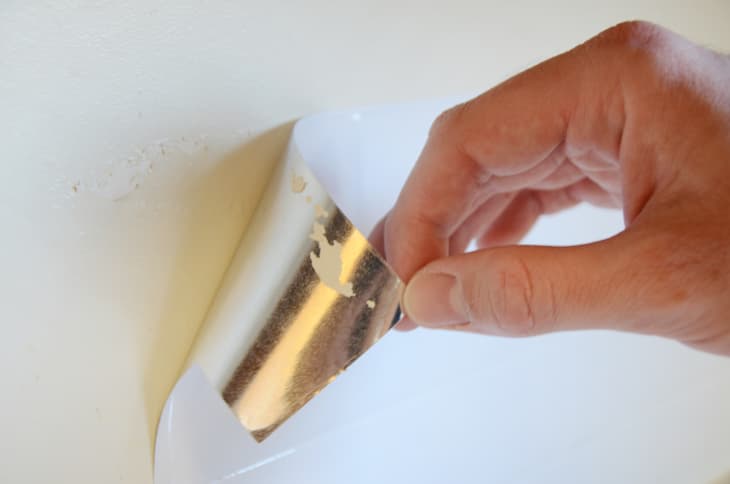
We made a mistake as we stuck the first Smart Tile sheet to the wall (it was slightly crooked), so we had to remove it. As soon as we peeled off a corner, it removed a bit of paint from the wall. Admittedly, our kitchen might not have the highest quality paint, but we were caught off guard when we saw the chips of paint on the adhesive. This went against the Smart Tiles claim that removal will not damage the wall. (However, they recommend using a blow dryer to heat up the adhesive before removal which I didn’t test.)
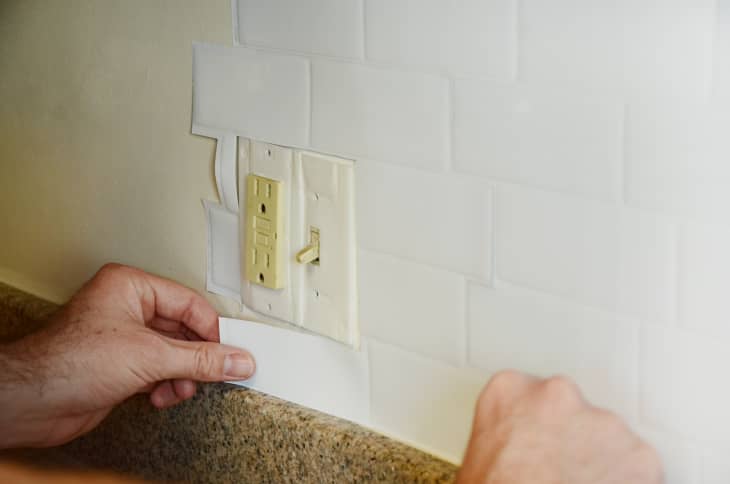
A few sheets in, we started to get the hang of placing them, and it got easier with each piece. We had to use our basic geometry skills when placing them in corners and around the outlet plate. For that step, we removed the plate and traced it onto the Smart Tile sheet, and measured as accurately as possible to make sure it’d fit into place just fine. Luckily, it did and we were successful on the first try. This was the trickiest part of installation.
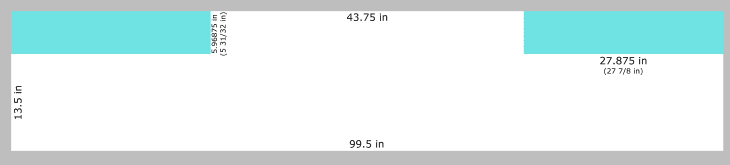
It took us about an hour to finish installing the Smart Tiles. We used about 25 sheets total. For reference, here are the dimensions of the wall we covered with Smart Tiles.
After Installation

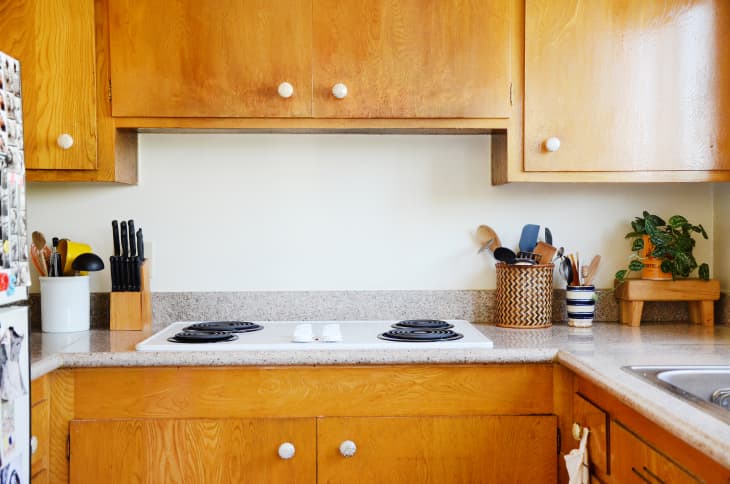
As soon as we finished installing the Smart Tiles, we felt like we had a brand-new kitchen. Since the adhesive sheets dry immediately, there was no wait time. The tiles add texture to the previously lackluster wall, and they even bounce some of the natural light into the space—brightening it even more.
Smart Tiles claims the sheets are easy to clean and maintain, and that they will never yellow or crack. The crevice between each “tile” on the sheet isn’t very deep, so it’d be difficult for grease or other funky stuff to get stuck in there.
Cost
Obviously, cost is an important factor to consider. In our case, we ordered 42 Subway White sheets, which came to a total of $335.58 (at $7.99 each). We actually ended up using only about 25 sheets, which would have cost $199.75, but I’d suggest getting a few extra sheets. Depending on the installation method, installing Smart Tiles may be more cost effective than installing an actual tile backsplash, as it doesn’t require a professional contractor. We think the cost is worth it, as it did visually improve our kitchen, and we get compliments from our guests.
Summary
Smart Tiles Product Used: Subway White
Associated Cost: $335.58 for 42 sheets, though we only used 25 sheets, which cost $199.75 without shipping.
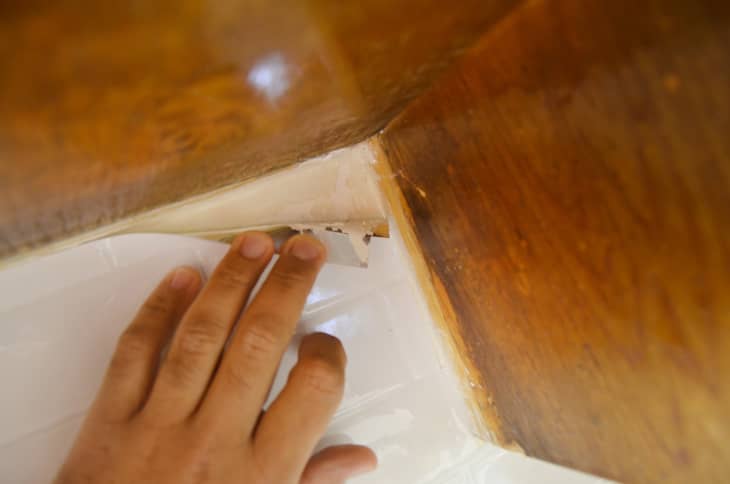
Dry Time and Removability: The tiles stuck to the wall immediately, and were removable, though a few sheets damaged the wall when I readjusted them. The sheets seem to be secure, and though it’s just been a couple of weeks, show no sign of warping or peeling. A couple of weeks after installation, I peeled the corner from a sheet and it removed a bit of paint (see above). Since we have no intentions of removing it for now, I stuck it back on the wall and the adhesive still held.
Takeaways
- I recommend going into a store and buying a sample (if possible) to test on your desired surface. Currently, Smart Tiles are sold in stores throughout North America—including Lowes and Home Depot—so if you’re nearby, go check it out. They’re also sold online at Wayfair.
- If you rent (like we do), it might be a good idea to get permission from your landlord before installing, as it can potentially damage the paint. In our case, it did a few times.
- Installation was easy, and required tools most people have around their homes: a ruler, level, and a pen or pencil. Preparing the wall for the tiles was actually the biggest time suck, so this project can be completed over a weekend—one day for cleaning and preparation, and one day for installation. We spent about an hour and a half cleaning the surface, and one hour installing the Smart Tiles.
- I suggest buying a few extra sheets, just in case.

Final Thoughts
Smart Tiles are a great solution for those of us who don’t have experience with home improvement projects, as installation doesn’t require a contractor or professional. They’re easy to install, and securely stick to the wall as promised.
The selection includes some sleek and modern options (I also loved the Hexago sheet), as well as more traditional patterns. I wouldn’t consider Smart Tiles fully renter-friendly, as they did chip off some of the wall paint a few times. That negative aside, our kitchen does feel brighter and looks more beautiful than before, so we consider the investment worth it.
Have you used Smart Tiles? We want to know how it went! Thinking about trying it out? Give it a shot and let us know what you think, or post your questions below before trying it!