
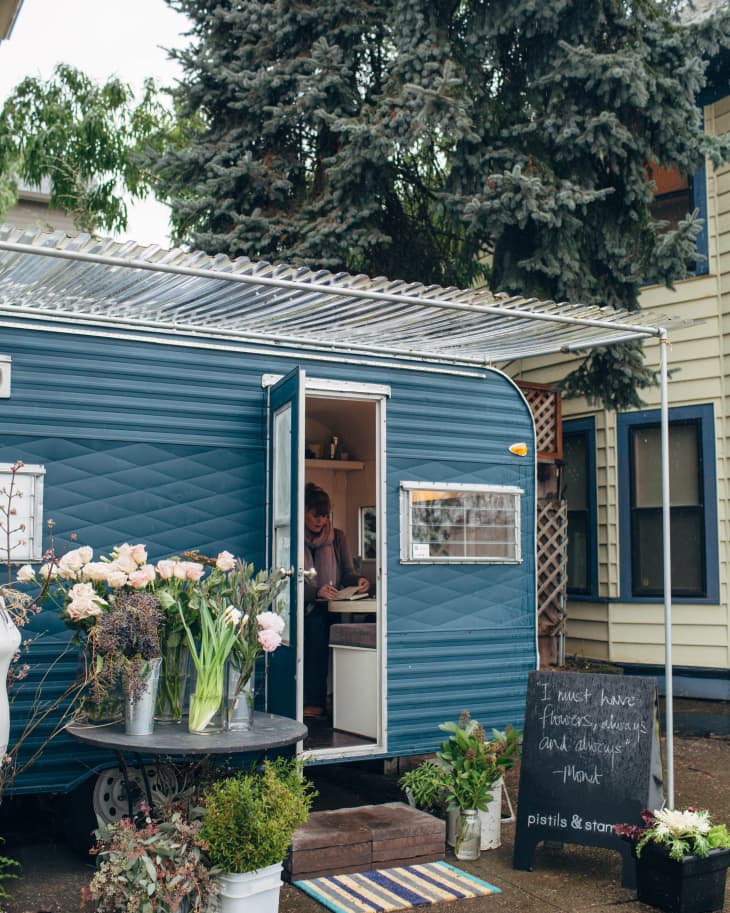
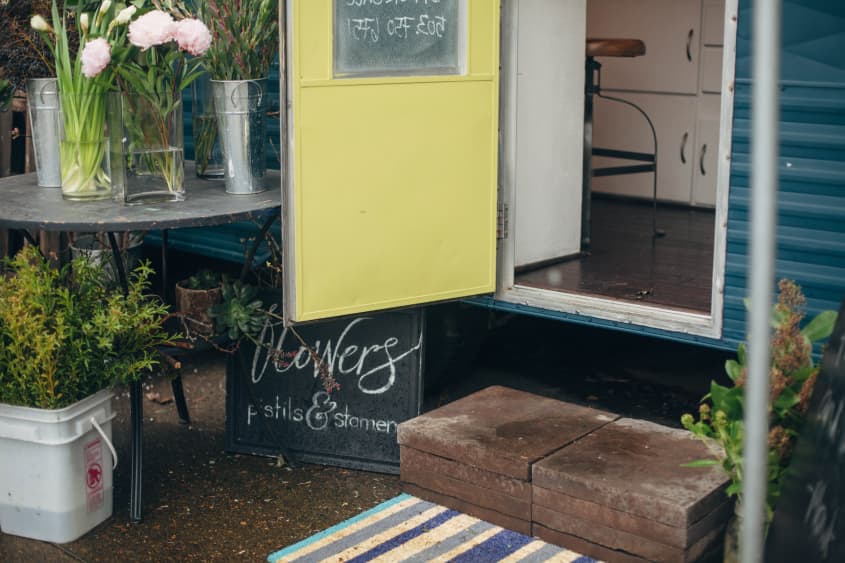
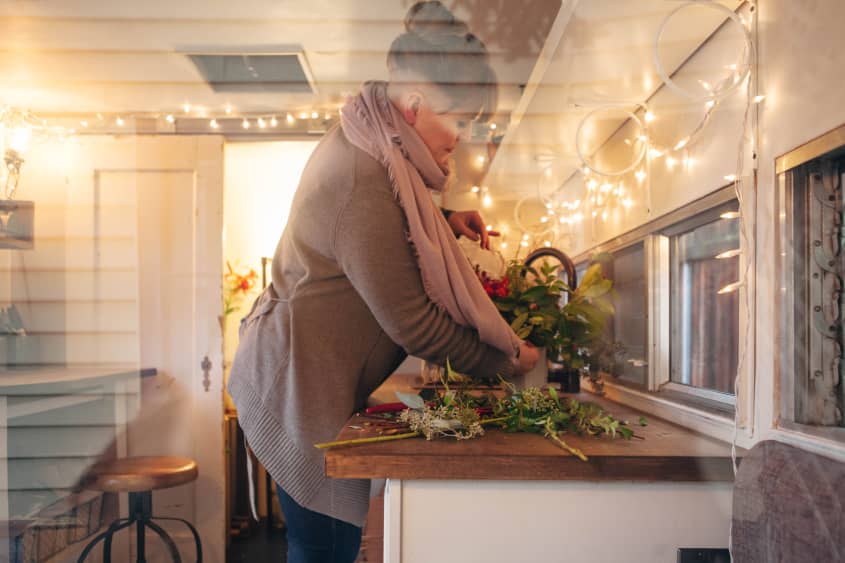
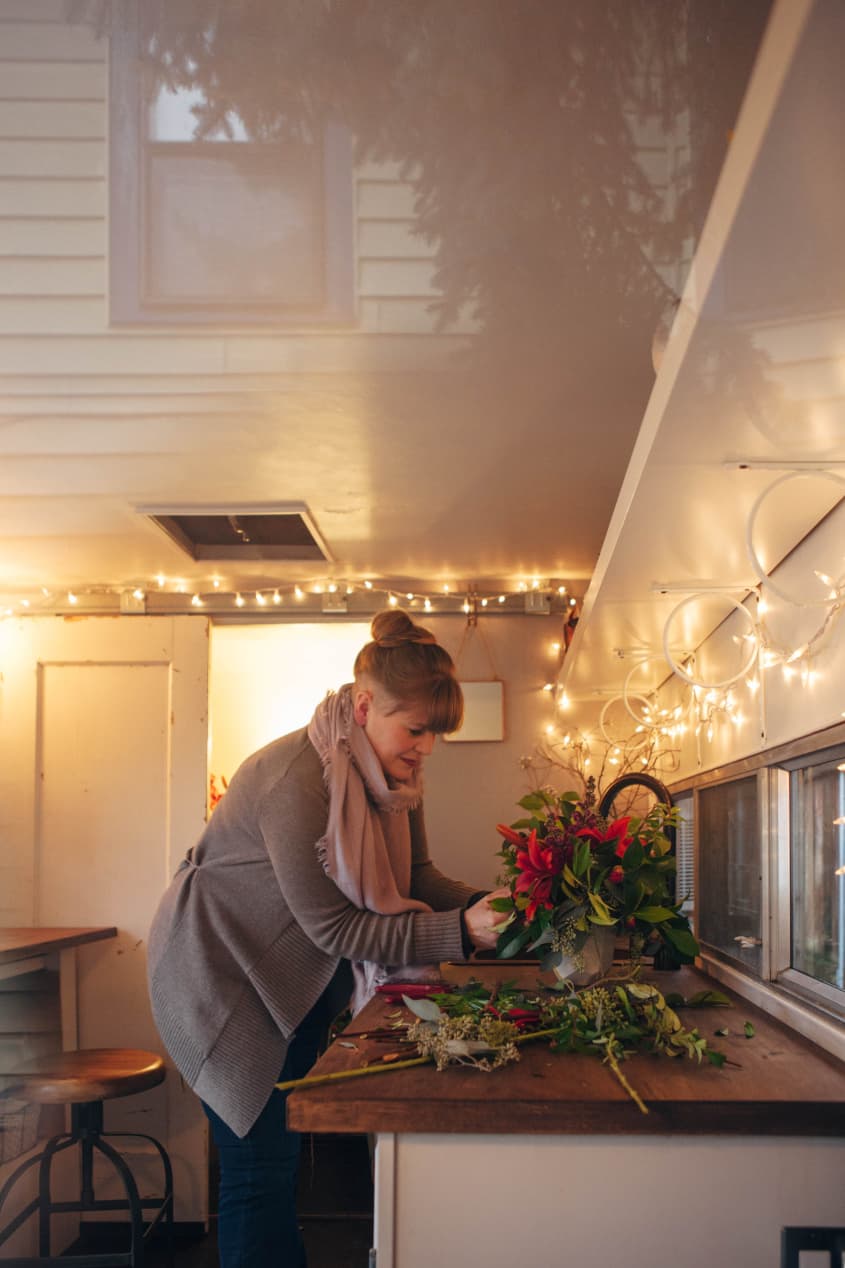
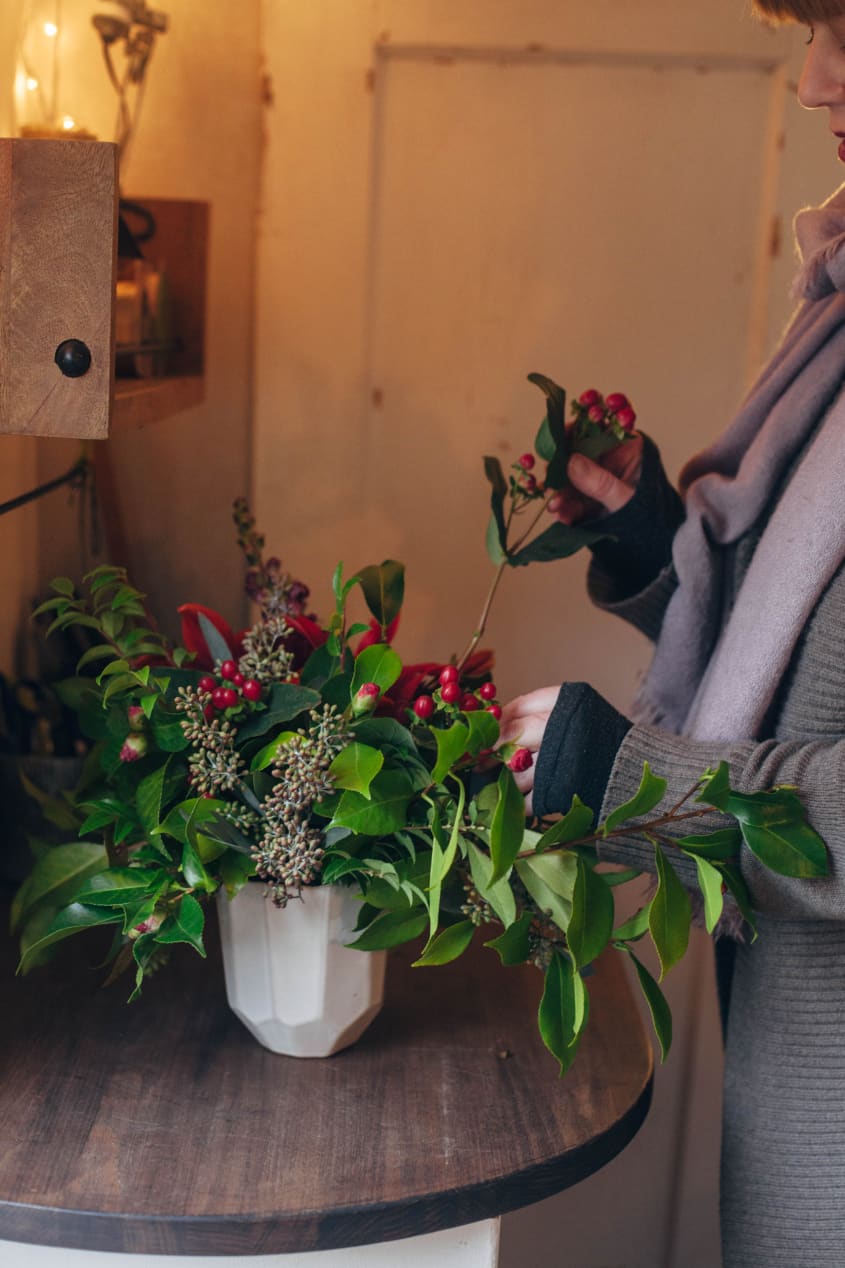
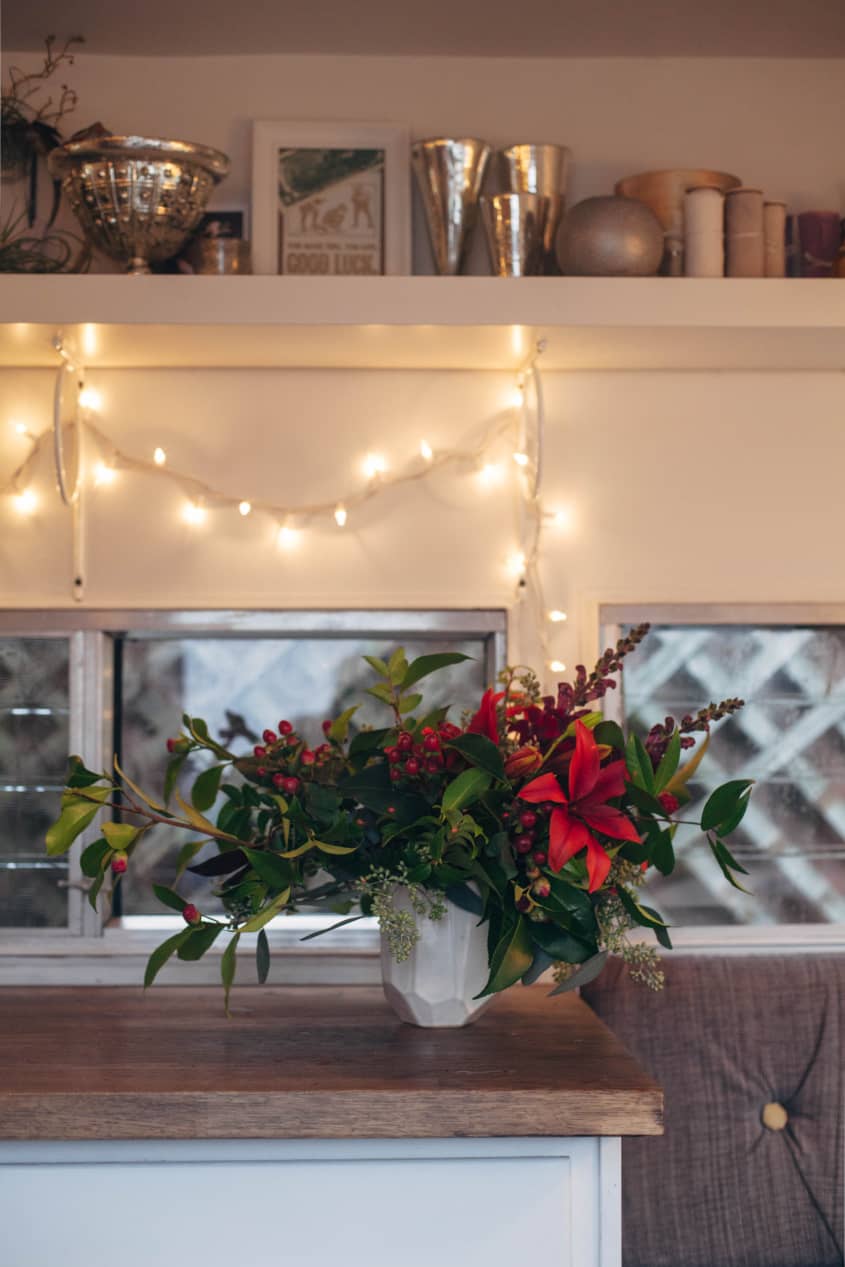
Susanna & Tod’s Renovated Portland Flower Cart
Name: Susanna Luck and Tod Hyland of pistils & stamen
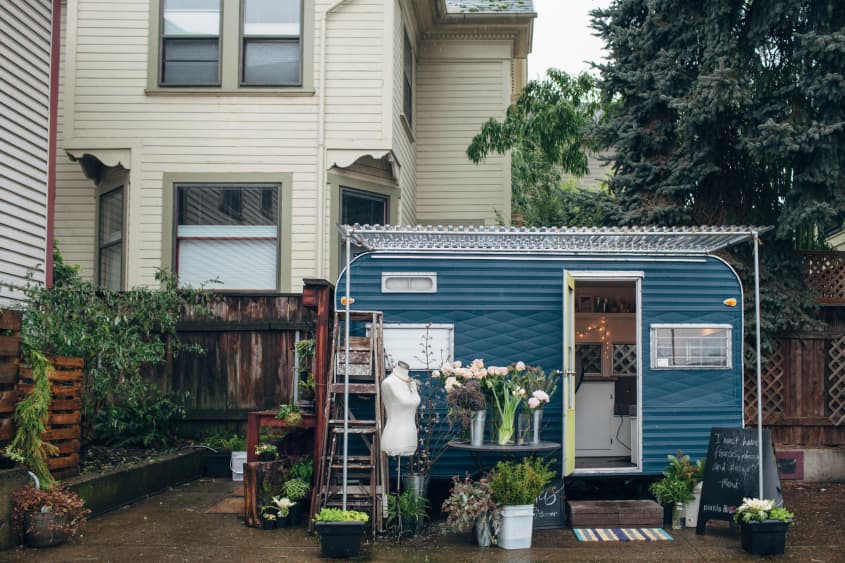
Location: 1515 NW 23rd Ave in Portland, OR
Size: 98 square feet
Years owned/worked: 14 months
Can't-Miss House Tours Straight to Your Inbox
Keep up with our latest house tours each weekday with our House Tour of the Day newsletter
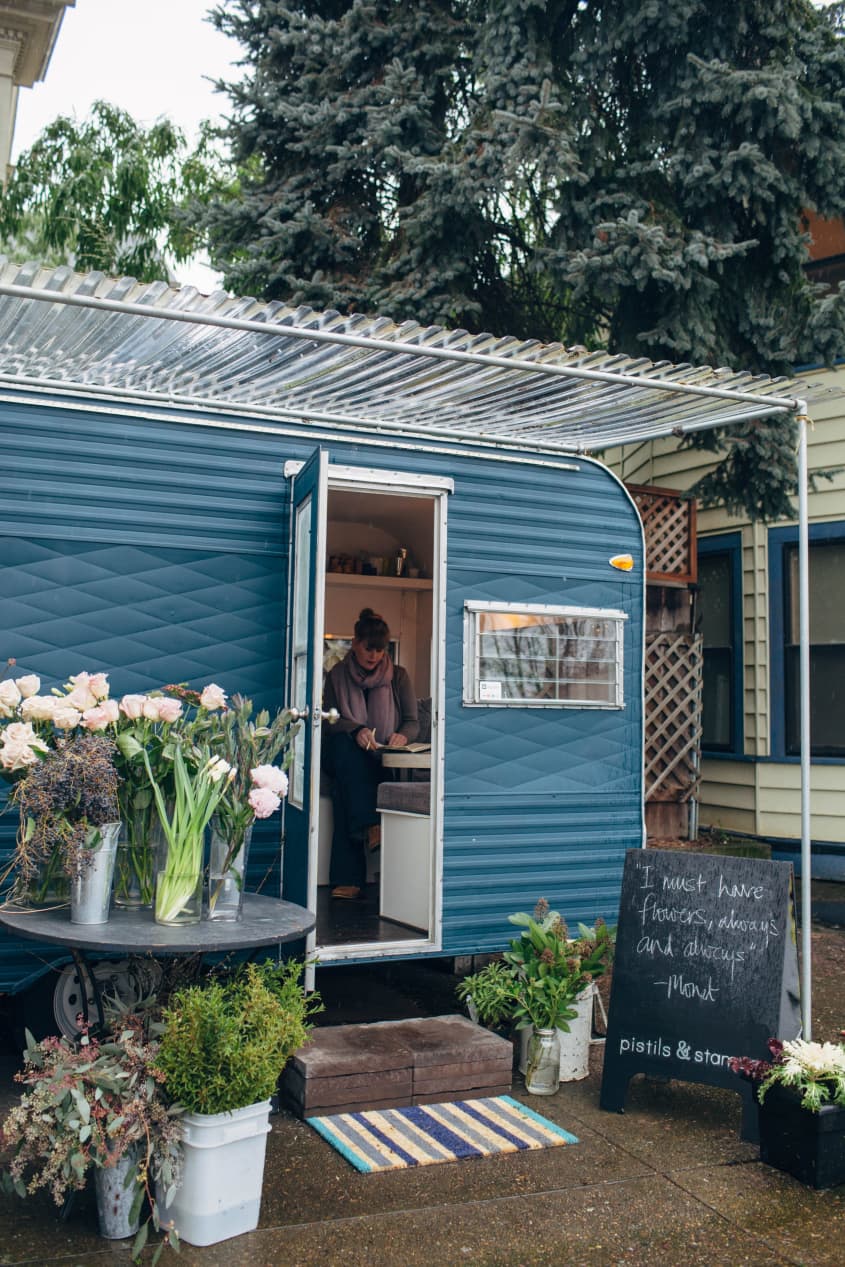
Susanna was born in England and came to the US in her twenties for art school. After years in San Francisco and Los Angeles, she found herself in Portland working as an animator before suddenly and unexpectedly losing her job. Once she had a chance to recover from the shock, she decided to take the opportunity her new-found freedom afforded and work full-time on developing an idea for a floral business she had been talking about with a friend—originally just as a just-for-fun, on-the-side kind of a thing. As she became more serious about the project, her friend dropped out and Susanna took over with her partner Tod stepping in as her official business partner. They opened pistils & stamen in 2014.

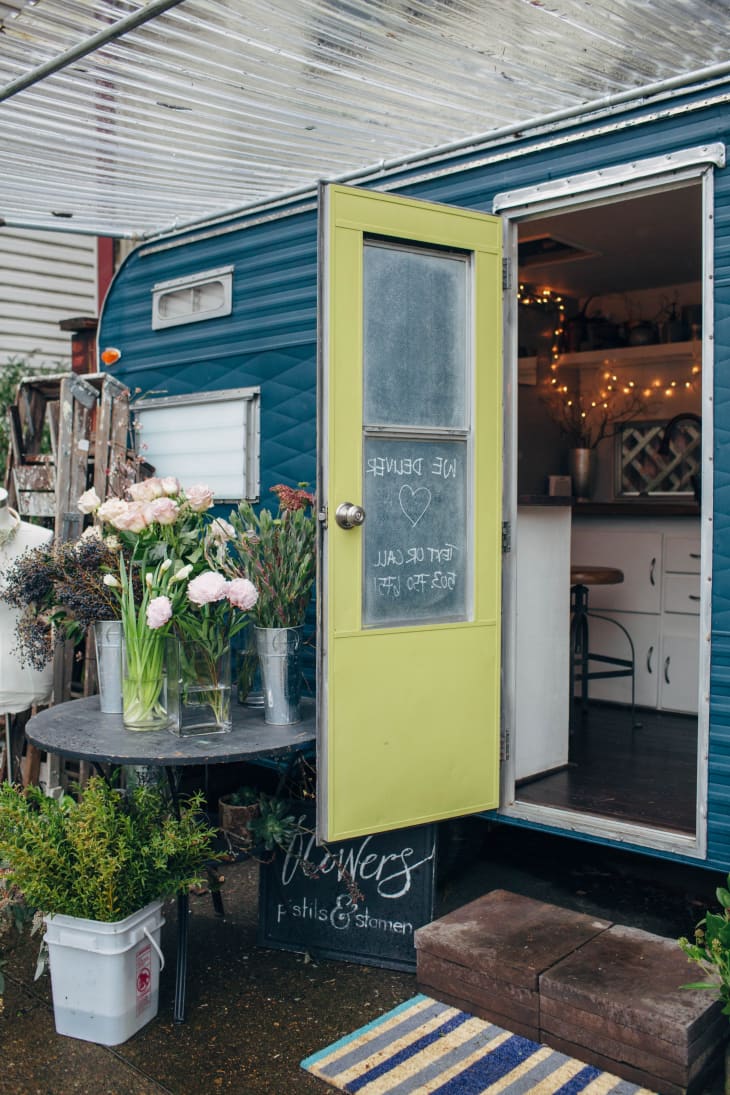
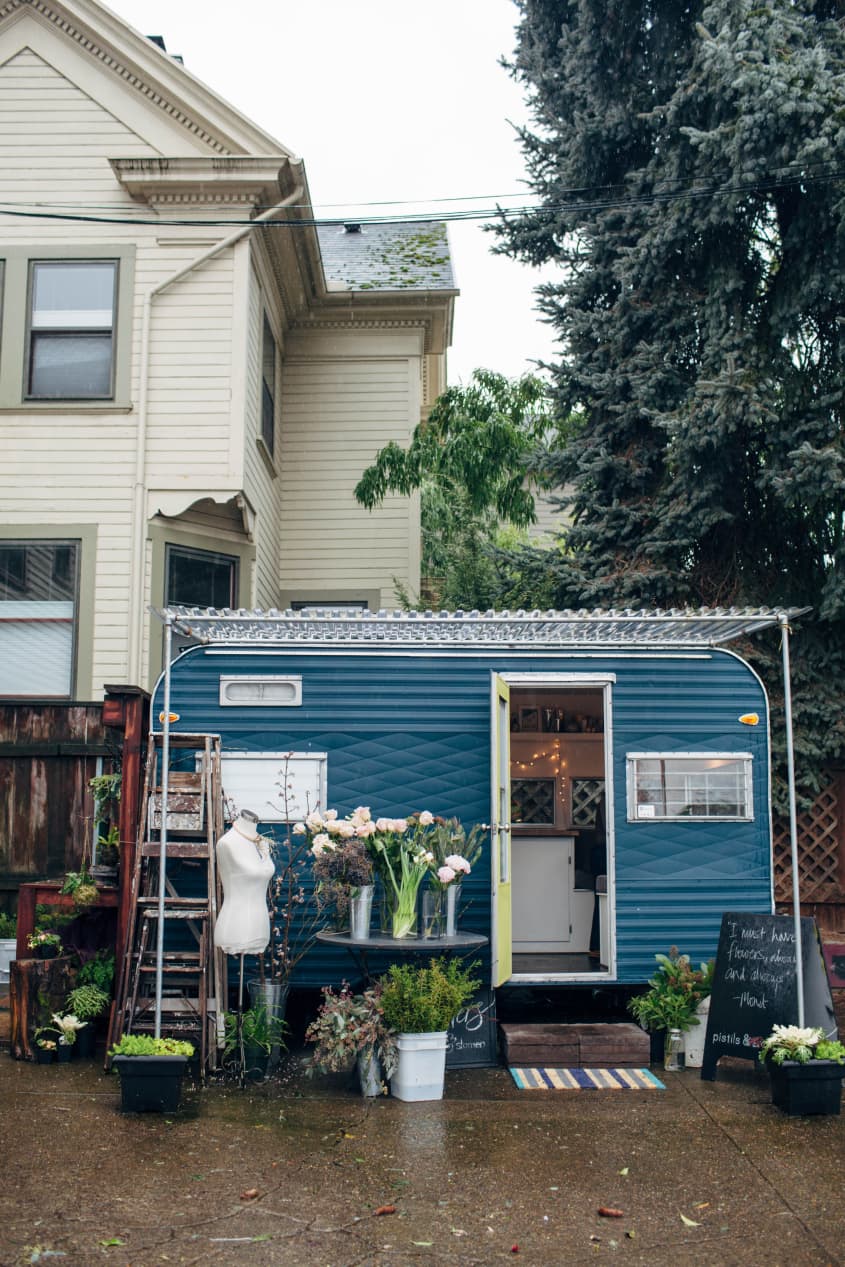
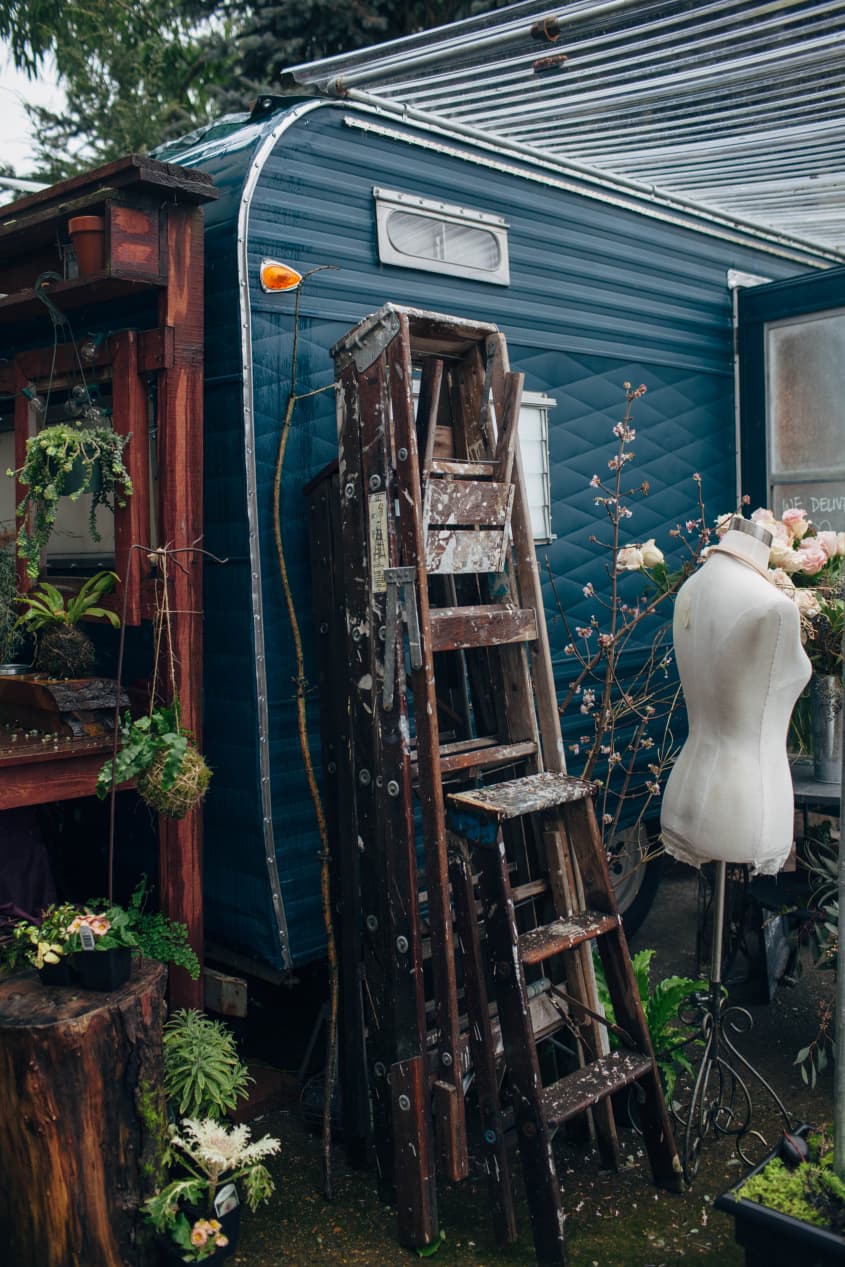
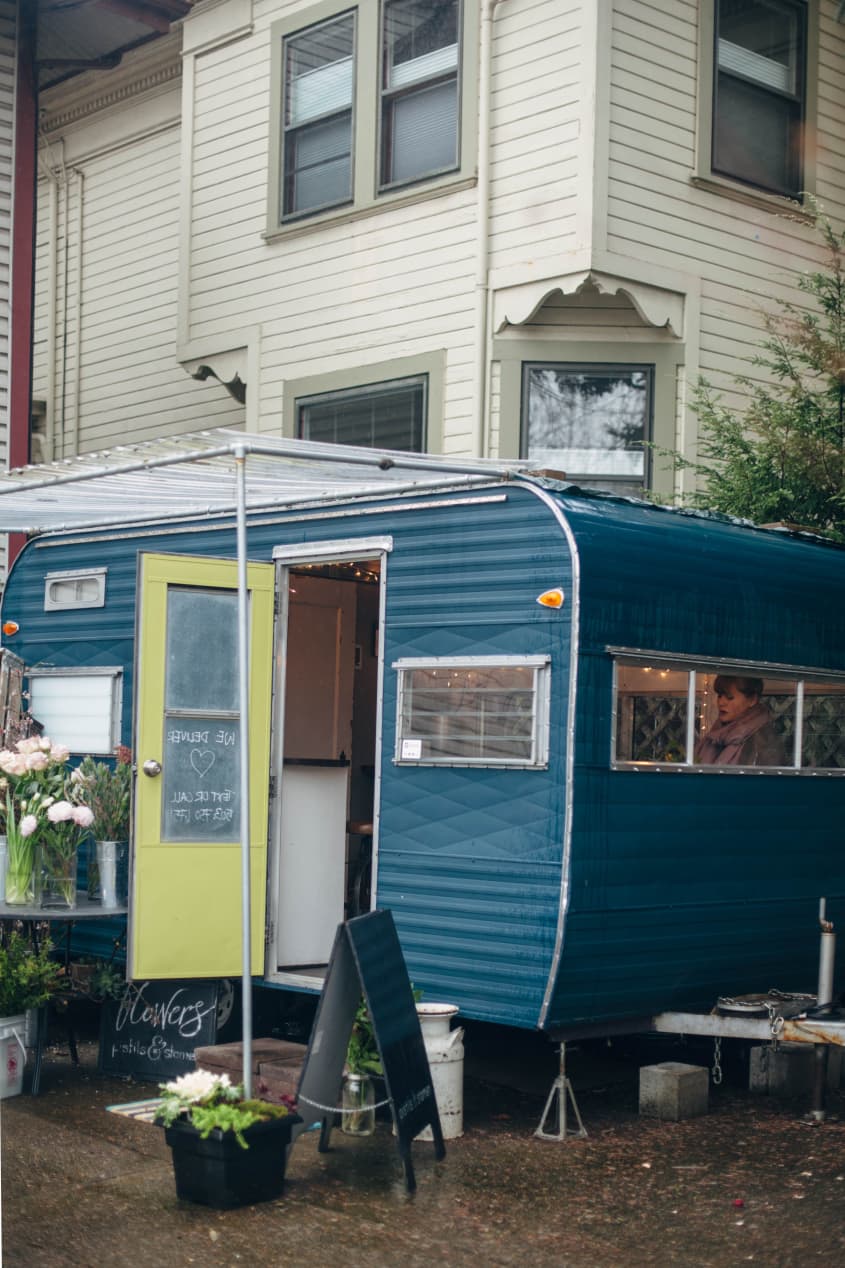
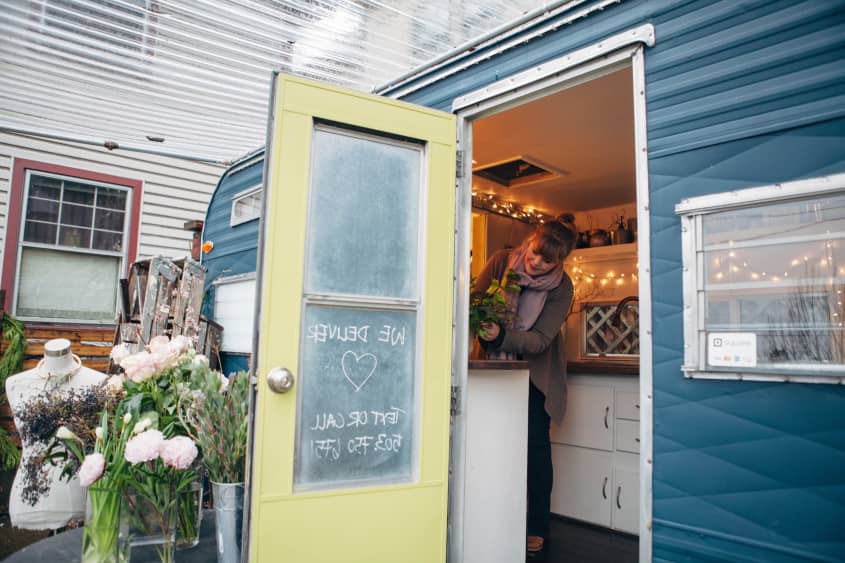
Susanna and Tod found the trailer on Craigslist after a bit of a search, having decided that they were going to take a page from Portland’s popular food carts and start, essentially, a flower cart. The trailer had been well-loved but needed a lot of work to get it to the place she envisioned for it, and in fact, the more they took it apart, the more they realized exactly how much work it needed.
It was made in 1965 and had some pretty extensive rot in the floor and some of the walls. In the end, they tore everything down to the studs and rebuilt it from there. While Tod had a lot of experience with carpentry, plumbing, and electrical work, neither of them had ever renovated a vintage trailer before.
Susanna looked at a lot of blogs, watched a lot of YouTube videos of people replacing very specific parts of vintage trailers (like the drip rail, which is quite tricky to do), and just took it one step at a time.
Susanna says they made a big mistake by starting the project at the end of summer. It took about three months of daily, full-time work to finish it and by the time they were done, it was literally freezing cold and the rains had set in again—making for some very challenging conditions while working outside! They love the finished project and would renovate another trailer again in a heartbeat, but this time they’d start in the spring.

Apartment Therapy Survey:
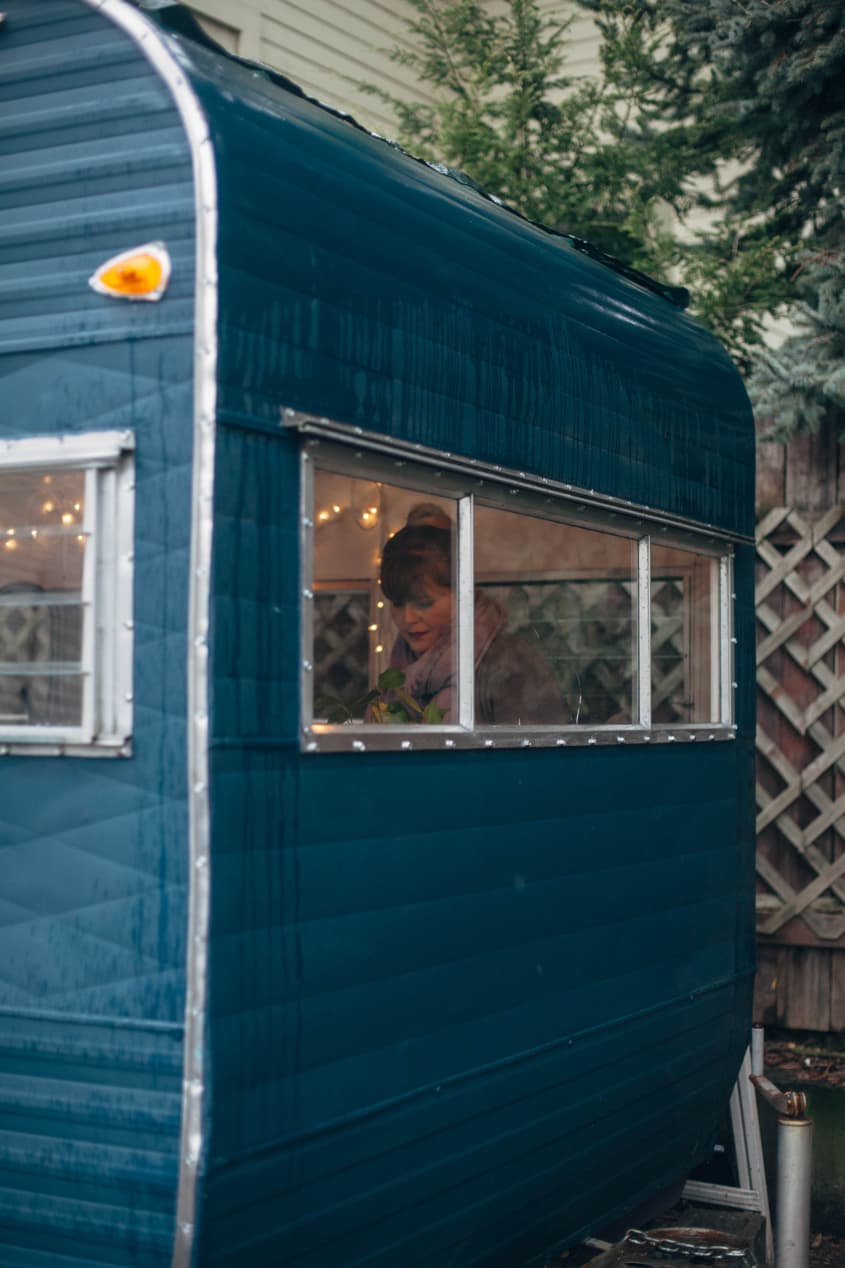
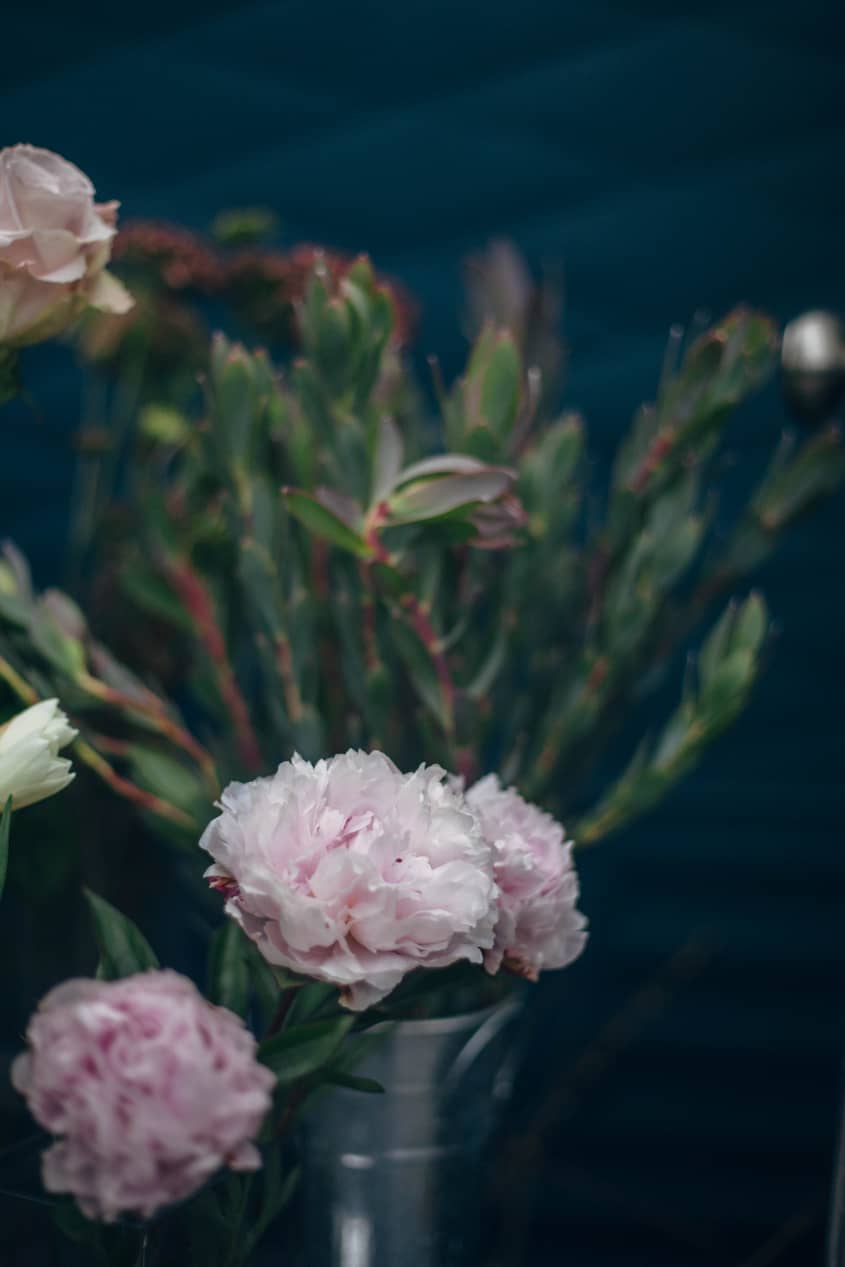
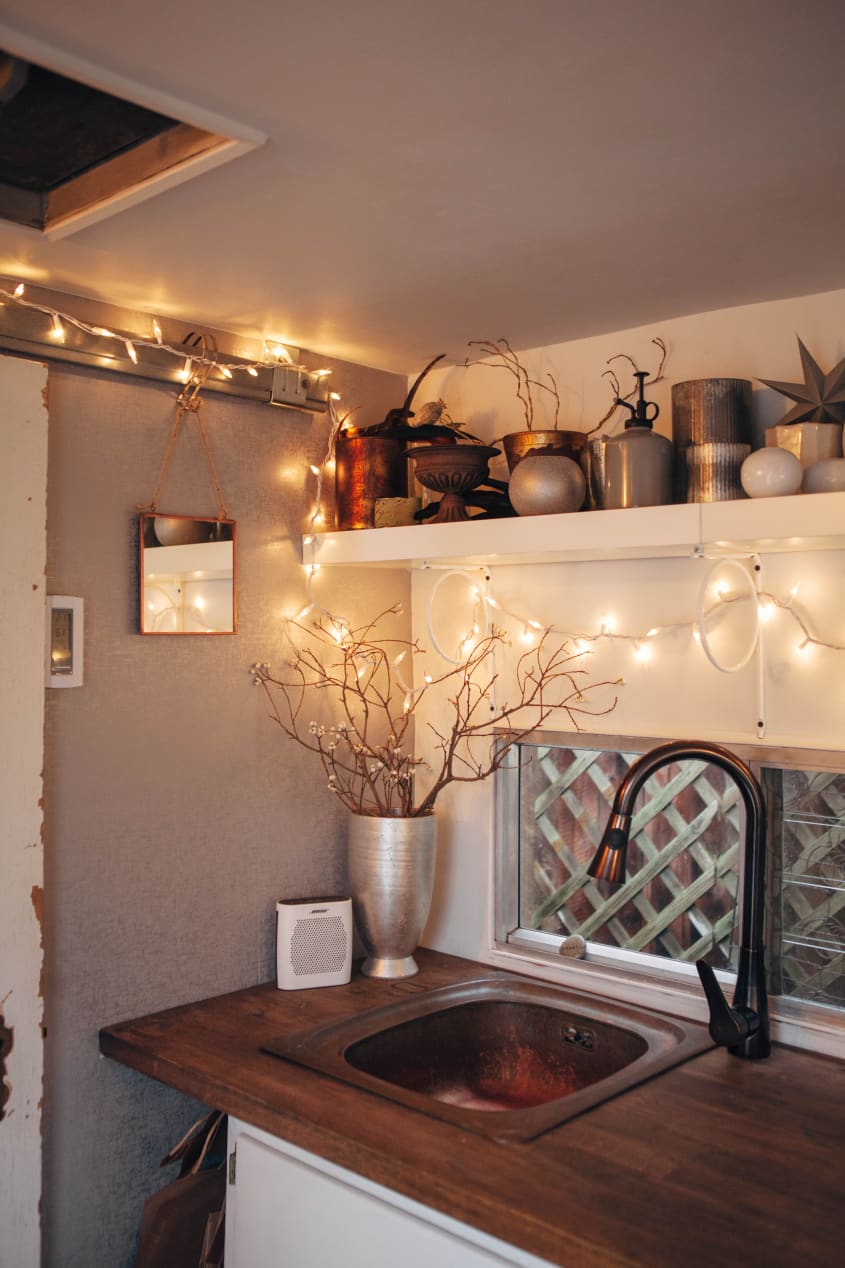
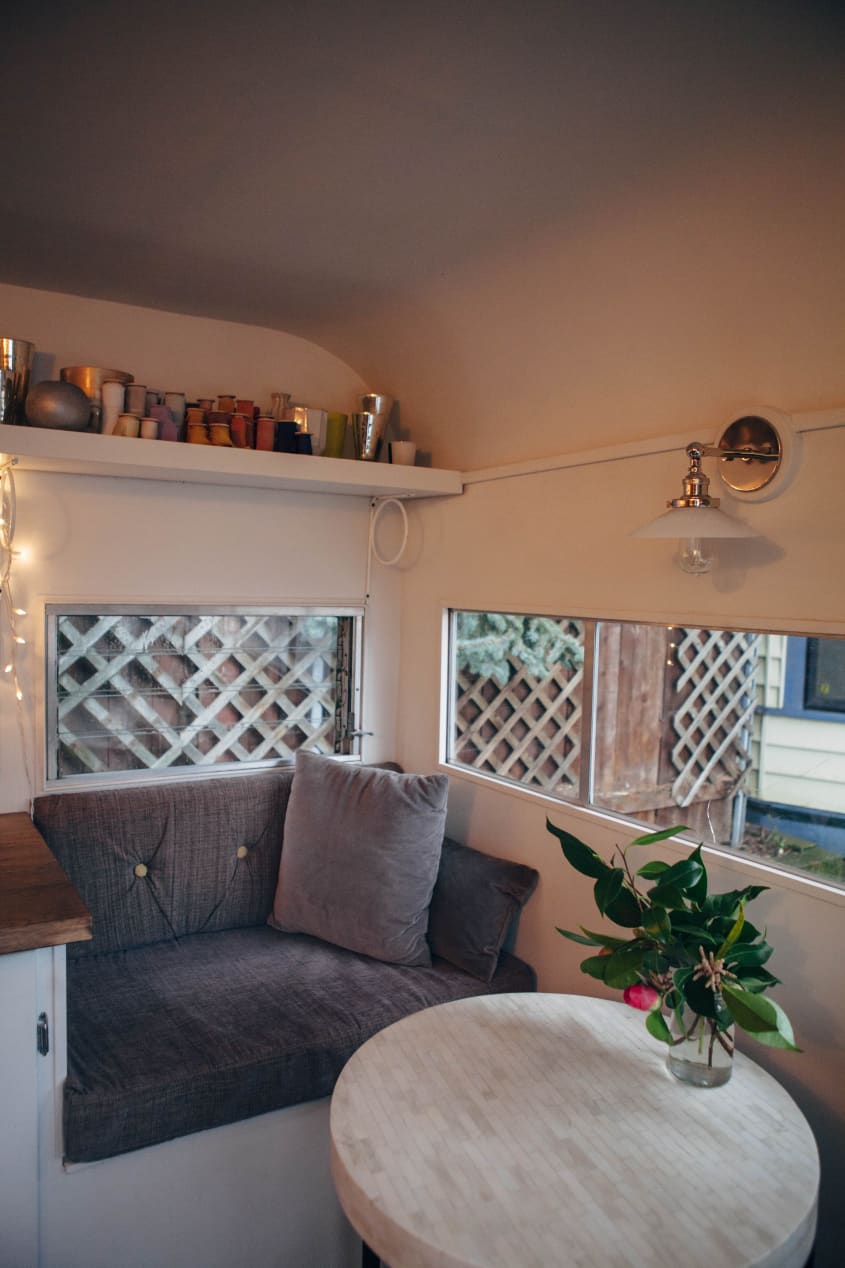
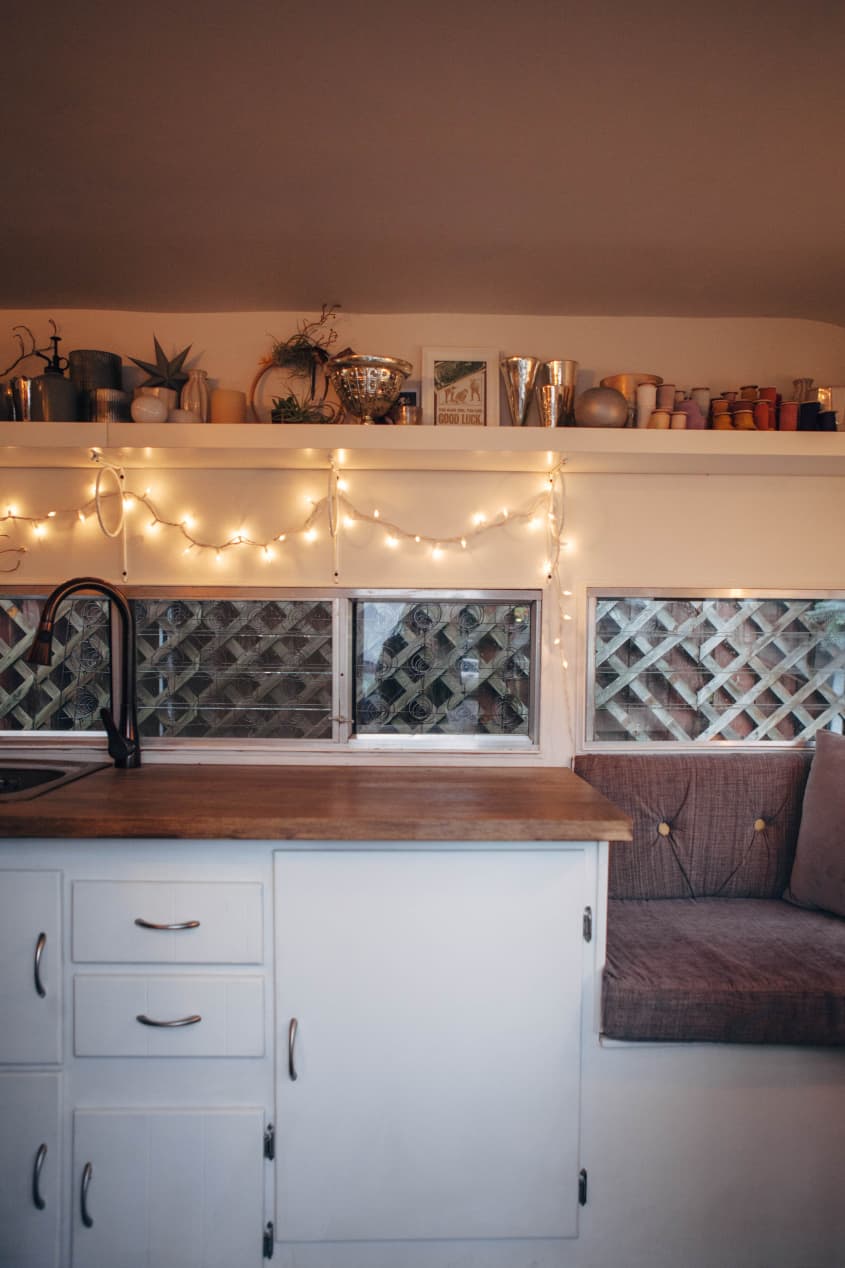
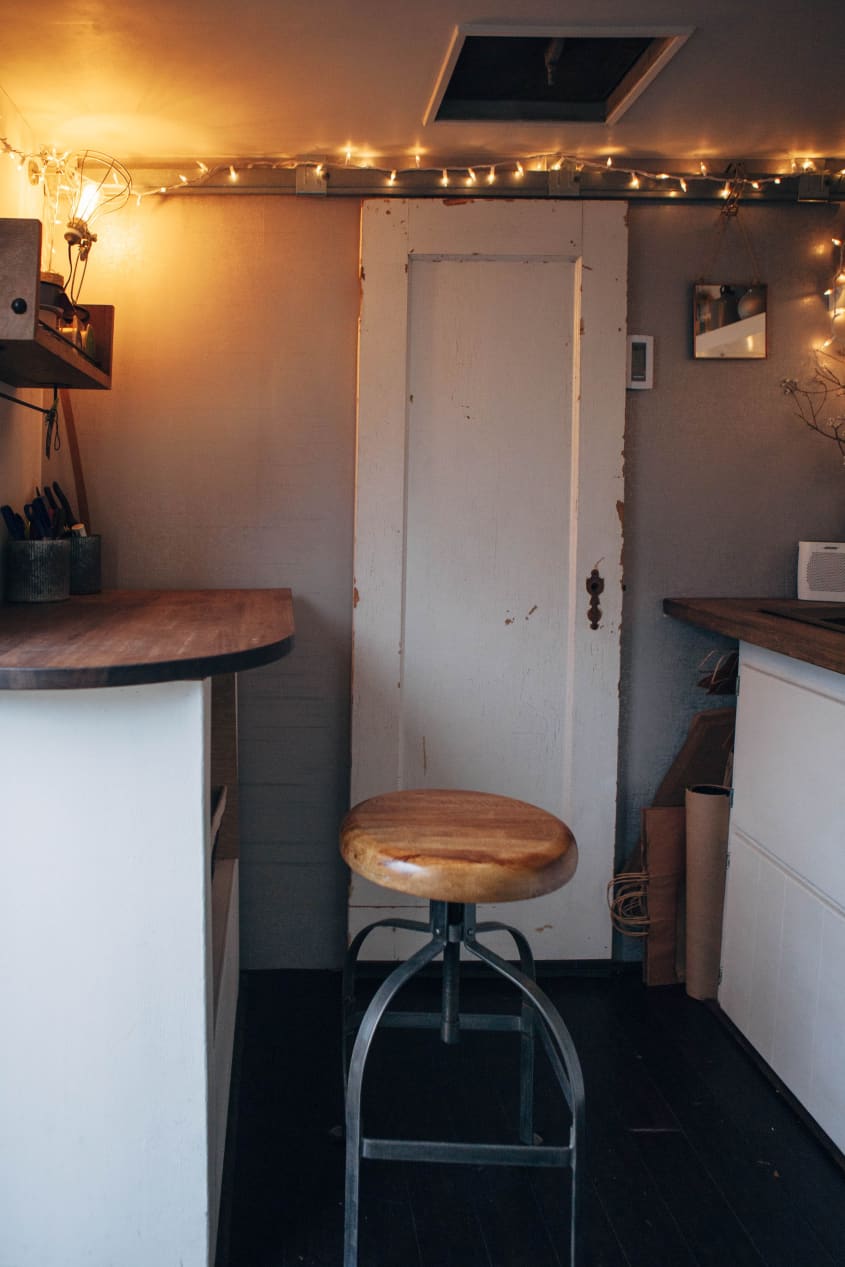
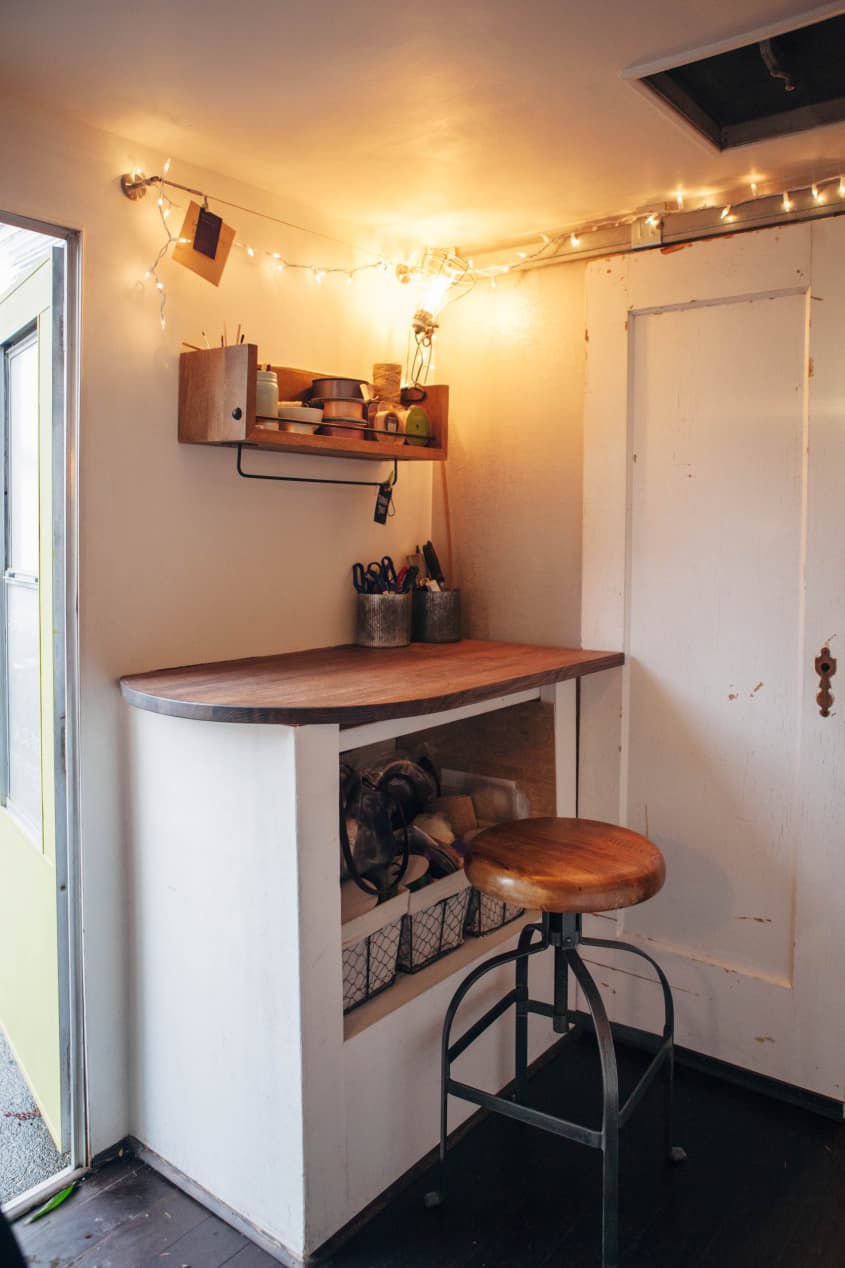
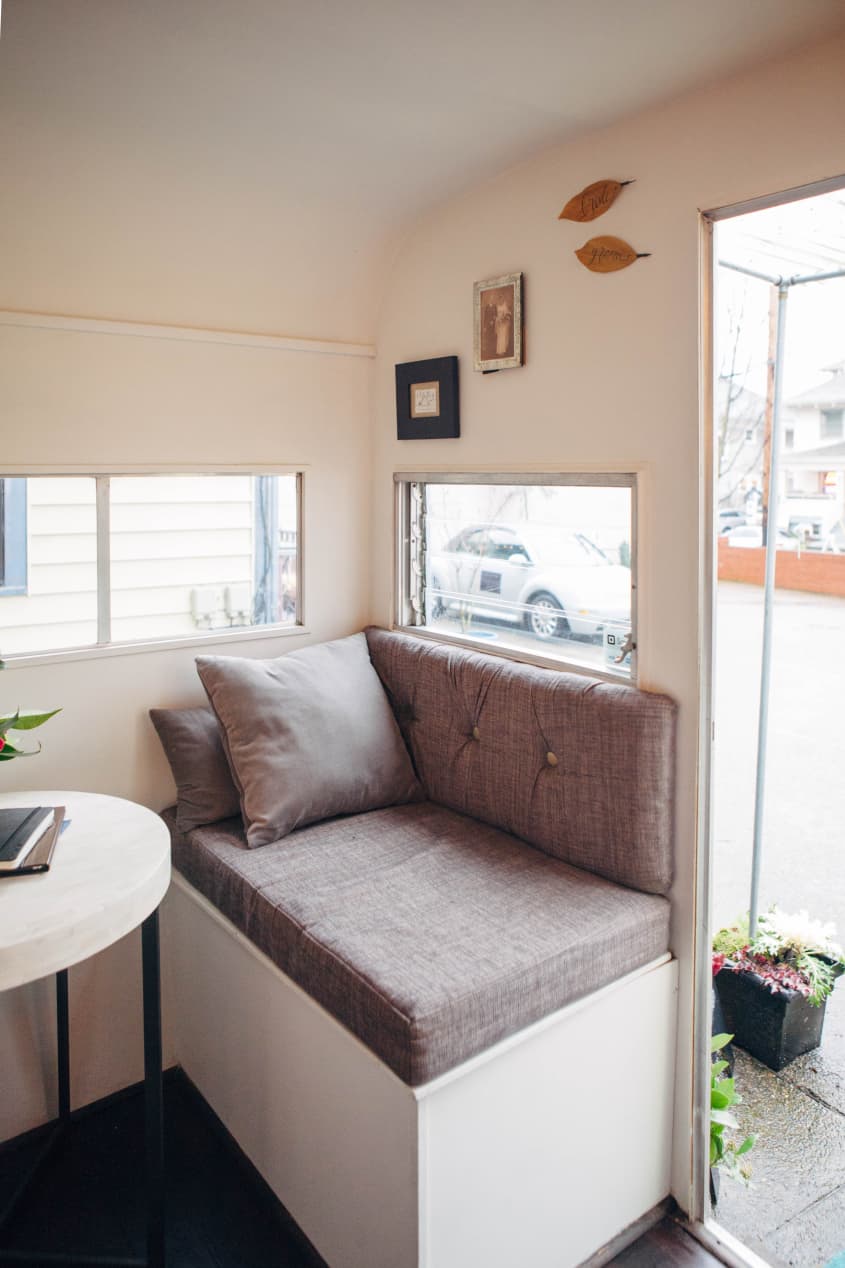
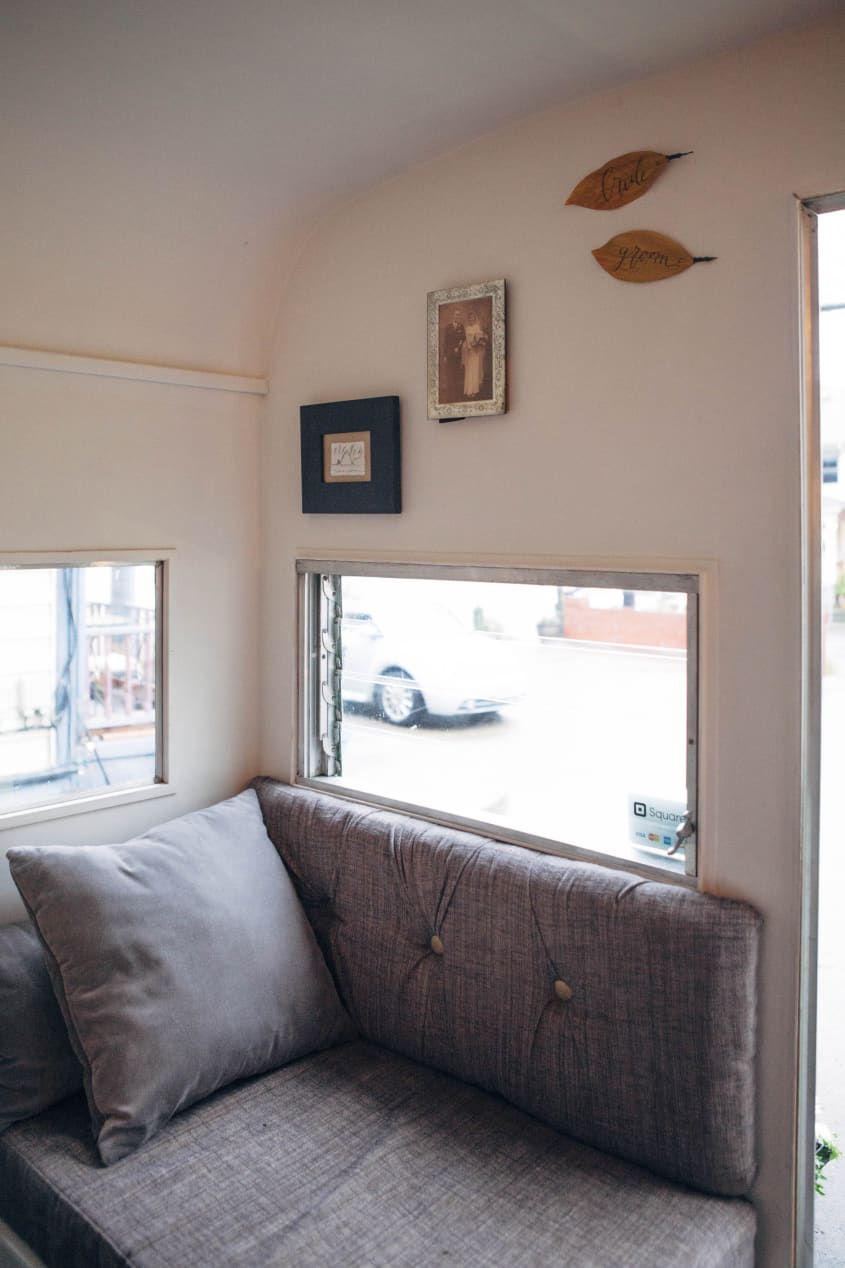
Our Style: I like simplicity in my workspace. Especially with such a small space, I wanted to keep the walls light and airy but I also love dark countertops, and I find the contrast warms it up. I wanted to honor the vintage curves of the trailer but preferred a modern take on the rest of the interior. I also needed to maximize the storage as much as I could, so Tod built the seats and there are storage bins underneath.
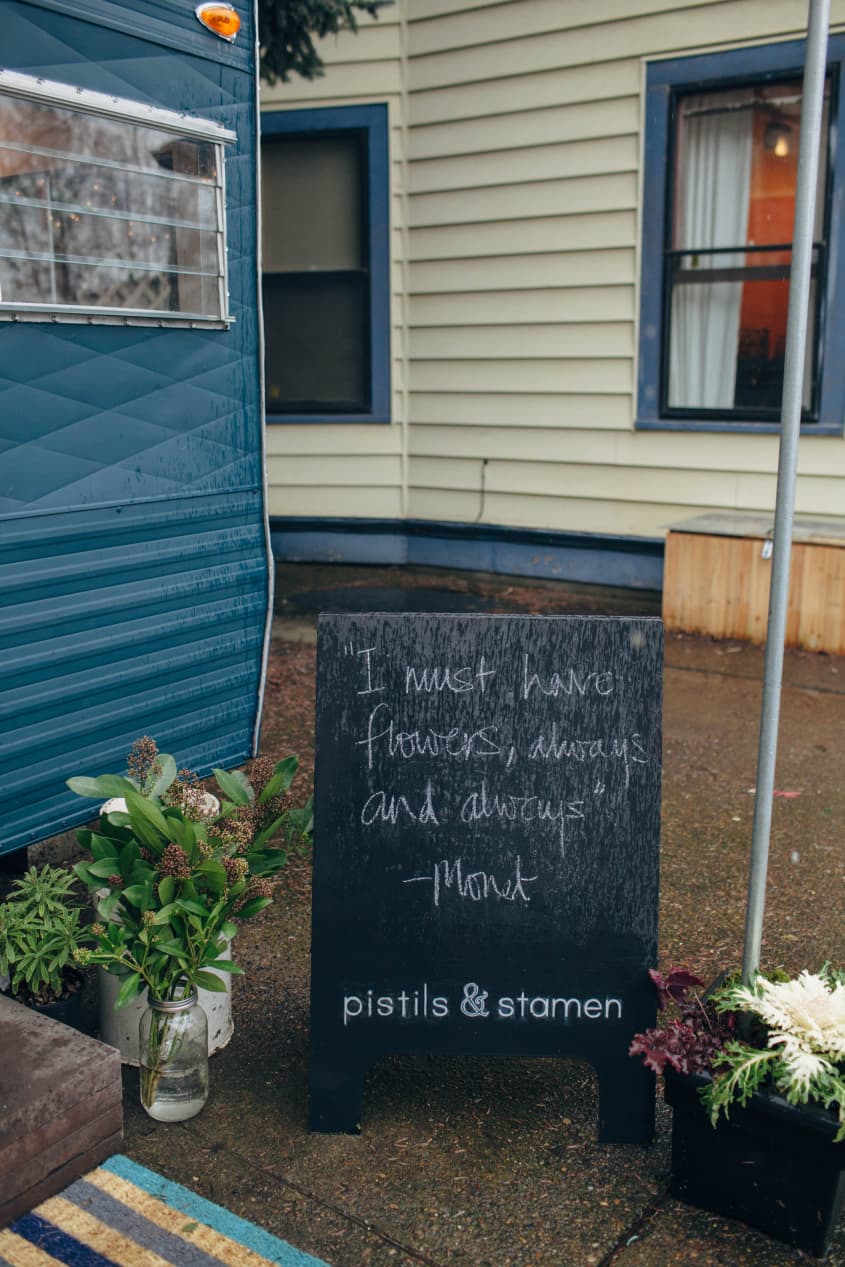
Inspiration: Portland food trucks! Portland has a huge affordability problem with living and workspace. I looked around at brick and mortar spaces and couldn’t imagine how I could start my business with a small budget. And then I thought about all the amazing food trucks we have here, which is a similar response by the food industry to the same issue, and thought: why not a flower truck?
Initially I gave a lot of thought to buying a literal truck and driving it around as a flower shop but they are actually much more expensive, even if virtually derelict, than trailers. I found this 1965 travel trailer on Craigslist for around $2k and we did almost all of the work (with the exception of installing the curved plywood interior skin and the industrial-grade electrical work—which was a nightmare) ourselves. We ended up having to strip it down to the studs and start over because there was so much water damage under the surface.
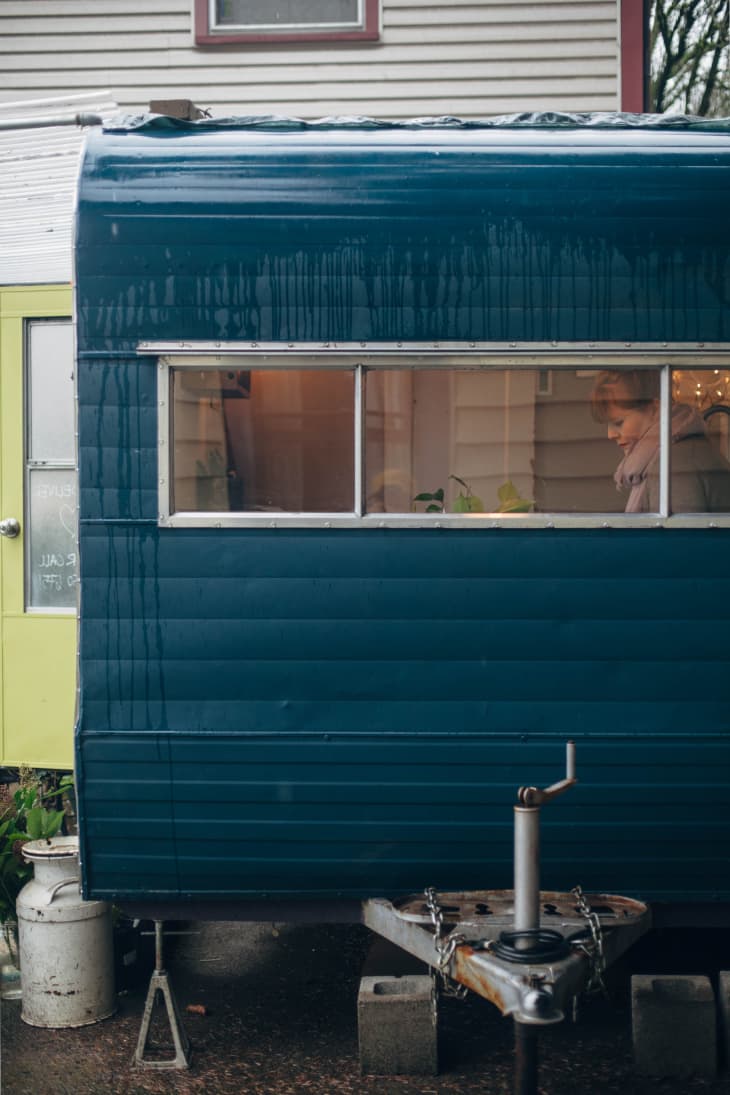
Once I started to think about a trailer, I was very taken with Australian designer Karen Roselund’s mini antique shop, which is a gorgeous deep, matte navy blue on the outside and light and airy inside. I also looked at a lot of modern updates of Airstreams, which would be a dream but wasn’t within reach for me at the time.
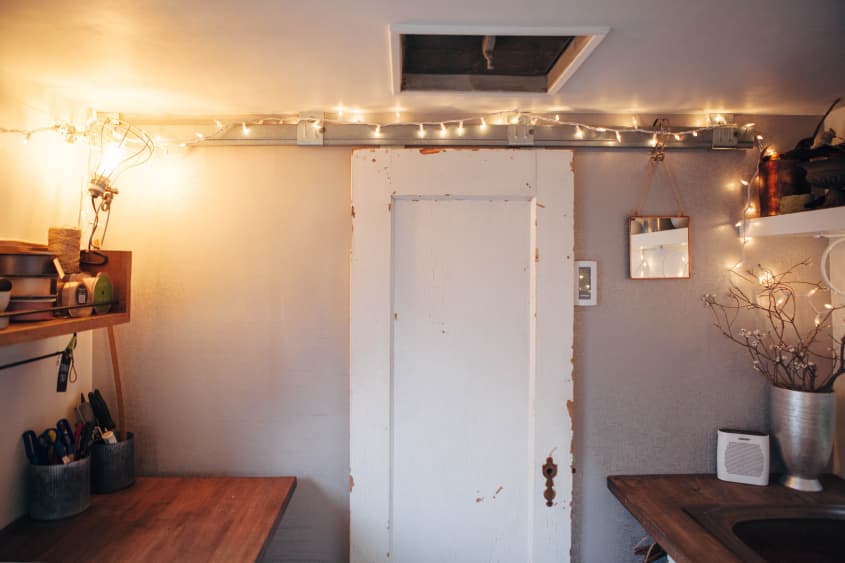
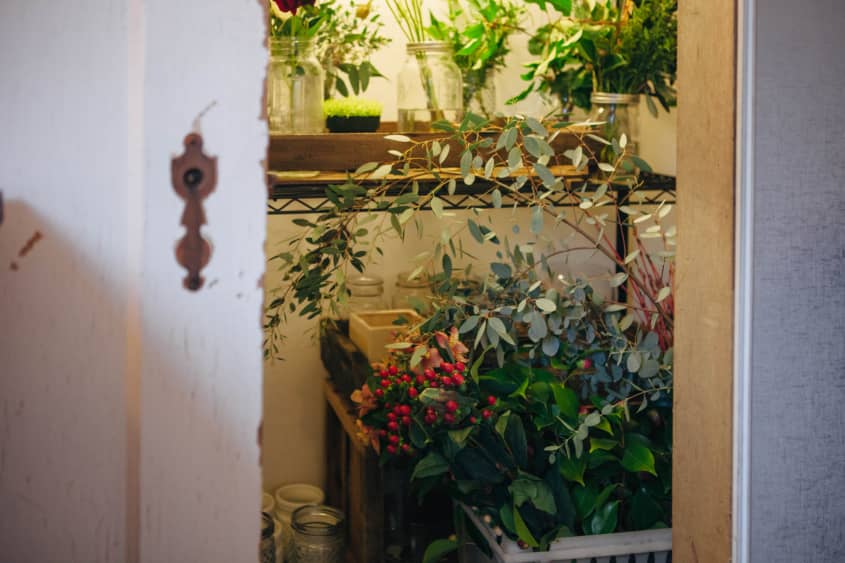
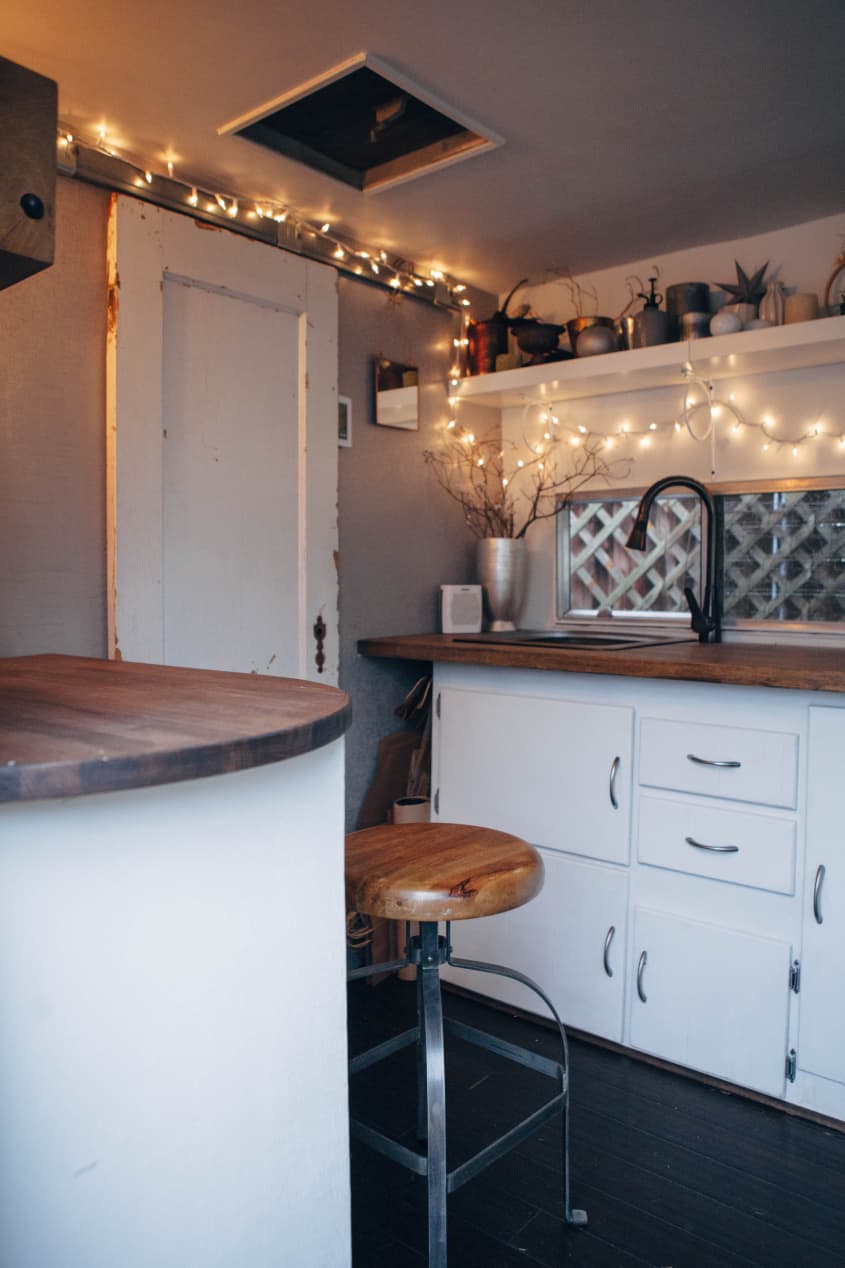
Favorite Element: The repurposed solid copper sink, found on Craigslist, and the repurposed closet door from my 1914 house, which I left with all of its long history of scratches and cracks showing and just cleaned up. We hung it on a barn door mechanism so that it could slide behind the counter and save that bit of space when it’s open.
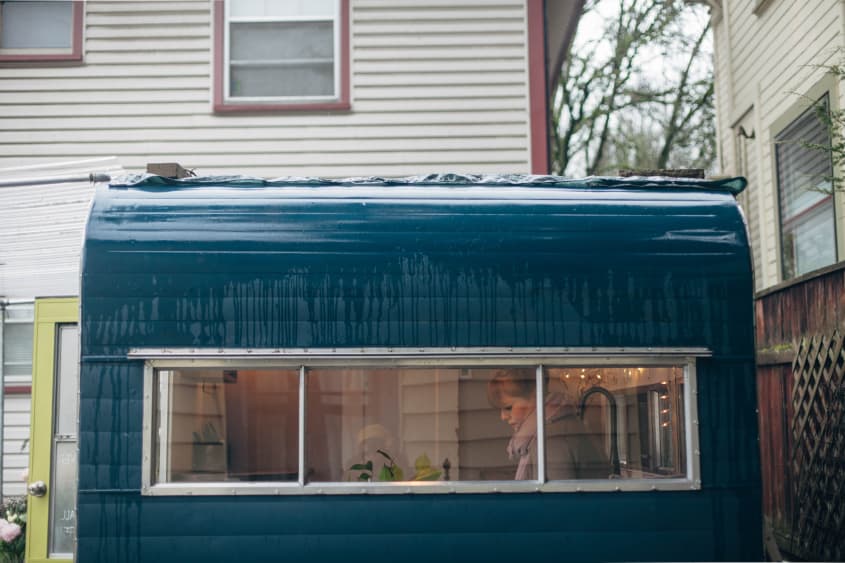
Biggest Challenge: Keeping it watertight! We still haven’t quite figured it out and we’ve tried EVERYTHING. It’s super-frustrating, and anyone else who owns a vintage trailer is probably nodding along in sympathy; they all leak.
What Friends Say: “It’s so cute!” “How do you do everything in there?” Children (and more adults than you would credit) also ask if I live there.
Biggest Embarrassment: Trying chalk paint on the exterior: really not a great idea in Oregon but I loved the matte finish so much! It was a gorgeous finish but stained oddly when it rained—the color didn’t come off, it just became stained a darker shade where the water had run over it. I’ve now stripped and painted it at least three times in its entirety and settled on a more conventional exterior paint with a flat finish.
Proudest DIY: The walk-in refrigerator with CoolBot wired to AC unit to make it a refrigeration unit (genius gadget!) Behind the sliding door is my refrigerator, which is essential for keeping flowers and botanicals fresh for as long as possible. It’s not that hard to follow the instructions for the CoolBot, but I was pretty proud of myself for wiring it in and getting it to work! I now have a 4’ by 7’ fridge and even in summer it’s never cost me more than $50 a month to run. When I do eventually move to a larger space, I’ll definitely do that again.
Biggest Indulgence: The fabric for the seats! I wanted something really luxe. I made them myself and researched the fabric for months. Also the table. I saw one like it at a yoga studio and just loved it. I looked everywhere for a cheaper version but they all looked cheaper and I was worried they’d fall apart in a few months, so I splurged a bit on something that I knew would raise the look of my tiny lounge area.
Best Advice: From YouTube videos! How to take off and replace the drip rails. It’s much trickier than you might think.
Resources
PAINT & COLORS
- Exterior: BEHR Exterior Flat—it was a custom color match, and I think I had it matched to a piece of fabric that I liked.
- Interior door: BEHR Flat Riesling Grape
- Interior walls: Ralph Lauren Flat Cove Point
EXTERIOR
- Trailer: 1965 travel trailer of unknown origin—I’ve tried very hard to find out who made it but with no success so far. If anyone could tell me, I’d love to know! I found it on Craigslist, locally.
- Awning: We built the awning ourselves from galvanized pipe and corrugated roofing material. I wanted something that was in keeping with the look of the trailer and that would let light in from above.
INTERIOR
- Countertops: IKEA, stained a deep ebony—I so much wanted to use reclaimed wood for these but I just couldn’t afford it, to my chagrin. That was one big lesson from this project: sustainability can really be out of reach sometimes.
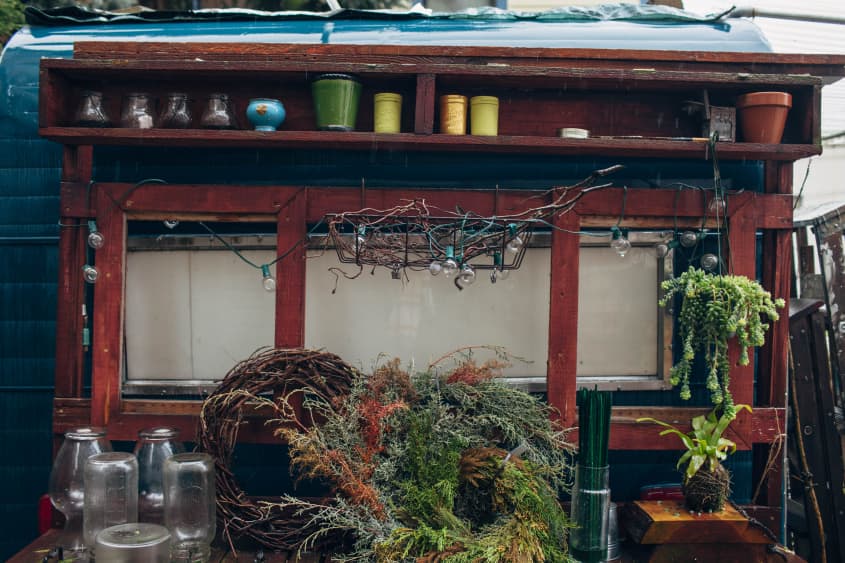
- Cupboards: The counter cupboards are the only original part of the trailer. We took the doors off, and I added new handles from a hardware store.
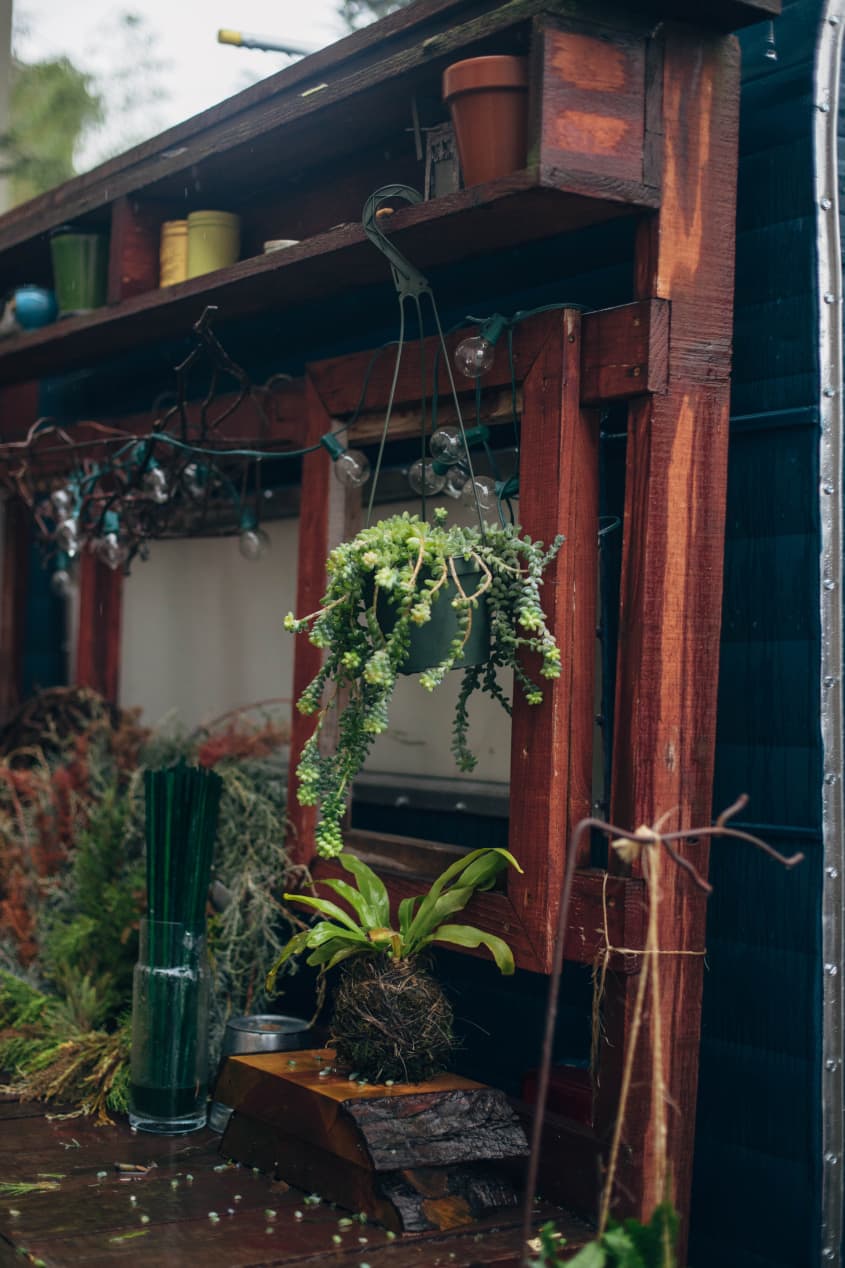
- White shelf: IKEA—I wanted it to run the full length of the back wall, so we cut one in half to make them fit.
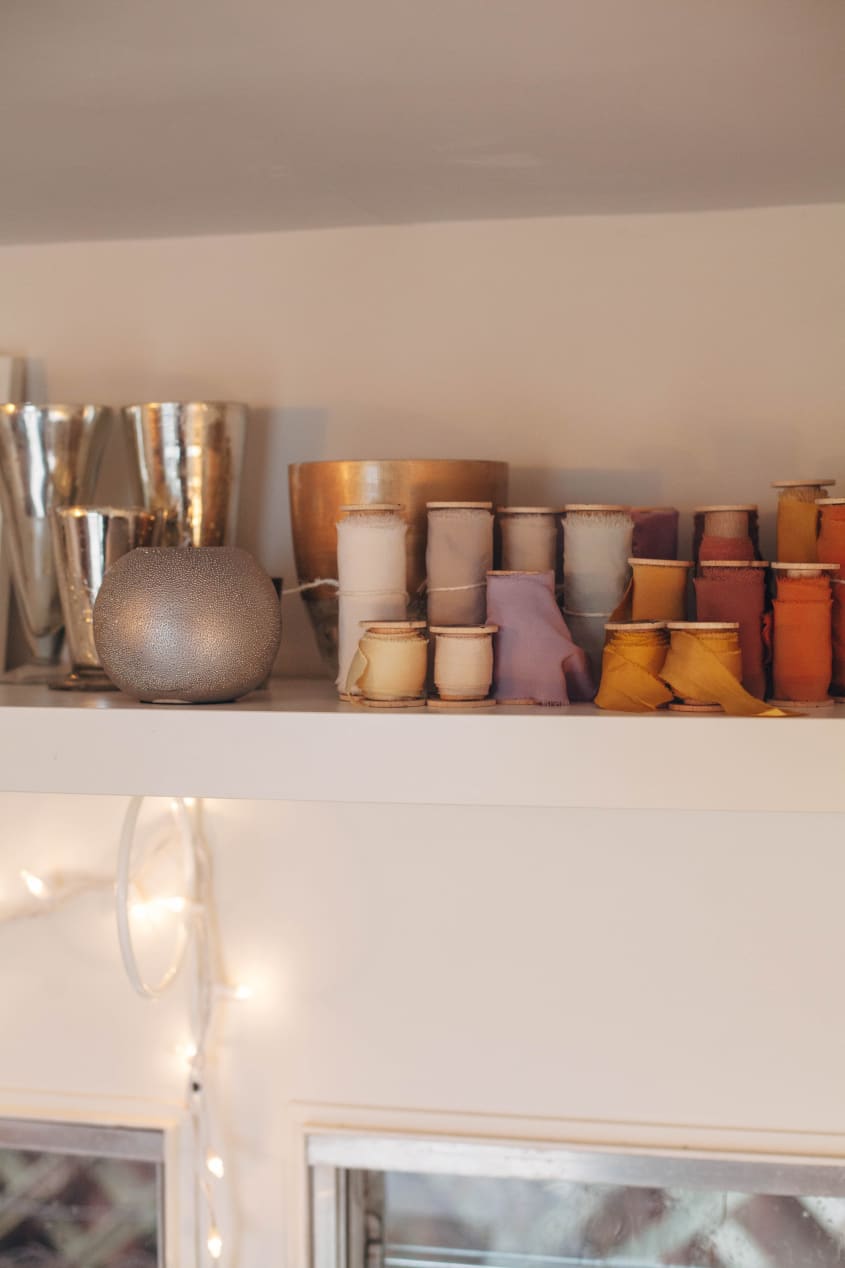
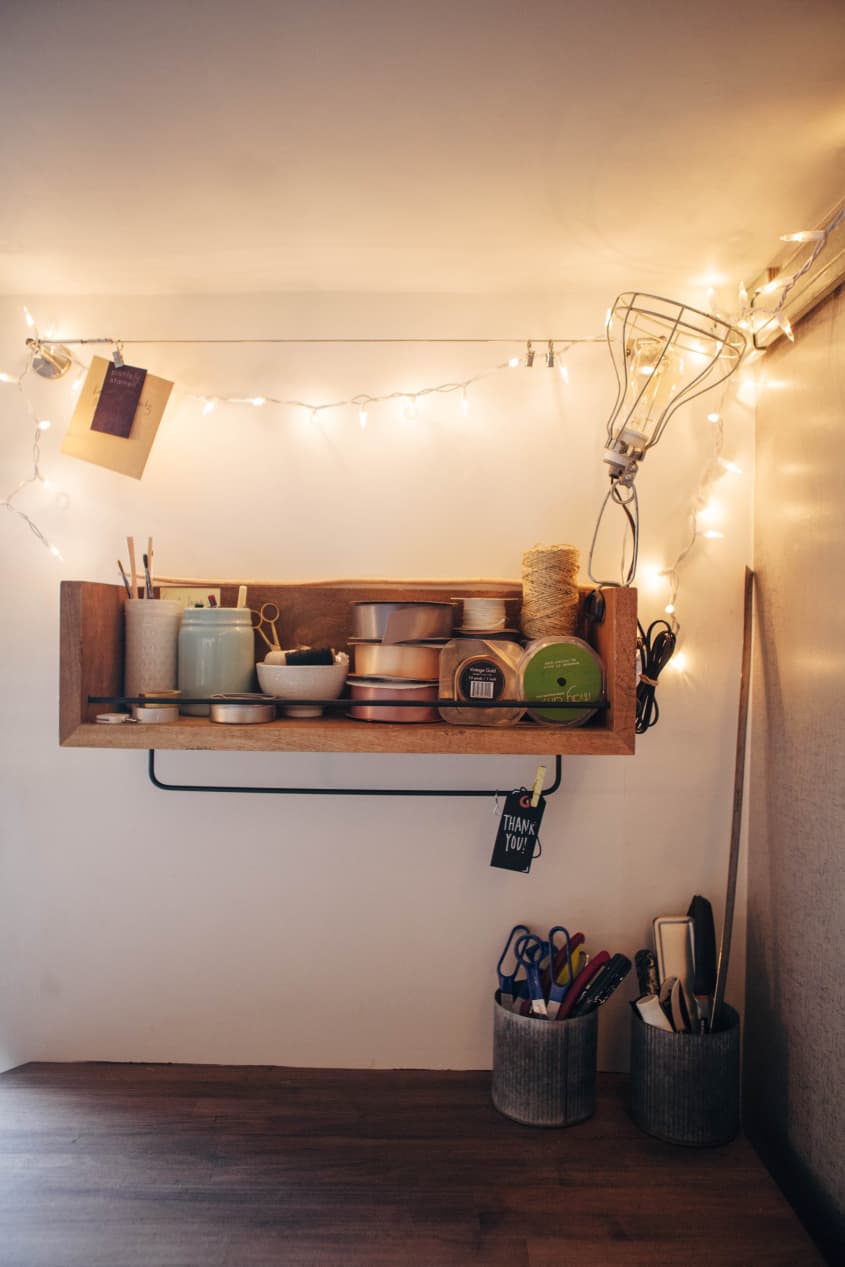
- Wooden ribbon shelf: West Elm
- Floors: hand-scraped bamboo from Lumber Liquidators—there is also underfloor heating.
- Shell-topped table: West Elm
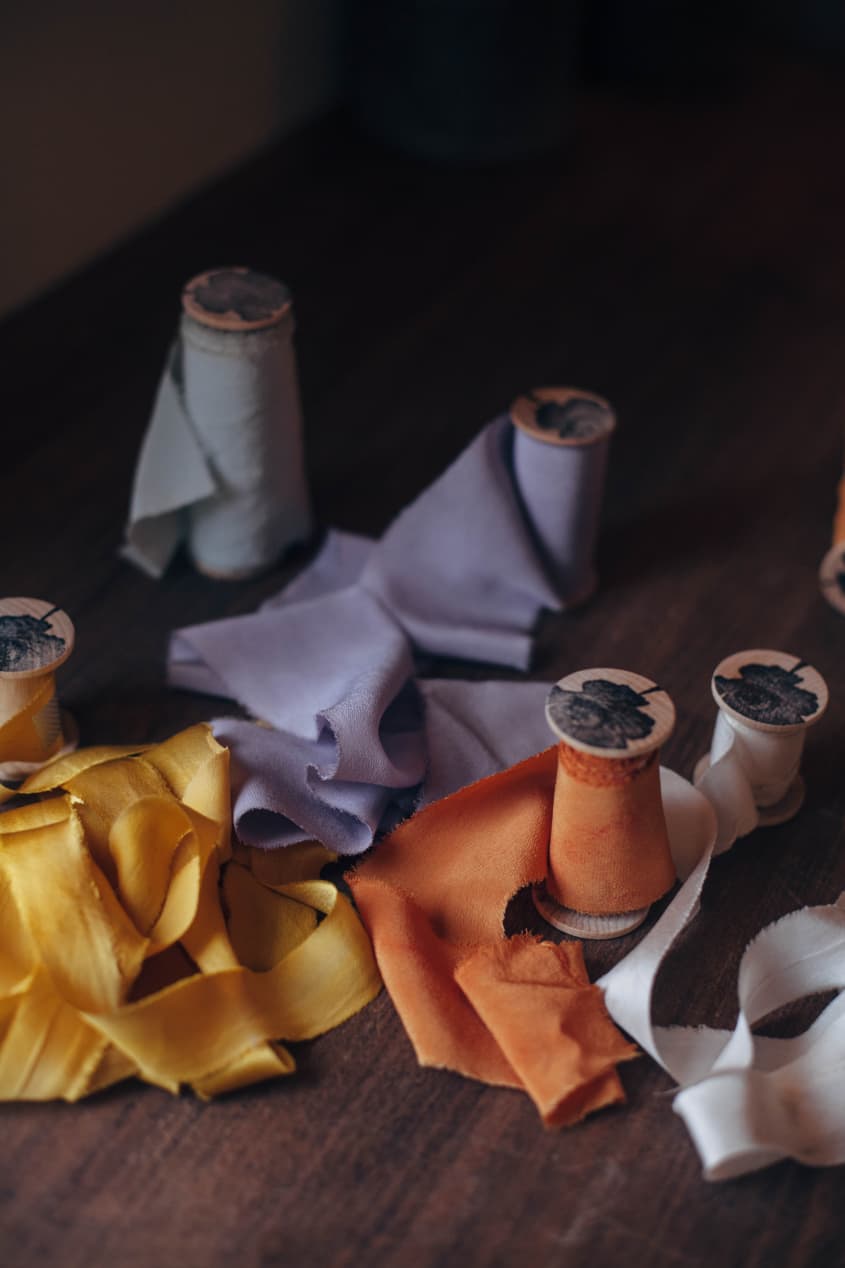
- Fabric for seat covers and backs: The Whole Nine Yards in Portland
- Grey pillows: Cost Plus Market
- Light fixtures: Restoration Hardware
- Water heater: There’s a small instant water heater under one of the seats to feed the sink hot water.
- Details: I also replaced a lot of little details that had become broken or lost, like the exterior lights and the little fobs that open the windows. I found Vintage Trailer Supply to be a great resource for that.
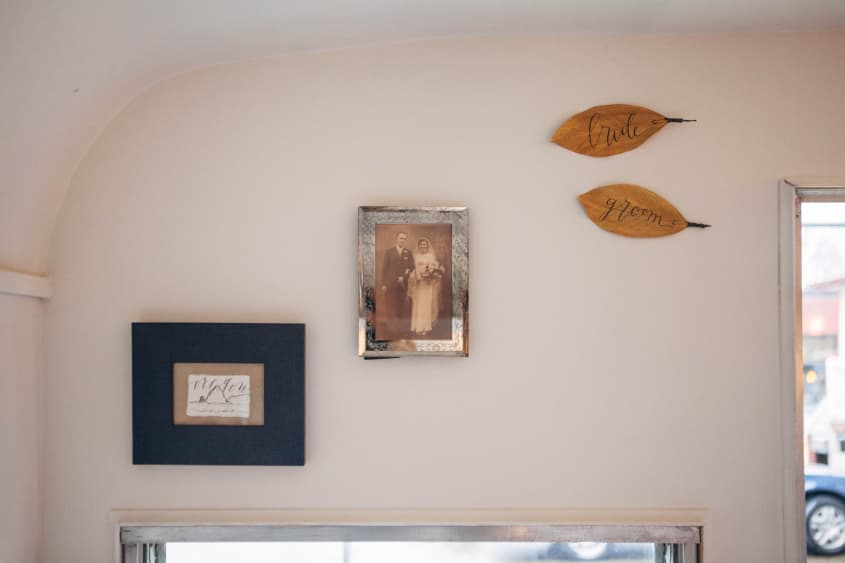
- Photo: There’s a framed photograph of my paternal grandparents’ wedding on the wall. My grandmother was a shopkeeper, and I like to think that she’s keeping an eye on things. She had a mind like a steel trap for money!
- Calligraphy: I’ve also kept and framed some of the lovely work of local calligraphers Kelsey Malie and Palomino because it’s just so pleasing to look at and I like to be reminded of collaborative projects I’ve worked on.


Send us your own:
→ Share your home with Apartment Therapy: House Tour Submission Form
→ Are you a designer/architect/decorator? Share your residential project: Professional Submission Form.
→ And see all of our past house tours here
Updated daily with fresh tours full of photos for you to pin & enjoy!