
Before and After: $200 Made this Living Room Window Seat a Dramatic Focal Point
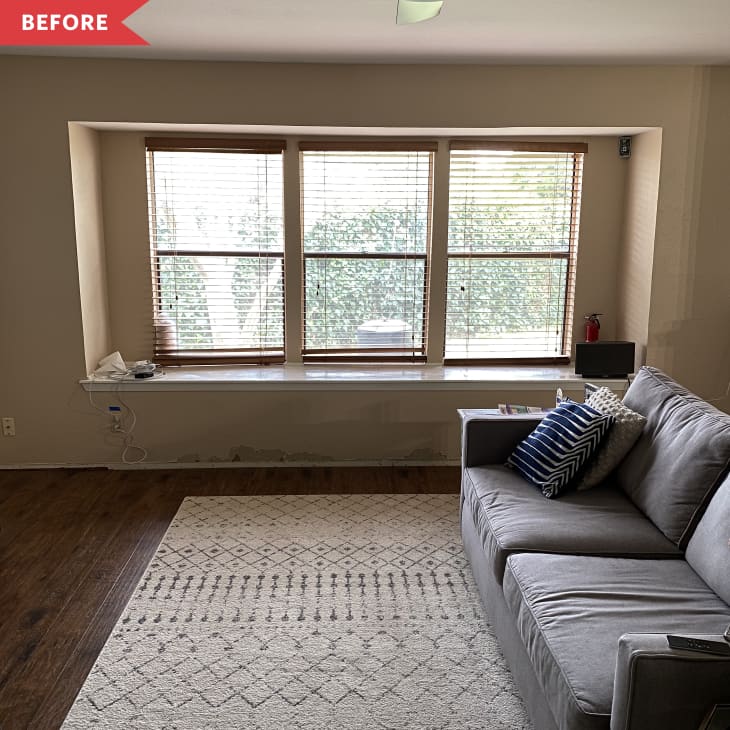
Sometimes, you have to add character to your home yourself. That’s what Jessalyn Thompson, of the.after.project, found when she moved into her new digs: a 1977 “builder-grade box with little character.” The living room had some potential in a window seat—though it was, Jessalyn says, poorly painted and surrounded by peeling drywall. “The original windows were—and still are—drafty and the wooden blinds were orange and dusty from neglect,” Jessalyn says. “I remember thinking I would do a wood slat treatment SOMEDAY but then changed my mind after installing wood floors and buying a wood media credenza and feeling like it would be too difficult to match so many wood tones in a small space.”
After doing other work on the living room—including opening it up to the kitchen—Jessalyn was ready to make the window seat into the focal point it was meant to be.
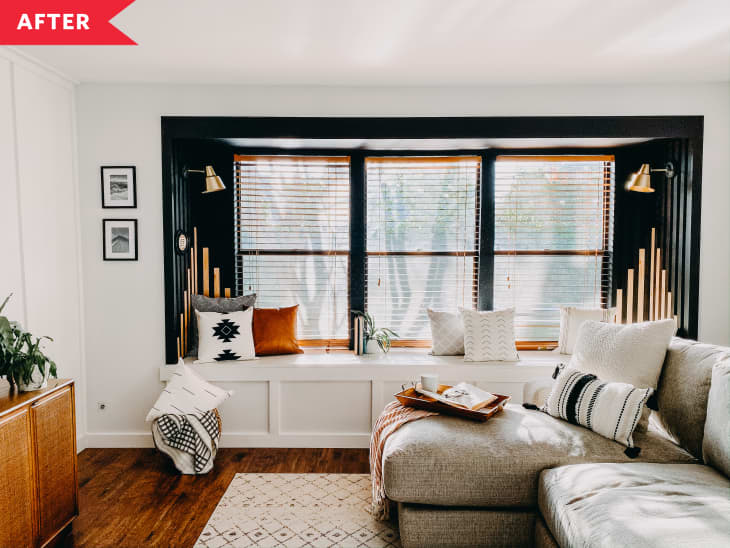
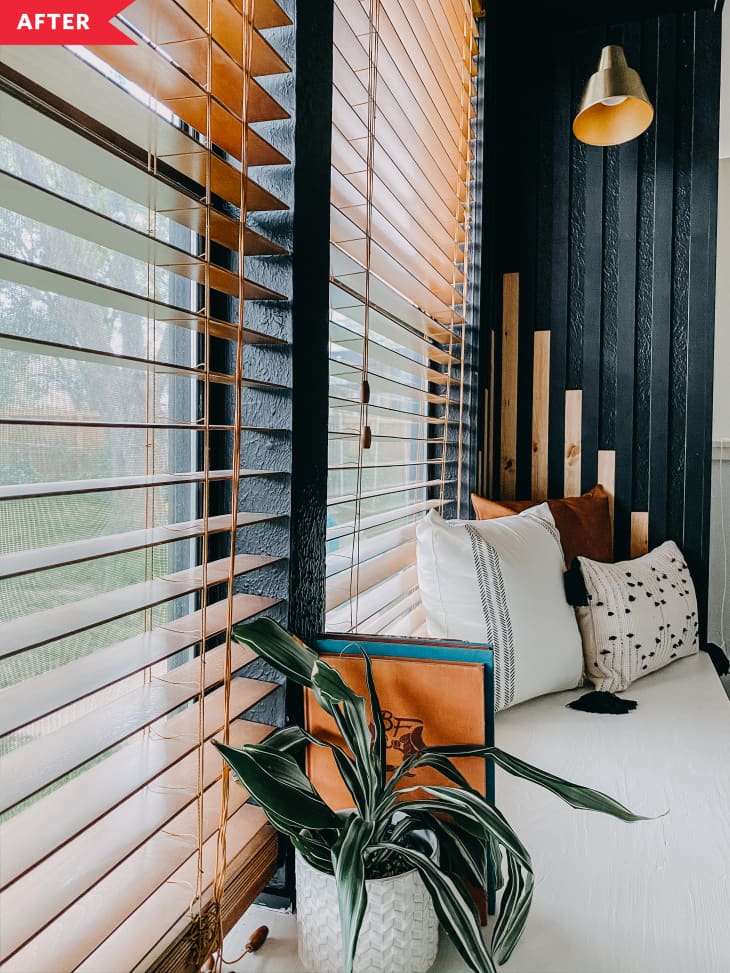
She did the full transformation over nine days for just $200—with major impact. She used MDF to create a board-and-batten look on the front of the window seat, adding sleek new trim to the top edge for a crisper look. Then, she added texture to the inside walls on either side of the seat by nailing up MDF strips to create a ridged effect. After painting the walls and ceiling of the window seat area black, she slotted strips of natural pine—cut to the exact size of the MDF strips—into the spaces between the ridges. The result is a funky, three-dimensional effect. Jessalyn painted the seat and the rest of the walls white.
“Most of the project was straight forward, but there were a few rough days,” Jessalyn says. “I decided to strip the window seat in hopes of restoring the natural wood—but instead found crappy veneer.” Not exactly the kind of surprise you enjoy! However, Jessalyn says, she still finished the stripping before repainting; it helped her get smooth, even results. Another challenge? Ripping (or cutting) the MDF and pine to size herself, which she did to save some money on the project. “If I were to do it again, I would probably just purchase the materials that are already the right size and shape, Jessalyn says. “It would have been about two times more expensive, but would take WAY less time and probably be more accurate and easier to install.”
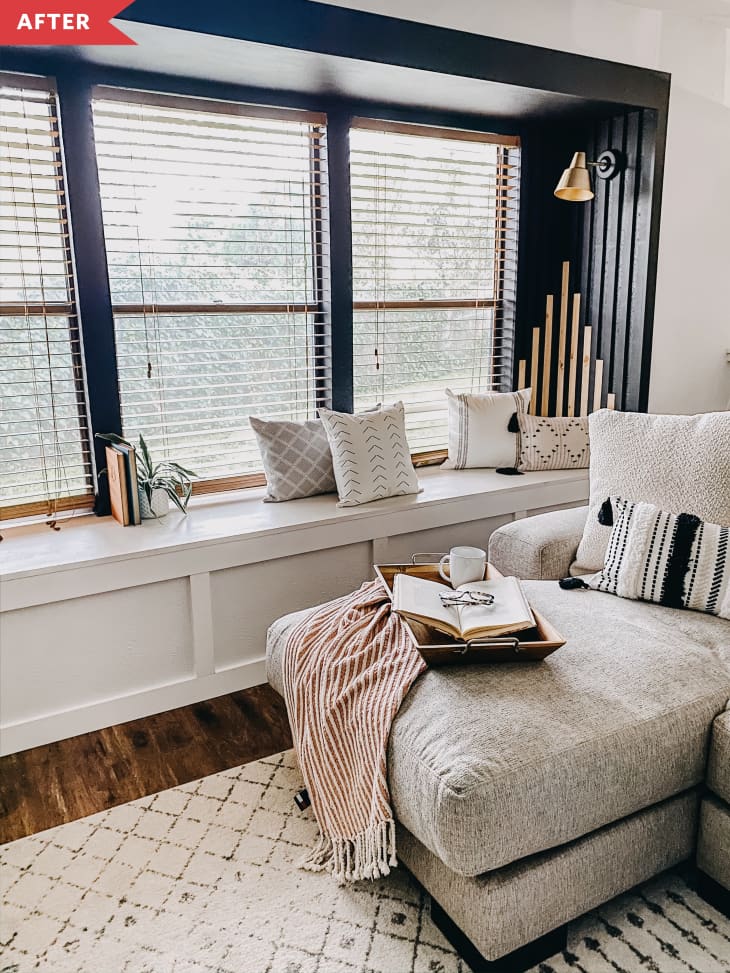
While the black MDF pieces are fastened in place, the natural wood is removable. “I love that I can change up the look by removing the wood strips or rearranging them,” Jessalyn says. “For something like this, leaving yourself options that don’t require you to demo a project but allow for future changes feels like a gift that will keep on giving. I can re-invent the space in just a few minutes!”
The lights have a secret, too: Jessalyn bought wired sconces from Amazon and fitted them with puck lights so they’d be completely operable without having to call an electrician—a clever cost-saving fix! All told, the project took nine days and just $200. The MDF and wood strips, paint stripper, paint, and trim cost $100; the lights added another $100.
“It’s amazing how simple it is when you break it down into its components, but it’s still very dramatic,” says Jessalyn.
Inspired? Submit your own project here.