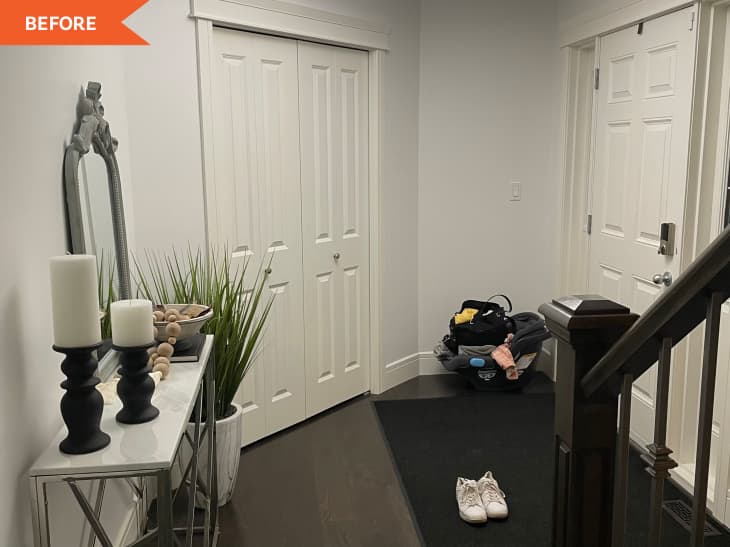
Before and After: $600 Later, an Inefficient Entryway Closet Becomes a Functional Design Feature

If you can spare the storage space, you could consider converting a closet into a functional design feature, like Ghalia Eltassi’s (@urban.homeology) closet-turned entryway drop zone.
Previously, the closet in Ghalia’s home’s entrance had two things that bothered her: Its bifold doors were clunky and blocked about six inches of space on either side of the entry, and the closet’s angled inner walls made the hangers on the sides tilt forward, thus making it difficult to actually hang things. On top of all that, the overall aesthetic of the entryway was a bit boring.
“This closet was one of those areas in our home that I would constantly focus on and think. ‘This could be so much more functional,’” Ghalia says. “Since our mudroom layout wouldn’t allow for a drop-off zone, I decided to create it in the entryway.” Her closet-turned-intentional entryway was an eight-week One Room Challenge project.
First up, Ghalia removed the closet’s bifold doors to create an open alcove. The plan was to create a usable bench that would have storage underneath and above. Of course, that was easier said than done: The closet’s interior angles didn’t match up, so cutting out a well fitting bench seat and floating shelf was a bit trickier than expected, Ghalia says.
Ghalia’s solution to the tricky angles was to make a paper template of the bench top before actually cutting the MDF. Her advice to future DIYers is to get all of the math for the project done first, then execute — it will help you save the heartache of cutting something to size that doesn’t actually fit. Also, painter’s tape can help you visualize the height and width of a shelf or a bench before you mount it, she says.
Ghalia used a sanding block to get a flush fit for her MDF and for any touch-ups afterward. She loves that now, she can seat her 1-year-old on the bench to help her put her shoes on. But Ghalia says if she could change one thing about the project, she’d drop everything (the bench, the upper shelf, and the hooks) 2 inches lower. “After I added the cushion on the bench, I felt like I would have preferred it a little lower, but it still functions great, and it’s something l learned to try differently next time,” Ghalia says.
Adding the vertical wood paneling above the bench was a much easier step of the process, Ghalia says. To lighten things up in the space, she painted the entryway a bright white (Sherwin-Williams’ Pure White). The new flooring throughout Ghalia’s home also helps give the room its “much more open” feel, as Ghalia puts it.
Note that Ghalia didn’t sacrifice on storage with her closet revamp, as she still has hooks to hang things where needed, as well as storage baskets for hats and gloves. She also replaced the small console table from before with a larger credenza from HomeSense with lots more capacity for closed-off storage.
All in, her project cost about $600, and she loves how much more defined the space feels and looks now. “My favorite part of the after is having a spot to sit … and it gives our guests a spot to hang their coats when they come to visit,” Ghalia says. “It took a lot of work to do, and I’m very happy with the final look.”
This project was completed for the Spring 2022 One Room Challenge, in partnership with Apartment Therapy. See even more of the One Room Challenge before and afters here.
Inspired? Submit your own project here.
