
Before & After: A 1950s Kitchen Gets a Modern DIY Makeover
We independently select these products—if you buy from one of our links, we may earn a commission. All prices were accurate at the time of publishing.
(Image credit: Kelly Goldman)
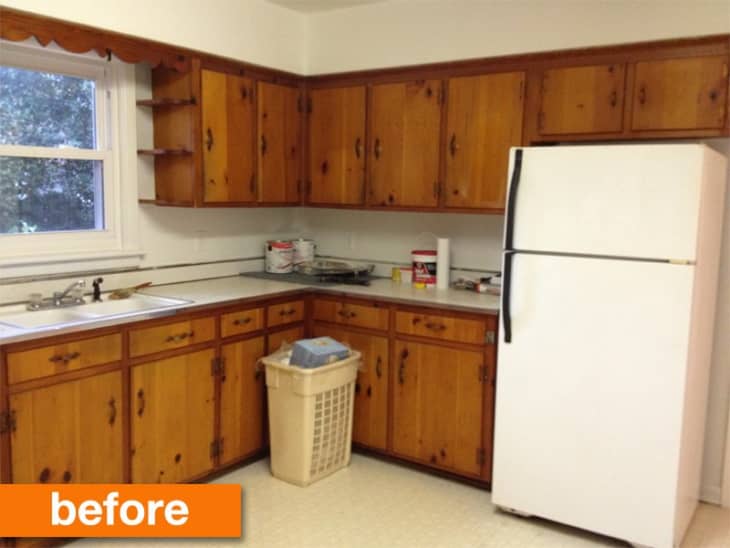
When Kelly and her husband moved into a 1950s fixer-upper in late 2012, they knew their kitchen — with original (in Kelly’s words, grime-encrusted) pine cabinets, aluminum-wrapped laminate counters and linoleum floors mixed with asbestos — would need some aesthetic upgrading. They even started working on this room two hours after closing on the house!
(Image credit: Kelly Goldman)
From Kelly:
When my husband and I moved in to our 1950’s fixer-upper in December 2012, I was acutely aware that we had a long road ahead of us, as far as renovations go — specifically in the kitchen. We had the original (grime-encrusted) pine cabinets, aluminum-wrapped laminate counters (that sent a shock through my forearms every time I used the sink), asbestos-laced linoleum floors, and a host of electrical upgrades to do. Approximately 2 hours after we closed on the house, began the kitchen journey.To say that it was a labor of love is an understatement. Hours (read: Days) were spent sanding/ priming/ trimming/ upgrading the cabinets. The cabinets themselves (sans-doors) were loaded up with all of our worldly kitchen possessions the day after they were primed. And we remained door-less for months. In fact, we hosted multiple parties when we had no doors to the cabinets.
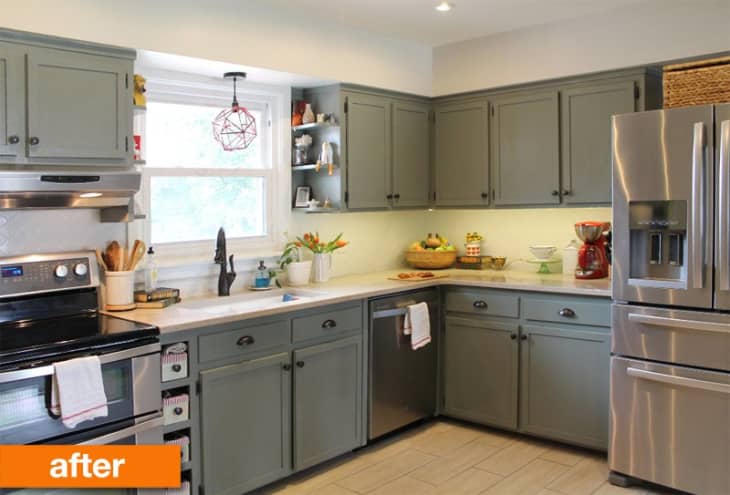
We kept the original cabinets (can’t beat solid pine!), but added some trim; changed and/or added hardware; DIY’ed a pendant light; installed tile flooring and a new backsplash; had the counters replaced with a delightful quartz; re-plumbed the kitchen sink (twice); removed the wall oven and cooktop and installed a freestanding range (which included reconfiguring/ creating cabinets); installed a dishwasher; covered up a pocket door; hand-crafted cabinet doors; had to get one dog’s ear stitched up; and a host of other minor projects.
Piece by painstaking piece, we managed to dis- and re-assemble our kitchen into a place that truly works for us. And our three dogs.
Love that you updated the look but still kept the kitchen’s original ample layout and even some of the character of the room. See more photos on Kelly’s blog.
Thank you Kelly!
Re-edited from a post originally published 5.7.14-NT