Before & After: Rachel’s Simple Yet Sophisticated TV Storage Solution

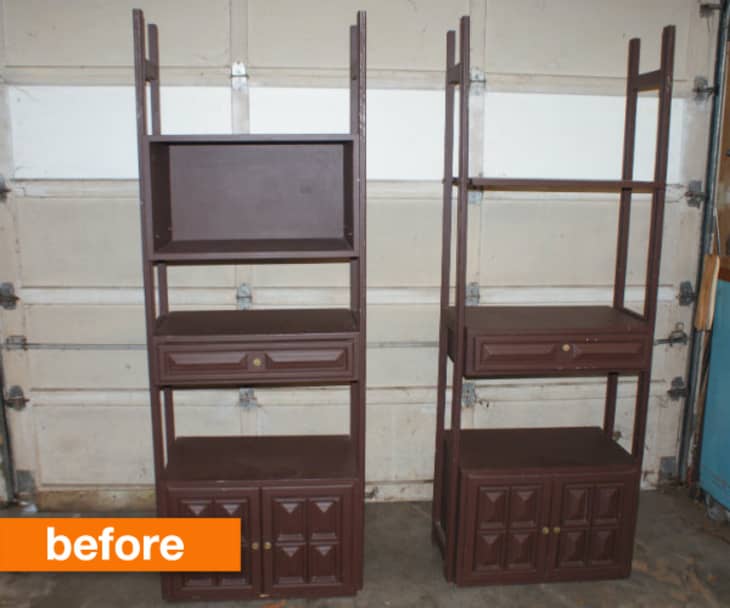
Rachel had tried plenty of solutions for her home’s media center over the years, from credenzas to painting the wall behind the TV and more, but nothing ever quite fit her style or made the most efficient use of space. It wasn’t until she came across two rough and tall storage pieces that she was able to envision the perfect solution — and do it all for under $250!
With full time jobs and a kid, the solution they came up with wasn’t complicated, but it did end up taking a few weeks to complete. Thankfully, the husband and wife team made the perfect pair as they worked on this pair of storage units, carefully sanding and priming (many, many coats) to paint the used piece a clean, crisp white. To connect the two pieces and house the TV, husband Jesse made some custom shelves, which Rachel painted to match the rest of the new, wall-sized, crisp entertainment center. Then came filling those shelves!
From Rachel:
Once the wall unit was in place, I spent some time styling up the shelves — my favorite part of the project! Back in my retail days I developed a knack for arranging displays, so it was fun to practice my little skill again. Everything on the shelves is from around our house except the two black canvas bins on the floor which I purchased from Garden Ridge — they’re for our son’s toys. I’m so happy with how this turned out and I love having space to show off our treasures and tchotchkes!
Cost breakdown and resources:
- Shelves, Craigslist: $65
- White semi-gloss paint and primer in one, Lowe’s: $30
- Nickel and faux crystal drawer pulls, Lowe’s: $30
- Pine lumber for modifications, Menard’s: $80
- Large black canvas bins, Garden Ridge: $30
- Total project cost – $235
See more on Rachel’s blog 52 Weeks of DIY.
Thank you Rachel!
Re-edited from a post originally published 1.5.14-NT
