
Before & After: Sabrina’s From Damaged to Daring Modern Desk Makeover
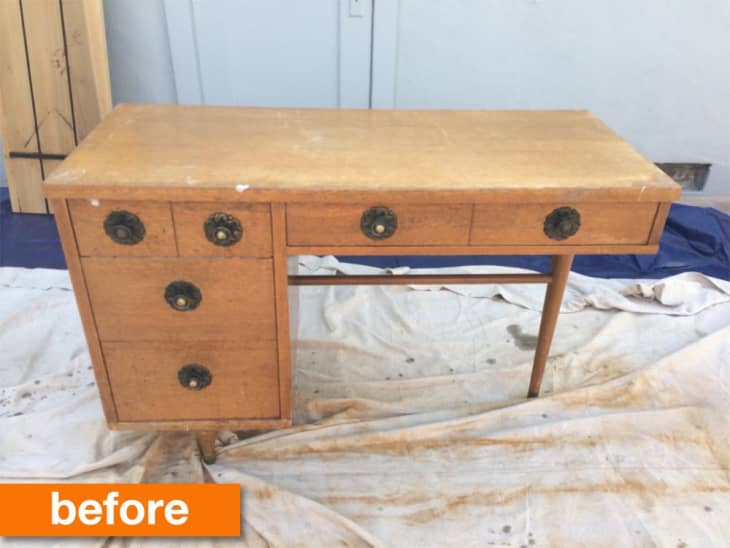
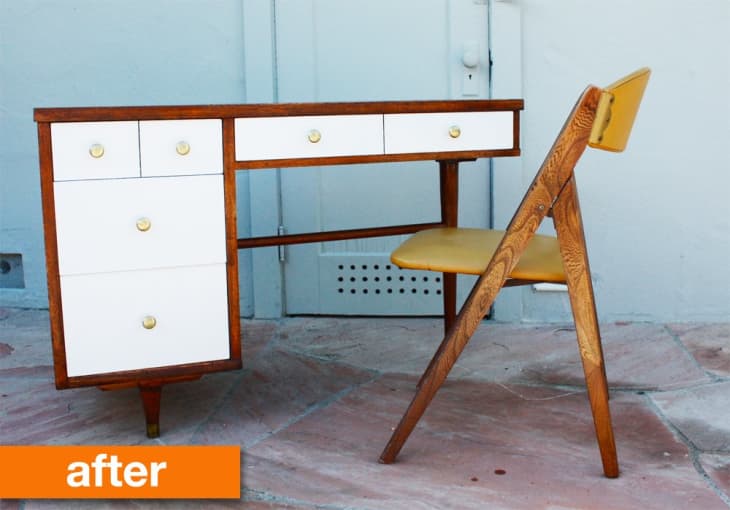
Sabrina is usually in the Mid-Century modern furniture purist camp. But what she dislikes even more than painted furniture is a bad patch job. And boy did this desk need a lot of patching: scratches, tons of stickers, stains, gum embedded in the grain and even “gaudy plates” covering original hardware holes. Sabrina was able to see past all the surface damage though, loving its lines, legs and sturdy frame. She decided that in this case, it’d be okay to have a little fun with a Mid-Century modern piece! And she tells us exactly how she did it.
From Sabrina:
I was initially inspired by West Elm’s Acorn desk, especially the two toned look with white drawers. I was looking for similar hardware, but they were hard to find or expensive, so I settled on these heavy-weight vintage brass knobs I found on craigslist.
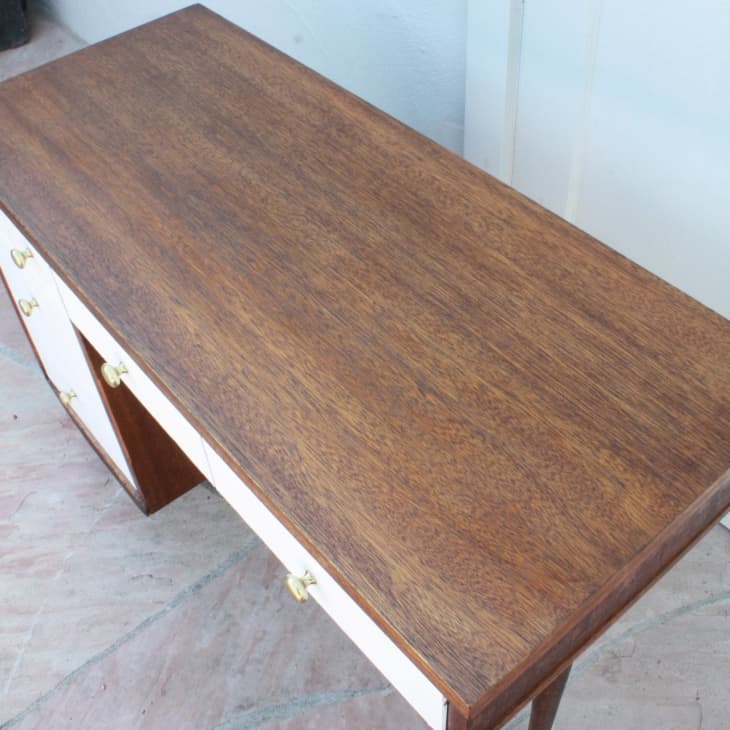
I like the look of natural wood, so I initially oiled it with danish oil. However, when it dried, I thought that color was too golden to contrast enough with the white drawers, so I decided to give it a darker stain. I probably should have sanded it again, but I didn’t want it to get too dark, so I just stained it on top of the oil. The result was a beautiful, dark, but golden and shiny desk, which I love! So for about $54 and a lot of elbow grease, I made an awesome one-of-a-kind desk!
Sabrina’s process with this desk:
1. Clean with Murphy’s oil soap and #0000 steel wool/scotch brite. Scrape off stickers and general gunk with a paint scraper and flathead screwdriver
2. Remove drawers and hardware
3. Sand everything down to raw wood (start with lower grit and work up to higher grit; 220), wipe down with tack cloth.
4. Fill old cabinet holes with wood filler and sand smooth 200 grit or higher when dry
5. Paint drawer fronts, and inside drawers with white oil paint (2 coats) with bristle brush
6. Oil table with danish oil and wipe after 20 minutes. Let dry for a couple days.
7. Stain with dark walnut, wipe off excess. Let dry for a couple days.
8. Paint the line between the false drawers black
9. Seal with Polyurethane (water based, to prevent yellowing on the white drawers). Let dry for at least 8 hours.
10. Measure, mark, and install new hardware.
1. Sandpaper: $10
2. Respirator $0
3. Tarp $0
4. Rags $0
5. Gloves $5
6. 2 Bristle brushes: $4
7. White paint: $10
8. Dark Stain: $10
9. Polyurethane: $10
10. New Hardware: $5 (this would have cost me $20 if I didn’t find some on craigslist)
Total: $54
See more of this transformation (including a visual catalog of how damaged this poor desk was beforehand!) on Sabrina’s website.
Thank you Sabrina!