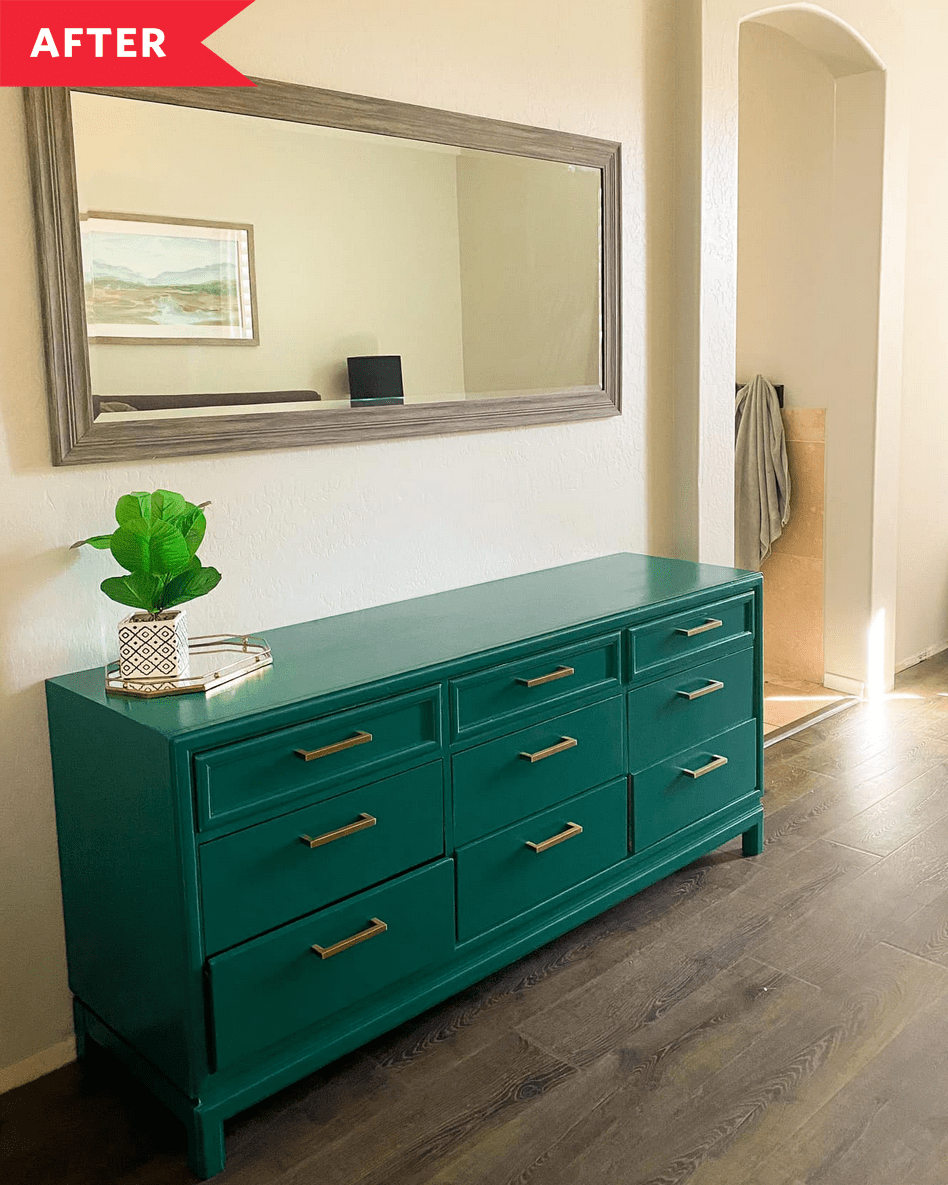
Before and After: A Salvaged $20 Dresser Gets a High-End Glow Up for About $75
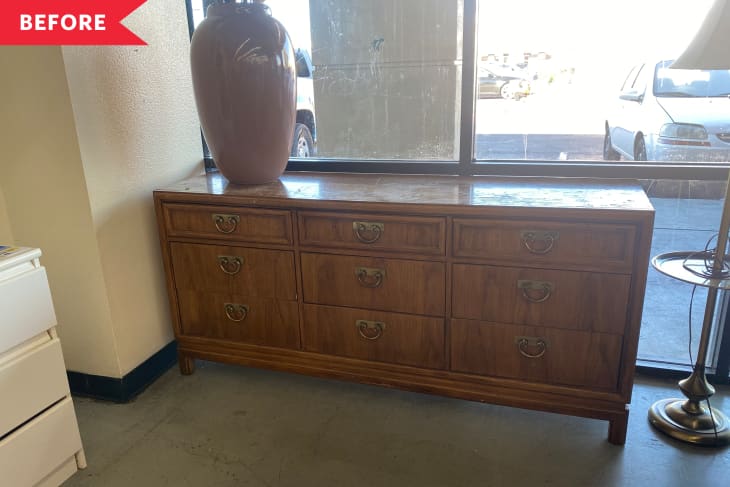
Scouting old pieces of furniture to rescue has been a favorite pastime of mine for as long as I can remember. And on a recent scavenger hunt, I came across a beefy Thomasville nine-drawer dresser in desperate need of a facelift. It had been seriously scuffed up, had a few deep scratches, was yellowed with age, and had some hideous, outdated handles. But it was a cool $17.50. I knew I could breathe new life into it, so I took it home.
I went back and forth on painting or staining this big dresser and ultimately landed on paint for a couple of reasons. First, I wanted it to serve as a true
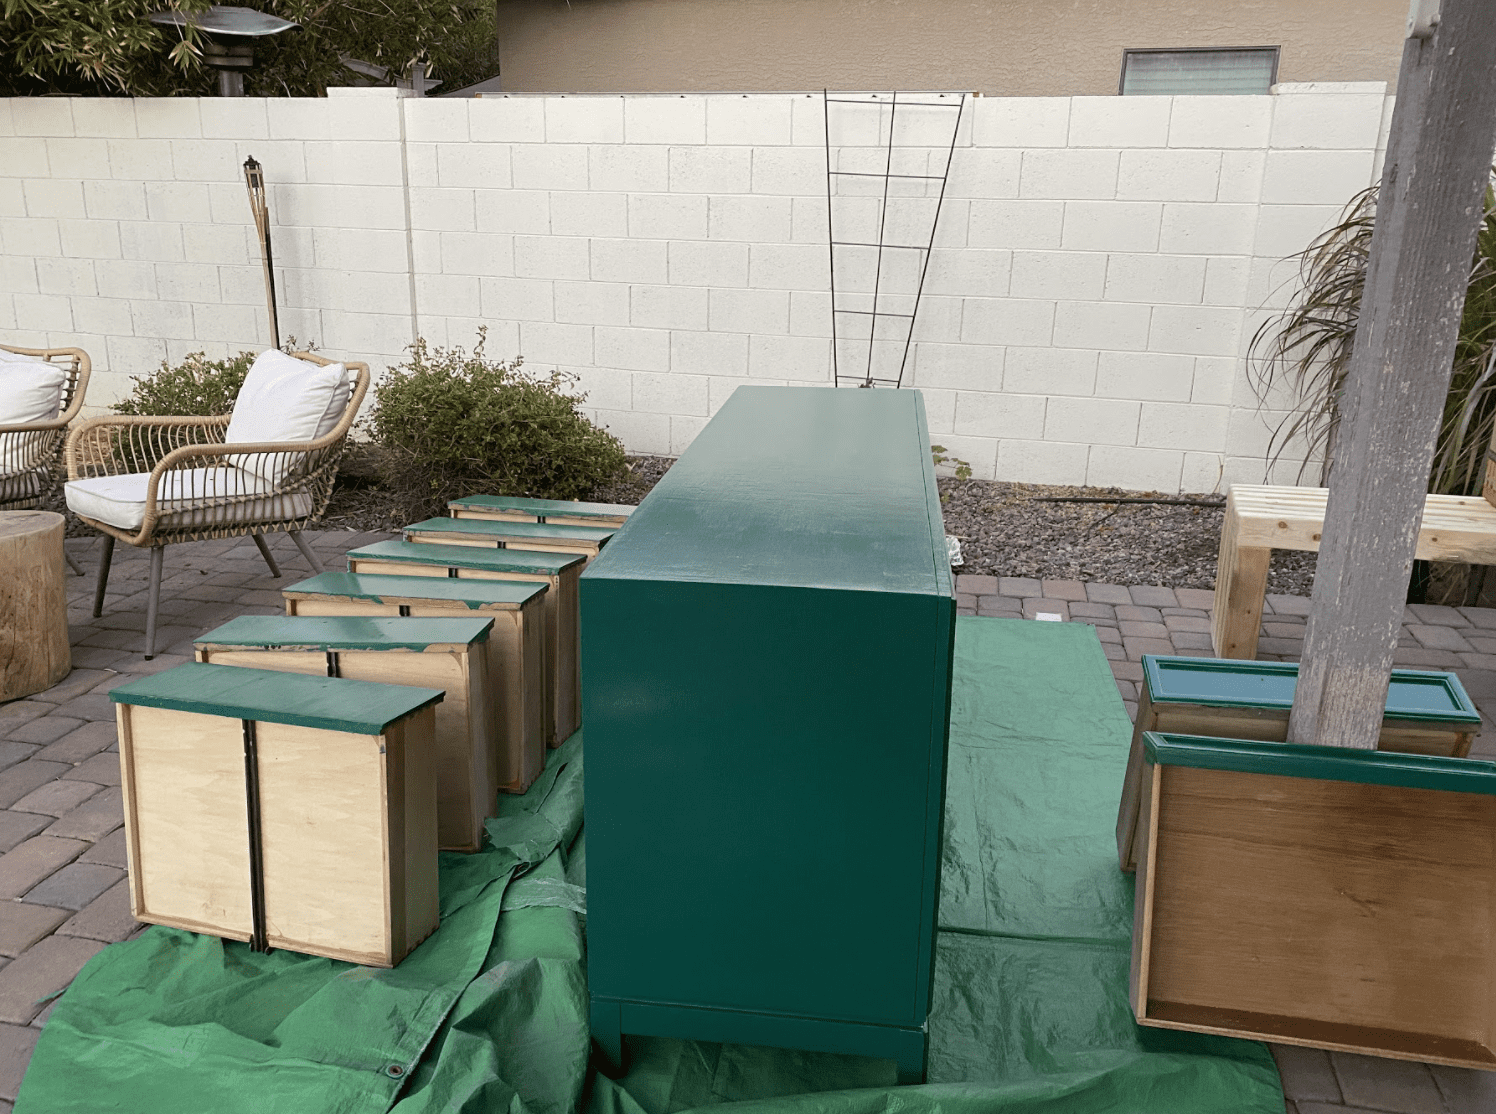
To prep, I removed all the pulls and lightly sanded everything. I used a palm sander with anti-vibration gloves (a must) on the top, sides, and faces, and then went in with sanding sponges for the smaller details. Because I was painting, it wasn’t a painstaking, laborious process. I mostly wanted to ensure the scuffs and scratches were buffed away and that I had a nice surface for the paint to stick to. (In hindsight, I should have used wood filler to fill in all the holes of the dresser, since my new pulls were a different size from the old ones, but I didn’t realize they were different until after painting. If you’re doing a similar project, fill the holes, re-drill new holes, and then paint). Next, I went in carefully with three coats of a beautiful forest green paint (Valspar’s Forest Shadows with Clark + Kensington premium paint with eggshell finish). The first coat was not pretty, but by the second coat it was looking fab. The third coat made it a done deal. Next, I applied four thin coats of General Finishes High Performance Water Based Topcoat. At this point, I realized my mistake with the handles, so I filled, drilled, added another layer of paint and topcoat, and then added my handles. I chose these 5-inch, satin brass modern pulls from Amazon. Because the dresser needed to cure, I let it set for a week before moving it and then refrained from putting anything on top of it or in the drawers for about a month. In total, I spent about $100 on supplies and the dresser itself — substantially less expensive than the $1,000-plus options I was eyeing in a similar style (like this one). I’m stoked with how it turned out, too. I am in love with the color and the way the new pulls look, and I feel great knowing that I saved an old piece.