
Before and After: Stock Tank Gardening Project
I’ve been in love with galvanized stock tank gardens for a long time and posted a roundup of my favorites last summer. Finally, I’ve gotten the chance to exercise my green thumb and take the first, small step to adding a little style to the exterior of my home.


After nearly a year of renovations to the interior of my home, I’ve finally had the chance to start adding a little curb appeal. Sure, it’s just a tiny corner of the property along the driveway, but it felt good to do something with the landscape. To my surprise, even the UPS guy approves.
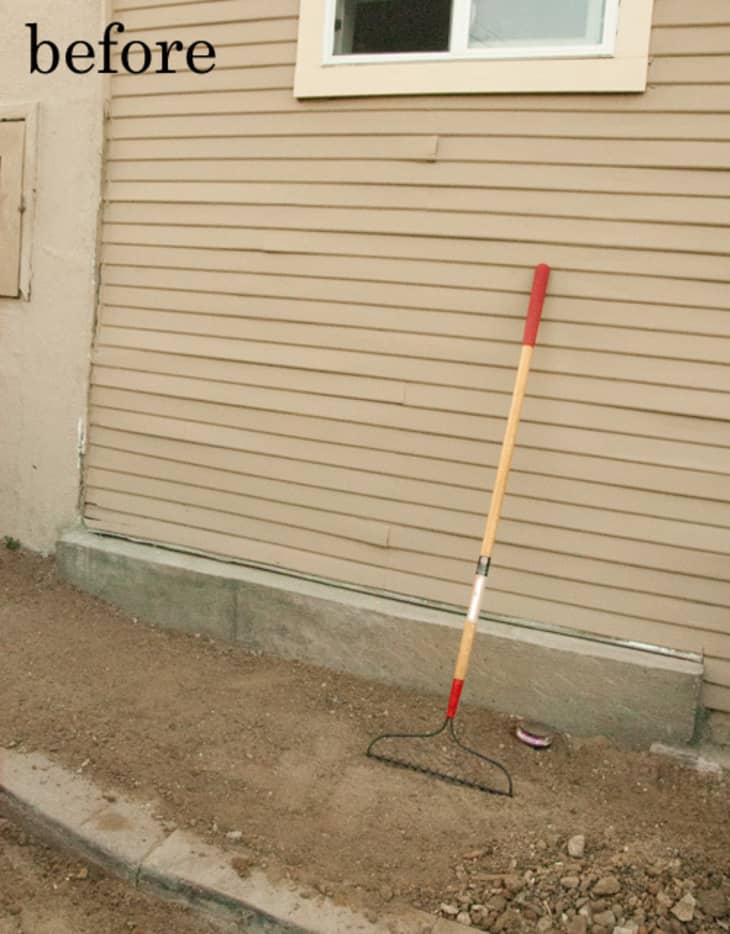
The area I chose had been part of a walkway that was demolished to repair the gas line. Rather than re-pour the concrete, I preferred to turn it into a little planting area.
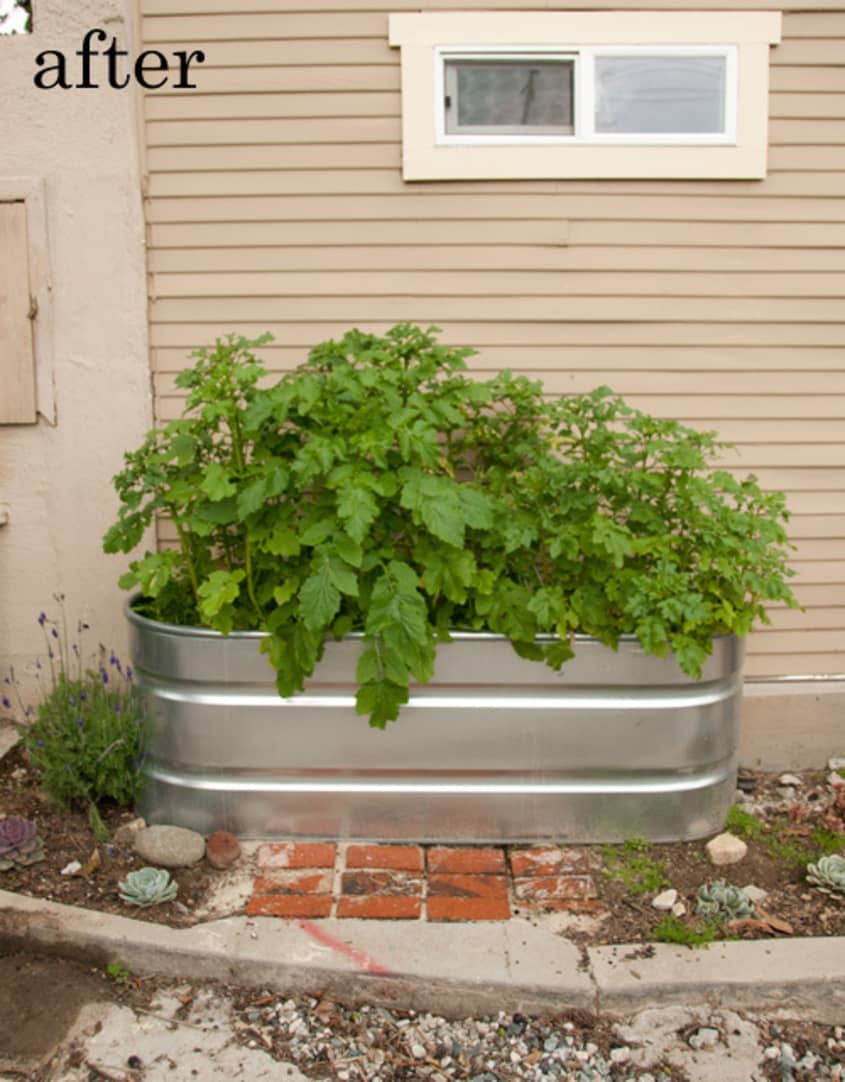
My first challenge was sourcing the stock tank. I found that I could order online Do it Best Hardware and have it delivered to a local store. I went with the six foot long, 169 gallon option for $149.99. Once I got it home, the first order of business was to drill 40+ holes in the bottom for drainage. Next, in the bottom of the tank I placed a lot of used concrete chunks that were left from a demolition project. I filled-in the rest with basic, organic potting mix. I ordered seeds suitable for winter weather (crimson clover, common vetch, alfalfa and braco mustard) from the Sustainable Seed Co. Basically, I just wanted to plant something that would grow nice and tall, while fortifying the soil, until tomato season arrives.
To complete the project, around the base I planted drought tolerant plants and made a little path out of used bricks for accessibility.
Related Posts:
• 5 Ways to Use Galvanized Stock Tanks as Planters
• Sage Gardening Advice: Taking a Slow Approach
• 35 Gardening & Outdoors Posts You Might Have Missed
(Images: Michelle Chin)