Before & After: What a Difference Some Paint Makes!
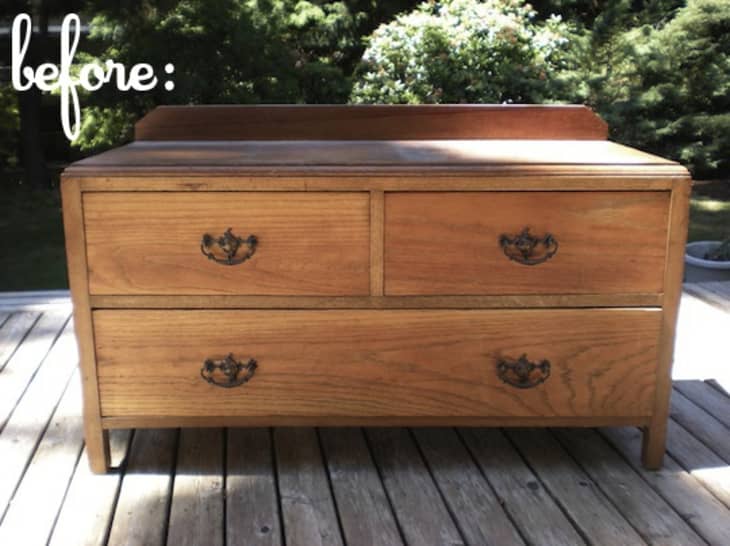
I am in the process of turning my bedroom into a shared space with my fiance. We are on the lookout for yard sale finds to accentuate the space, and were happy to find this great miniature dresser last year. It has been sitting in the storage unit waiting for refurbishing time and the perfect color of paint.
Finally, with a little time off and the right color of paint (Martha Stewart’s “Pencil”), we went to work.
With a short stint of Seattle sun, we were lucky enough to do most of this project outside to avoid dust and paint fumes. Starting with a coarse-grained sand paper and a small power sander, we removed the dark, outdated wood stain. When it was relatively free of stain, we went over it again with a finer sand paper to smooth it out. Using a water-based primer (be careful not to use an oil-based primer with a latex paint, as it will not bond properly), we lightly coated the dresser with two thin coats. Primer is necessary on bare wood, as it provides a base for the paint to stick to, and allows your chosen color to show itself without the wood grain showing through.
Before painting, we lightly sanded the primer to make sure there were no drips or globs that would compromise the smooth surface. With paint, always remember that it’s better to apply four or five thin layers than one or two thick ones. The thicker the layer, the less even your results will be and you will be battling sloppy drips. I also found that a small foam roller provided smooth coverage, without those pesky brush strokes. We allowed several days for drying and fit the dresser into our new room!
(Images: Andie Wurster)
Re-edited from a post originally published 7.11.11 – JL

