
Before and After: This Free Dresser Found a Fancy Second Life for Just $45
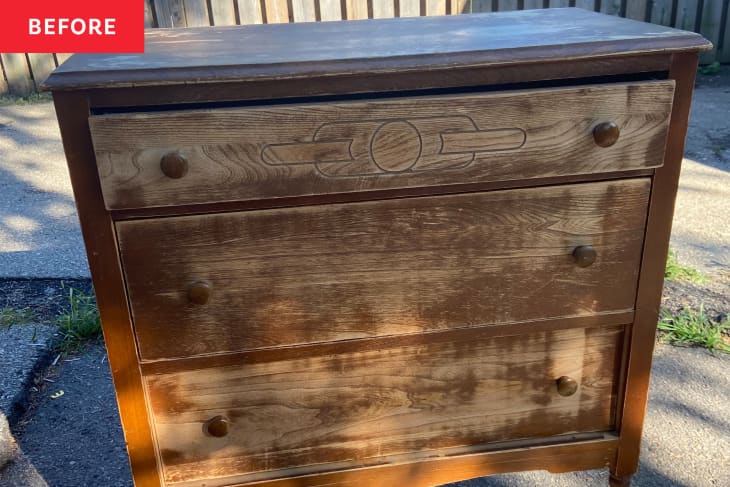
If there’s one thing I love, it’s an affordable DIY transformation. My Pinterest board is filled with amazing furniture flips and hacks, and after months of browsing and ogling, I decided to finally take a project on myself. Open to trying anything, affordability was my only requirement, so I set a total budget of $100 for the whole project. After a little bit of searching, I eventually found this adorable three-drawer wooden dresser with potential on Facebook for free (score!). Within a few hours of finding it, the piece was sitting in my garage, eagerly awaiting its makeover.
While it felt like a shame to cover up the original wood, the dresser itself was a little beat up and required a bit more fixing than I anticipated. So after much deliberation, I decided painting was the way to go. I’m a huge fan of black accents in my home decor (we have a black accent wall in our bedroom!), so I decided on a black finish that I’d dress up with gold hardware. I chose Fusion Mineral Paint’s Coal Black and found some vintage-style brass pull ring knobs on Amazon that I knew would pop. All in all, I used paint, paint brushes, sandpaper, wood filler, wood glue, a miter saw (which we already had, thankfully, so it didn’t add to my bottom line), contact paper, and new hardware to completely transform this freebie.
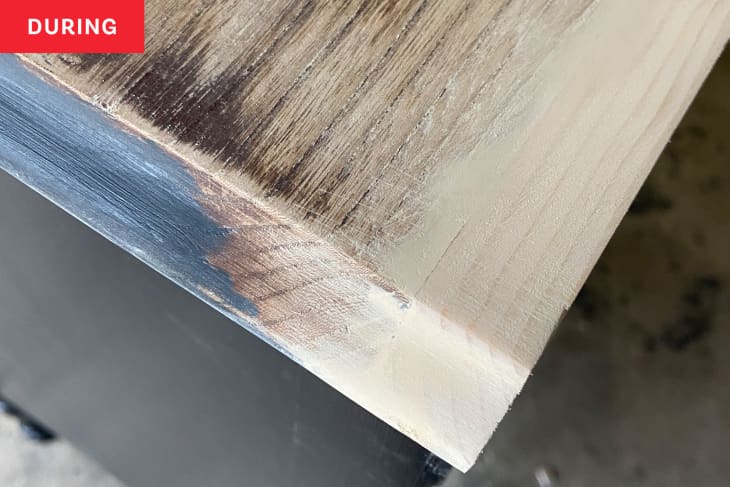
Besides painting the dresser, a few repairs needed to happen for the piece to reach its full potential. At some point the dresser had a mirror attached to the back of it, and the top was missing about an inch at the back as a result. This meant that we (my boyfriend got recruited for this part) needed cut a small piece of wood to size to patch the back part of the top board. We also needed to ensure the edges matched the existing beveled edges. While this seemed like a daunting task, we ended up hand chiseling and sanding for a seamless look, which was actually pretty easy and turned out great in my opinion.
Besides this repair, prepping and painting the dresser was fairly easy. A light cleaning and sanding was all that was needed to prep the wood, and since Fusion Mineral Paint is extremely forgiving and has great coverage, I only needed two coats. This paint has a stunning matte finish, which while beautiful, ends up being somewhat impractical in my home. For a shinier finish that is easier to clean, I opted to finish the dresser with a Varathane top coat.
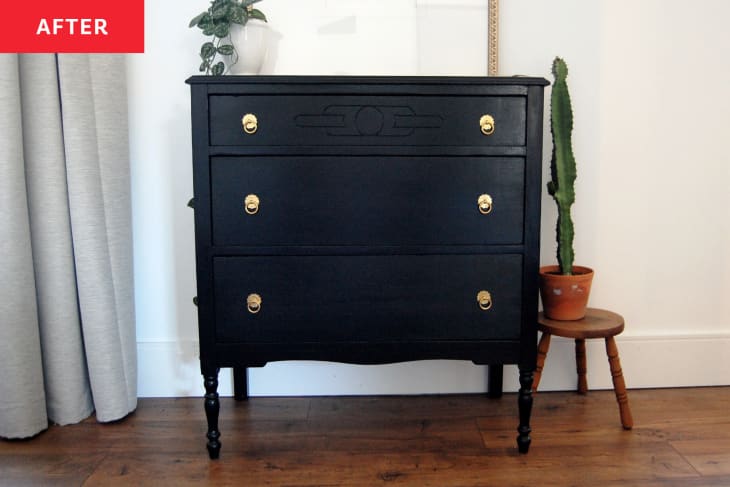
As a last step, I put some patterned contact paper inside the drawers and added the hardware! Now, this little dresser has a new life in our home, and I’m thrilled with the results. All in all, this project cost around $45 in total — way below my $100 budget! I see many more DIY furniture transformations in my future!