This Mural-Loving DIYer’s Must-Have Tool for Bold Paint Projects

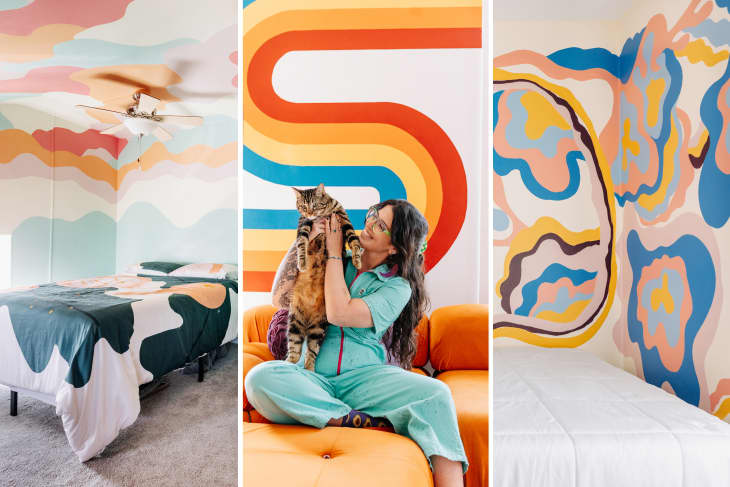
When first-time homeowner and avid DIYer Emma Chasen and her now-wife Carolyn Chernous purchased their Victorian home in Philadelphia, they knew they’d found “the one.” The row home’s quirky charm immediately spoke to them, and Emma soon got to work on a ton of incredible bold paint projects throughout the home: on the ceiling, around sconces, in door frames, on furniture, and of course, across all the walls.
“When I get an idea in my head I have to create it,” Chasen says. “My wife jokes that for a while, she would come home from work and a new mural would be on the walls of our home. But now that I’ve painted most of the house, I take my time before I choose to take on a project. I think it through and sit with the idea for a little while before I commit to make sure I really want to do it or if it would really fit with the rest of the vibe of the space.”
Early on, though, Chasen says she made some painting mistakes due to impatience. “I’ve skipped taping lines and covering floors to try and speed up the project,” she explains. “I’ve also skipped sealing the painter’s tape and have peeled it off the walls prematurely. All of these mistakes caused me to spend a lot of time touching up paint or scrubbing my carpet to get paint stains out.”
Moral of the story? Do the prep work, she says. “It is tedious, but it is worth it for a better end result.” And if you really want to do a great job with a bold, statement paint project, she offers up her recommendation for must-have tools.
The 2 Tools This Experienced Mural Painter Swears By
To get the best results possible, Chasen recommends using a high-quality painter’s tape — and her pick is FrogTape (available in various widths for around $10). “This is so necessary for clean lines,” she says. Skimp on this, and you’re likely to see messy edges where paint dripped underneath the tape during your project.
Even with a great tape, Chasen advises taking an extra step to help ensure super crisp lines. “My tip is to seal the painter’s tape by painting over the edges with the wall color underneath the tape,” she says. “This will give you clean lines every time.”
But when you’re working outside straight lines, there’s actually something more important: high-quality paint brushes. “They’re so worth it!” Chasen says. Cheap ones might work if you’re painting a whole wall, but if you’re working on detailed projects you’ll need a brush with bristles that will hold their shape.
For murals, Chasen especially loves to use an edge brush with an angular bristle shape and a short handle: “It allows me to have a lot of control when painting,” Chasen notes. You can “choke up” on a classic paint brush to gain more control, but a short-handled brush like this one — easy to find at hardware stores and online — lets you get a firm grip near the brush’s head without extra handle space at play.
A great brush is especially important when you’re working without painter’s tape — as you might for a mural with lots of curved edges. Take, for example, Chasen’s proudest achievement in her home so far: a stunning rainbow ribbon mural she painted in her hallway. The multi-colored masterpiece spans two floors and reaches all the way to the ceiling, but includes no straight lines.
“I really wanted it to feel like it was playfully pulling you along as you walked up the stairs,” she says. “In addition to being playful, I wanted it to be precise — the same width at all points with smooth lines. I don’t use a projector for my murals, and even if I did, the hallway is such a tight space it would have been difficult to project the design onto the walls in the way I wanted.”
To accomplish the design, Chasen says she drew a single line twirling throughout the space and then measured 1.5 inches from that line, dashing along the way. Then she connected the dashes with a smooth line to make sure the ribbon was 1.5 inches thick in all places.
For the colors, Chasen used paint she’d already used throughout my house and painted a palette on a piece of scrap paper to figure out the color order. And because she didn’t use tape, her brush did lots of heavy lifting. “When I painted, I used some really good edge brushes to make sure my lines were smooth,” she says. “I had to do a few coats, listened to a lot of podcasts while doing it, and risked my life on a ladder leaning over my stair railing to reach all the high corners on the third floor, but I really am proud of how clean it came out.”
