
Before and After: A Three-Week $500 Kitchen Facelift
The materials in this kitchen appear to all be of high quality — stainless steel, pretty wood cabinets and floors, granite countertop—but I can also understand why reader Devann referred to this kitchen as “bland brown-on-brown-on-brown.” Sometimes even the most beautiful finishes need contrast in order to shine!
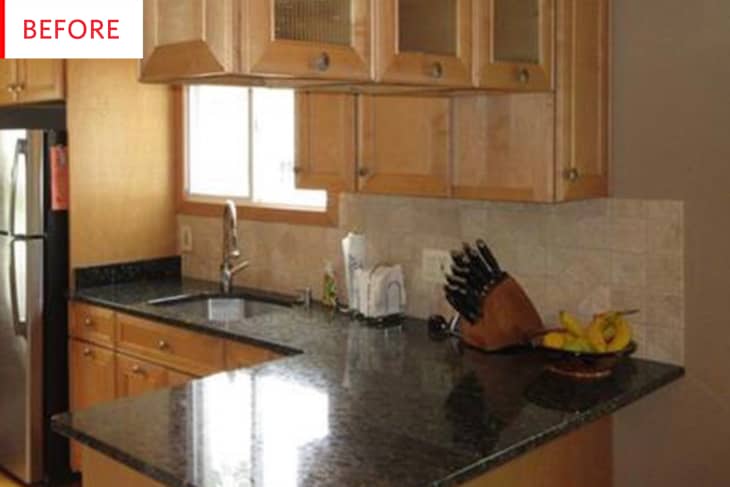
Here’s a full-length shot of the original kitchen and Devann’s description of it:
Before, our kitchen was very monotone. The kitchen cabinets were light wood which matched our floor color. The bland brown-on-brown-on-brown made us want to add some color!
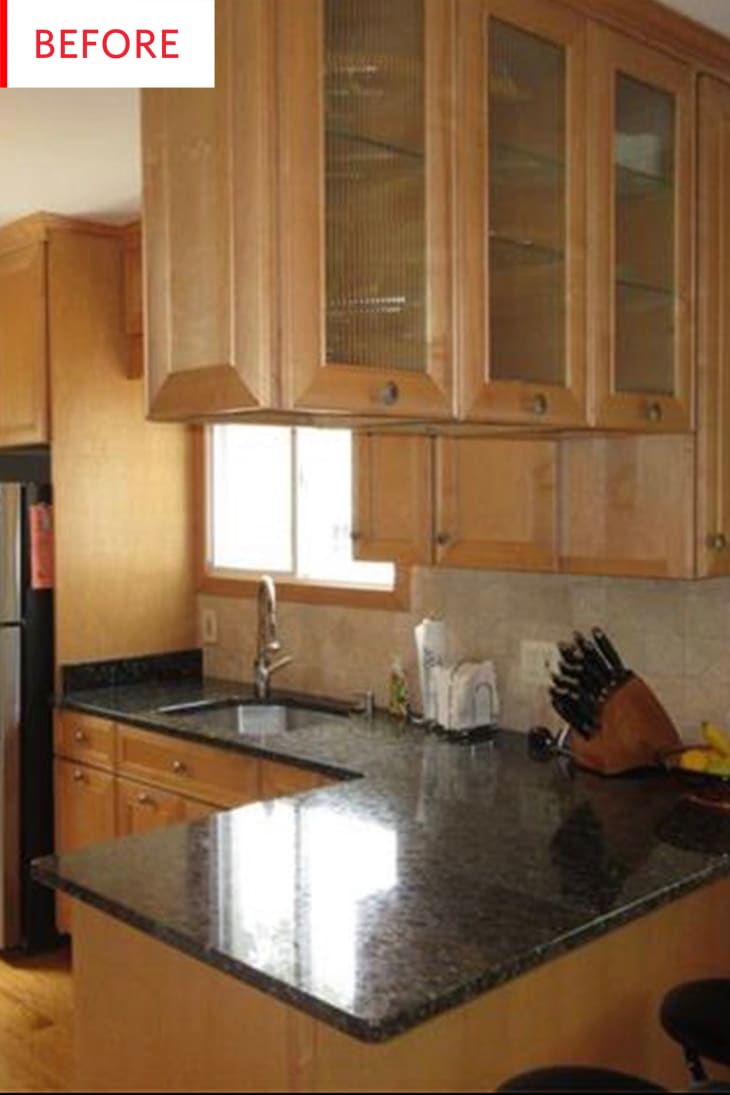
While the floor is enviable hardwood, it’s the exact same color as the cabinets and peninsula, and the fascinating detail of the granite gets lost in the mix. The beige backsplash further muddies the waters, and the stainless steel refrigerator sticks out like a sore thumb.

This is lovely! The floor can now be fully appreciated since it no longer has to compete with the cabinets, that white-painted backsplash tile is a major upgrade over the taupe, the granite is the superstar it deserves to be, and the two paint colors both really highlight the pleasing lines of the cabinetry. But what we need to discuss is that stunning tile! It’s so interesting and beautiful, and so well chosen. Somehow, its intricate pattern doesn’t fight with the counters — instead they set each other off perfectly. I’m in love with that tile but, unfortunately, Devann isn’t so sure:
We love how much brighter the after is! I go back and forth on the tile we choose for the area by the stools.
If, like me, you have none of these doubts and want these ceramic tiles on nearly every surface of your home, they’re EPOCH from Lowe’s, and they come in sheets that look relatively easy to install.
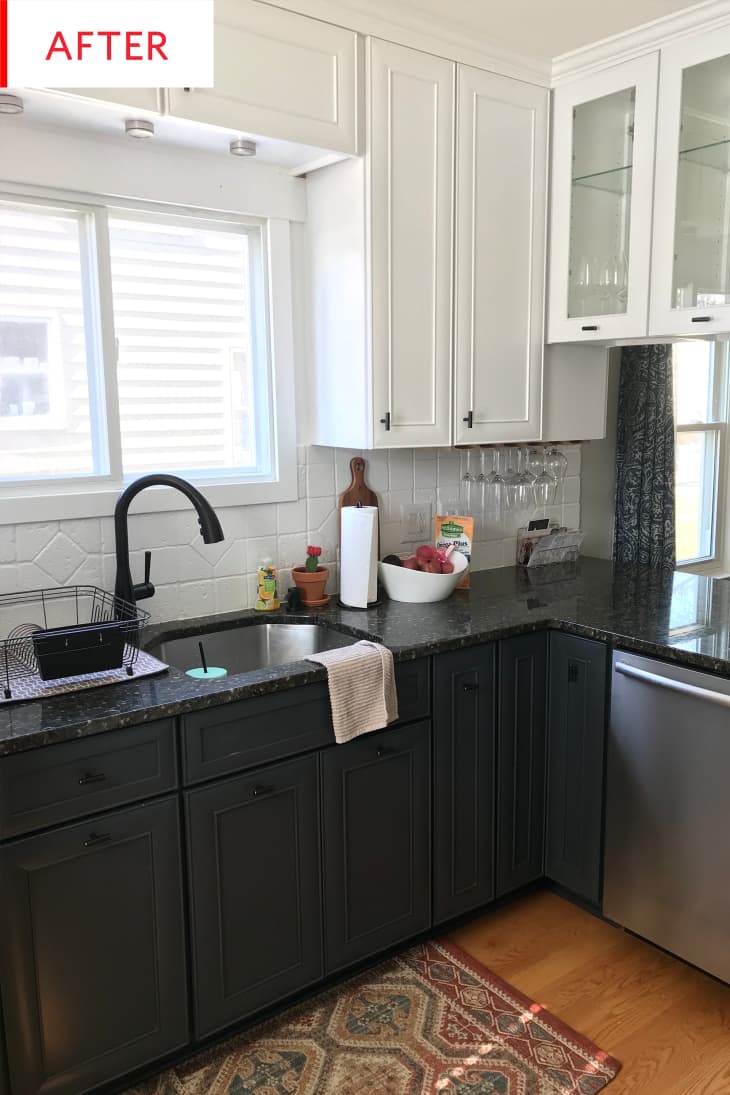
Here we can see how well the stainless steel appliances work with the new black and white finishes, and how effectively the wood floor adds warmth. I especially like those cute tiny lights above the sink!
Here’s more of that taupe tile, and this photo reveals the all-too-relatable clashing appliances as well. What did it take to give this perfectly reasonable kitchen a makeover?
The process took about 3 weeks total. From sanding, priming, painting and hanging, it was a longer process than we thought. The full project cost about $500.
That’s impressive — I feel like three weeks isn’t too bad, given how great the results are.
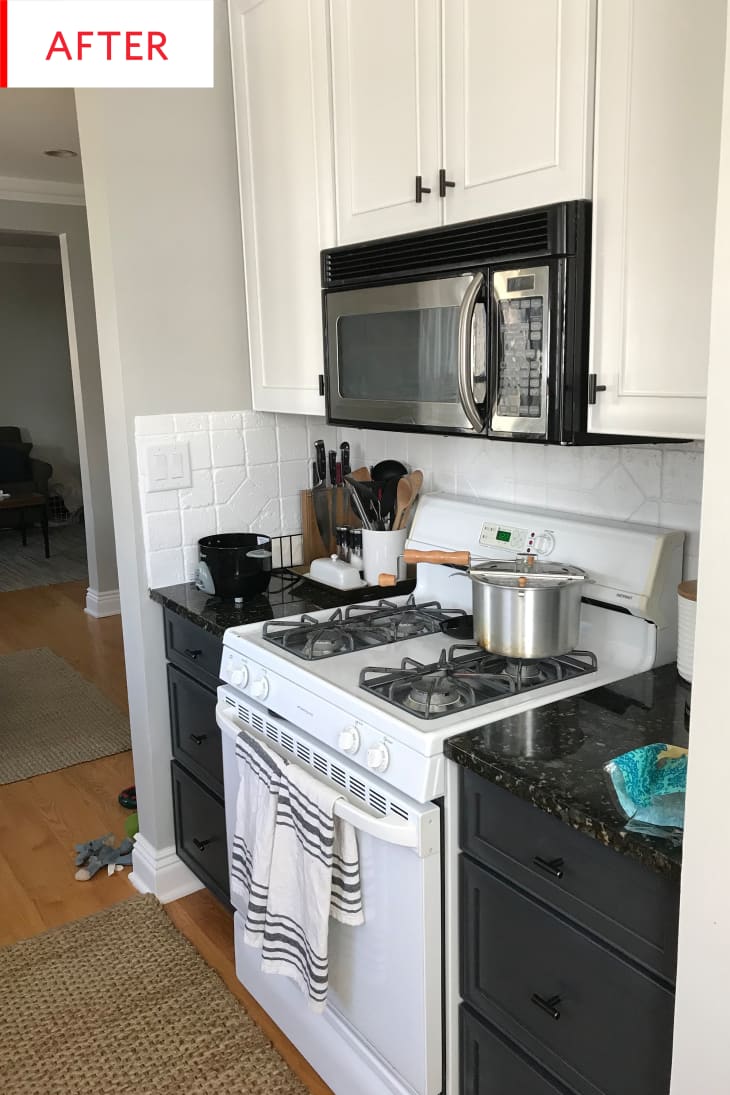
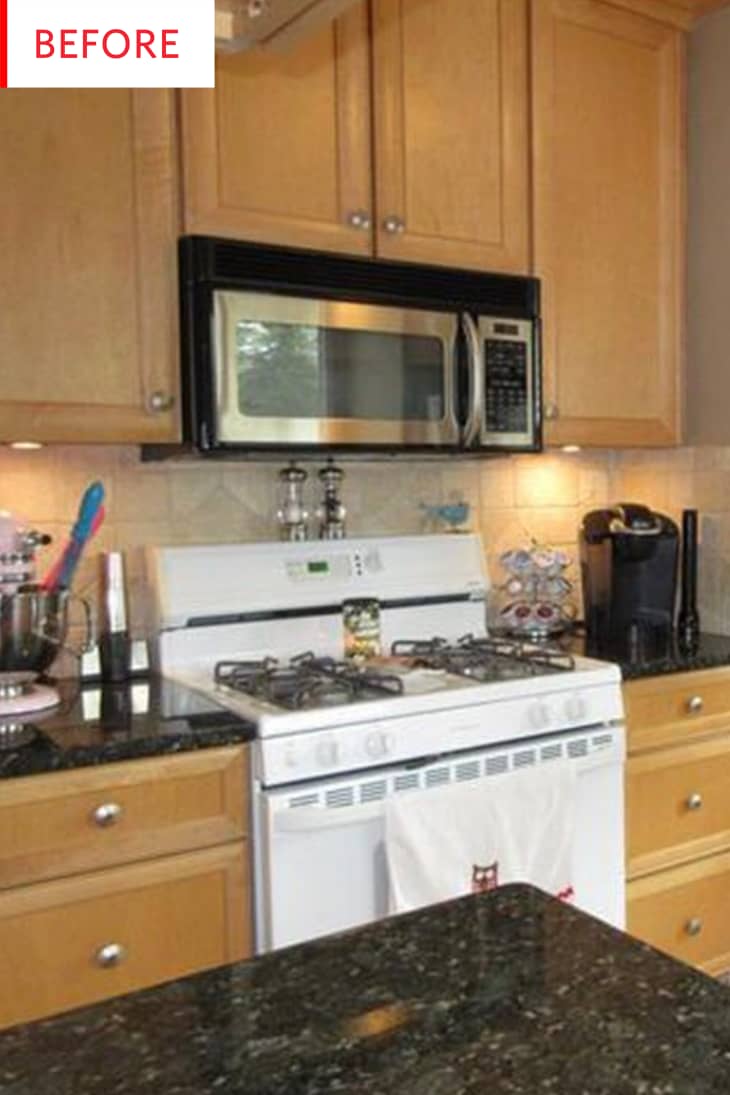
This is where the magic happens: that is a fantastic white stove, and when it was surrounded by beige tiles and wood cabinetry, it seemed to clash terribly with the black and stainless steel microwave. But now that the palette has been shifted to black, white, and grey, the two appliances get along just fine! I really like the whitewashed-brick look of the painted backsplash, as well as the way the wood floor stretches into the other rooms. If the floor had been replaced, you’d lose that beautiful flow!
Thank you, Devann!