
Before and After: My Daring Bedroom Makeover Embraces 2 Design “Hot Takes”
I have two hot takes that informed my recent bedroom makeover. First, I don’t believe in accent walls. In my mind, if you’re going to wallpaper a room, go all in. Do the whole thing top to bottom, wall to wall.
The second is your bedroom should never be the last room you tackle. People often go straight to renovating their living rooms, kitchens, and dining areas because that’s what guests see. Meanwhile, they’re sleeping on a mattress on the floor and using a moving box as a dresser. But shouldn’t your bedroom be your haven? It’s your retreat away from the world, where you curl into bed to recharge. Make your bedroom somewhere calming, and your days will start and end on the right note.
All that is to say, while I currently have a tub in my living room, a bathroom vanity in my dining room, and a microwave that’s held together with masking tape, I do have a dreamy bedroom that’s 90% done.
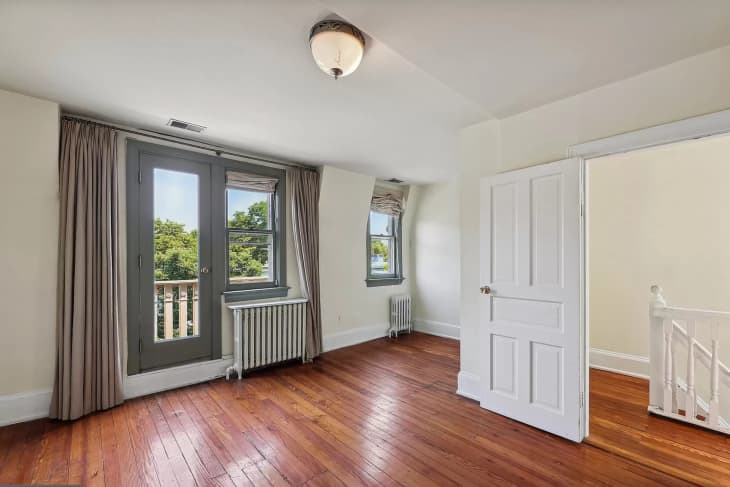
Part of what made my bedroom redo so exciting was finally having a completely blank slate. For years, I’ve had tiny bedrooms where all I could fit was a queen bed and two tiny nightstands. Moving into this home, with a main bedroom that not only had room for a king bed but also room for a chair and a dresser (imagine that!), got my wheels turning.
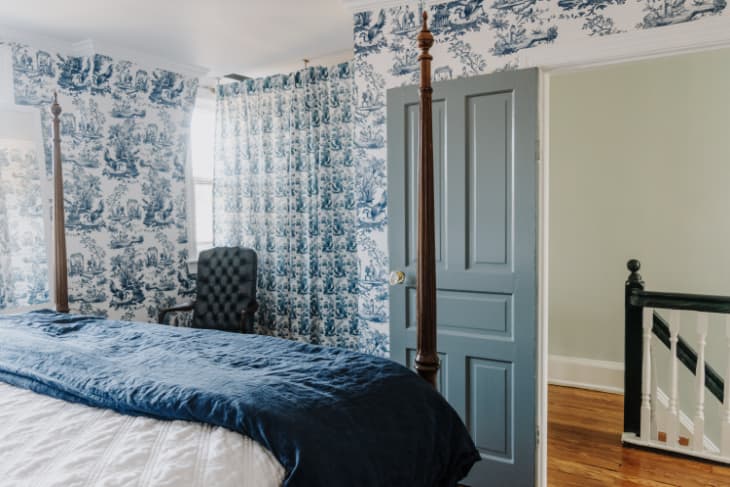
The (wall-to-wall, of course) wallpaper is classically chic.
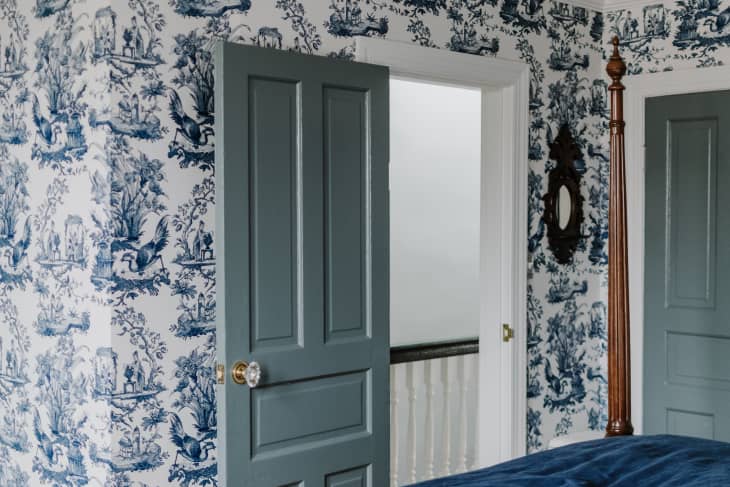
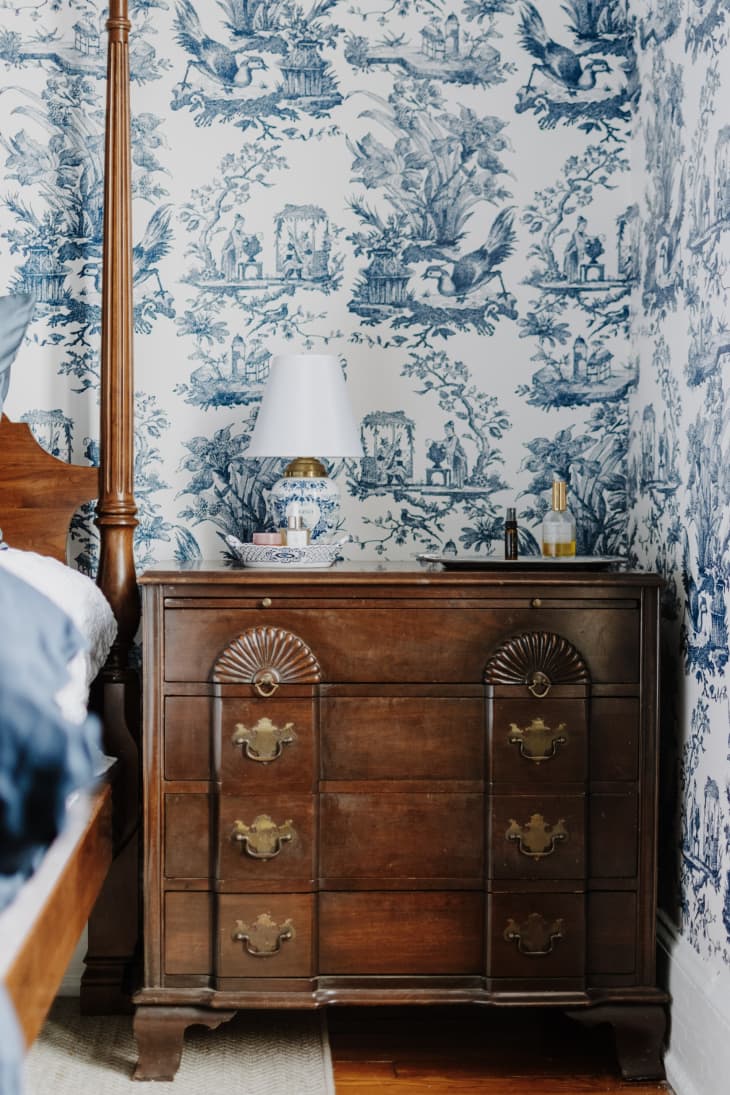
The blue and white toile wallpaper was the foundation of the entire design scheme. This print seemed big enough to hold its own given the size of the room, and it was just off from pure white, giving it a softer feel.
Going all-in throughout the room, including on the ceiling dormers, was a bold move, but it makes me feel enveloped within the space. Because of the blue and white palette, as well as keeping the palette blue and white throughout the room, the result is calming rather than frenetic. While I’ve DIYed wallpaper in the past, I do know the limits of my abilities — in this case, it made sense to hire someone to do the job!
I highlighted (and added) architectural details.
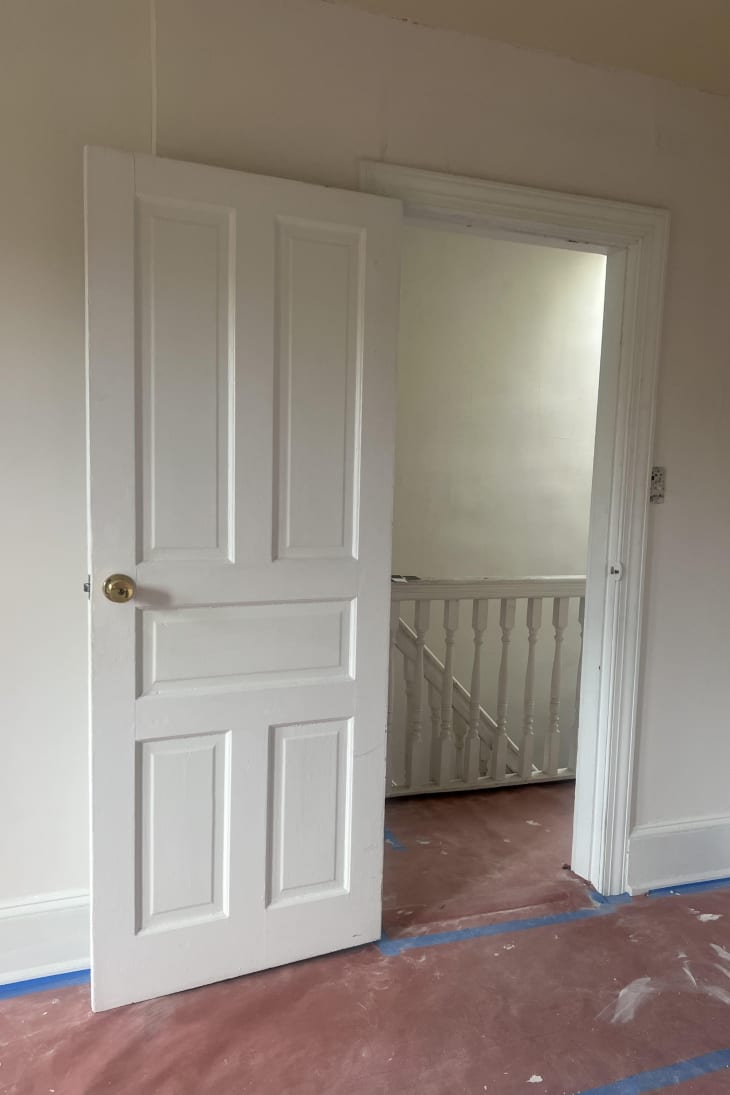
Crown molding was added to give the room a polished feel that works well with the new wallpaper. I also painted the doors throughout the house in a grayish blue (Benjamin Moore’s Apollo Blue). We’re lucky enough to have the original doors still in place here, but undoing 130 years of paint layers was a little intimidating. The easiest way to update them was to paint over them (again) in a striking color.
Throughout the room, I’ve paid attention to the devil in the details. A company called House of Antique Hardware has been my best friend. I’ve ordered door hinges (yet to be installed!), door knobs, switch plates, and outlet covers all in the same brass Victorian detail. Those are a few of the nagging pieces that are left, but they’re the details that make a room, and they’re easy to install — all you need is time (hence my not having installed all of them yet!).
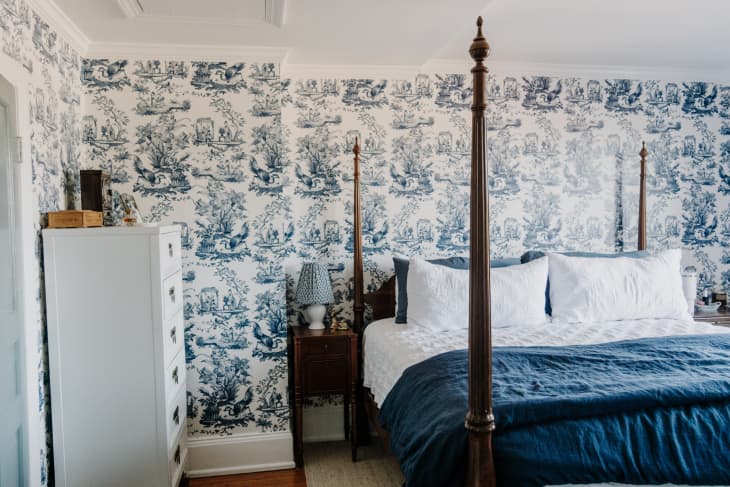
I kept my furniture neutral.
The classic blue and white look is frequently accompanied by light wood or wicker, but I wanted something a little less expected. I added chocolate brown furniture for a look that’s a little surprising but still timeless.
Every piece within this space is secondhand, from the bed I got on Kaiyo, to the Facebook Marketplace nightstands, to the leather chair from an antiques market and the Etsy lingerie chest (a splurge I’ve had for nearly six years now). Even the lamps are vintage, with the small ivory ceramic lamp coming from my childhood bedroom. (Adding a new Ballard Designs lamp shade gave my childhood heirloom a fresh look.) I chose a neutral rug from The Perfect Rug to bring the space together, and I plan on adding a second smaller one in a custom size to match underneath the leather chair.
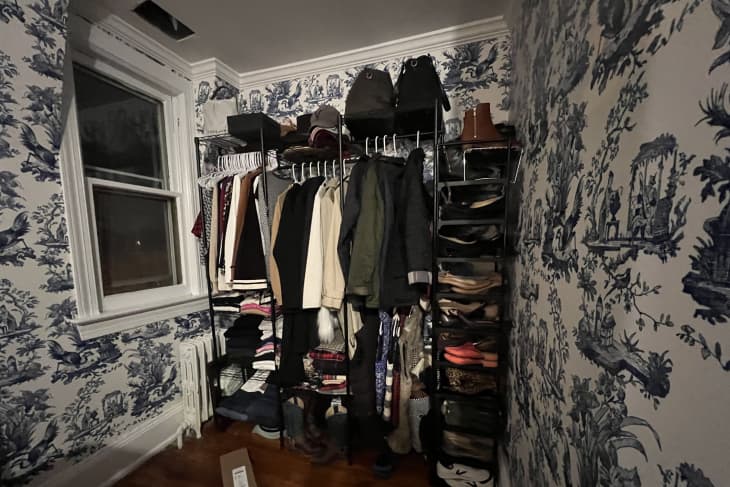

I carved out my own closet space when 1895-sized closets wouldn’t cut it.
The closet situation, however, was the trickiest piece. There are two closets in the room, but they’re 1895-sized, with barely enough room for a hanger. There is, however, an alcove that’s nearly too spacious, and I saw the opportunity for even more concealed storage here. In theory, I could have a beautiful built-in closet there, but that takes major dollars. I dreamt up a budget-friendly alternative that would only require some DIY skills and a few hundred dollars.
First, I measured the space carefully and ordered a combination of clothing racks that would perfectly fill the space. Then, I ordered a drapery rod and hooks that would hang from the ceiling. Spoonflower, where I got the wallpaper, carries a myriad of products in each print, so I ordered two drapery panels. My thought process was I would wrap the room in this print, and the drapery in front of the clothing rods would just seem like they were hiding a window. And (drumroll, please) it totally does!
Do I still want a custom closet? Sure. But the drapery DIY hack works, and the clothing racks are “customized” to exactly what I need for my clothes. The drapery print is slightly different — smaller, bluer — than the wallpaper, but the look is still the same, and it wraps the room in blue and white grandmillenial maximalism.
There’s still more to be done, but if I’ve learned anything about decorating an old home, it’s that there’s always more to be done. Even if there are outlet covers to be added and hinges to be switched, my bedroom still feels like a calming retreat that I love to come back to at the end of the day.
Inspired? Submit your own project here.