
Before and After: This Low Budget Kitchen Remodel Was DIYed from Head to Toe
This kitchen’s new owner described it as “functional, but an eyesore” and was determined to make it as pleasant as possible. Nine months and a ton of DIYing later, this “midway” renovation is complete and this kitchen is a totally new room.
Reader Erin Corbett was kind enough to submit this project and share details about the issues and inspiration behind it:
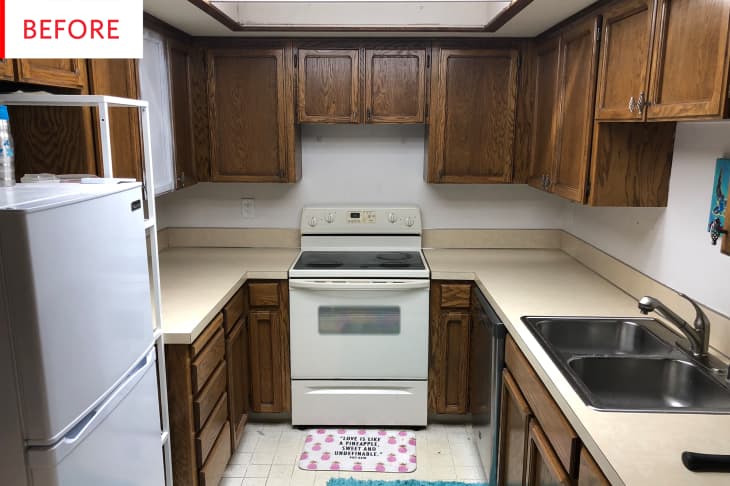
My little condo was built in 1984 and not much in the kitchen had been touched since then. It had dark wood cabinets, cream and metal rimmed laminate counters, a backsplash with a lot of damage and rust, heavily stained linoleum floors, and a mish-mash of white, cream, and low quality silver appliances. It was functional, but an eyesore!
The kitchen was at the top of my list of things to update when I bought this place. I bought it after the dissolution of my relationship, and it was important to me to prioritize making a nice home for my 4-year-old daughter and me. I have a strong aversion to browns and eggshells, so it was easy to choose the kitchen to work on first!
That is such a sweet, relatable reason to undertake a renovation! Also, I just wanted to point out the fact that the cabinets were a nice, dark, rich wood, as opposed to the aggressive honey or builder’s standard orange wood that we usually see. I could definitely see them working well for some of us, but they didn’t work for Erin.
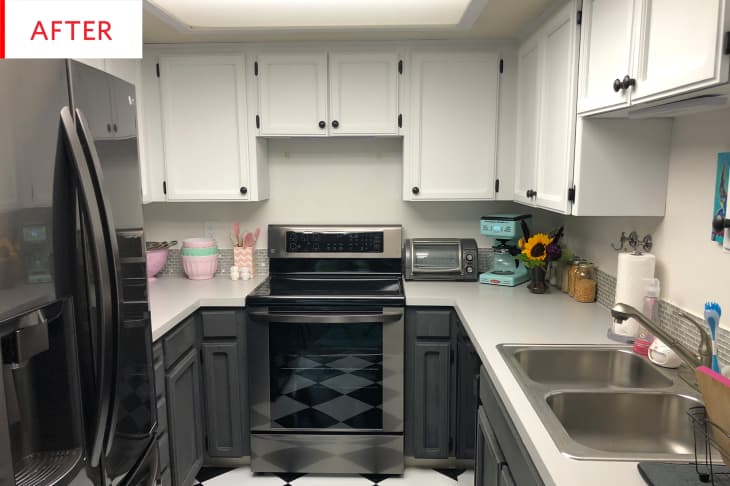
It’s now a totally different room. All traces of the brown and eggshell have been erased, replaced with a fresh black, white, and gray palette that works much better with the stainless sink. There are no longer any signs of rust, and fancy new appliances have taken the place of the “low-quality” ones; once again, the kitchen palette works perfectly with the new black and stainless fridge and stove. The petite backsplash adds a bit of sparkle and has a strong presence in the small kitchen.
Let’s hear Erin describe the project:
I painted the cabinets with chalkboard paint in gray and white, swapped out all the cabinet hardware for black, re-coated the countertops to a light gray, overlaid the flooring with peel-and-stick tiles, replaced the backsplash with an iridescent silver mosaic, and re-painted the walls.
From start to finish, it took about nine months. I have never done any sort of home improvement projects before, so I did this entirely through online tutorials, advice from friends, and trial and error! Not including the appliances, the total materials cost was under $600. The backsplash tile sheets were more than half of this, I really loved this mosaic design and splurged.

Here we get a good look at the black-and-white checked floor—always a classic. Erin didn’t have a floor that needed to be restored or saved, and replacing it would have been a huge expense, so peel-and-stick tiles seem like the perfect solution.
After so many months of work, Erin is rightfully pleased with the results:
I love the fresh, clean look now. It’s lighter, more functional, and inviting. It’s cohesive, and everything looks like it belongs together. I learned a lot on this project, but ultimately I’d do the same things again. I was short on both time and funds for this, so choosing the most budget-friendly materials I could find was a key to success. If I had waited to afford to replace the cabinets and counters entirely, I would still be walking into that “before” photo every day. This is a great “mid-way” remodel that will keep it inviting and nice, and I can now address a major remodel in another 10 years.
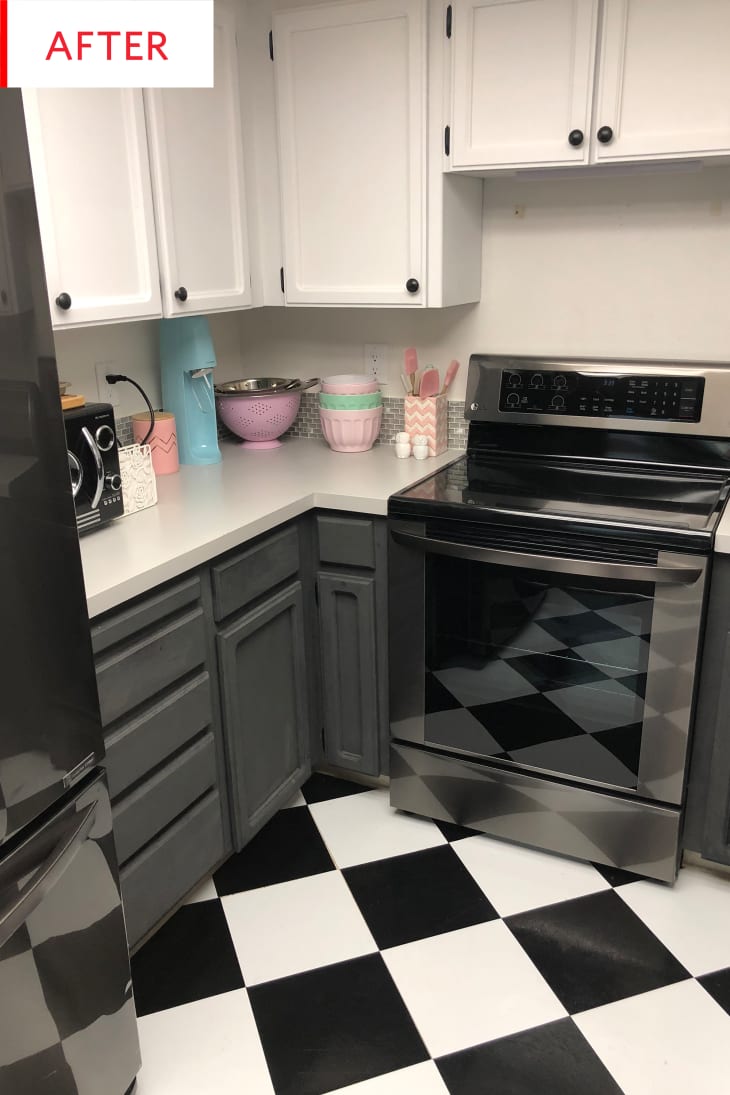
This shot gives us a glimpse of Erin’s colorful accessories, an echo of the bright, cheerful rugs and art we saw in the Before image—now they pop against the monochromatic backdrop. Until the eventual full reno, Erin could dramatically change the look of this kitchen just by adding or swapping out a rug, tea towel, art, and other accents.
Prepare yourself for one of the best home improvement tips I’ve ever read:
Insisting on perfect is the best way to get nothing done. My kitchen isn’t perfect, but it’s a whole lot better! Pick one thing and set aside a weekend to get started. Two months before I started this project, I took a paintbrush and put a big white “X” on the front of one of my cabinet doors, to force myself to follow through. It worked!
Thank you, Erin!