
Before and After: With Less Than $100, This Dark Dresser is Totally Transformed
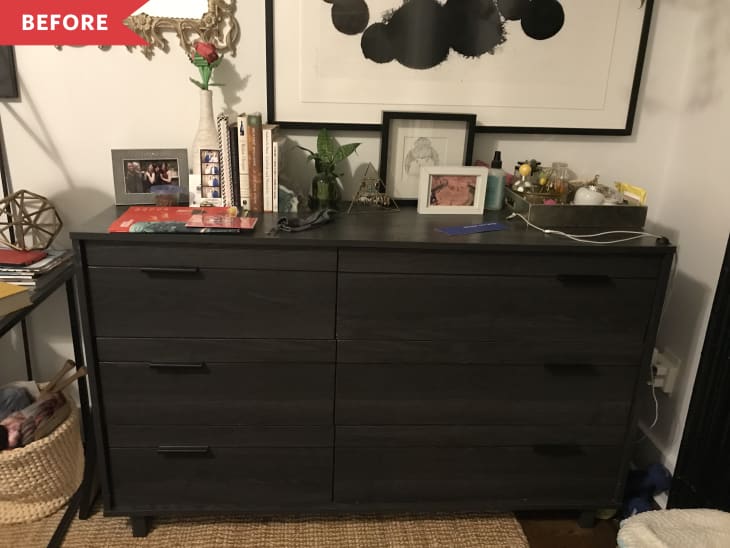
When the furniture you have fits perfectly in your space, it can be hard to let go—especially in small spaces. For Bellamy Grindl, the dresser in her bedroom “had seen better days,” but finding something to use in its place was tricky. “I was searching endlessly to replace it but I was having a hard time finding a replacement with the exact dimensions to fit in the bedroom,” she says.
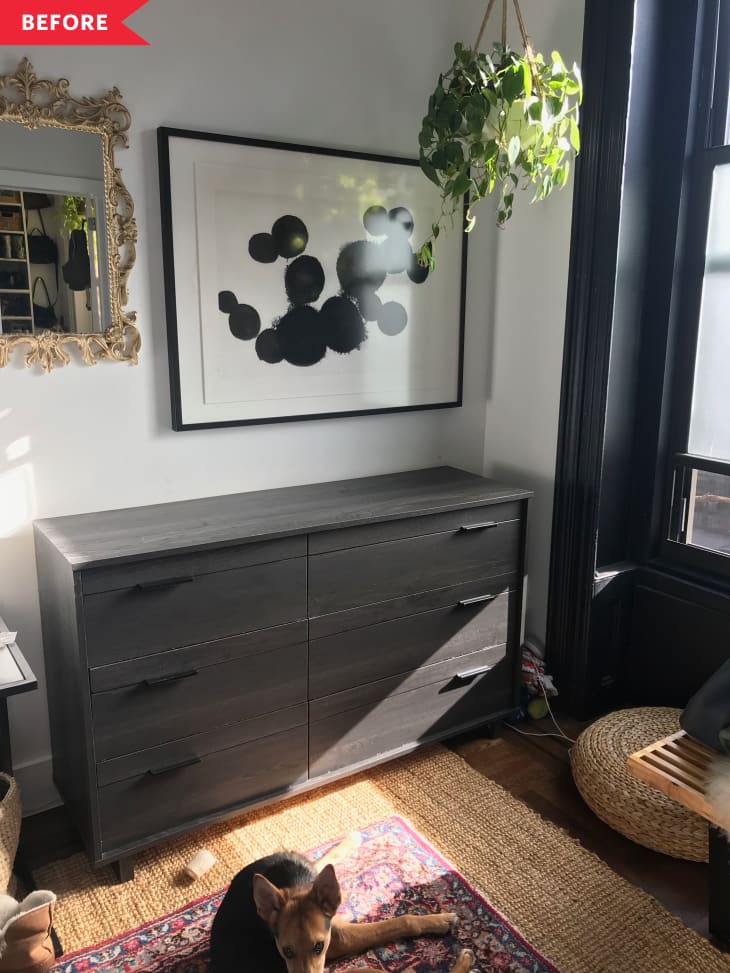
In the end, she decided to keep the dresser after all—after all, she knew it was a perfect fit, space-wise. But she wanted to give it an entirely new look that wouldn’t feel quite so tired. “I was inspired by some of the home interior bloggers I follow on Instagram and some of the DIY projects they did with cane furniture,” Bellamy says. “I also love a good DIY project and repurposing what I already own.” Music to our ears!
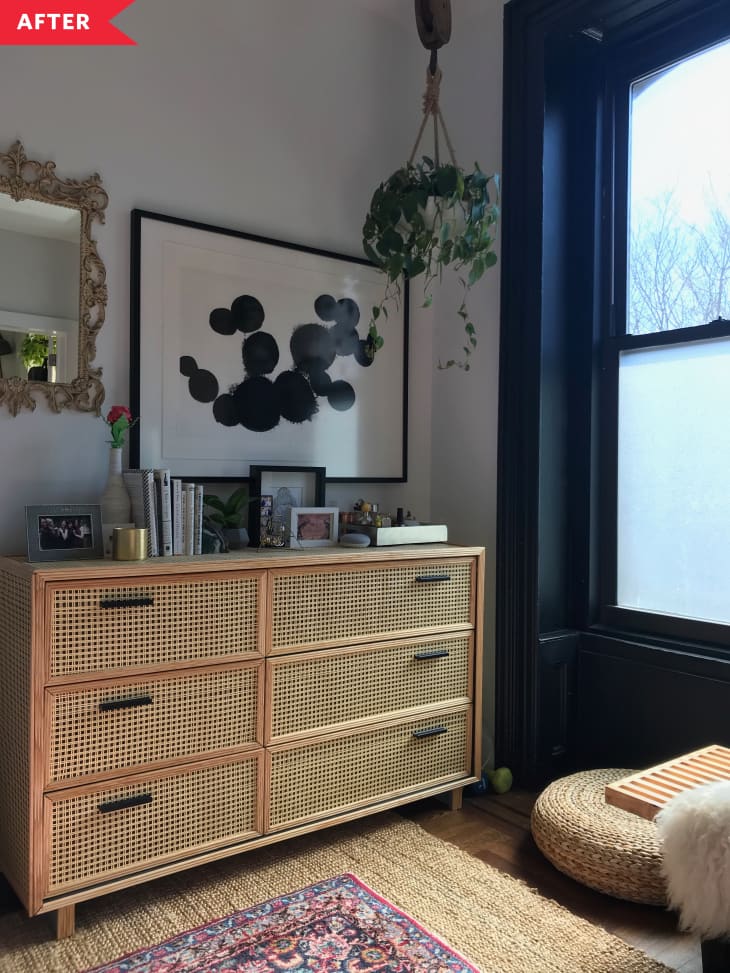
Initially, Bellamy painted the dresser white—but when that felt too light for the room, she stripped the wood down to its natural finish. Then, she bought caning from Frank’s Cane and Rush Supply as well as trim pieces from Home Depot. Bellamy had a few different stains and finishing oils already on hand, so she tested each of the colors to see how they paired with the untreated cane. After choosing the winner—linseed oil—she used a staple gun to attach the cane to each drawer front as well as the sides of the dresser, pulling tightly and trimming the excess once it was fastened in place. Then, she used a miter saw to cut her wood trim to size and used both wood glue and a nail gun to attach the wood pieces to frame the drawer fronts and dresser sides. Total cost in materials: just $100 for a totally new look that’s seriously on-trend.
Bellamy’s advice? “This is easier than it looks!”
Inspired? Submit your own project here.