
I Transformed My Chaotic Coat Closet Using These Pro Organizer Tips
When I renovated my house, a bigger coat closet for my family of six was non-negotiable. I loved the result — hanging space, hooks, shelves, and a drawer for each family member — but over time, the space became chaotic. The oddly shaped closet and the sheer number of people using it every day made it hard to keep things neat.
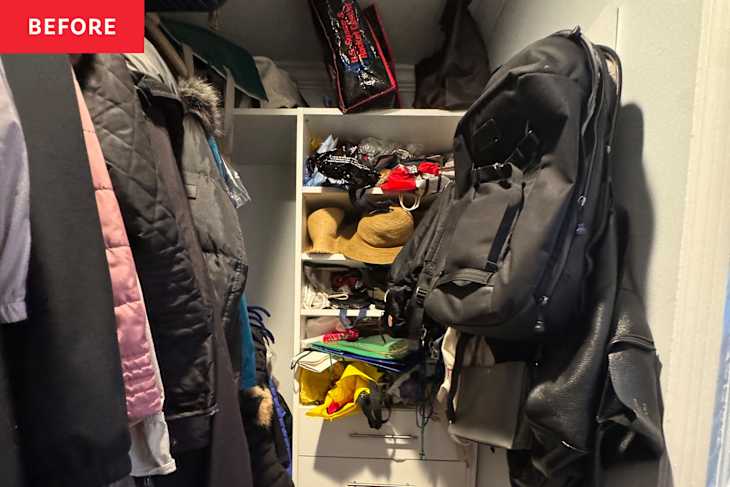
Bags and coats piled up, the floor disappeared, and extra space wasn’t solving the problem. So I finally decided to call professional organizer D’Nai Walker of The D’Clutter Method for help. Here’s how she helped me transform my chaotic coat closet.

Step 1: Clear Everything Out and Sort Them
When Walker first arrived, she helped me gather the basic supplies we would need: a trash bag, donation bag, and boxes for sorting. We pulled everything out of the closet — coats, hats, toys, and bags — and grouped them into categories like rain gear, summer toys, and accessories.
When it came to coats, Walker had me sort them by season. That one small change made a big difference, letting me see how many winter coats we truly owned (and how many we didn’t need). I even uncovered an old snow bib that hadn’t fit anyone in years.
Step 2: Toss What Doesn’t Belong
The next step was to get rid of anything broken or unnecessary, including old toys, cracked hangers, and caps my kids had outgrown. I asked how much I should throw away, and Walker’s advice was simple: Whatever fits comfortably in my space is what I keep.
I liked her practical approach. Instead of focusing on how much I was getting rid of, I focused on what made sense to keep. One bin of baseball caps? Great. Anything that didn’t fit? Gone.

Step 3: Face the “Bag Problem”
Once the closet was empty, one thing stood out: my mountain of tote bags. I had dozens, plus piles of paper and plastic shopping bags. Walker helped me sort them into three categories: reusable, recyclable, and ready-to-toss.
The unusable ones (stained or torn) went straight into the trash. I donated the good totes and gave away the paper and plastic bags through my neighborhood Buy Nothing group. Someone actually picked them up for their food co-op. It felt good knowing they’d be reused. Walker assured me I wasn’t alone and that almost all of her clients have a bag problem.

Step 4: Reimagine the Space
With everything cleared out, we re-evaluated how my family used the closet. I needed everyday access to backpacks, umbrellas, and hats, while beach bags and seasonal gear could live higher up. I found new homes elsewhere for some other items, like my belt bags.
Walker used shelf dividers and bins to corral categories and create a cleaner look. She even adjusted the shelves to better fit our needs. Later, I added a few finishing touches — lucite bins, containers, and extra dividers from Wayfair — plus a mat under my kids’ backpacks to protect the floor.

Step 5: Enjoy the Results
Walker spent a little over two hours on the project, and I spent another hour and a half finishing and setting up the new systems. I am thrilled with the results. I no longer have to deal with bags and hats constantly falling off shelves. My kids now have an open, designated place for their gear, and they actually use it. It wasn’t as hard to organize the closet as I had feared, and I wish I had done it sooner.