
Before and After: A Luxe $300 Redo Transforms These Cheap Cube Shelves
IKEA-style cube shelving seems to be offered nearly everywhere these days, and for good reason: The open cubes can be used as-is or with perfectly sized bins, the shelves themselves can be placed either horizontally or vertically, and — best part — they’re reasonably priced no matter where you pick them up.
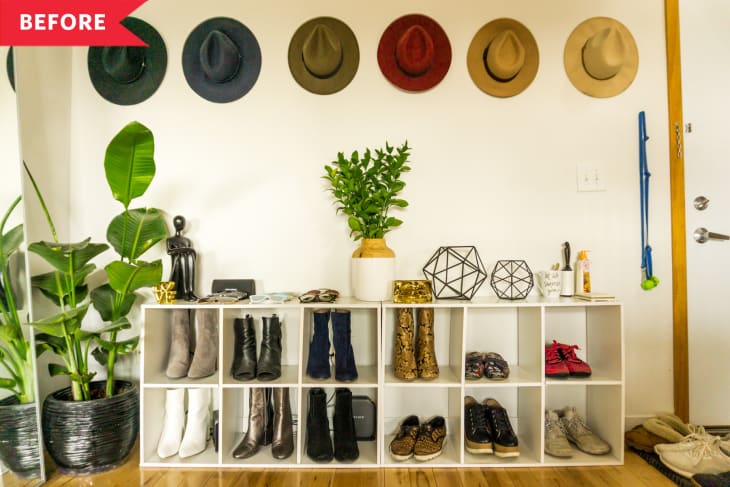
Jordan Blackwell (Lil Miss JB Style) snagged her pair of white ones from Walmart about six years ago, when she moved into her first real apartment after college. “They were inexpensive and easy to assemble, which was perfect because I needed something simple to keep all my clothes organized in my closet,” Jordan says. “Originally I used them to store shirts, sweaters, and pants. They were super convenient and made it really easy for me to keep my closet from feeling too cluttered.”
In Jordan’s next apartment, the closets already came with storage — so old cubes became shoe storage. However, she hit a snag: “Although the cubes were really practical, they just didn’t provide enough space for my ever growing shoe collection!” Jordan says. “Every day I’d come home and have no place for my shoes, so they’d sit by the door in a pile, waiting for me to trip over them.”
She knew she needed another solution, but everything she liked was out of her budget. Then, Jordan says, “I stumbled across a cool rattan console that I just couldn’t get out of my head, and I realized I could probably just do it myself with the cubes I already had.”

Jordan started by sanding and priming her cubes. Once it had dried for a few days, she painted the cubes matte black, then added new legs to help elevate the look.
Jordan made the door frames herself using 1.5-inch wood from Home Depot cut to size. She created the frame shape, glued the wood pieces together, secured with screws, and painted them black; once dry, she stapled cane webbing to the back of her assembled frames. Once that was complete, she attached the doors to the cubes with hinges; magnets on the inside of the door and on the cube help keep the doors from swinging open. Final touch: pretty gold bamboo pulls.

“This process took a lot longer than expected,” Jordan says. “One big reason it was slow was because I really wanted to give the paint enough time to cure in between each step. I’d painted an IKEA dresser a few years back. I didn’t let dresser sit long enough and ended up with marks and scuffs all over the top. I was so upset and knew I didn’t want to make that same mistake with this project.”
The extra time between steps helped her get a professional-looking finish on the project. And in the end, the project still only took about two weeks and $300 to complete.

“I just love the way the cabinets came out,” Jordan says. “It makes the space look much cleaner and gives me more room underneath to store more shoes. They also fit so much better with my apartment decor.”
Inspired? Submit your own project here.