
See How I Created a Champagne-Level Dining Room on a Seltzer Budget
I haven’t been shy about being totally over open floor plans — give me dedicated rooms, please! When I was house hunting, one of my top requirements was separated rooms and specifically, a designated dining room. After years of eating at a small table in a living/dining multipurpose room, I was itching for a place where I could invite friends over for dinner without half of my guests having to balance plates in their laps on the sofa. I wanted to set a holiday table, dim a chandelier, and have room for candlesticks without sacrificing space for wine glasses.
I wanted the formal look that I’d imagined as part of a grown-up home and, when I found an 1895 row home with its rooms still intact, the first room I dreamt of decorating was the dining room. There were a few challenges I had to deal with first, though.
First, while it’s a formal dining room, it’s also the only dining room. It’s right off the kitchen, which doesn’t have room to sit. This dining room needed to be functional 100% of the time.
Second, it has a bizarre layout. Queen Anne Victorian townhomes are known for their bay windows and quirky angles, and ours is no exception. The dining room not only has enough room for a large dining table, but also features multiple sitting and storage areas.
And, of course, the last challenge was addressing all this on a budget. I had formal dreams but, with major renovations, I needed to allocate the budget carefully. Here’s how it came together.
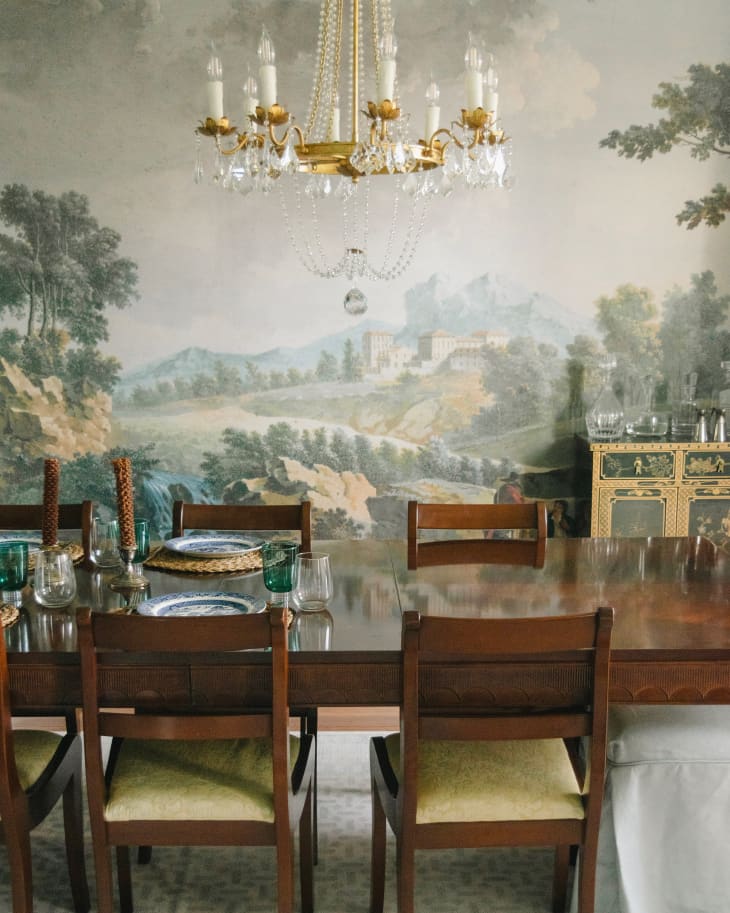
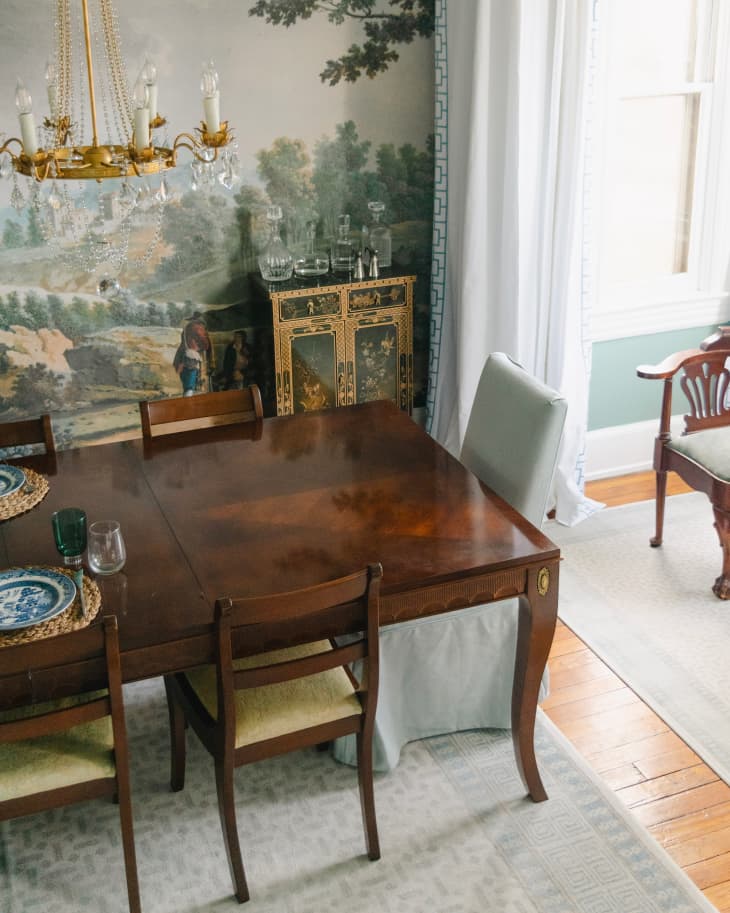
I chose a saturated blue-green for the walls.
Inspired by a vibrant peacock green library I saw on Instagram, I started down a road of teal blues and deep aquamarines. I eventually landed on Benjamin Moore’s Stratton Blue, a bold but lovely blue-green. I kept the trim white (Benjamin Moore’s Chantilly Lace), but did paint the ceiling light blue.
Here’s a trick I learned in the process: Your eye will read the ceiling as wherever the ceiling color starts, so if the crown molding and ceiling are the same, it will drop that line down. You can make your ceilings seem higher by painting the ceiling a different color than the crown molding.
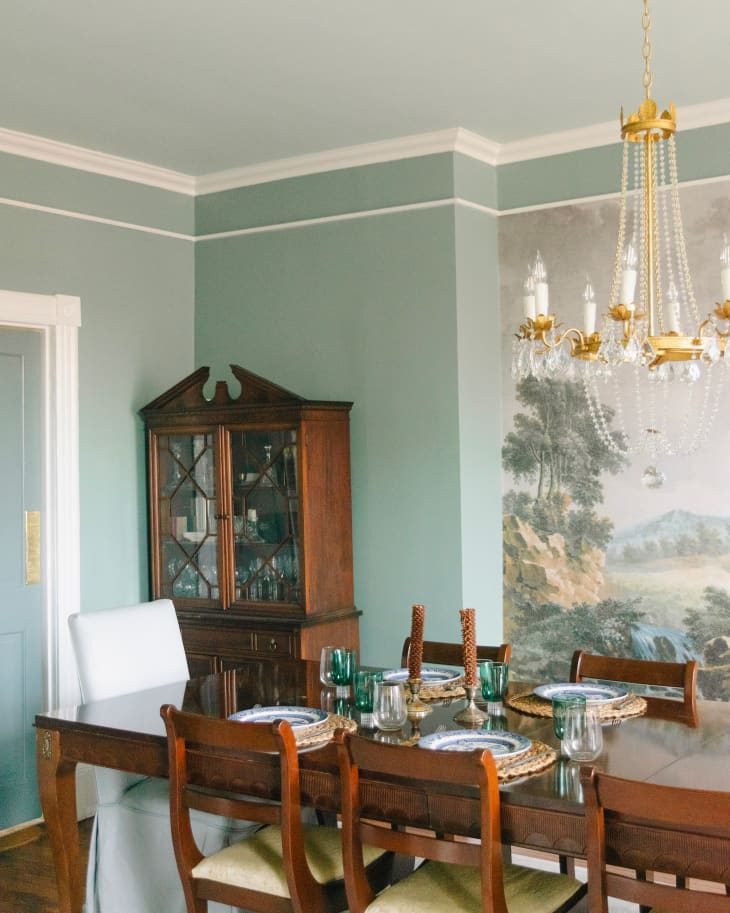
I used an Etsy mural to fake a historic look.
Let me start by explaining the mistake I made here so you don’t do the same. I picked and painted my wall color before selecting a mural, despite knowing I wanted to incorporate a mural. It would have been easier to start with the mural first and then choose the paint color.
Even so, I found a mural that perfectly complemented the colors I’d chosen and was available in easy-to-install panels, creating a beautiful focal point with an antique look.
I separated this room into practical zones.
I wanted a formal dining room, but did need to have some space within it for other things. A dining table takes center stage, but a chair and table in the window nook are the perfect spot to sit with a cup of coffee in the morning. Off to the side, another nook is a more relaxed space for lounging after dinner.
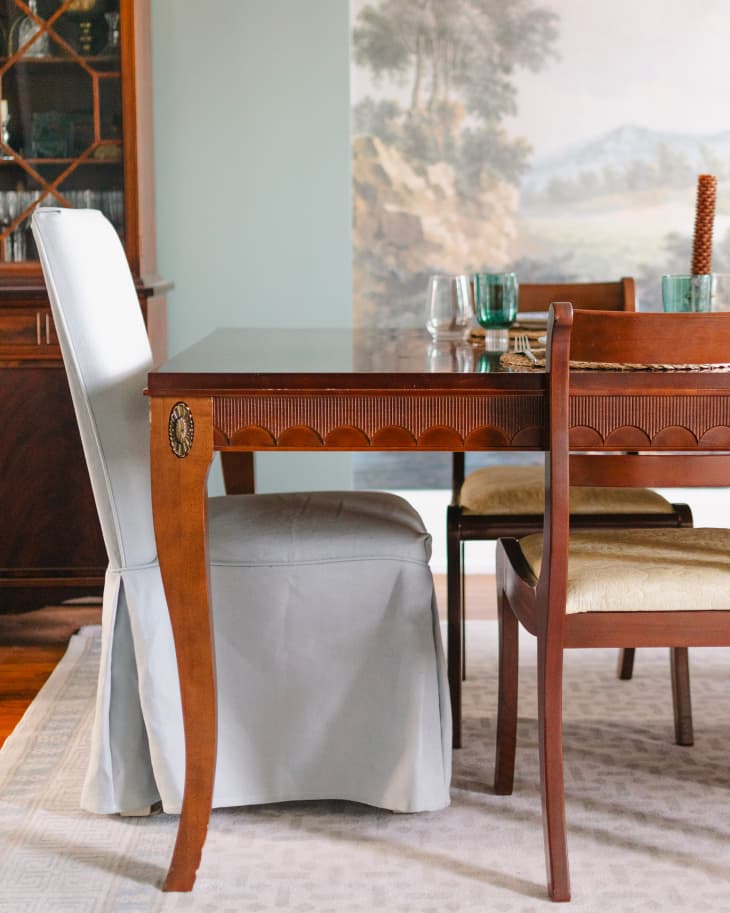
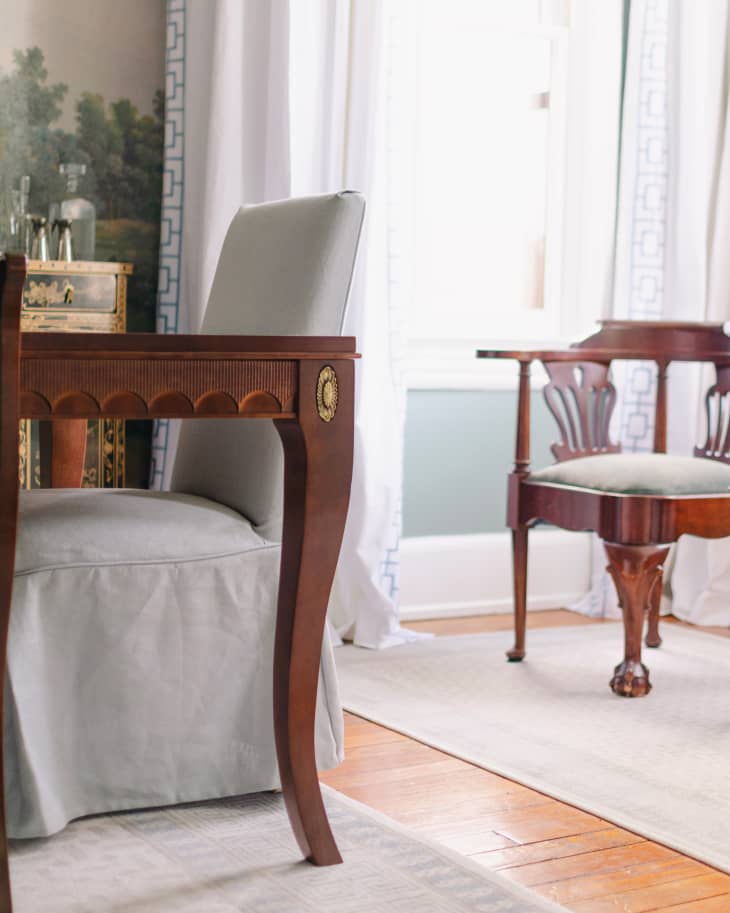
I shopped secondhand for fancy-looking furniture on a budget.
I snagged a 108-inch-long dining table from secondhand website Kaiyo for just $400, a corner chair for $50, two upholstered end chairs for $150, chinoiserie bar cabinet for $100, and a gorgeous flame finish china cabinet for $125 from Facebook Marketplace. Paired with dining chairs and a side table inherited from a great aunt, I had a striking room full of high-quality furniture that looks like it costs thousands of dollars.
An IKEA sofa I bought secondhand years ago and dressed up with a Soferia ivory velvet cover perfectly fit in the nook, along with two more secondhand finds: a cocktail table and small accent table.
I added more luxurious details overhead and throughout.
I weighed whether to go modern or traditional with the chandelier and landed on a vintage-inspired brass and crystal chandelier. I added a medallion that I painted with the same paint as the molding to give it a been-there-since-1895 look.
The seller of our house left up the drapery rods throughout the home, including in this room, which I didn’t truly appreciate until I realized they’d been custom fit for all of the awkward angles of the space. I used a combination of two different spray paint colors to give the rods and rings the exact same brushed antique gold finish as the chandelier, then landed on trellis drapery from Ballard Designs. While I don’t plan on closing the drapes often, these gorgeous white panels with blue embroidery make the room feel a little more finished.
I finished with practical touches.
Using a formal dining room as the only dining space can be a challenge. There’s a difference between a once-a-week dinner and three meals a day. A washable rug seemed like a no-brainer, and I went straight to one of the most well-known washable brands: Ruggable. The light white and blue-green print of the Kairos Ivory & Blue Rug gives the room a soft look, and I was able to get it in three different sizes to cover each area within the room, making it feel cohesive and intentional.
Lastly, we eat here every day, nearly every meal. There’s no TV, and I use it as my excuse to set the table — even for a casual Wednesday night dinner. Because the room is so formal, I like to keep it easy and fresh. Timeless Blue Willow everyday china is offset by funky Sprezz glassware that I don’t save for special occasions — I use these every day, because aren’t the good things meant to be used?
Inspired? Submit your own project here.