Before and After: A $30, One-Day Dining Room Project (That Works in Any Space)

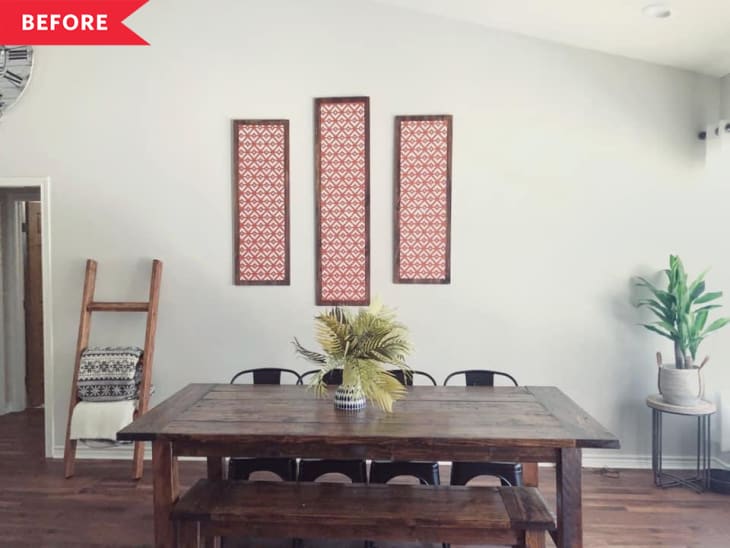
Large stretches of white wall can be a head-scratcher when it comes to decorating. It can be tough to fill all that blank space! Gallery walls are a great pick, but what if you don’t want that much art taking up your wall? That was Carley Lawson’s struggle in filling out the dining room in the home her family had lived in for the past year and a half. “This wall was impossible to decorate,” Carley says. “We hung pictures, homemade signs, even wreaths but nothing felt big enough for the space without feeling like clutter.”
“I wanted my dining room to feel artsy but maintain a warm, homey feel as well,” Carley says. So, inspired by abstract art, Carley dreamed up a paint plan.
To paint her arch feature, Carley first found the center of the wall where she wanted to arch. Then, she used a makeshift compass to draw the arched top; she created that by tying a pencil to a piece of string anchored into the wall with a thumbtack. After drawing the arched top, Carley used painter’s tape to get straight edges on either side. “The hardest part was getting the arch at the very top right,” Carley says. “I think I went back in several times with an eraser and a lot of strong words to that wall.” She painted the base a vibrant orange (Sherwin-Williams’ Tassel).
For the stripes, Carley taped out the curved parts in 3-inch increments of painter’s tape to guide her painting, then used painter’s tape all the way down to the baseboards as well. She filled in with sample pot sizes of dark blue (Sherwin-Williams’ Endless Sea), terra cotta (Sherwin-Williams’ Cavern Clay), and pink (Sherwin-Williams’ Sandbank). “Our walls are textured so getting a crisp line is a little more difficult,” Carley says. “A tip I learned is to paint inwards on the tape to decrease bleeds.”
The whole project took six to seven hours of careful painting, but only about $30 in supplies. That includes the floating shelf that Carley’s husband Jeremy Lawson built by re-purposing old wall decor.
Carley’s words of wisdom to anyone else taking on a paint feature like this one: “The only thing I would do differently, or spend a little more time perfecting, is the taping,” she says. “If you’re more of an eyeballer like myself, take the extra time to get your measurements right. It’s a little more work, but a lot more rewarding.”
Inspired? Submit your own project here.