
I DIY Art, But I Won’t DIY (or Skimp On) the Framing, and Here’s Why
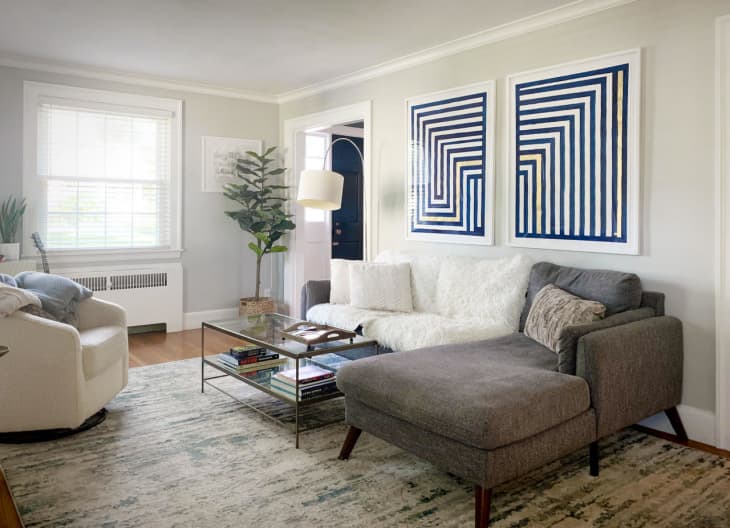
I searched high and low for the perfect budget-friendly artwork to go above my friend Lisa’s sofa. Nothing was quite right because it would either be awesome but too small or the right size but not the right style or aesthetic. So I gave up looking and decided just to make something.
A professional framing is what adds polish to a piece and keeps it in pristine condition over time. That’s not to say you have to spend hundreds of dollars on this service (I got these pieces framed at Michaels, which is where I got the rest of my project supplies). But it’s worth outsourcing this extra effort because it will 100 percent elevate your piece in a way an IKEA frame just can’t.

Want to recreate this graphic look? All it takes is some planning, a steady hand, and a few hours’ time. First, measure the space where you want the art to go, keeping in mind your ultimate frame size. I knew that I’d do a float mount so the edges of the watercolor paper would show in the frame (again… when have you seen this technique really nailed in a store-bought frame?), which gives a piece that extra handmade, special look. I ordered the largest watercolor paper I could find and cut it to my measurements. Then I used the ruler and pencil to draw an outer box around the edge of the entire paper that would contain the painting itself. Repeat that same thing on a second sheet (and your third, if you’re looking to create a triptych).
Next, lay both pieces of paper side by side and plan out your design. For high contrast lines that flow from one piece to the next, you’ll find it helpful to sketch things out on a separate piece of paper first to make sure your patterns connect the way you want them to. Once you have your design roughly planned, break out your ruler and pencil and trace everything out line by line. I used the width of the ruler to determine the width of the lines I’d be painting, but you could vary your scale a little bit if you want.
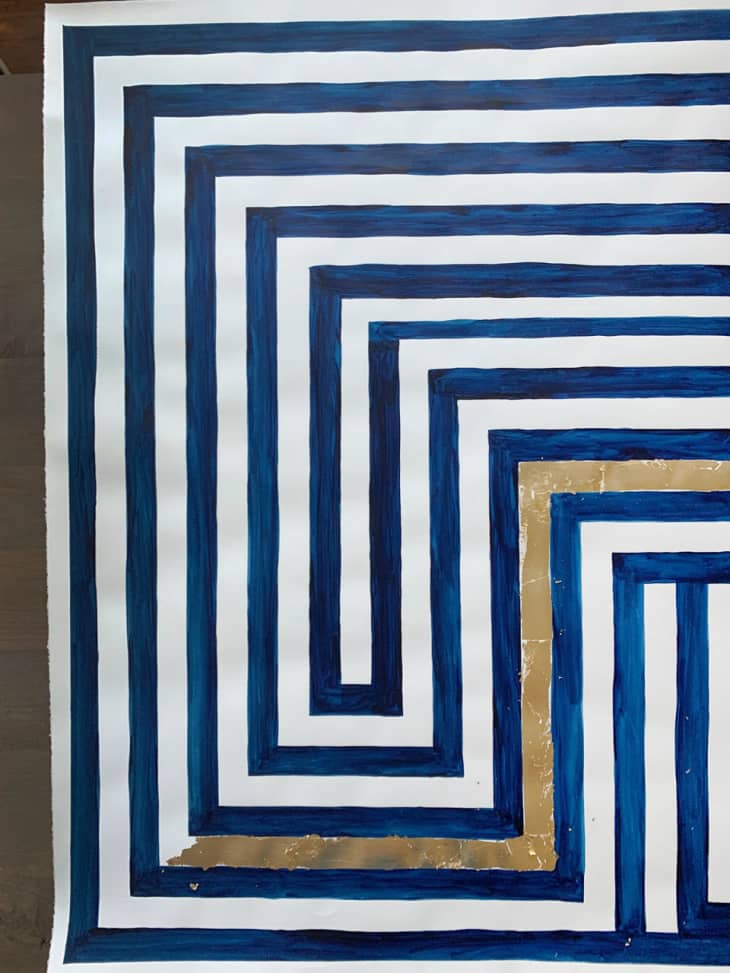
At this point, I suggest grabbing a beverage and putting something on your TV to binge watch as background noise and getting to painting! If you’re looking for a little more variety in color, you can paint lines in different shades entirely or go from light to dark with one hero hue. We knew one shade of indigo was the way to go with this one, but I wanted to add some warmth to the room, too, hence the gold leaf accent stripes.
This part of the process was time consuming, but also meditative in a way. Don’t worry about perfection. A helpful hint: When you need to step away from painting but want to keep your pieces safe from the perils of everyday life, tape your paintings-in-progress up to a wall with a little bit of painter’s tape. You’ll get to step back to see your design starting to come together, but the pictures also won’t be in the way of anything (and you won’t do any damage to them or your walls in the long-run).
Once the paintings are finished, apply gold leaf for that extra bit of fancy, if desired. I find gold leaf to never be as easy to apply as it is in YouTube videos, so I emotionally settled into the imperfection of it. I also wanted to do just one line of gold that flowed from one piece to the next — for continuity between the pieces — but not overdo the gilding. Again, you can nix this part entirely or go a little more for the gold; it’s totally up to you.
Finally, once your pieces are totally dry, sign and frame ’em. Again, DIY art is still real art that you put your heart, soul, and time into, and thus, it deserves recognition with your signature and professional framing. It’s still a hand crafted piece of work and one-of-a-kind, so my suggestion is to frame it for keeps!
Design Defined
Never miss the style inspo and recommendations you crave with Design Defined. Follow along each week as our Home Director Danielle shares the best style advice, latest trends, and popular decor finds you just can't miss.