
How To Make Dip-Dyed & Painted Paper Lanterns
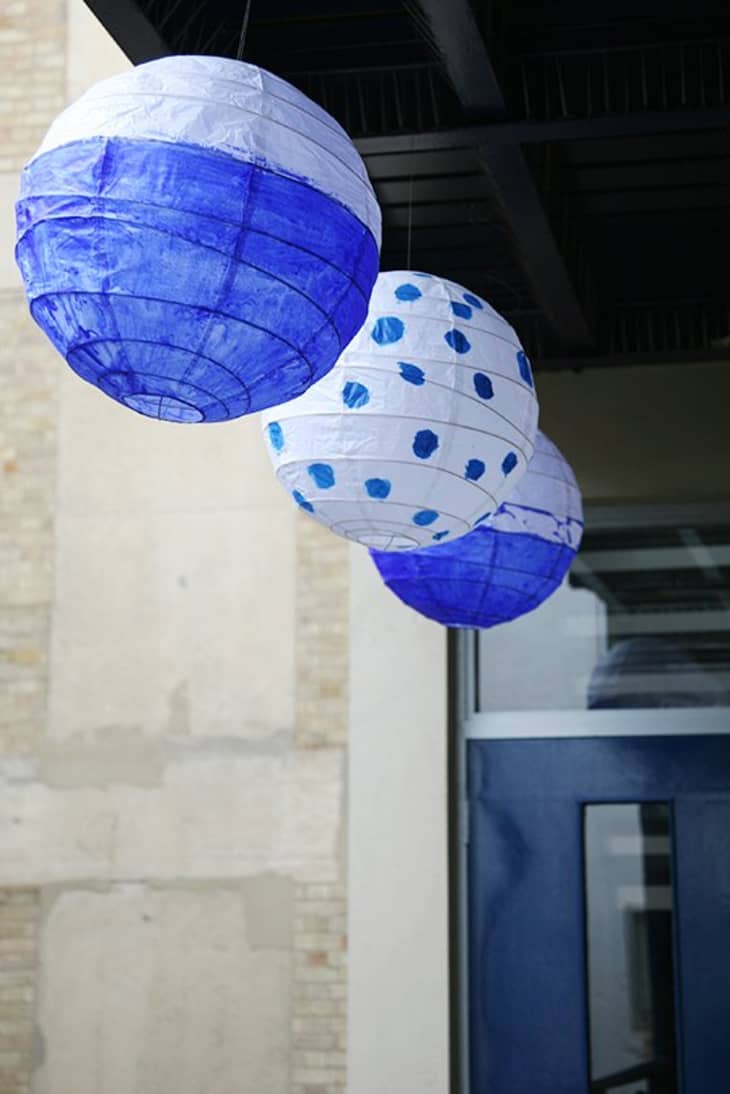
Taking inspiration from the IKEA summer catalog and Designers Guild, I decided to dip dye paper lanterns to replace the grubby, aging ones currently hanging from my balcony. The 4th of July holiday gave me a good deadline to finally get this DIY project off the back burner.
This is one of the cheapest and easiest DIY projects that I have done. You can get a basic white paper lantern from Luna Bazaar for as little as 80 cents, so if you are afraid of messing up you can buy a pack of 10 lanterns and not be afraid of this project. Plus small imperfections make these dip-dyed lanterns even better.
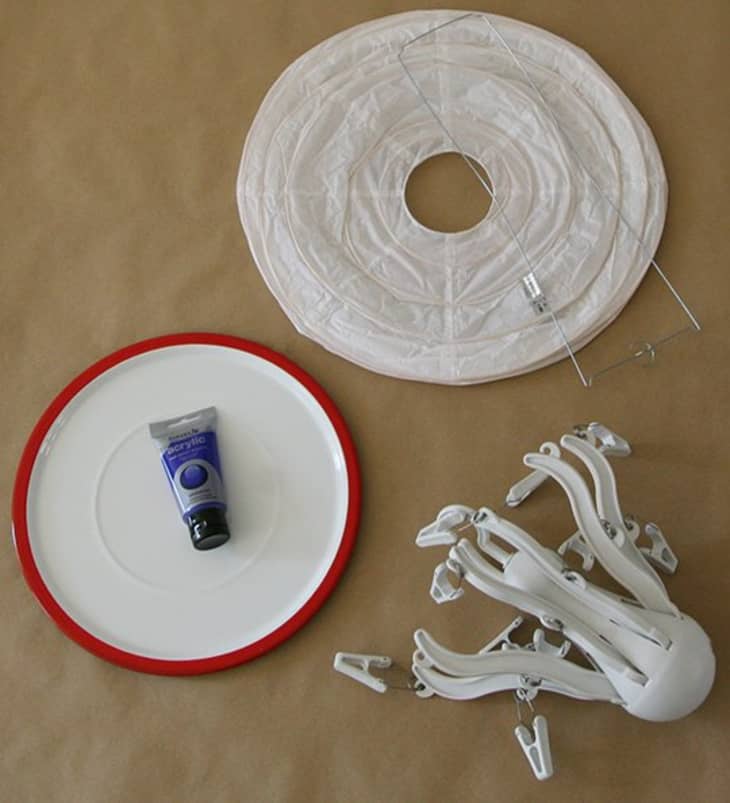
WHAT YOU NEED:
- Paper Lanterns found at Luna Bazaar or IKEA
- Paint (acrylic or poster paints)
- A plate or tray for the paint
- Hangers for drying
Step 1:
Pour the paint into a paper plate. I used an acrylic paint and thinned it with water so that it would easily cover the lantern.
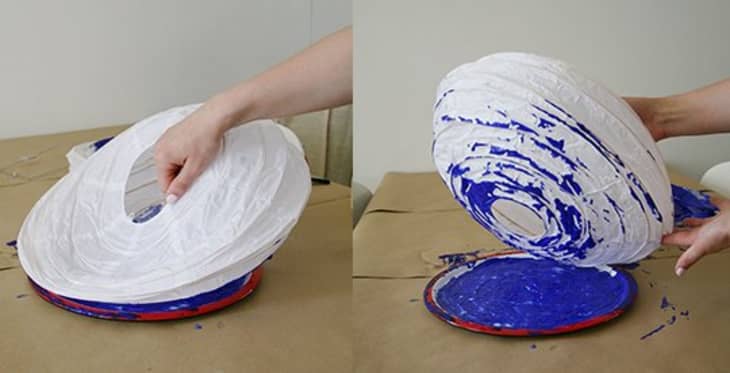
Step 2:
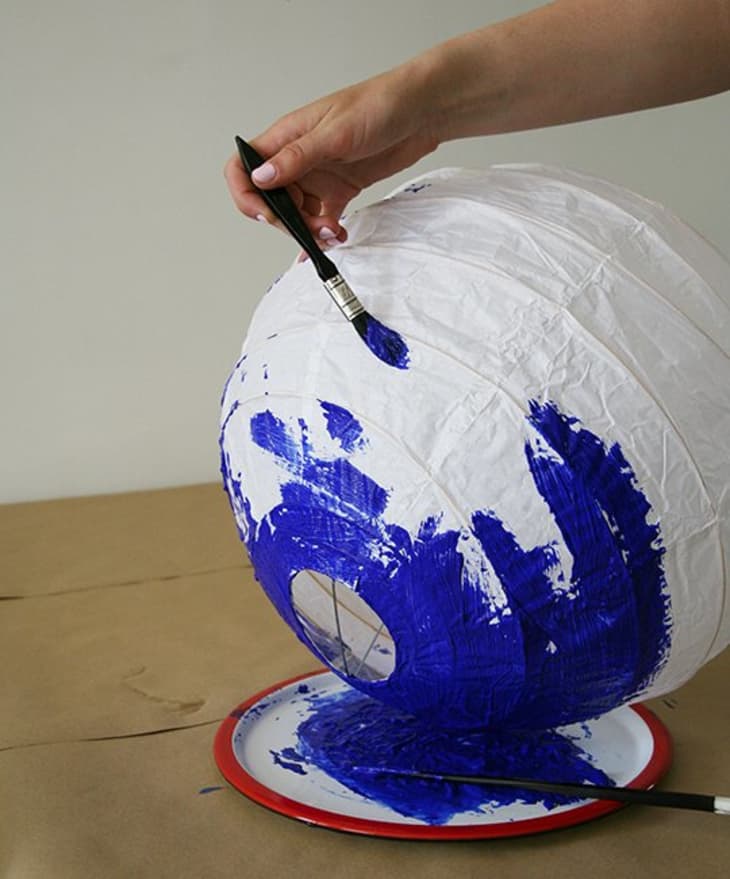
Dip the bottom of the lantern into the paint and roll the lantern through the paint to cover the base of the lantern as much as you want. I also ended up working with a paint brush (as seen below), as the rolling method didn’t work out as easily as I would have liked. The new Liquitex Paint Markers also worked out well for my polka dot lantern.
Step 3:
Hang the lantern to dry suspended over a covered area. I used the octopus looking hanger from IKEA to easily suspend the lantern while drying. Make sure that the lantern is in its final form to dry, otherwise the folds will dry together and rip when you construct the lantern.
Finally, hang the lantern indoors or outdoors — however, if hanging outdoors, make sure to hang in a covered area as these are not rain proof!

Shown Above: Decoration inspiration from IKEA and Designers Guild
Design Defined
Never miss the style inspo and recommendations you crave with Design Defined. Follow along each week as our Home Director Danielle shares the best style advice, latest trends, and popular decor finds you just can't miss.