
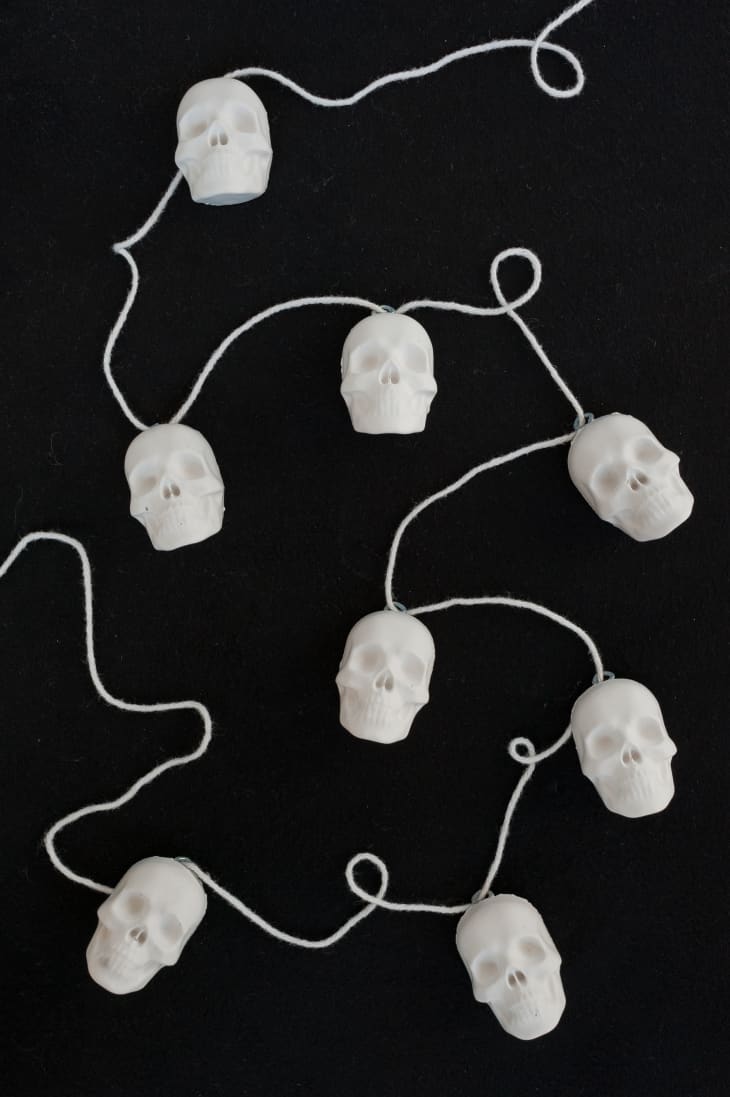
Make This Gothic-Glam Skull Garland from an Ice Cube Mold
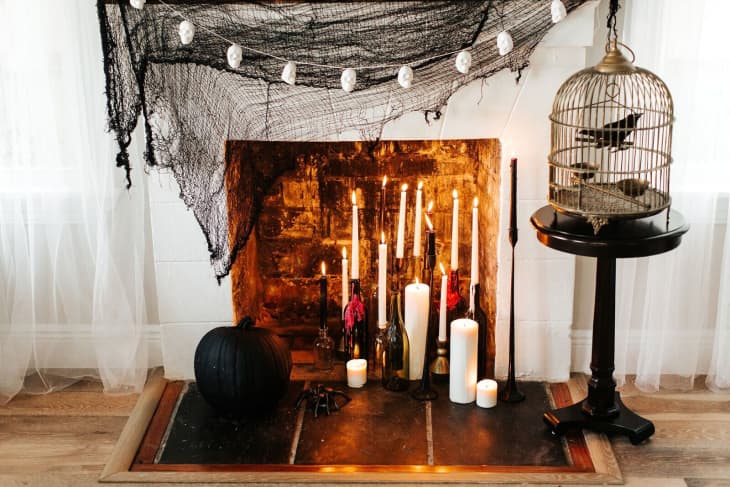
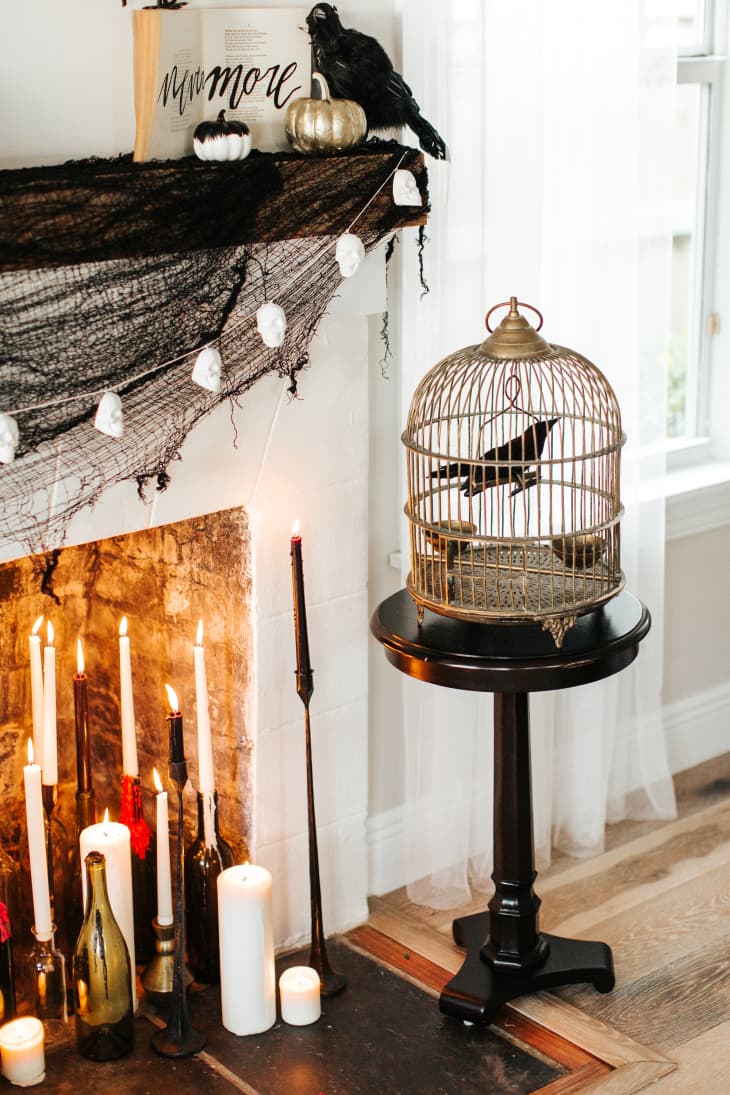
What do you get when you mix Edgar Allen Poe and a bit of glam? A bewitching style that’s all about rich blacks, candles, and skulls. And if you’re into skulls, you’ll be into this quick and easy DIY. Using silicon skull molds and plaster, you can add the perfect garland accent to your Halloween spread, or leave it up and keep your glam goth game strong all year long.
What You Need
Materials
- Plaster of Paris
- Silicon skull ice mold
- Eye hooks
- String
- Bucket
- Paint stirrer or similar
Instructions
1. In a medium-sized container, mix your Plaster of Paris per the instructions on the original packaging. Stir your plaster and water using a wooden stick or disposable utensil until it becomes a pancake-like batter.
2. Slowly pour the mix into the skull side of the silicon ice-cube mold. You will not need to use the other half of the mold, so set it aside.
3. Tap the mold on a flat surface several times to remove air bubbles, and to ensure the plaster fills every crevice of the skull.
4. Once the plaster has settled, carefully place an eye hook at the top of each filled mold. Press it in just enough to cover the screw portion of the hook. Allow to dry at least 45 minutes before removing.
5. Once the skulls have set (they should be cool to the touch), gently peel back the silicon to reveal your skulls. You can break off or sand any unwanted pieces left from the mold.
6. String them up one at a time and hang them on your mantel, or use them as the perfect centerpiece for your Halloween party.
*Styling by Hayley Sheldon in collaboration with Arlyn Hernandez; special thanks to Social House for sharing your beautiful cottage with us for this shoot.
Have a really great DIY project or tutorial that you want to share with others? Let us know! We love checking out what you’re making these days, and learning from our readers. When you’re ready, click here to submit your project and photos.