
3 Dramatic DIY Transformations That Cost $50 or Less

In our DIY Makeover Issue, we offer project inspiration, instruction, and helpful tips and hacks for every DIYer, no matter your skill level or budget. We can’t wait to see what you create with your new skill set — find it all here. This content was created independently by our editorial team and generously underwritten by the new Ford Maverick™.
If money were no object, you could make some incredibly impressive renovations to your home. Of course, money is generally a very big object. The thing is, with careful thought, preparation, and a good amount of creativity, you can make smaller but still really impactful changes to your space on a tighter budget, too.
To demonstrate this idea, we decided to introduce the $50 Makeover Challenge. The premise: We asked three DIYers to use no more than $50 to redo/revamp/zhuzh up something they already had — for example, a piece of furniture or an area of their home. Because this was a makeover challenge, we asked that they not use the money to build or create anything from scratch. And we let them know that, if they already had leftover materials from other projects, they could use those for this makeover without impacting their total budget (because points for resourcefulness, always!).
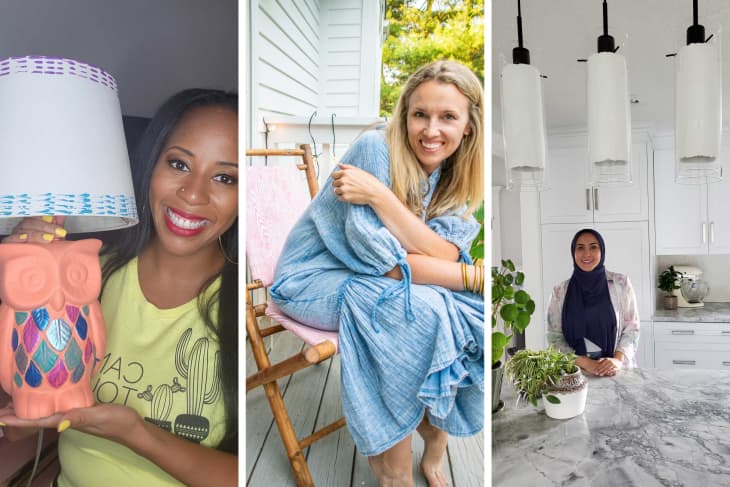
Excited to see what they came up with? Keep scrolling for the redos that Charlotte Smith (@atcharlotteshouse), Nada Taha (@onefortyfour_), and A.V. Perkins (@avdoeswhat) dreamed up. Here’s the kicker: All three of them used far less than their $50 max.
As Charlotte put it, “I love the challenge and ingenuity of bringing life and color to a space on a budget. Anyone can go to a store and splurge — but finding creative ways to repurpose and reimagine items around the home is truly what brings me the most joy when designing a space.”
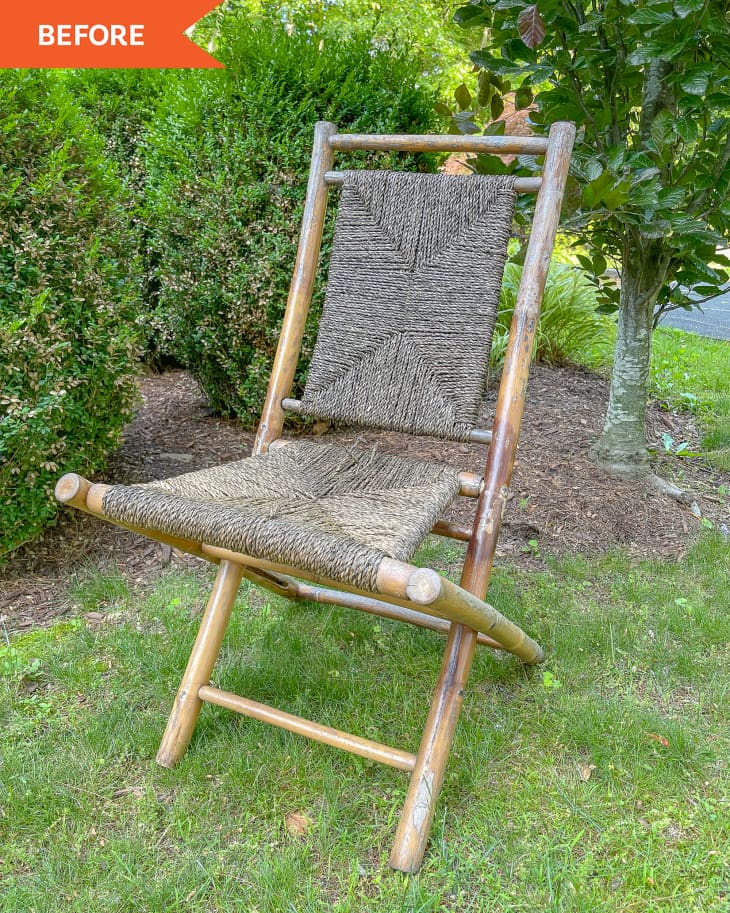
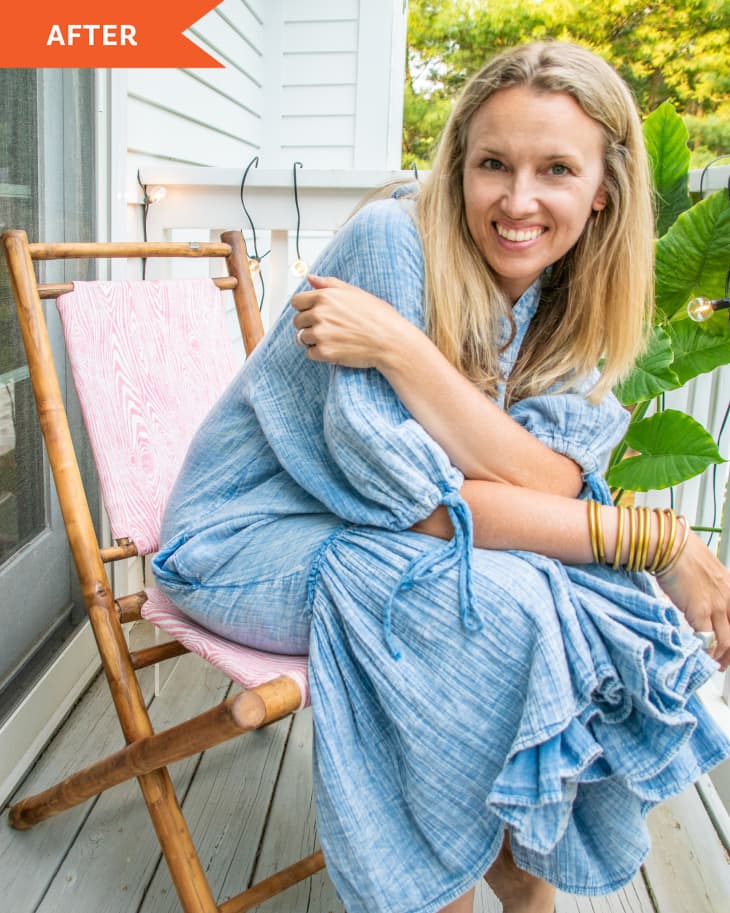
A Revamped Folding Chair Adds Color and Fun to a Forgotten Balcony
When we reached out to Charlotte Smith (@atcharlotteshouse) for the $50 Makeover Challenge, she says she immediately thought of some thrifted folding chairs she already owned, “along with the one spot in our house that I’ve never spent any time or energy on: the upstairs balcony.” Charlotte says she basically forgets that this little balcony even exists off of her primary bedroom. Her goal: to change that. “I wanted this space to feel lush and green and cheerful — a space that would [be] dreamy and cozy. Somewhere I could escape to for a cup of coffee or a glass of wine,” she explains.

In one morning, she made that happen. First, she used a utility knife to remove the chair’s existing webbing, which had definitely seen better days. Then she moved on to the most time-consuming aspect of the makeover: sanding down the chair’s bamboo frame. “I started with a higher grit paper and tried to remove any flaking clear coat or discoloration,” she says. Once she had completed that step, she applied rejuvenating oil to maintain but spruce up the amber color of the bamboo.
Then it was time to attend to the seat covers. Charlotte decided on some pink faux bois fabric she had left over from a bench project, plus some painter’s drop cloth, and got to sewing: “I measured the distance between the chair frame with extra length so I could wrap the fabric around the back of the chair and secure with staples,” she says. “For the seat and the backrest, both pieces were the shape of a chunky cross with rectangles with tabs on each side just long enough to wrap around the bamboo. By placing the right sides of the fabric together, sewing around the perimeter, and then turning them inside out, I made two stuffing-free ‘pillowcases’ that I then wrapped around the bamboo of the chair, pulled taut, and secured with my staple gun.”
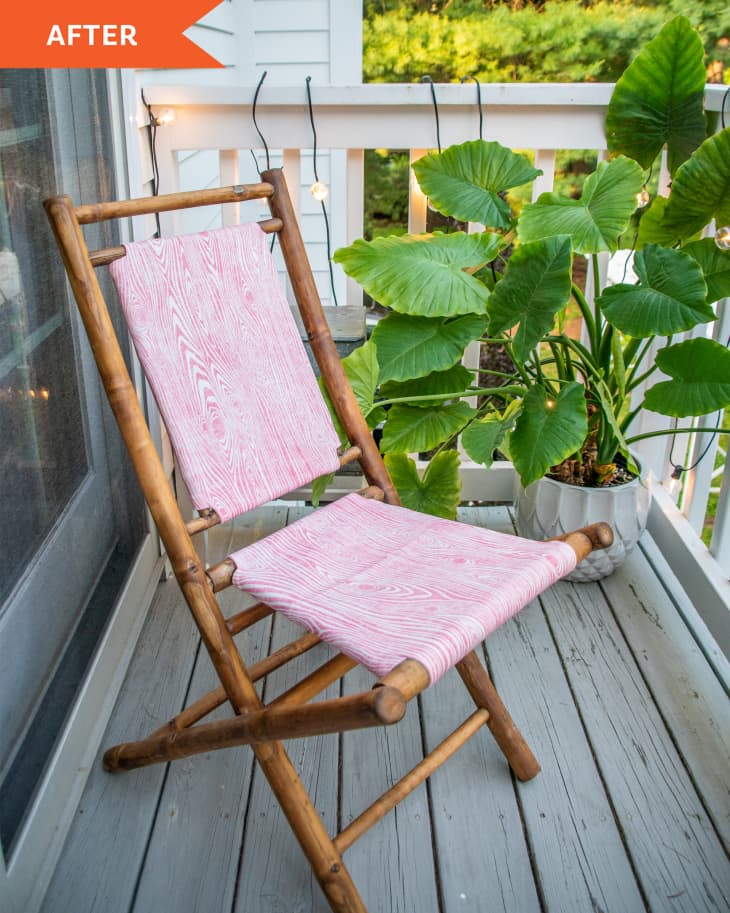
Charlotte says she does wish, in retrospect, that she had made the “tabs” of the fabric longer in order to better hide the staples. “I might sew a few strips of fabric and glue them over the staple line to conceal them,” she says, “but for now, you can’t see the back of the chair so it’s not an issue.”
Last, she sprayed the chair with waterproof spray to help shield it from the elements, and set it up on her balcony with a few large plants she took out of her bathtub, string lights, an acrylic table, and a cooler for drinks.
And get this: Charlotte technically spent only $7 for this challenge, because the only thing she didn’t have on hand was the waterproofing spray. (FWIW, she had previously paid $25 for the set of four chairs.)
@apartmenttherapy We're in awe of @atcharlotteshouse #diyproject that only cost $7 🤯 #DIY #makeoverproject #chairmakeover #balconymakeover #beforeandafter ♬ original sound – Grace 🙂
“I love what a difference a few plants and a bit of color can do,” Charlotte says of the makeover. “This folding chair looks so chic and modern now that I replaced the dingy webbing. I can’t wait to make over the other three chairs.”
A Standard Light Fixture Gets a Plaster-Perfect Upgrade
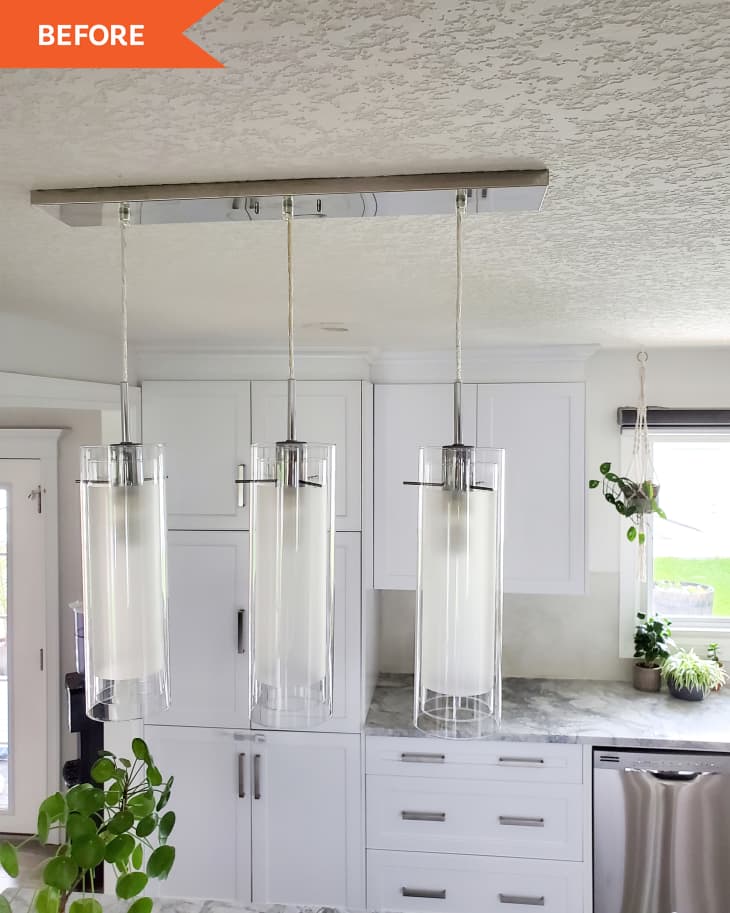
A makeover can be a great way to zhuzh up a piece until you save up enough money and/or time to do a full-on replacement. In Nada Taha (@onefortyfour_)’s case, she wants to swap out the glass pendant light fixture in her kitchen, but it’s not going to be an easy job — it requires “extensive ceiling work,” she explains — so this challenge provided the perfect opportunity to improve the fixture for the time being.
Last year, Nada DIYed a microcement backsplash in her kitchen. “I love organic materials and texture right now,” she says, “and I wanted the pendant lights to complement my new DIY microcement backsplash, which was inspired by Middle Eastern homes/interiors. I love wabi-sabi interiors and find beauty in imperfections. So, when I decided to redo the glass pendant lights, I wanted to create imperfect textured art on the inner glass pendant and keep the outer part of the pendant glass clear.”
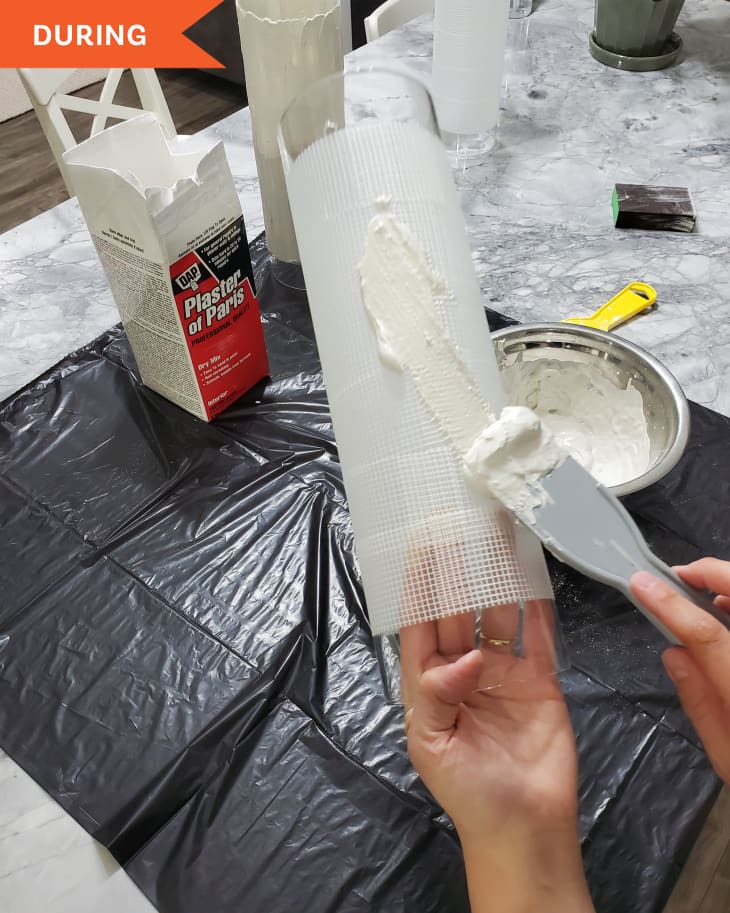
First things first, Nada did her research, testing out Plaster of Paris on a glass cup to ensure that the product would hold on glass. It did! So she got down to business: She applied self-adhesive dry wall tape to the fixture’s three glass pendants in the places where she planned to apply Plaster of Paris, then did exactly that. “It is super important to note that the direction you apply the plaster in is how it will dry, so I was mindful of my application method,” she says. “I applied vertically, not horizontally.” After allowing the pendants to dry for half an hour, she sanded the plaster parts lightly, then repeated the application and sanding process.
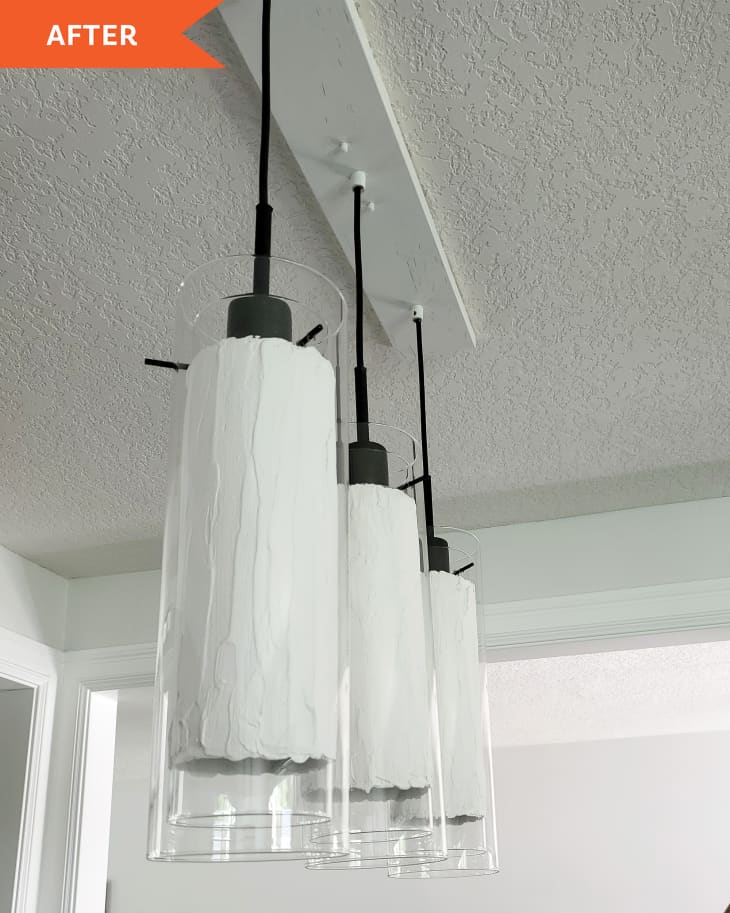
Next up, she primed the rest of the fixture before painting the ceiling cover white to blend in with the ceiling and the wires and hardware black. “The only thing I would do differently is remove the light fixture and spray it outdoors,” she says, explaining that, by not removing the fixtures before spraying them, she had to do more prep work to make sure she didn’t accidentally spray other things in the kitchen.
Nada says the overall project cost $19.98 in Canadian dollars (she did have leftover paint from other projects) and took two days.
@apartmenttherapy @onefortyfour_ made a one-of-a-kind #pendantlight for under $20 💡 #diyproject #DIY #budgetdiy #homeproject #diyhomedecor #diyhomeprojects #diylight ♬ original sound – Apartment Therapy
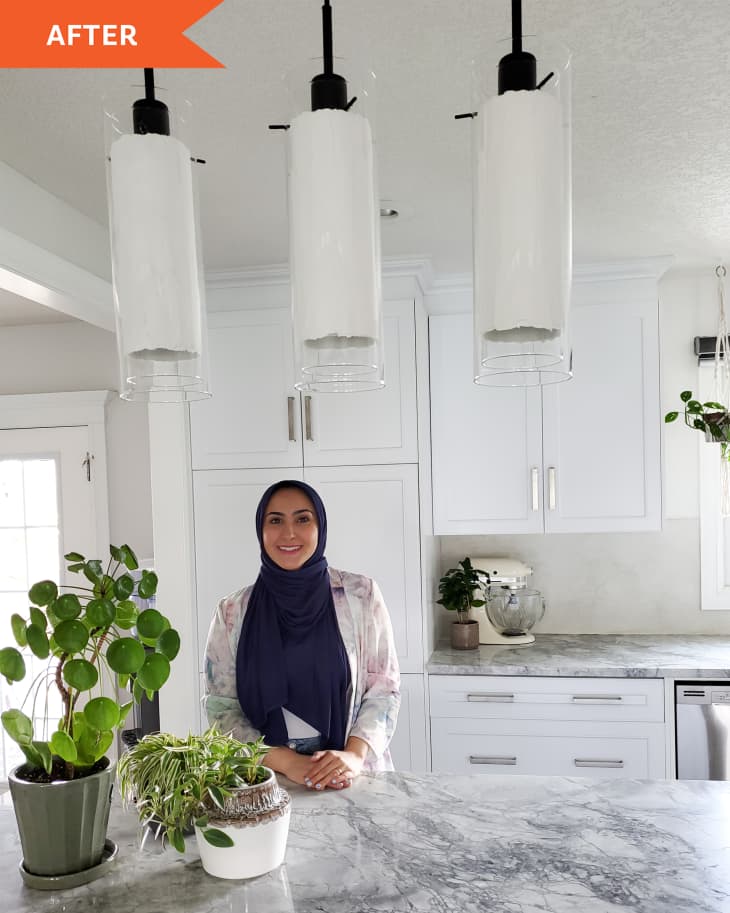
And now? “I love the texture I created on these glass pendants,” Nada says. “I also love knowing that these pendant lights are unique and one-of-a-kind. My kitchen has a whole new vibe. Lighting makes all the difference!”
A Whimsical Lamp Makeover Demonstrates the Power of Paint
One of the coolest things about home makeovers is that you can revamp a piece in your home — and then decide later on that you’re ready to give it yet another redo.
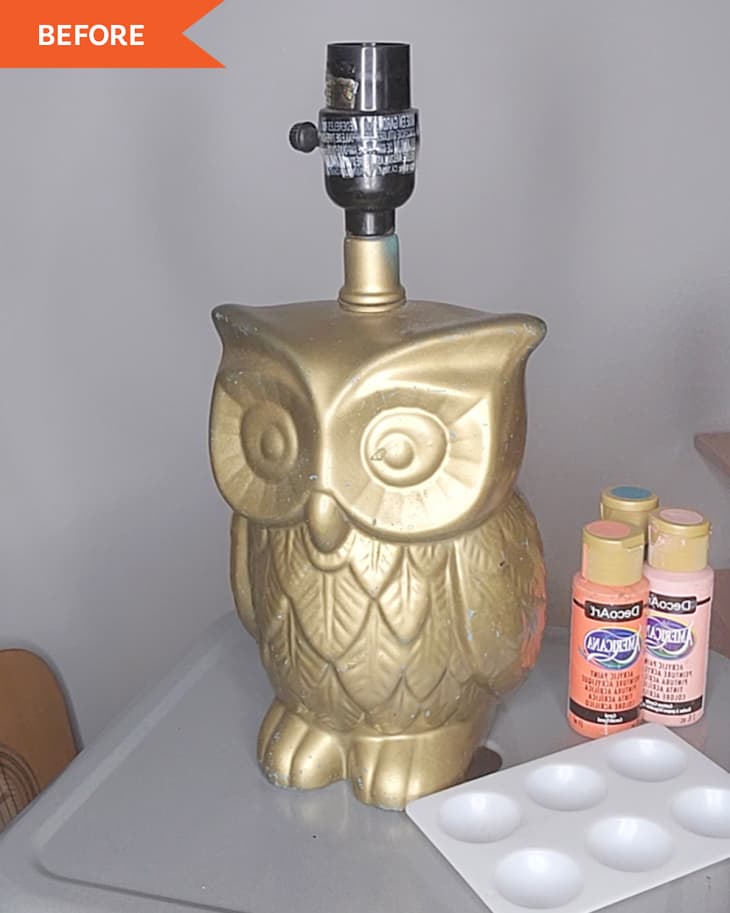
That was the case for A.V. Perkins and her owl lamp. “Initially the lamp was blue and I spray-painted it gold,” A.V. says, “but this time I wanted to make it extra colorful to give to my niece. Although the lamp is of an owl, I was inspired by a peacock.”
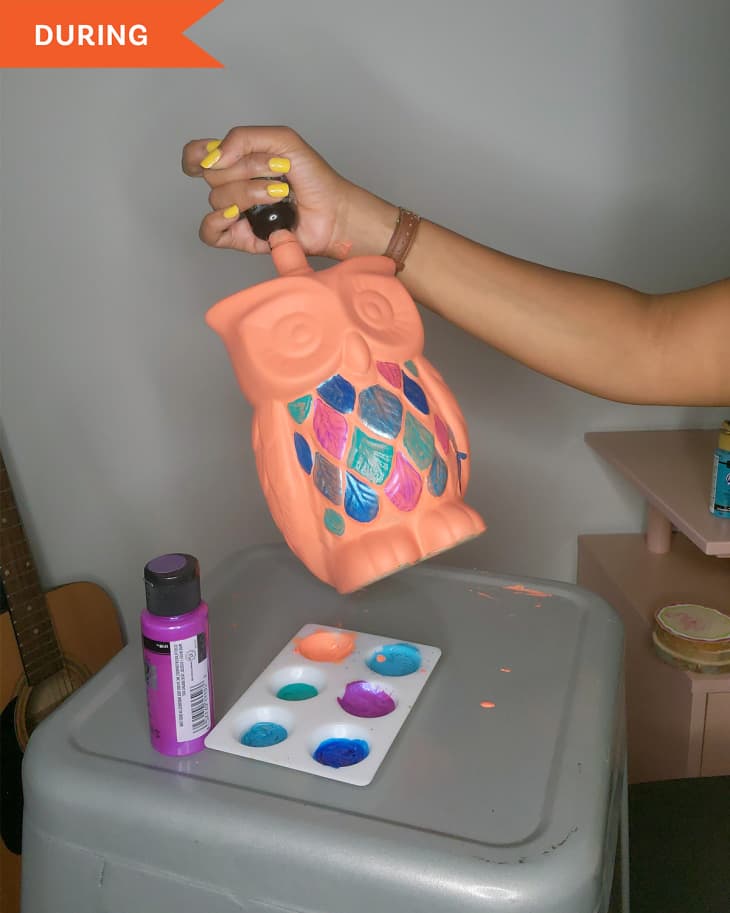
The only material that A.V. needed for this makeover? Paint! Specifically, five paints she already had on hand, which she estimates would have cost $13.40. Over a couple of hours, A.V. swapped the owl base’s metallic gold for coral. (She recommends using primer if you try this yourself.)
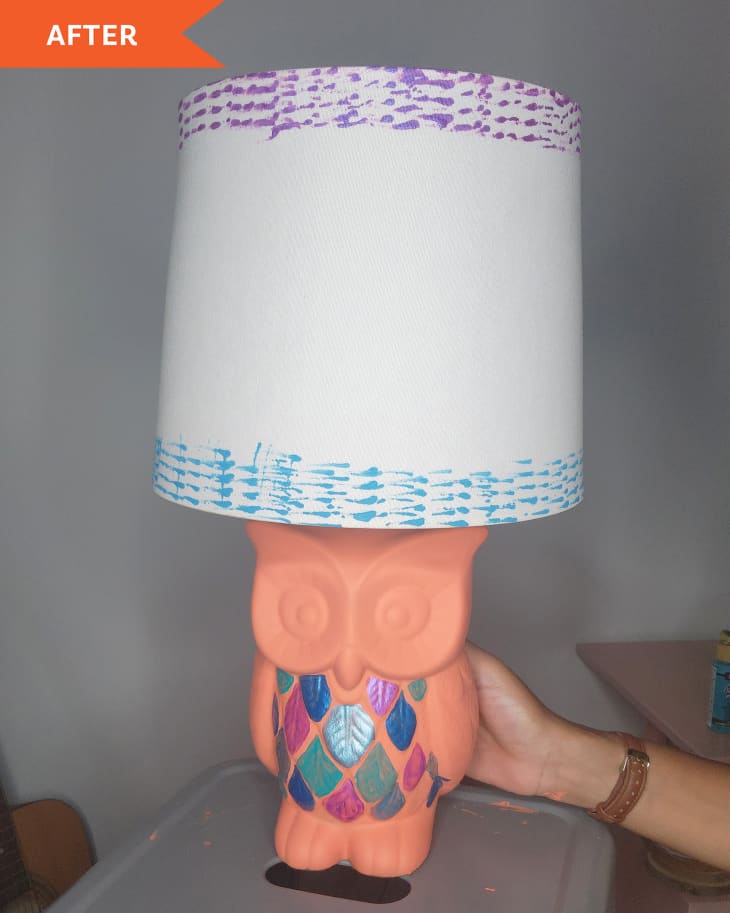
While that dried, she moved on to the lamp shade, using a fork to create a fun, colorful pattern (how smart!). Then she switched back to the base, applying more of the jewel-toned paint to the owl’s feathers.
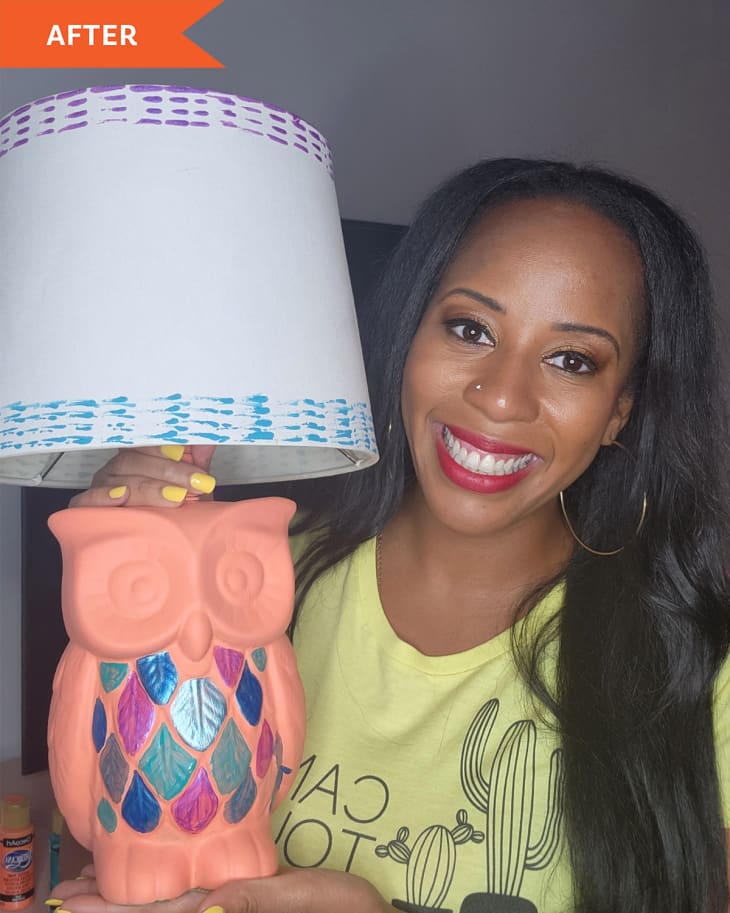
A.V. loves the “after” and thinks her niece will, too. “I think the challenge is so cool. I am always here for high-impact, low-cost projects. That is something that can be definitely achieved with paint,” A.V. says. Plus, she adds, “Remixing items you already have is not only good for your home, but great for the environment.”
What’s next for A.V.? “I’m patiently waiting for the $25 Makeover Challenge!” she says.