
Before and After: A Simple $60 Project Revitalizes an Existing Headboard, Saving This DIYer Thousands
It’s a common problem: You love your furniture when you first by it, but over time, as trends change, your personal style evolves, or just the sheer number of times you’ve looked at your sofa, kitchen table, your desk chair, or your headboard, increases, the more you may want to change things up.
The good news? Sometimes you can work with the existing furniture’s framework to create something totally new, meaning you can save money, save shipping materials, and save an old piece of furniture from potentially ending up in the landfill. For inspiration, check out: this innovative nightstand redo, this dresser that got a grown-up new look, or this now-vibrant bench.
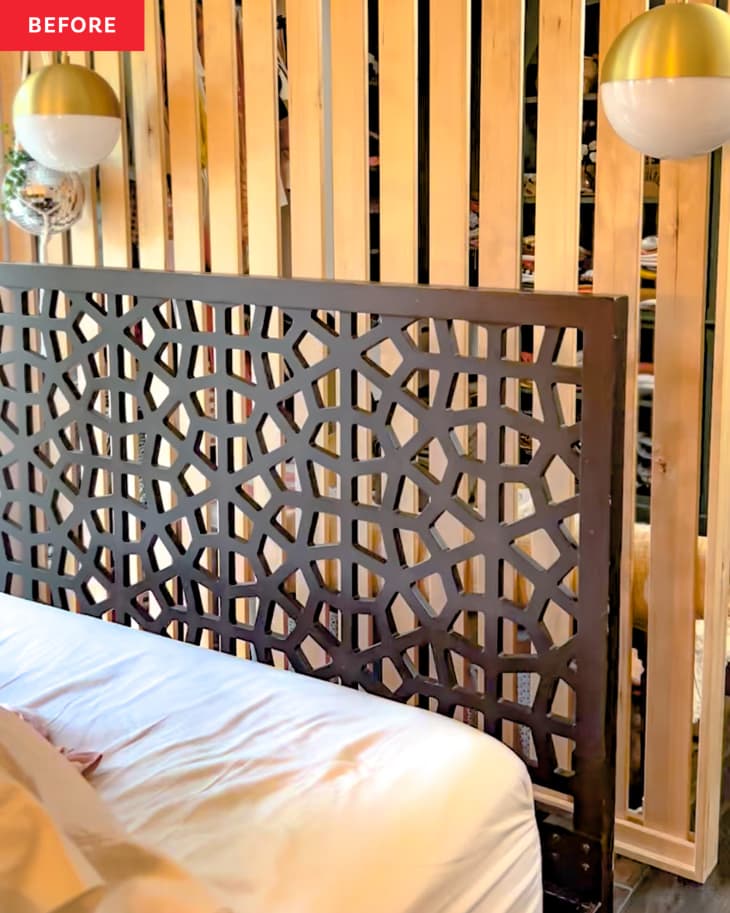
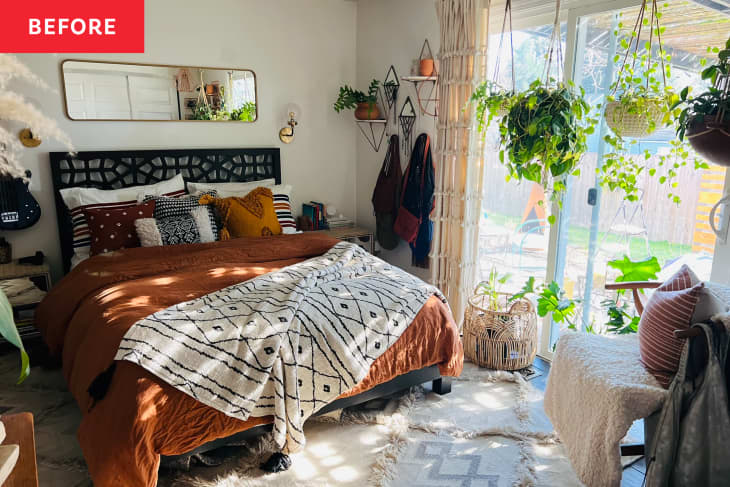
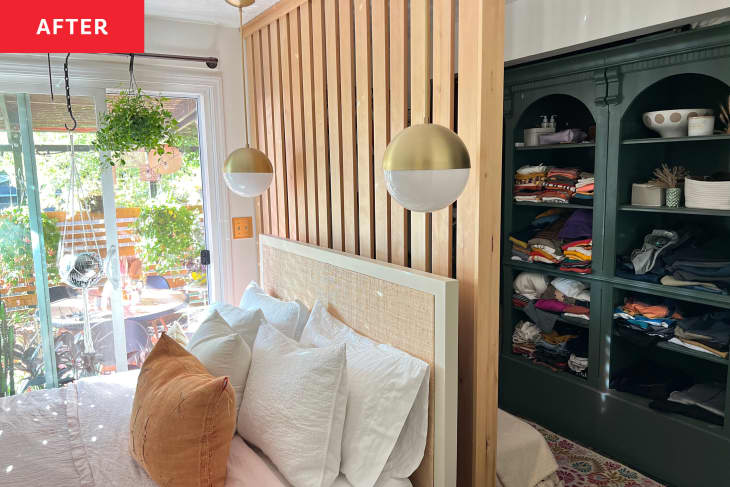
Another furniture flip that’ll inspire you is Amy Garrison’s (@mypdxhome) and her husband Wyeth’s headboard project. Amy was growing a little tired of her existing brown headboard with geometric cutouts, a perfectly stylish find originally from West Elm that she scored secondhand. Because Amy decided she was going to rotate her bed so the headboard leaned against her bedroom’s wooden slat wall, she decided her tried-and-true headboard was too busy as-is.
“I considered buying a new one, but the price was out of my comfort zone, costing somewhere in the range of $1,000 to $2,000,” Amy explains. And at $60 (done on a $70 secondhand headboard), her DIY option was much cheaper.
“Once we decided to try and make our own, it was a very quick project and was finished in an afternoon,” Amy explains. “We had most of the supplies on hand but took a trip to the fabric store. I was looking for a cane lookalike that would be a bit softer to lean against. I found some burlap and some light tweed options, but on the last row of fabric, we came across raffia. It’s easy to work with, and it was 70 percent off.”
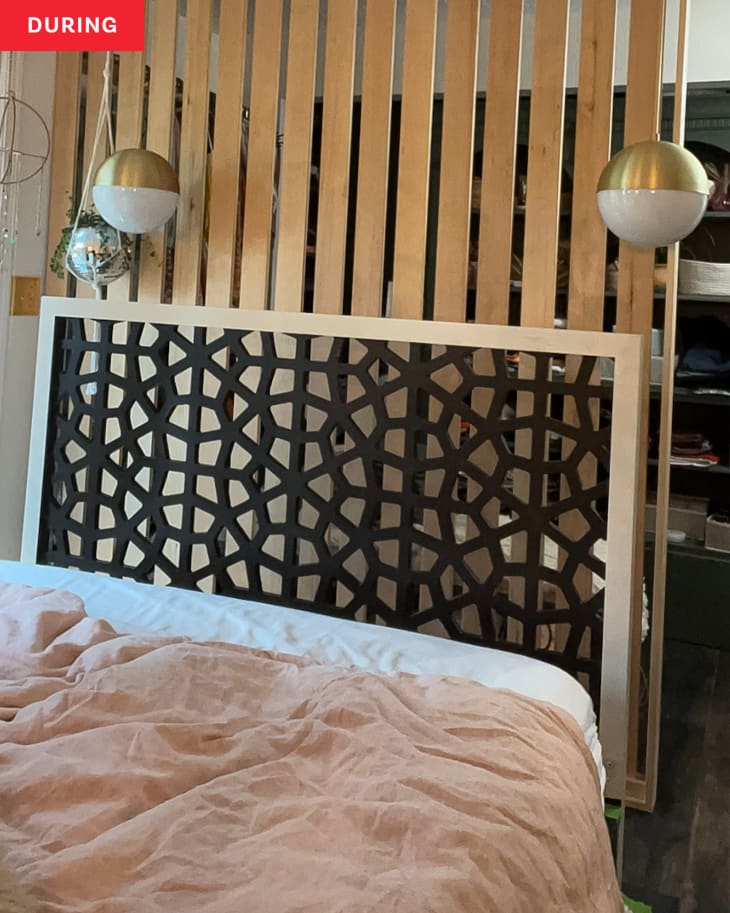
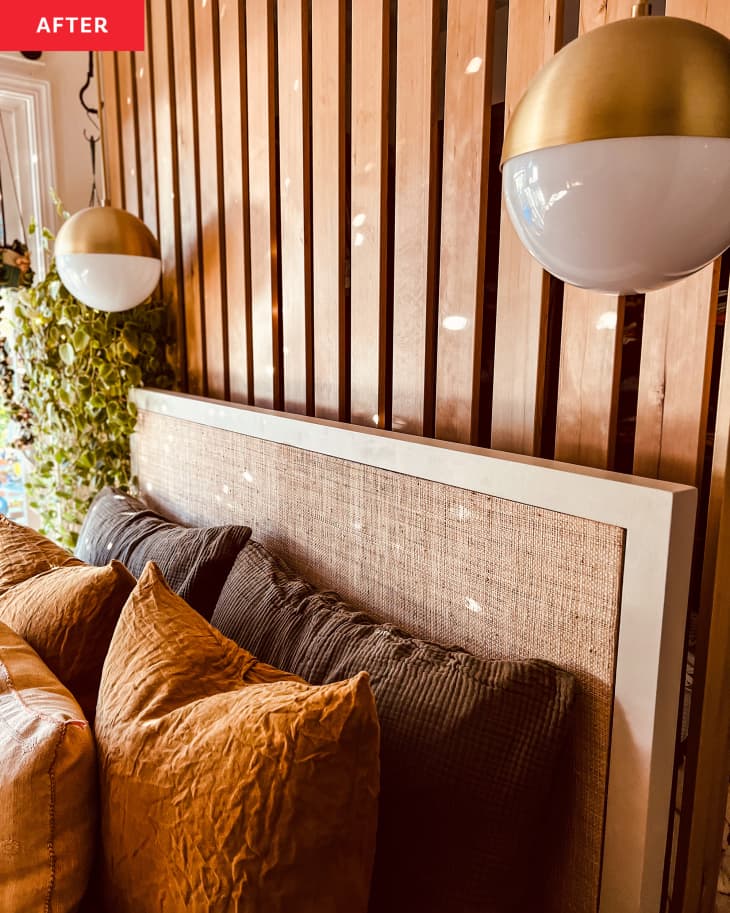
Amy bought two yards for a total cost of $23. She decided to use the raffia and some leftover plywood to cover the headboard for a more simple organic look. “Essentially we would be building out the middle of headboard so it was level with the frame,” Amy explains. “The 1/2-inch thick board we had on hand was a perfect thickness, so we cut it down to size added a small layer of foam padding, then my husband stapled the foam and raffia to the back of the plywood.”
Amy says you can use an upholstery stapler or a mechanical stapler to do this — and that, because the project was fairly easy, this was actually the most difficult step. “My husband would have appreciated another set of hands if we were to do it again,” she says.
While Wyeth stapled the foam and raffia down to the board, Amy painted the frame a light creamy white that she had just used on a bathroom door in her house.
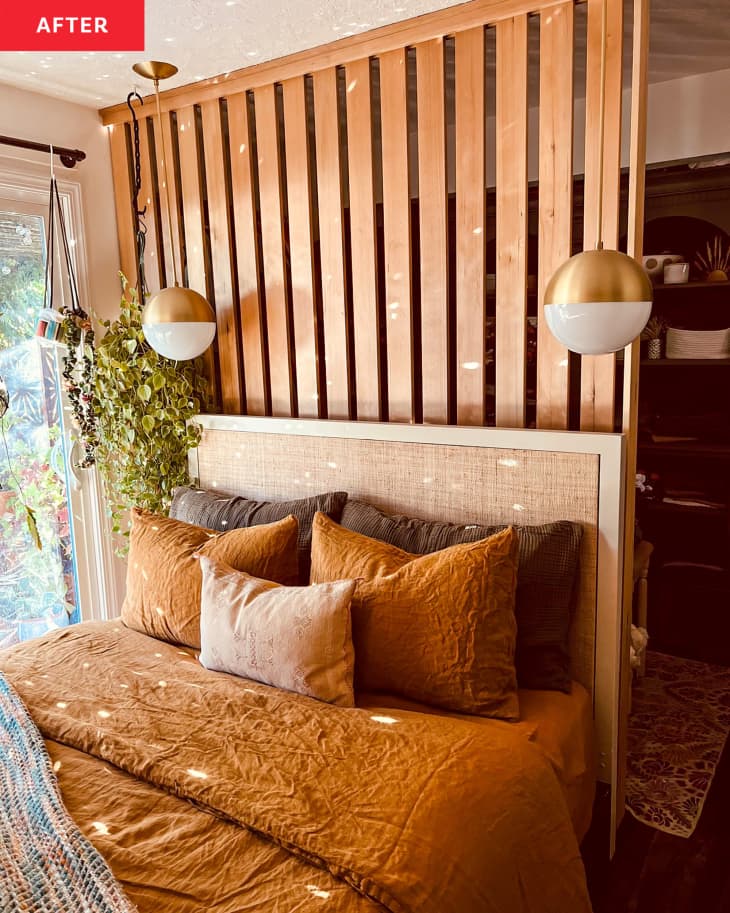
Once the paint dried, the couple used six wood screws to attach the plywood to the existing headboard. “The point was to have screws that were long enough to go through the existing headboard and then into the plywood, but not through it,” Amy explains. (She and Wyeth used 1 1/4-inch screws.) She says if they decides to move the bed away from the slat wall, they’ll also add the plywood and raffia treatment to the back of the headboard; but for now, the headboard looks lovely — all thanks to such a simple DIY.
“I love how simple this project was but still gave us a completely different look,” she says. “This headboard was transformed by simply applying a pretty piece of fabric to plywood and adding a new neutral paint color to the frame.”
And if Amy and Wyeth change their minds, design-wise, again, the plywood is totally removable. “If we want to change up the material down the road, it’s an option,” Amy says. She’s proud that this solution is adaptable for down the road.
“I am most proud of trusting my gut and trying new things,” she adds. “We gained a bit more confidence which helps trying other new a bit easier down the road. If this idea was a flop, I would have been out a few bucks and an hour of our time, which was a minimal risk for the fabulous reward that will last for years to come.”
Inspired? Submit your own project here.