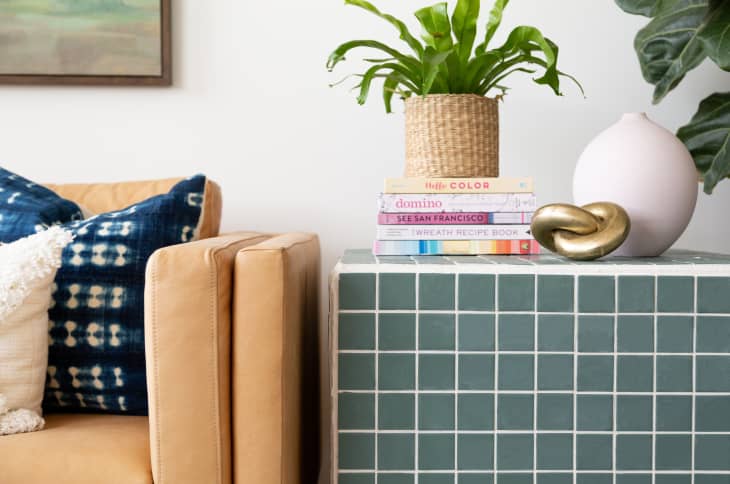
This DIY Tiled Side Table Looks Like a Designer Piece — But You Can Make it in a Weekend

The 1990s have been swinging back into style for a while now, and with that, some familiar materials are coming back, too. One that you might have seen popping up on Instagram and TikTok? All-over tile furniture, which uses old school square tiles to adorn surfaces from top to bottom. Even though the look is a throwback, the style is decidedly fresh: These pieces — in virtually every color — are modern, stylish, and totally versatile. A tiled coffee table contrasts beautifully with a plush sofa, just as a rattan headboard complements the lines of a tiled nightstand. It seems like the perfect addition to any room.
To create this simple but chic tiled side table, I started by building a basic box side table using plywood. Then, I covered it in porcelain tile sheets — far faster and easier than applying individual tiles. The entire process works well for beginners and experienced creators alike, and the end result is just as universally appealing. When it’s completed, feel free to style it with books and plants, plus a few coasters for drinks. The best part about a tiled side table is its durability, so even if you forget the coasters, it won’t show. Read on for the full tutorial so you can bring this vintage-meets-modern trend into your home.
What you’ll need to make this tiled side table:
- 2-inch porcelain square tile sheets (any color of your choice)
- Tile adhesive
- Tiling grout
- Trowel
- Grout sponge
- Rubber grout setter
- Plastic tub
- Five ¼ in x 2 x 2 plywood panels
- Brackets and ¼ inch screws
- Power drill
- Jig saw or circular saw (optional)
How to make this tiled side table:
1. Build your table.
Before you tile, you’ll need to build your base table. This is a cube, with the bottom face open. To make the plywood pieces fit together exactly, you will need to trim two of the five.
Trim 1/4 inch from the length and width of two of your five panels. You can use a jigsaw, circular saw, or table saw for this task; you can also ask the hardware store to cut the panels for you.
Using the five square plywood panels, start to build a box shape. Lay your first un-trimmed square panels flat. Screw two brackets into the side of one of the un-trimmed square panels so that their corners are aligned with the edge of the panel, as shown in the picture above.
Add wood glue to one edge of the next un-trimmed two-foot-square panel.
Place the bracketed panel on top of the glued panel so that their edges are flush and they form an L shape. Screw the top of each bracket onto the base panel.
Attach two brackets to one side of one of your trimmed panels. Then, make a line of glue on the top edge of your base panel (next to the already attached panel). Place the bracketed, trimmed panel onto the glue line so that the edges of each panel sit flush; screw brackets into bottom panel.
Repeat until you have a five-sided box. You should alternate full-size panels with trimmed panels for flush edges.
2. Apply tile adhesive.
Flip the box so that the open side is facing the floor. Grab your trowel and adhesive. Apply about a half-inch adhesive to one side of the box.
3. Apply the tile sheets.
Lay out the sheets of tile. You should have four sheets for each side of the box. Gently push the tiles into the adhesive. If you get adhesive on the tile, remove it with a sponge. Allow the tiles to dry for 24 hours.
4. Grout the tile.
I used a pre-mixed grout for this project. Grab the handled grout sponge and apply some grout to the tile. Go over the tile with a grout sponge in a diagonal three times, making sure to get the grout fully in between the tiles.
5. Smooth out any edges.
Use the grout sponge to add grout and smooth out edges along the box. I also recommend doing this to the bottom edges of the table as well.
6. Remove excess grout.
Use a sponge and bucket of water to remove excess grout. You should do this within 15 minutes of applying the grout. The glossier your tile, the easier it is to wipe off grout. Allow grout to set overnight.
7. Let dry, and enjoy.
Move your finished piece to your living room, your bedroom, or even outside if the weather’s nice. Then, revel in your DIY skills and get ready for friends to start asking where you bought your fab new table.
