
Even the Smallest Space Has Room for This Festive DIY Wall Light Tree

Hands down, our favorite holiday decor is twinkly lights. Whether gracing a festive mantle, peeking out from icicles on the eaves, or sparkling in store windows, string lights are the warmest, brightest sign of the season.
This easy wall light tree is a fun, unexpected way to incorporate more string lights into your holiday style — plus it’s ideal for folks who don’t have space for a huge live tree. And thanks to some clever Command™ Products, it’ll stay put ’til the New Year. Command™ Hooks, Clips, and organizational products feature innovative damage-free adhesive strips that help you bring your decor dreams to life without damaging walls or paint jobs. Here’s how we used them to create this merry and bright moment.
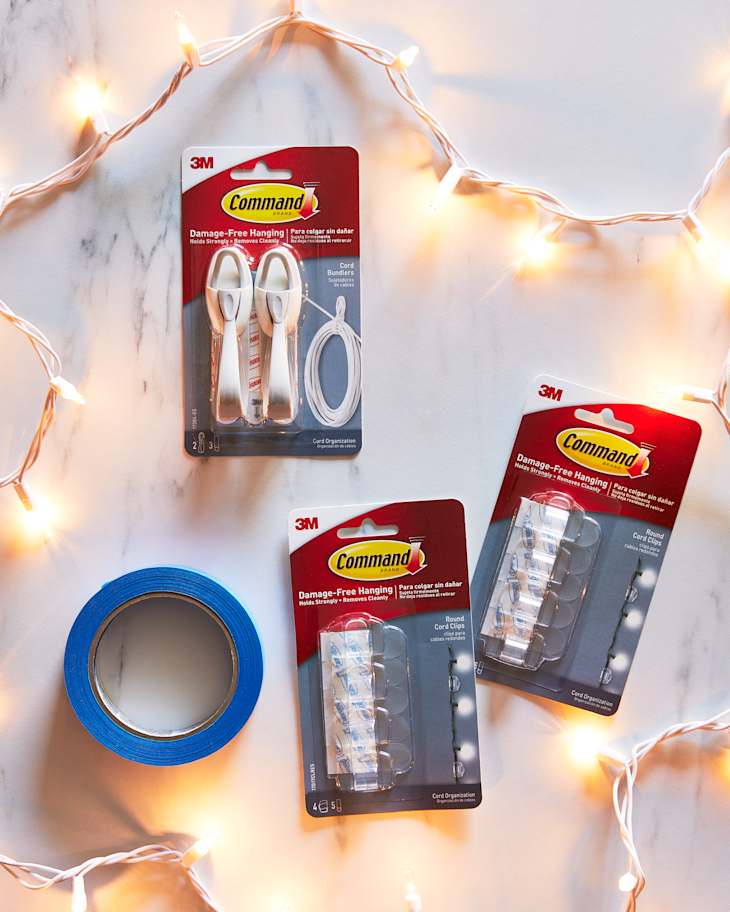
Supplies
- Command™ Cord Bundler
- Command™ Clear Round Cord Clips
- ScotchBlue™ Original Painter’s Tape
- Clear string lights
- Presents and other holiday decor (optional)
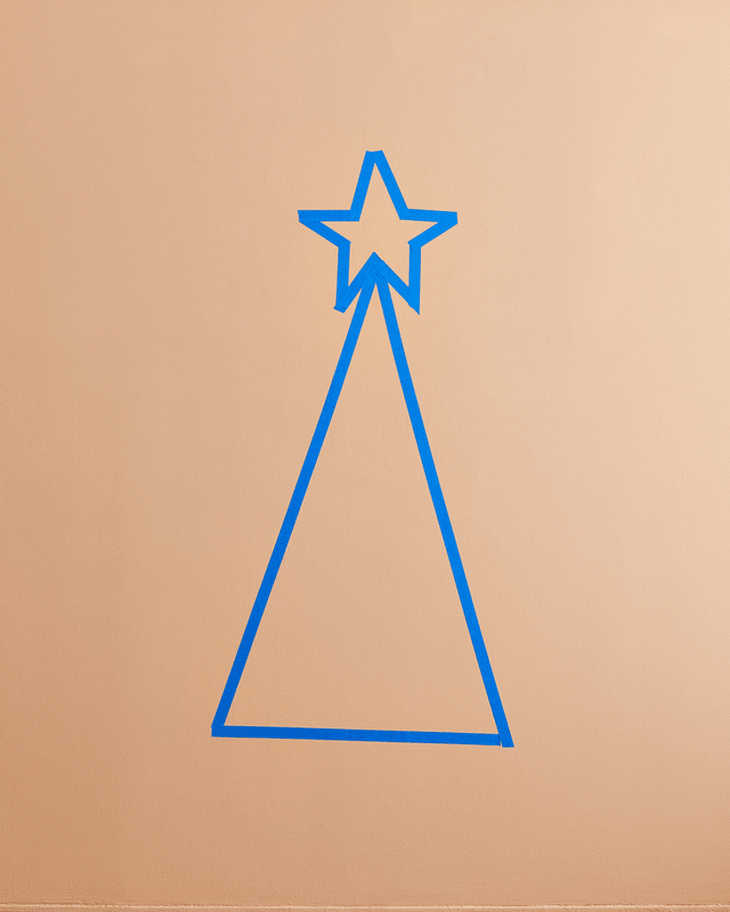
1. Outline Your Tree
Use ScotchBlue™ Original Painter’s Tape to create a triangle on the wall in your desired location. This will be the shape of your tree. Just above the triangle, use more tape to create a star shape, which will be the tree topper. ScotchBlue™ Original Painter’s Tape comes off clean, without sticky residue or paint damage, so don’t worry if you don’t get the shape right on the first try.
Once you’re happy with the placement, adhere Command™ Clear Round Cord Clips at all star points and corners, being sure to follow all package instructions. These small, clear clips won’t detract from your design, and you can re-use them for your next project with just a new strip! Continue mounting clips along the tree outline, lowering each point an inch or two as you move down the tree from one side to the other. This will create a zigzag effect with the lights. Position clips just outside the tape, so you can easily remove the tape later.
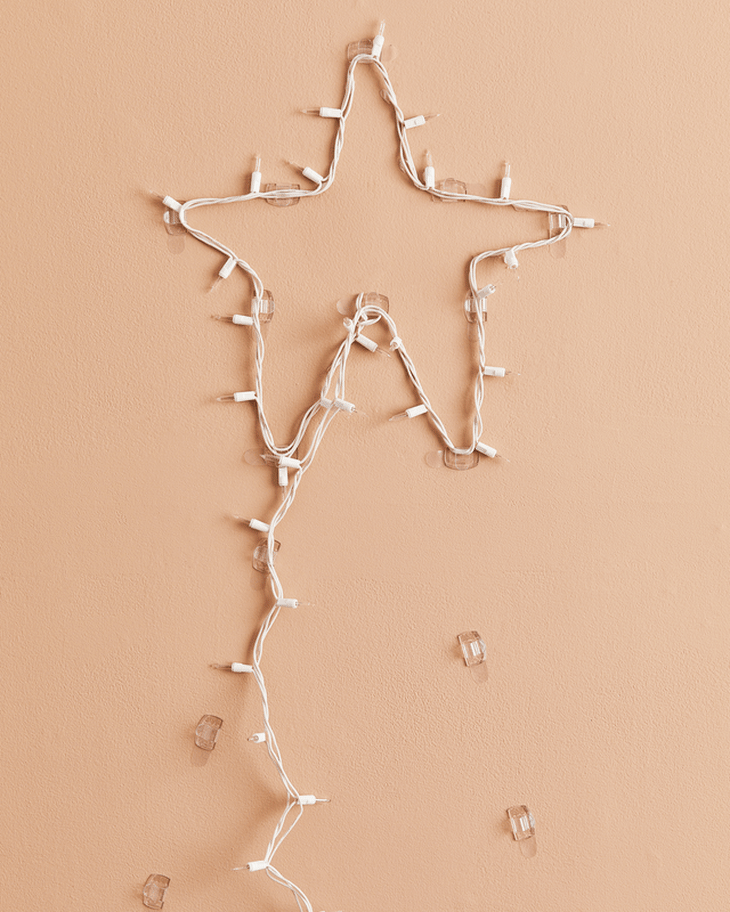
2. Arrange the Lights
Starting at the bottom center point of your star, make a gentle knot with the end of your string light and loop it around the clip. String the lights clockwise around the star, securing the cord in the clips as you go. Once you get back to the beginning, move down to the tree. Swing your light strand out and secure it to the tree’s topmost left Command™ Cord Clip. Continue down the tree, swinging the light from left to right and securing at the next available clip, as if lacing a shoe.
After you’ve attached the light to the last Light Clip, allow the string light to trail off the bottom corner of the tree. Following all package instructions, mount a Command™ Cord Bundler to the wall where you want to gather the remaining light cord. The Cord Bundler can hold up to two pounds and comes off cleanly, making it easy to keep holiday decor neat and organized. Just gather your remaining cord inside the rubber strap and secure it in place.
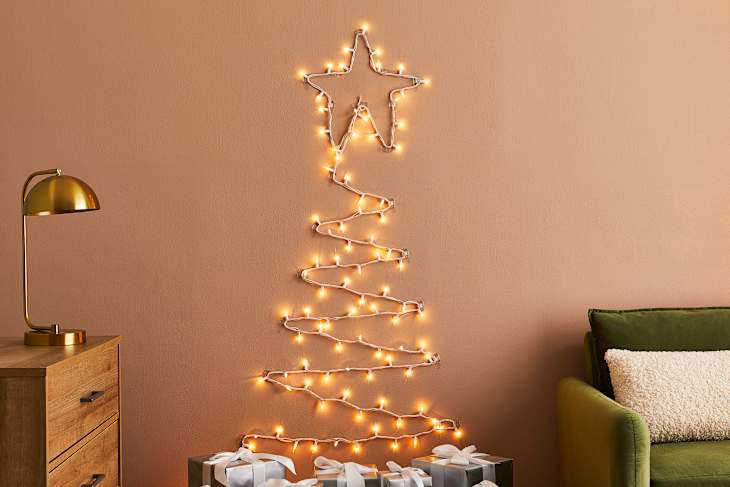
3. Add the Finishing Touches
Your tree is done! Remove the painter’s tape, add holiday extras like wrapped presents under your tree, and admire your festive handiwork all season long.