
This Stunning Kitchen Makeover Is “Art-Forward” and Incredibly Creative
Fact: Any time you renovate something, you’re going to create waste. But you can try to cut down on wasted materials — and materials ending up in landfills — by shopping secondhand and trying to keep things like cabinets and appliances intact during the demo to donate later or use in a different room.
When Katherine Krehbiel of Not a Humble Home was giving her kitchen a makeover, she tried to be ultra-conscious about what she was keeping. “While this is not the kitchen I would have designed if starting from scratch, most elements functioned, so for budgetary and environmental reasons, I wanted to make high-impact changes with minimal gutting,” Katherine says. “I also wanted to make sure the changes I made had staying power and were not too trendy.”
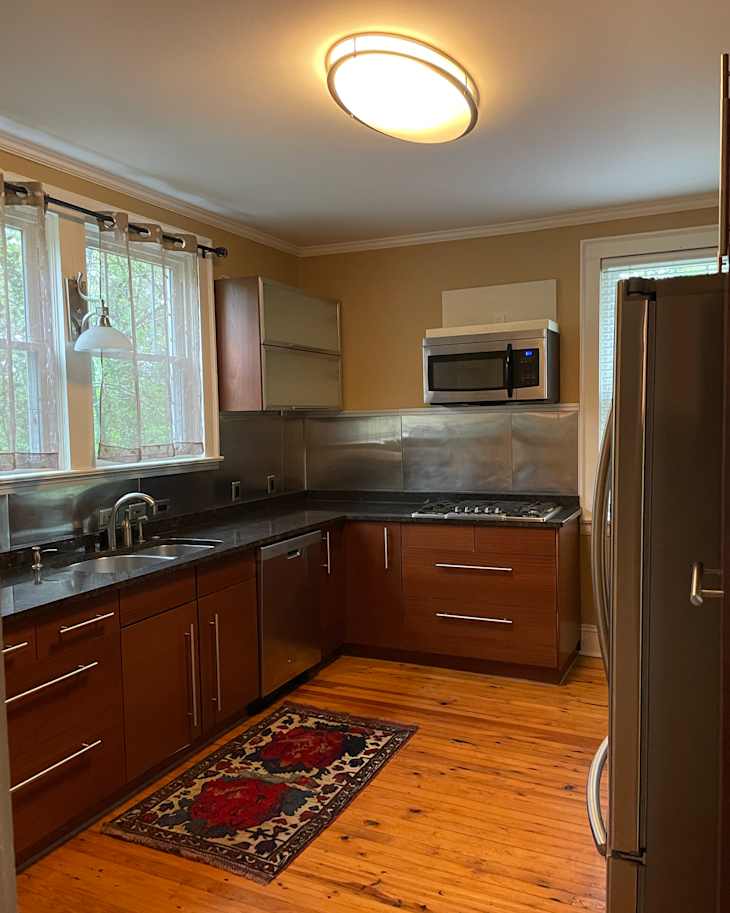
Katherine and her family’s kitchen, when they moved in, had “beige walls, reddish brown fake wood cabinets, [a] stainless steel backsplash, orangy-yellow oak floors, [and] black and brown granite countertops,” she describes. “The combination made the room feel more closed in when it is a large space.”
In a part-professional, part-DIY $7,000 project, Katherine transformed the kitchen into a stylish space that incorporates her creative side.
The transformation began with paint.
Katherine’s best kitchen renovation advice is to plan out what you want to tackle in order so you can allow time to budget for the big stuff. “I started with painting cabinets and walls because I knew they would make an impact on the room, while I could save up for tiles and install.”
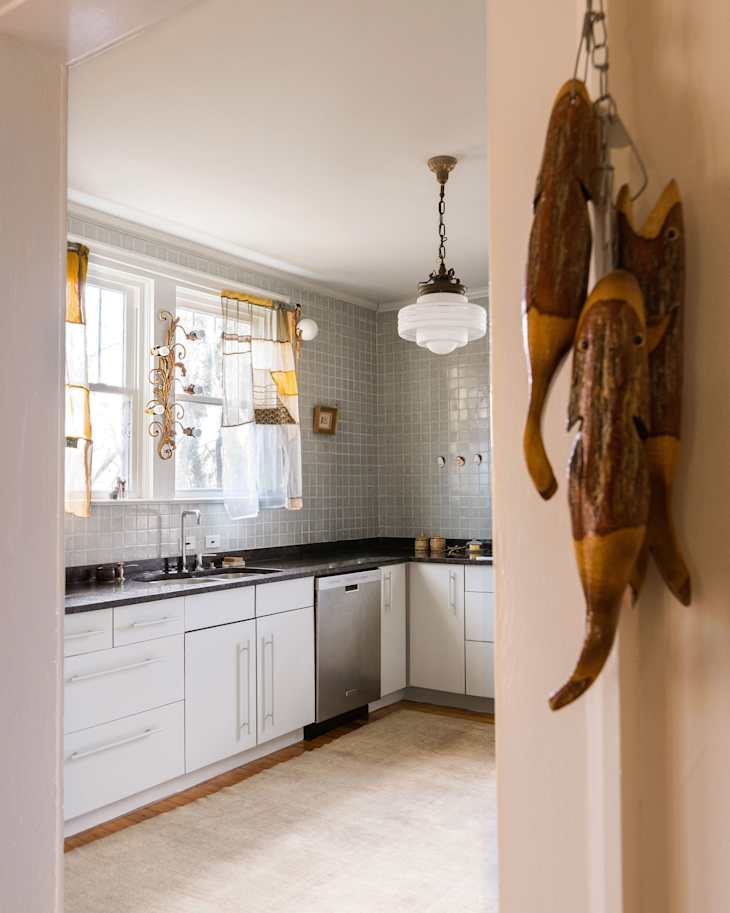
She chose Benjamin Moore Sleigh Bells (walls, ceiling and cabinets), though the walls are mostly covered by blue-gray tiles on the left-hand side of the kitchen.
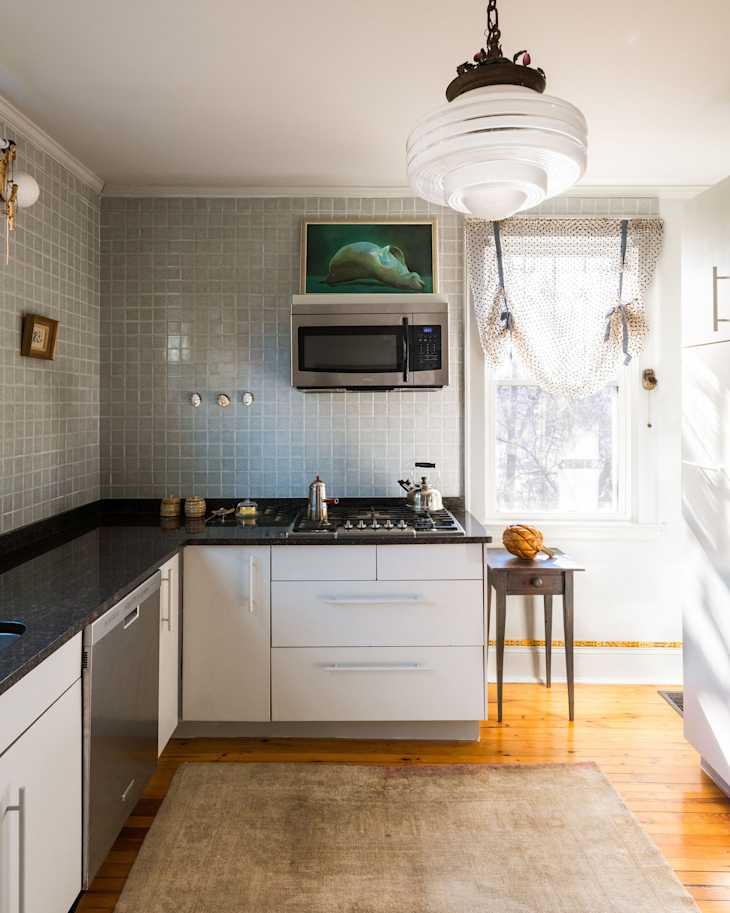
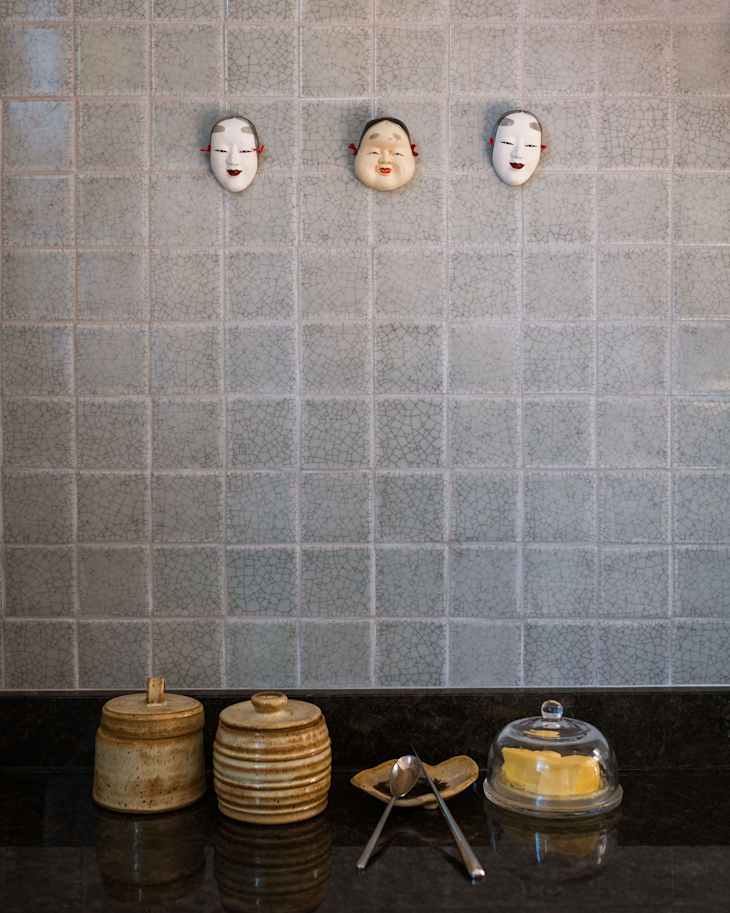
Tiles add texture and warmth to the kitchen.
Katherine hired professional tilers from Villa Brothers Tile to install her tan-meets-gray Fireclay Tiles, and for both tiles and the paint, she wanted a calming color palette.
Her one tiling regret is the grout color. “I picked a light blue thinking it would become invisible against the tiles, and it did the opposite,” she says. “It bothered me so much that I ended up coloring over it with gray chalk.”
“I also hate how front and center the microwave is in the kitchen, but it works, so it’s staying for now,” Katherine adds. “I have a fun idea up my sleeve for a custom range hood and mosaic backing when we’re ready to replace it.”

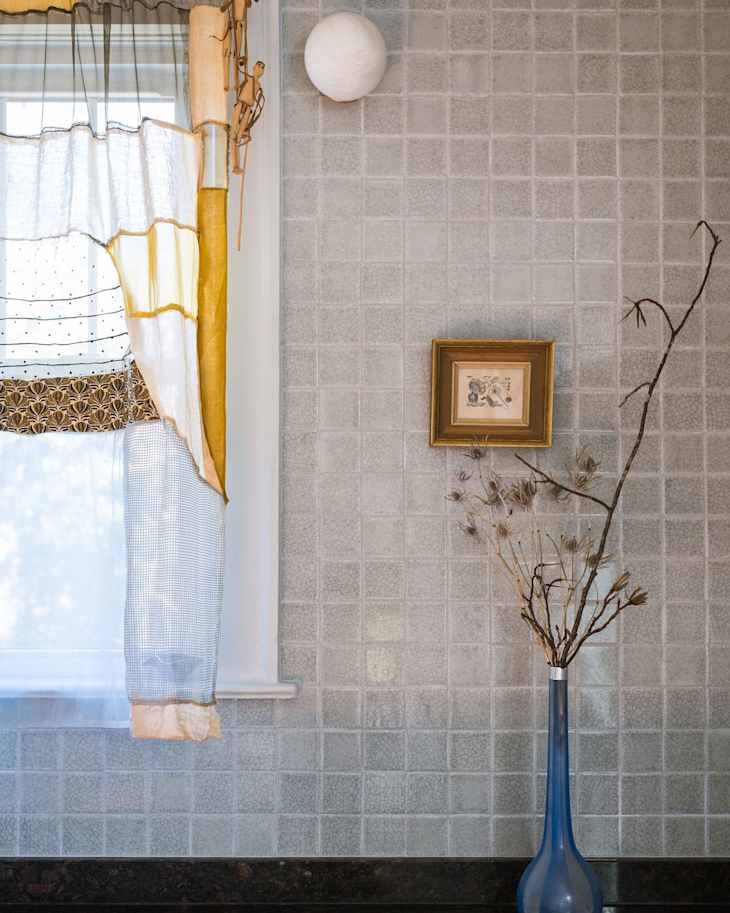
The curtains were handsewn.
Katherine did several DIY projects in the space in addition to painting, like making her own curtains for the room and adding a domino trim detail around the room.
“I was initially planning to build my own upper cabinet using stained glass doors and wood from an 1800s china cabinet I found on Facebook Marketplace,” she adds. “This proved to be significantly more challenging than I expected, so I had to pivot. A stroke of fortuitous timing led me to purchase a cabinet from Good Eye House + Style … it was delivered the day I had the tilers arriving for install.”
Katherine loves the way all the bespoke details came together. “The room feels like a true expression of myself and my design ethos,” she says. “It is whimsical and art forward. It was carefully considered to minimize waste. And most importantly, it has its own point of view and inspires me. I find that I spend much more time in here as a result.”
Inspired? Submit your own project here.